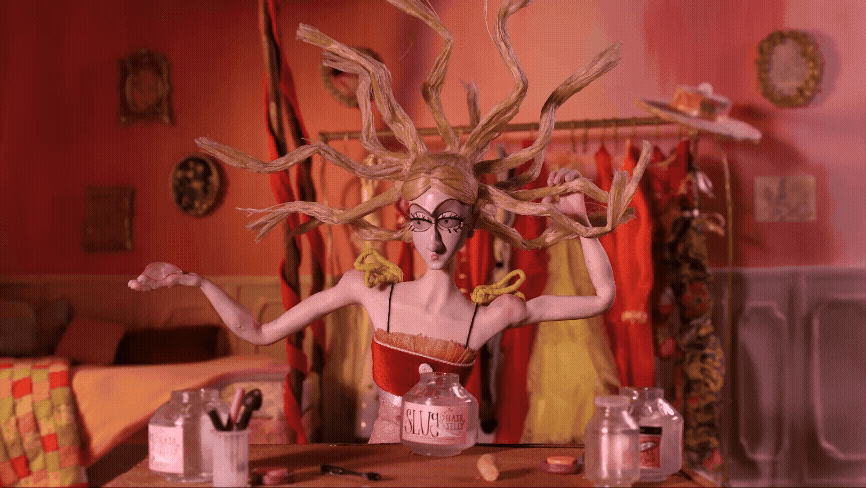
Dina Bo Bina Puppet
I was the fabrication lead for this stop motion puppet, which I made with a ball-and-socket armature, foam, silicone, thermoplastic, wire, 3D printed replacement faces, and replacement wig caps. Everything except the costume was fabricated by me.
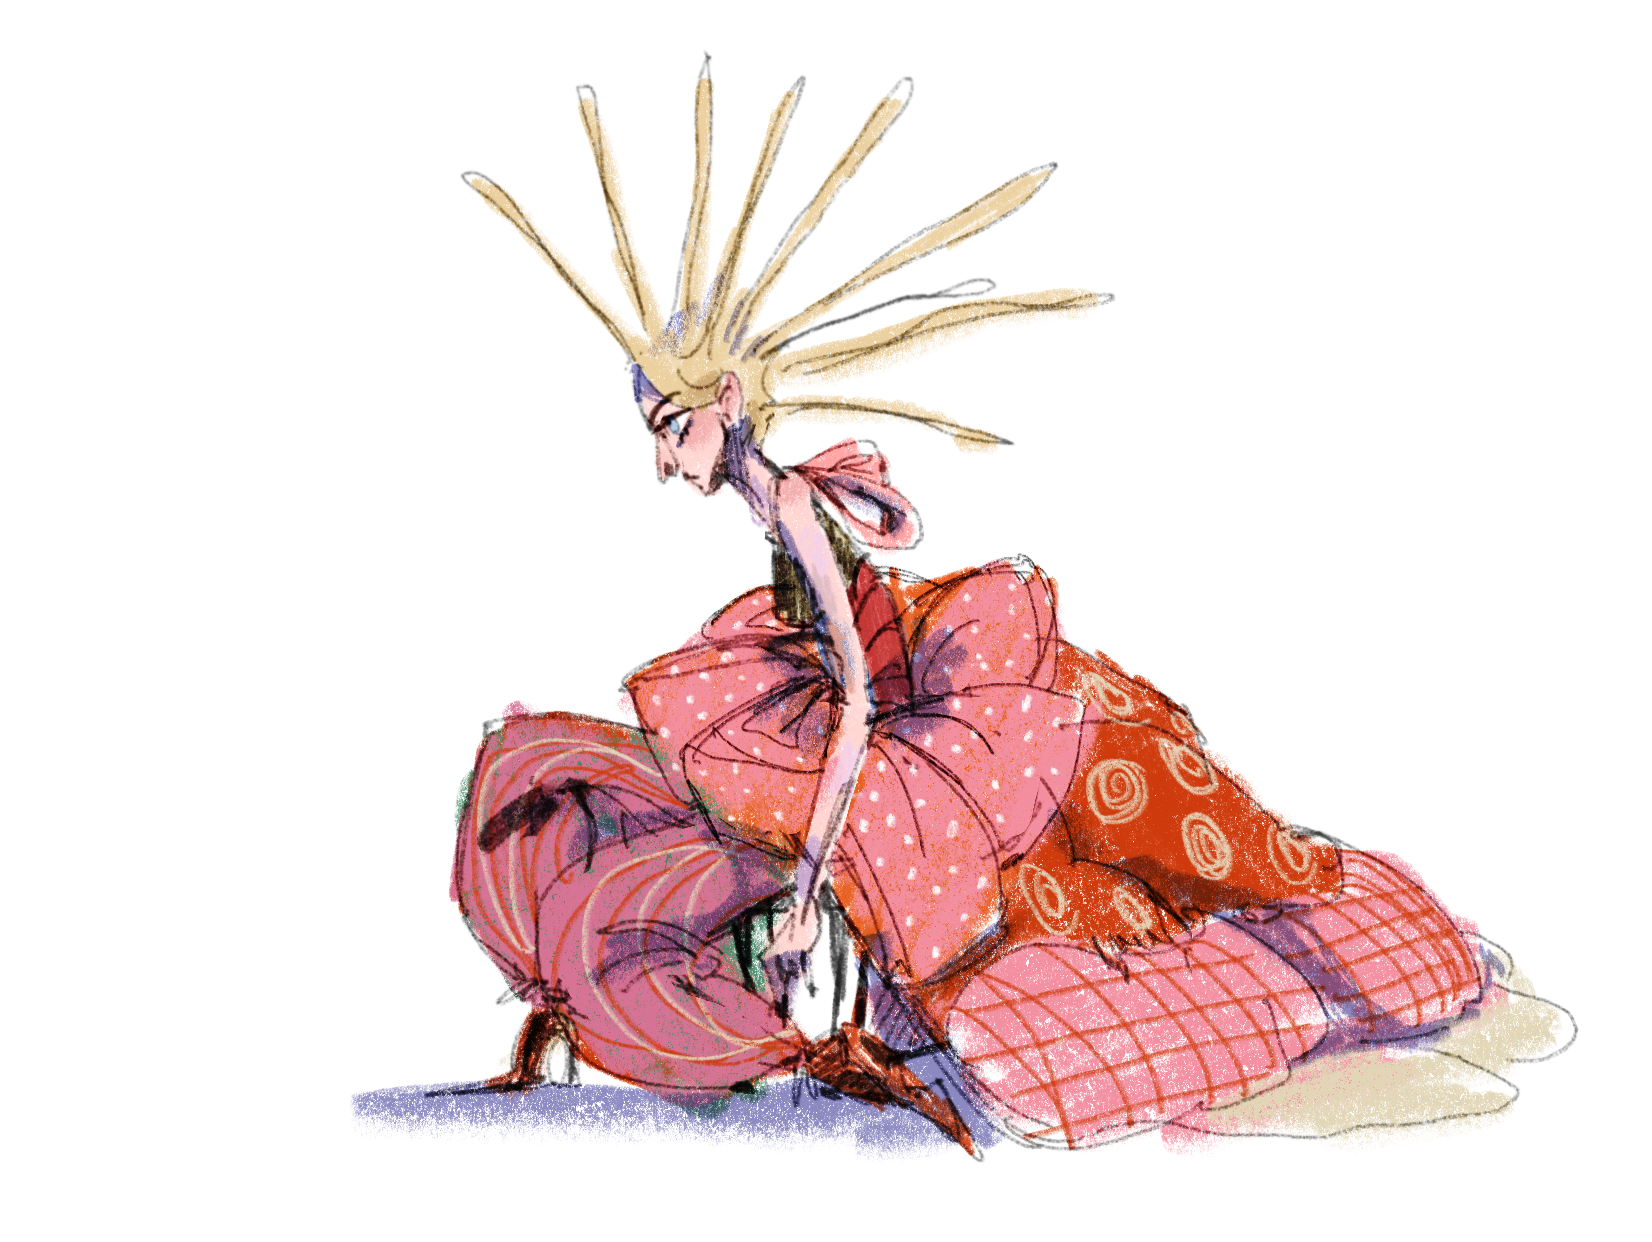

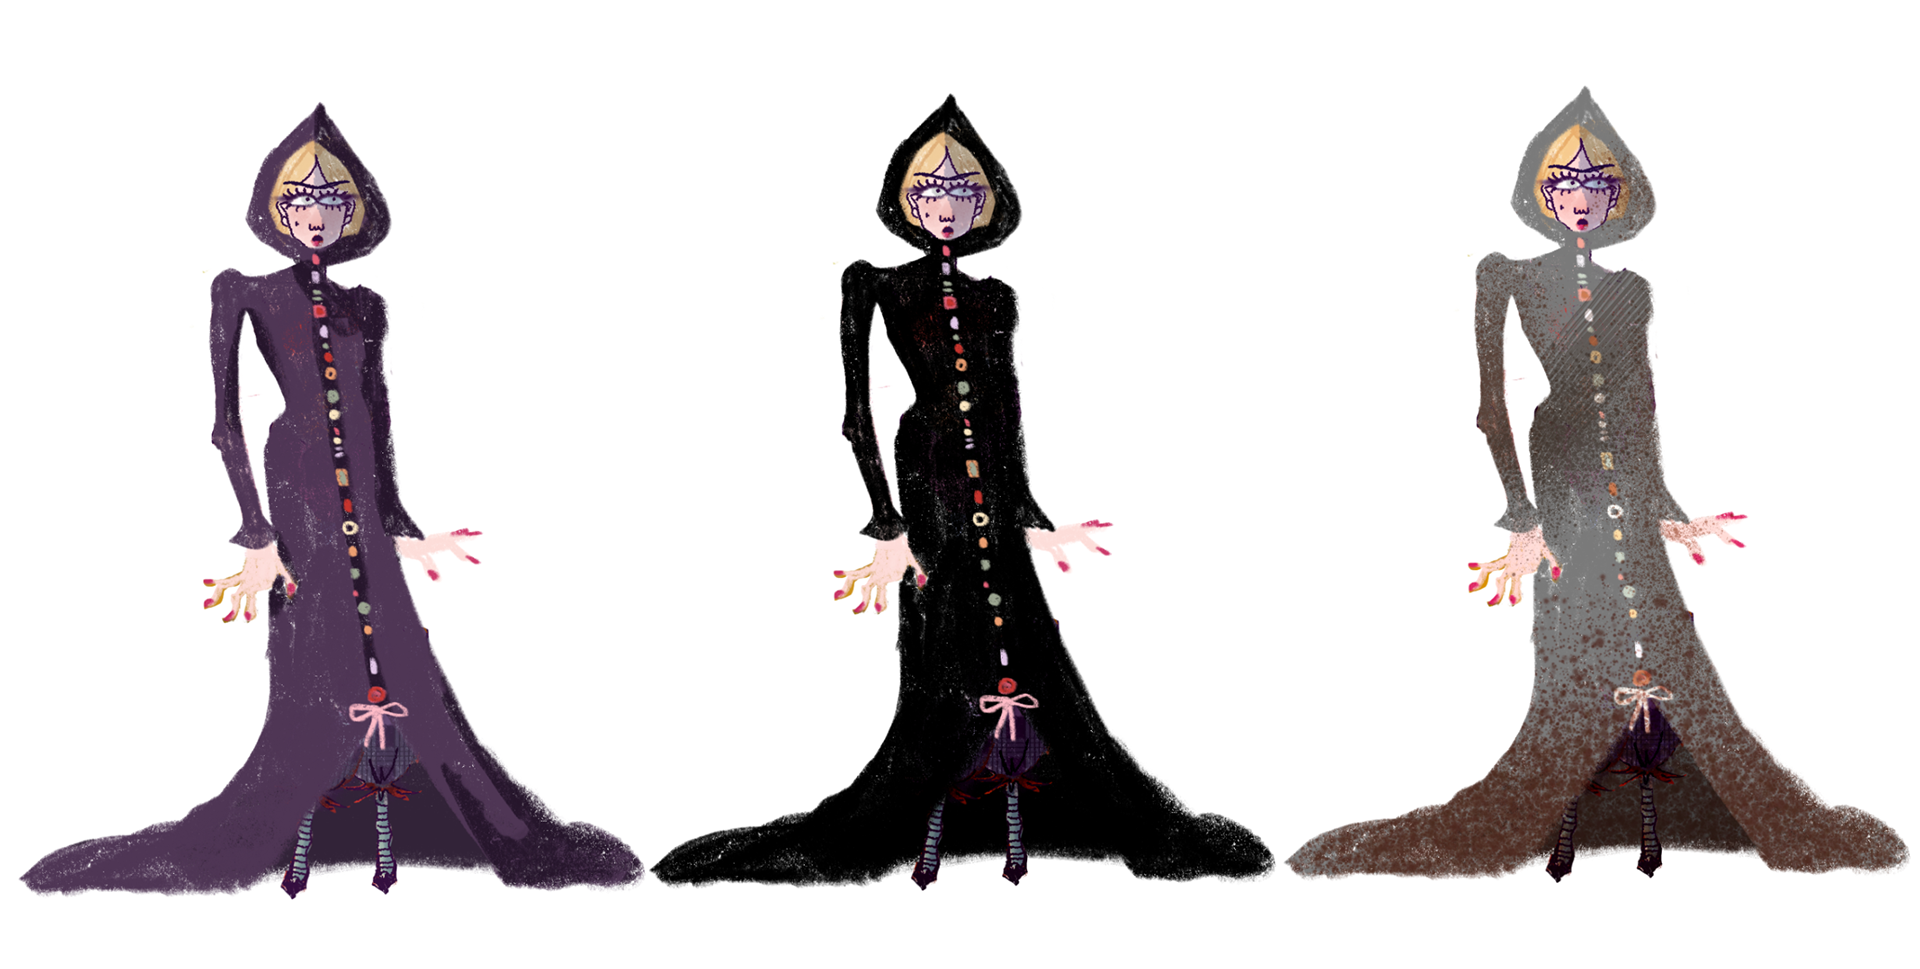
Above: Dina concept art by Ella Hiebert
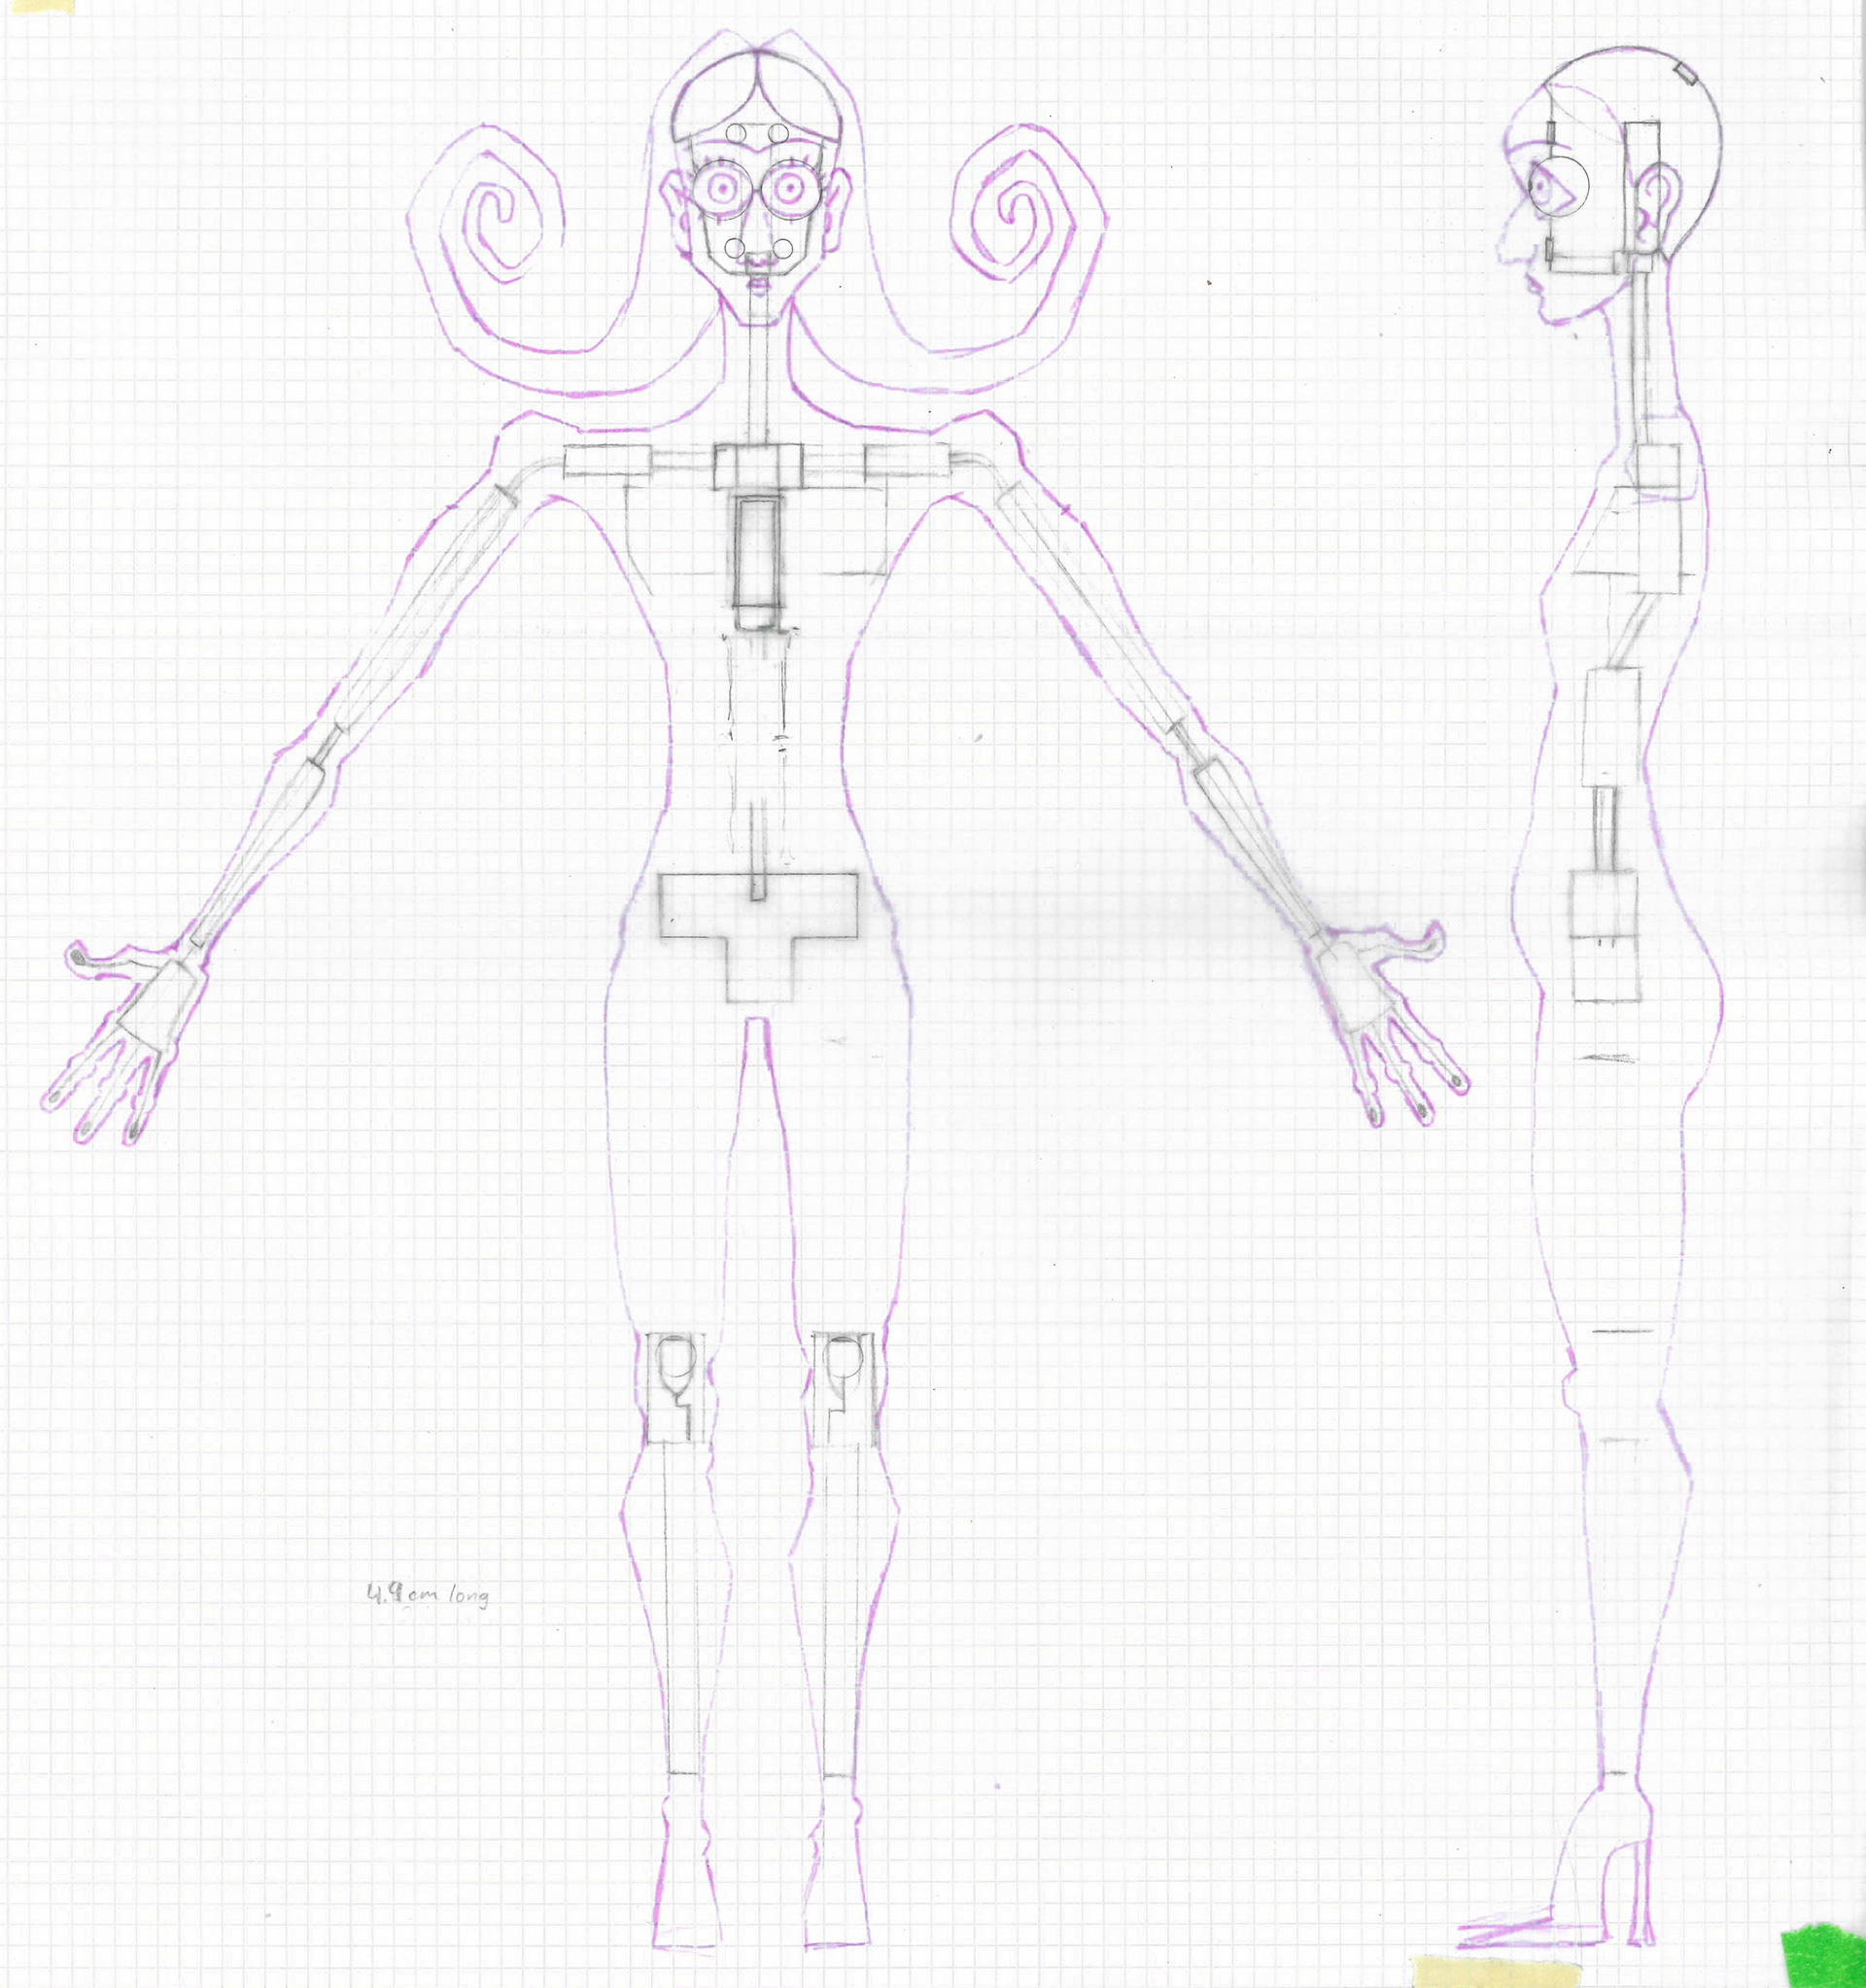
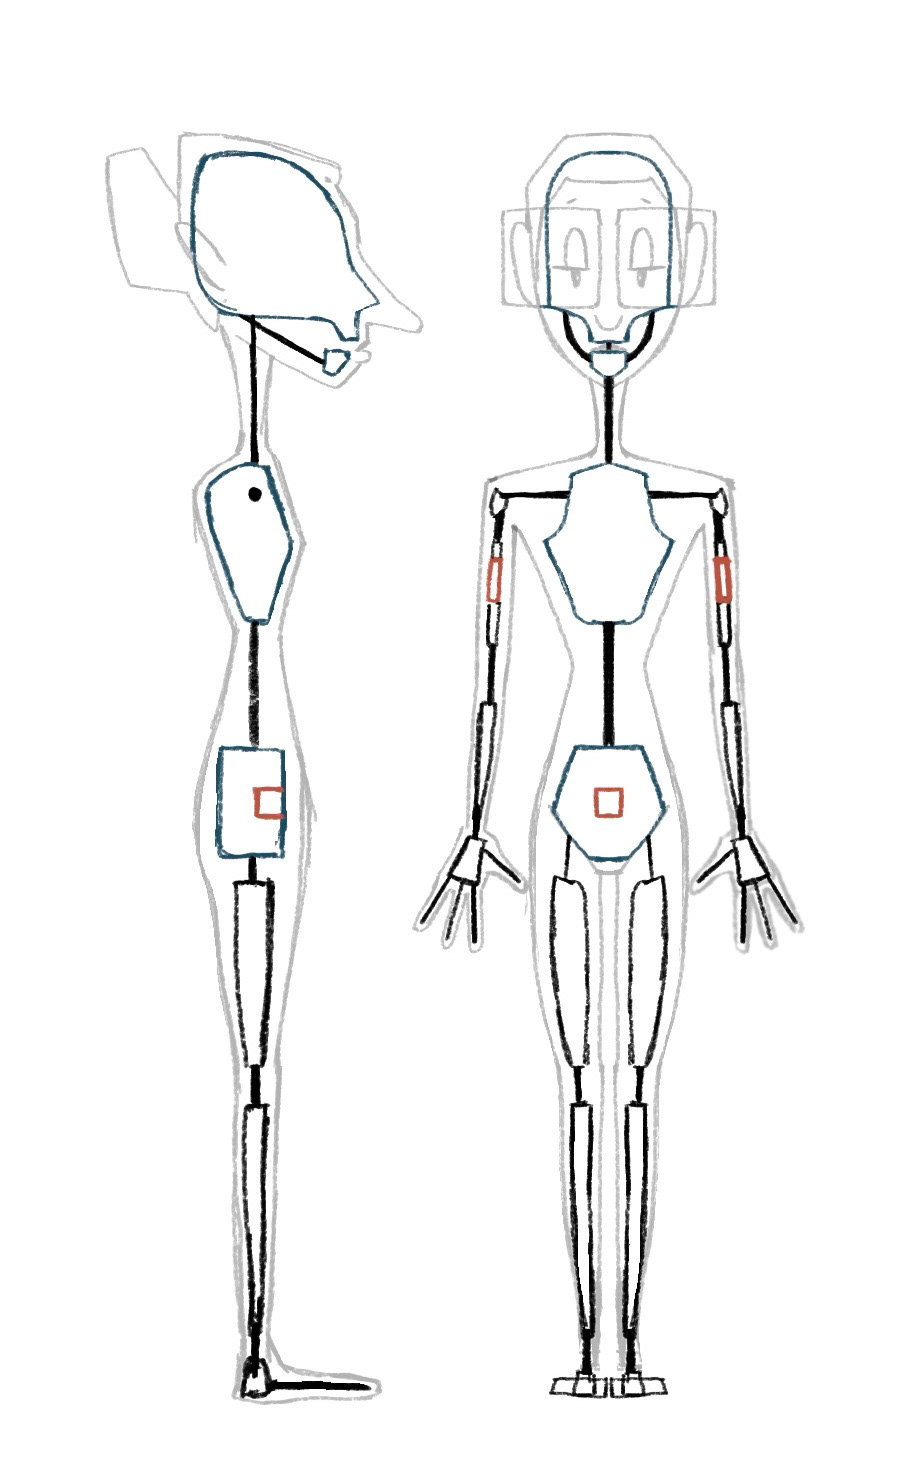
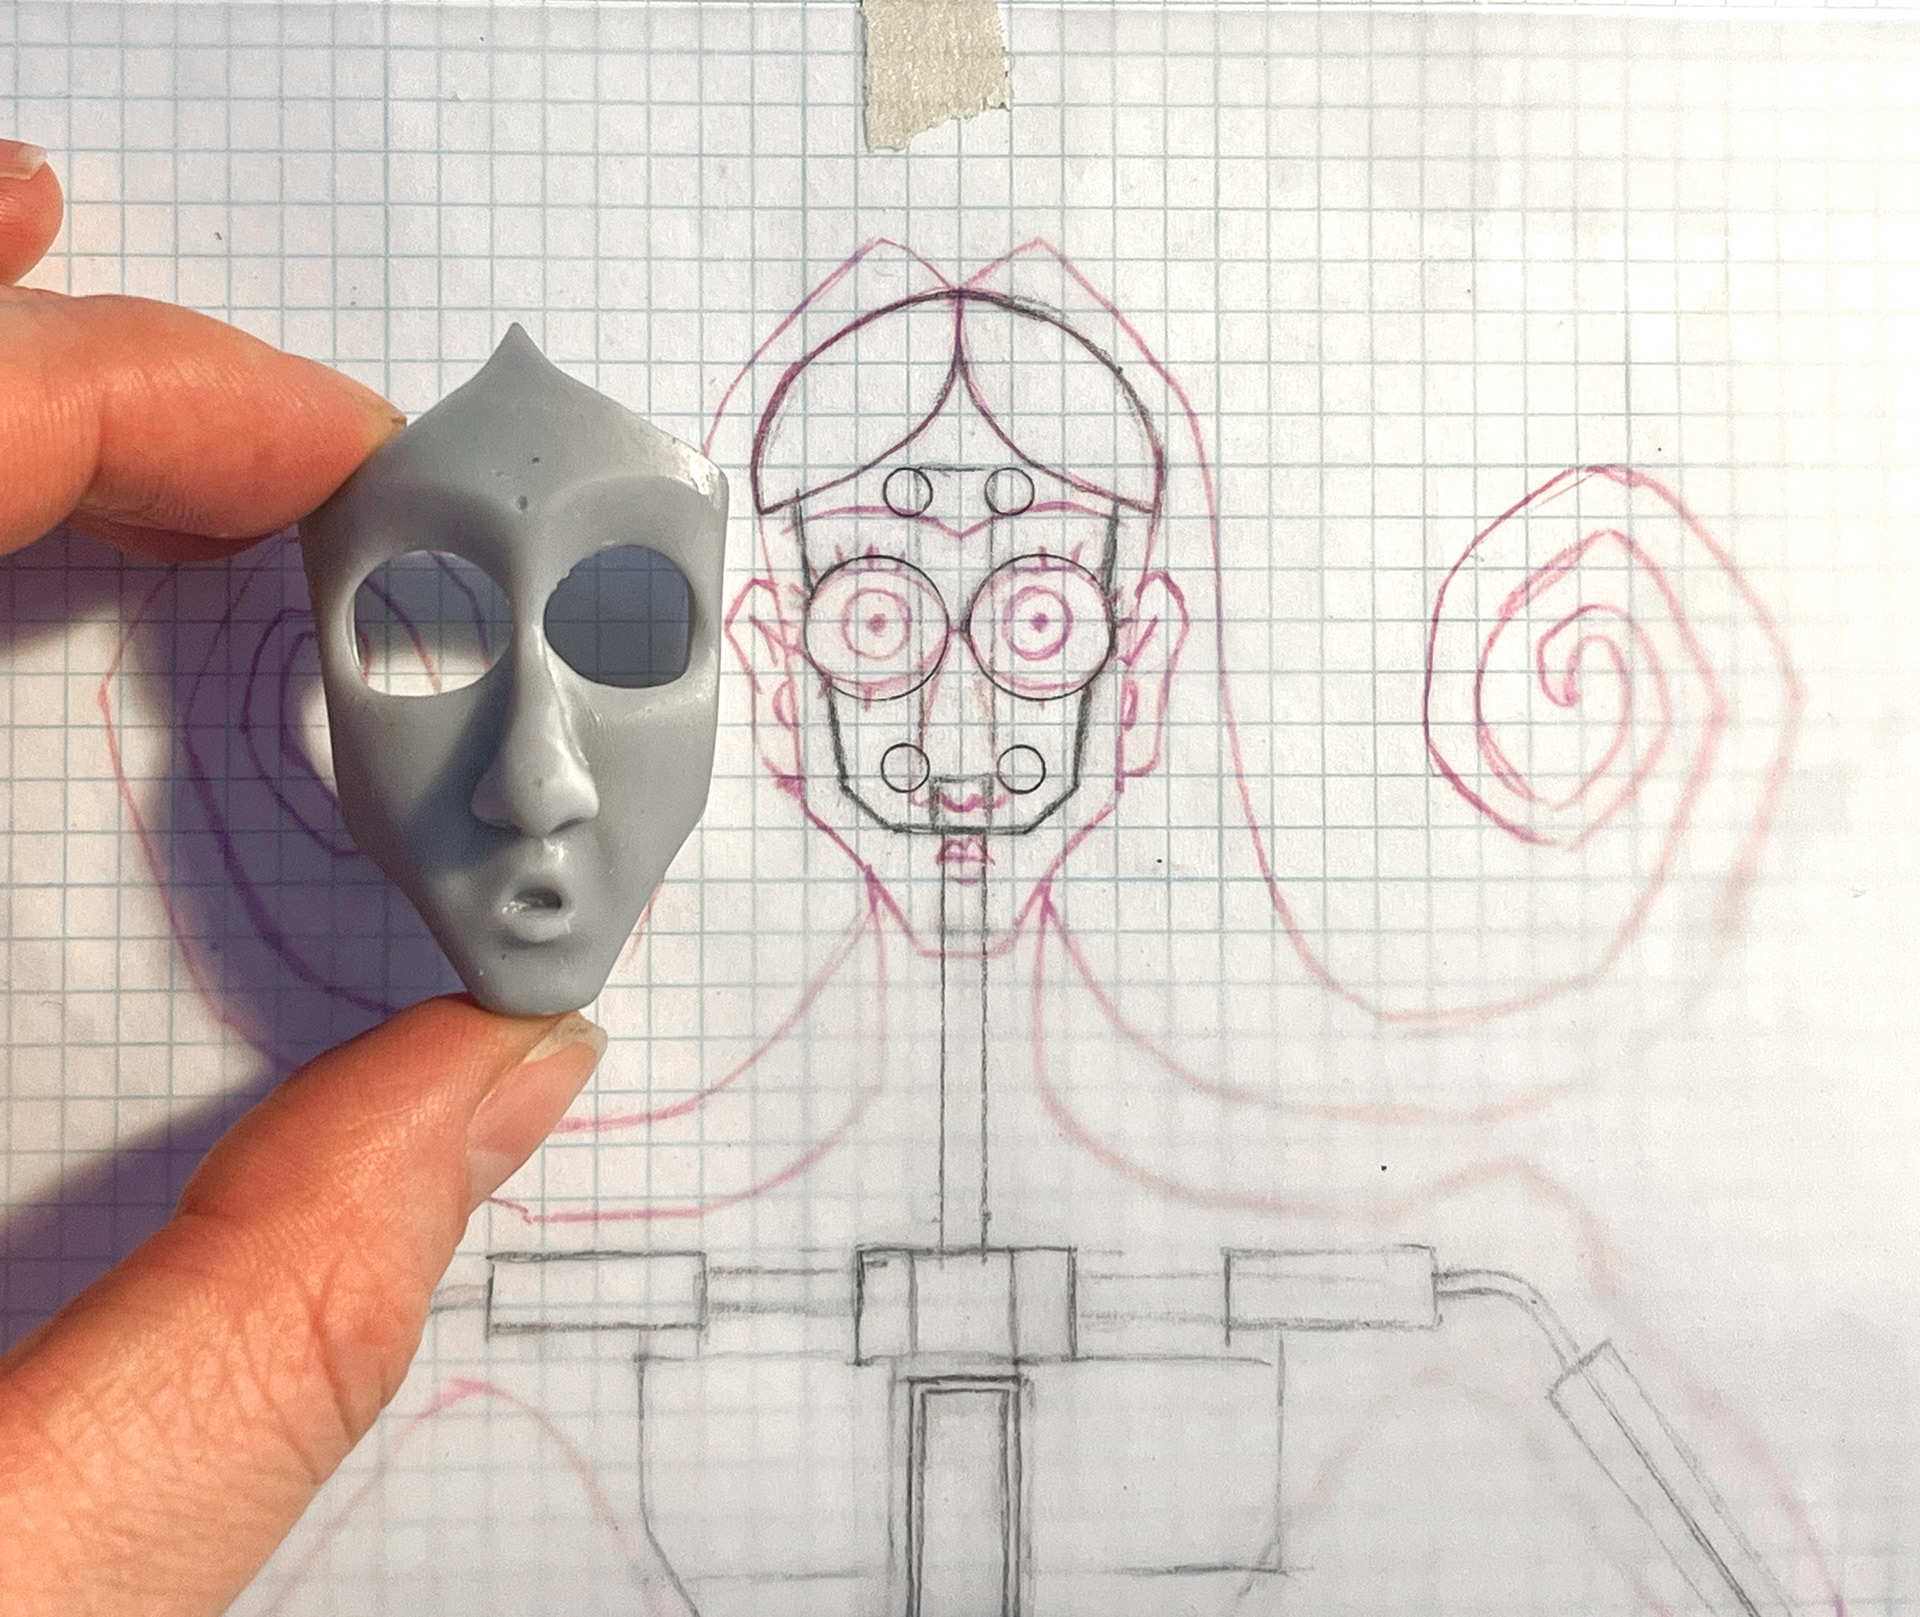
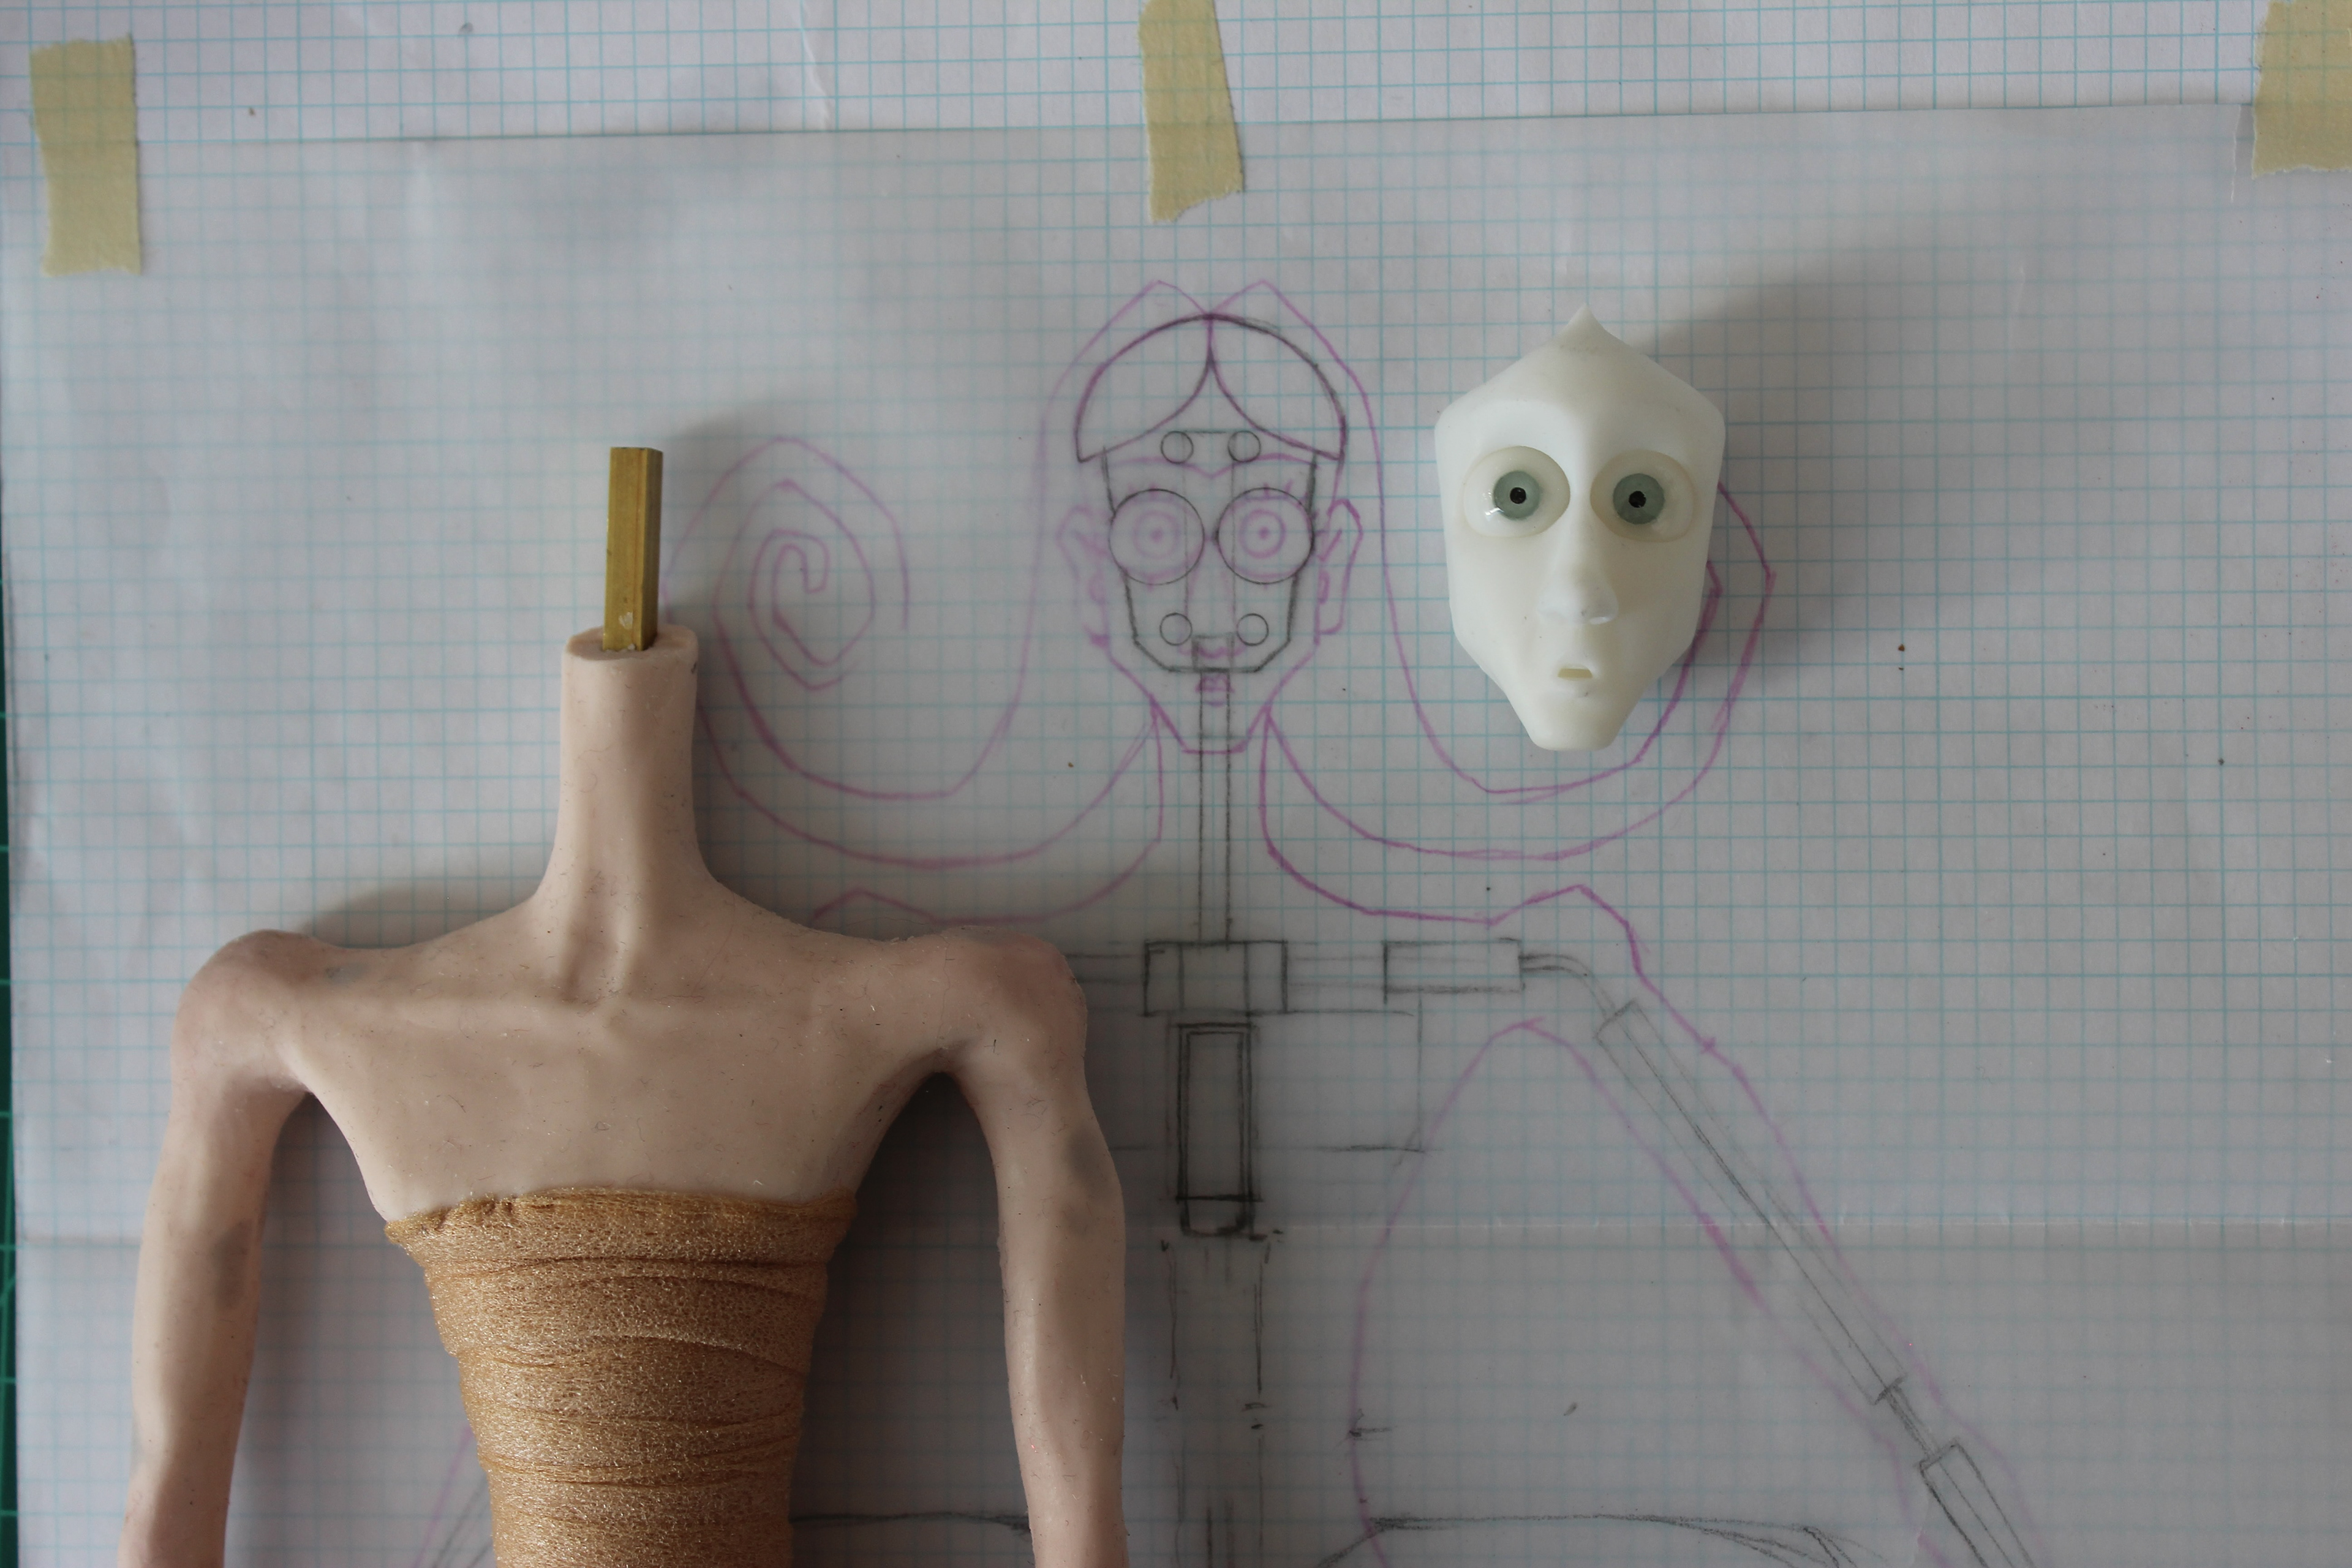
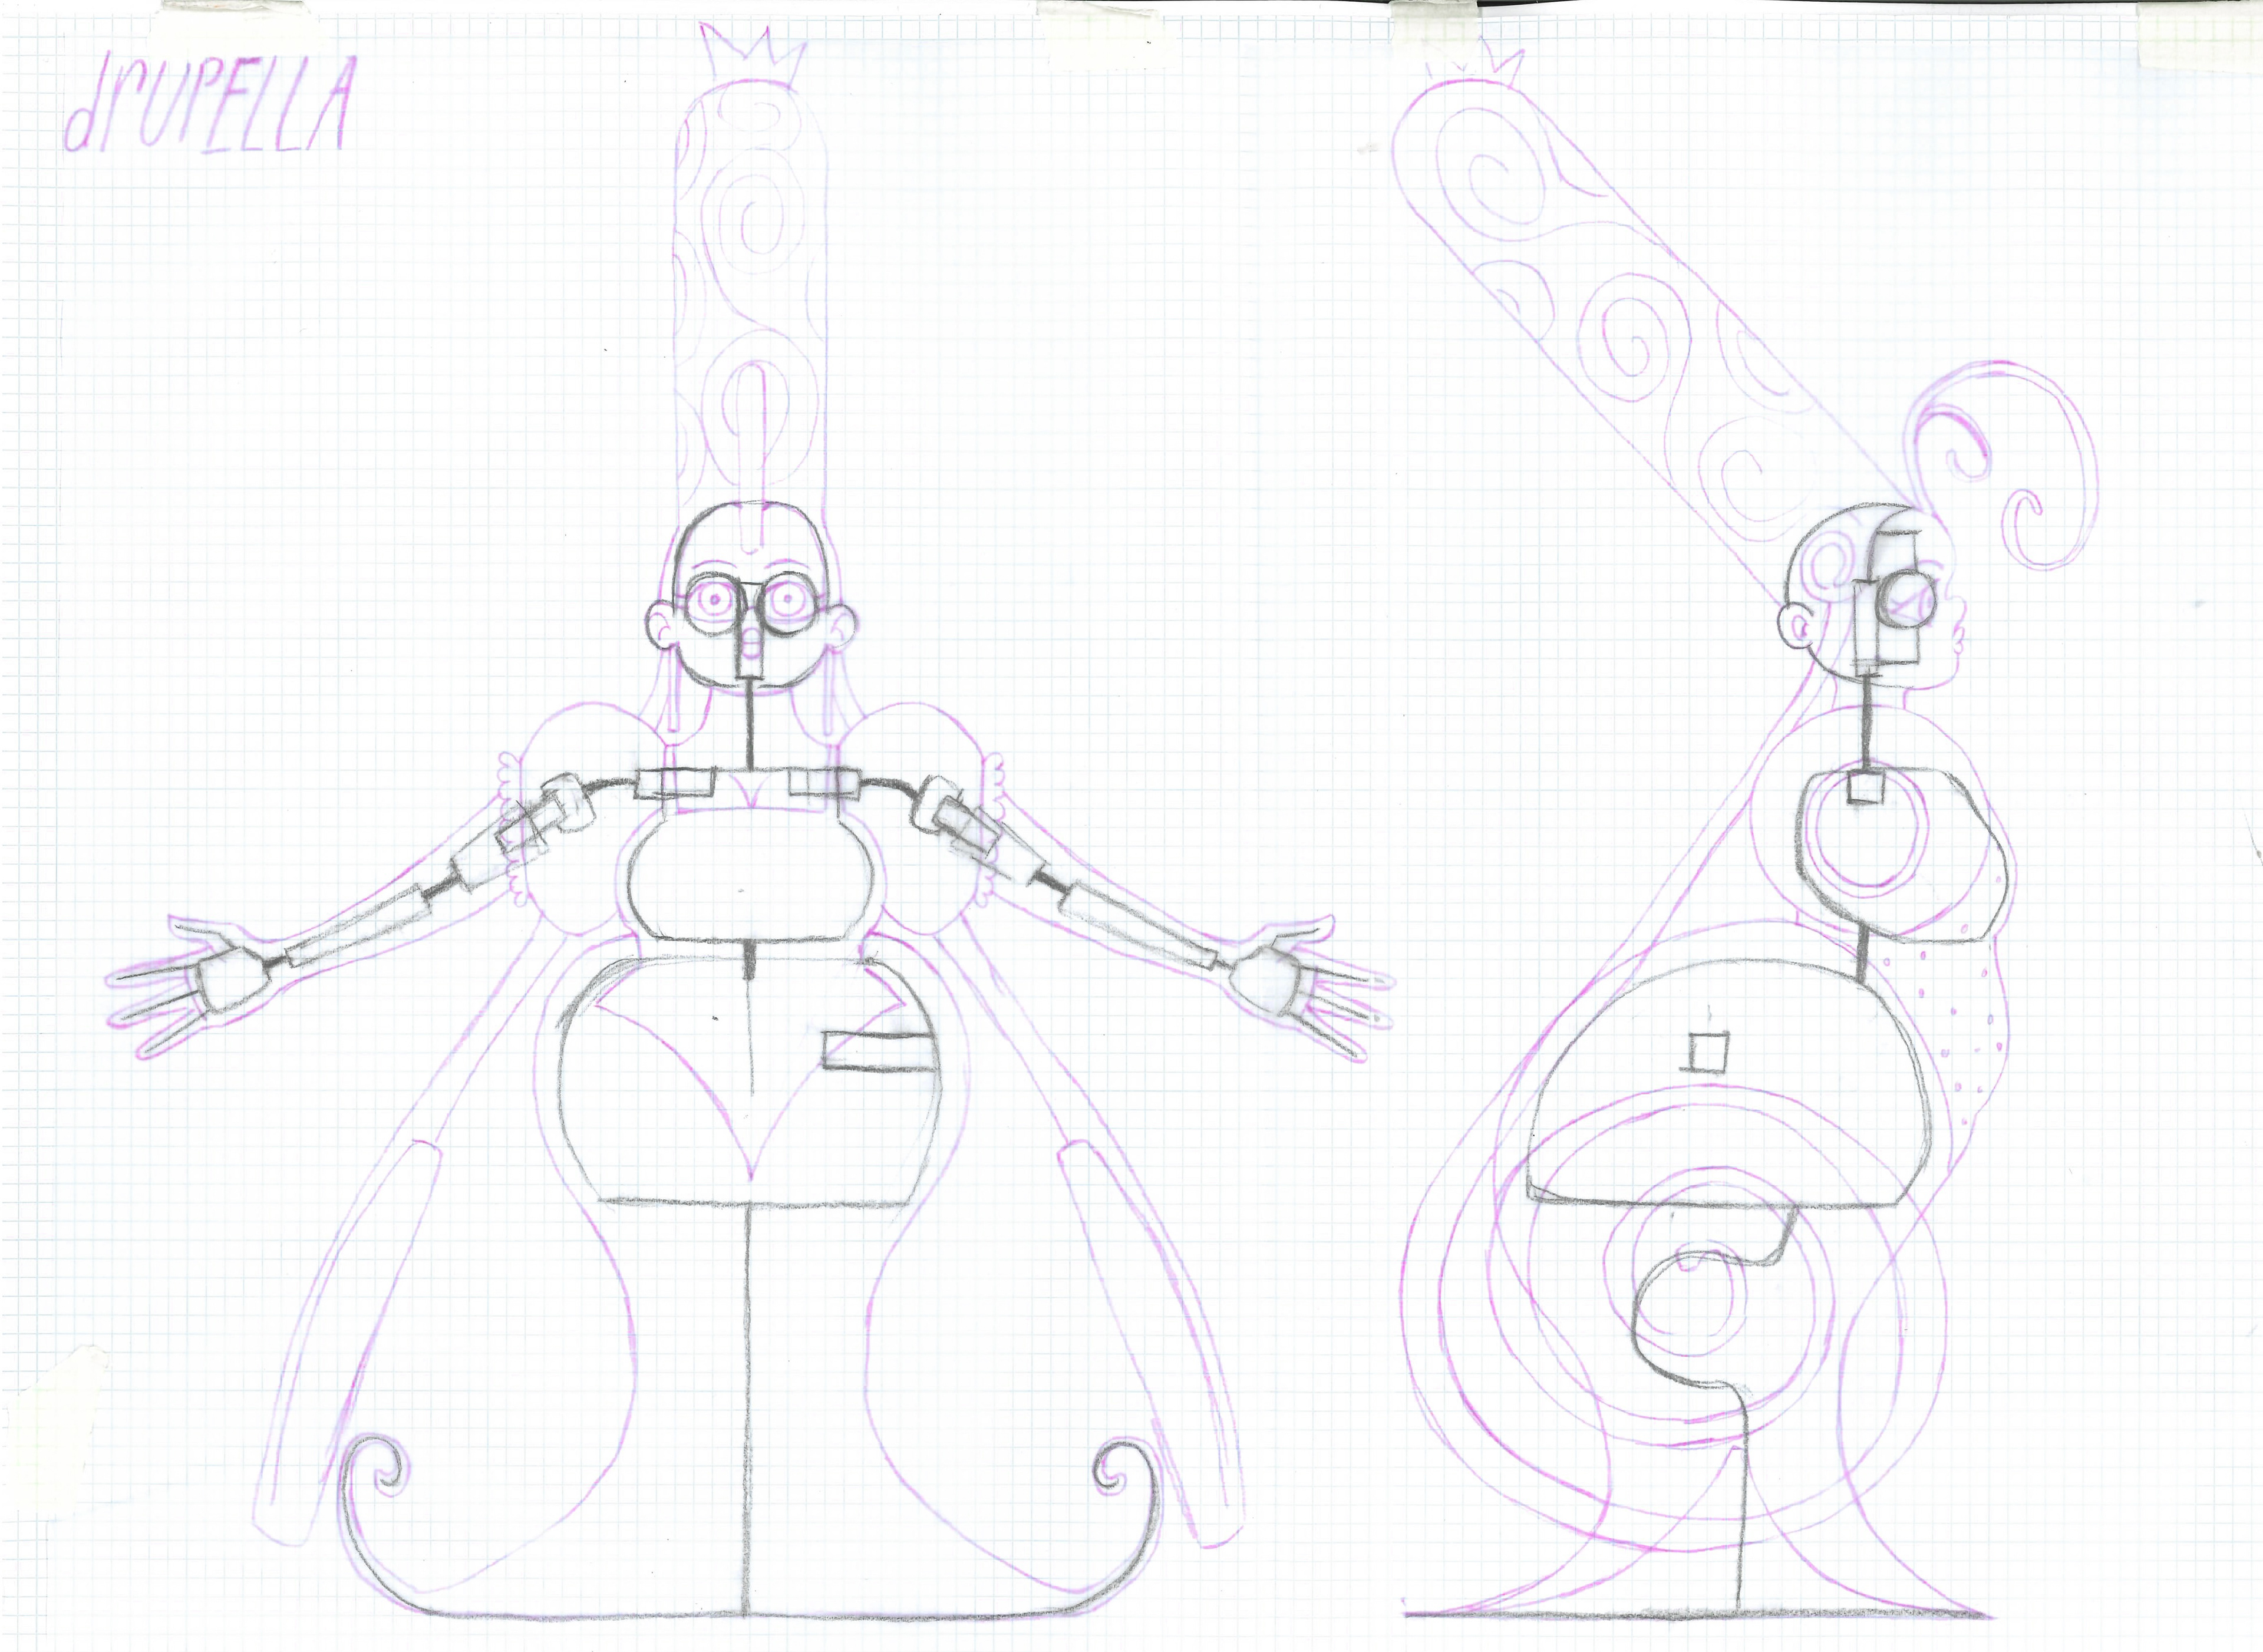
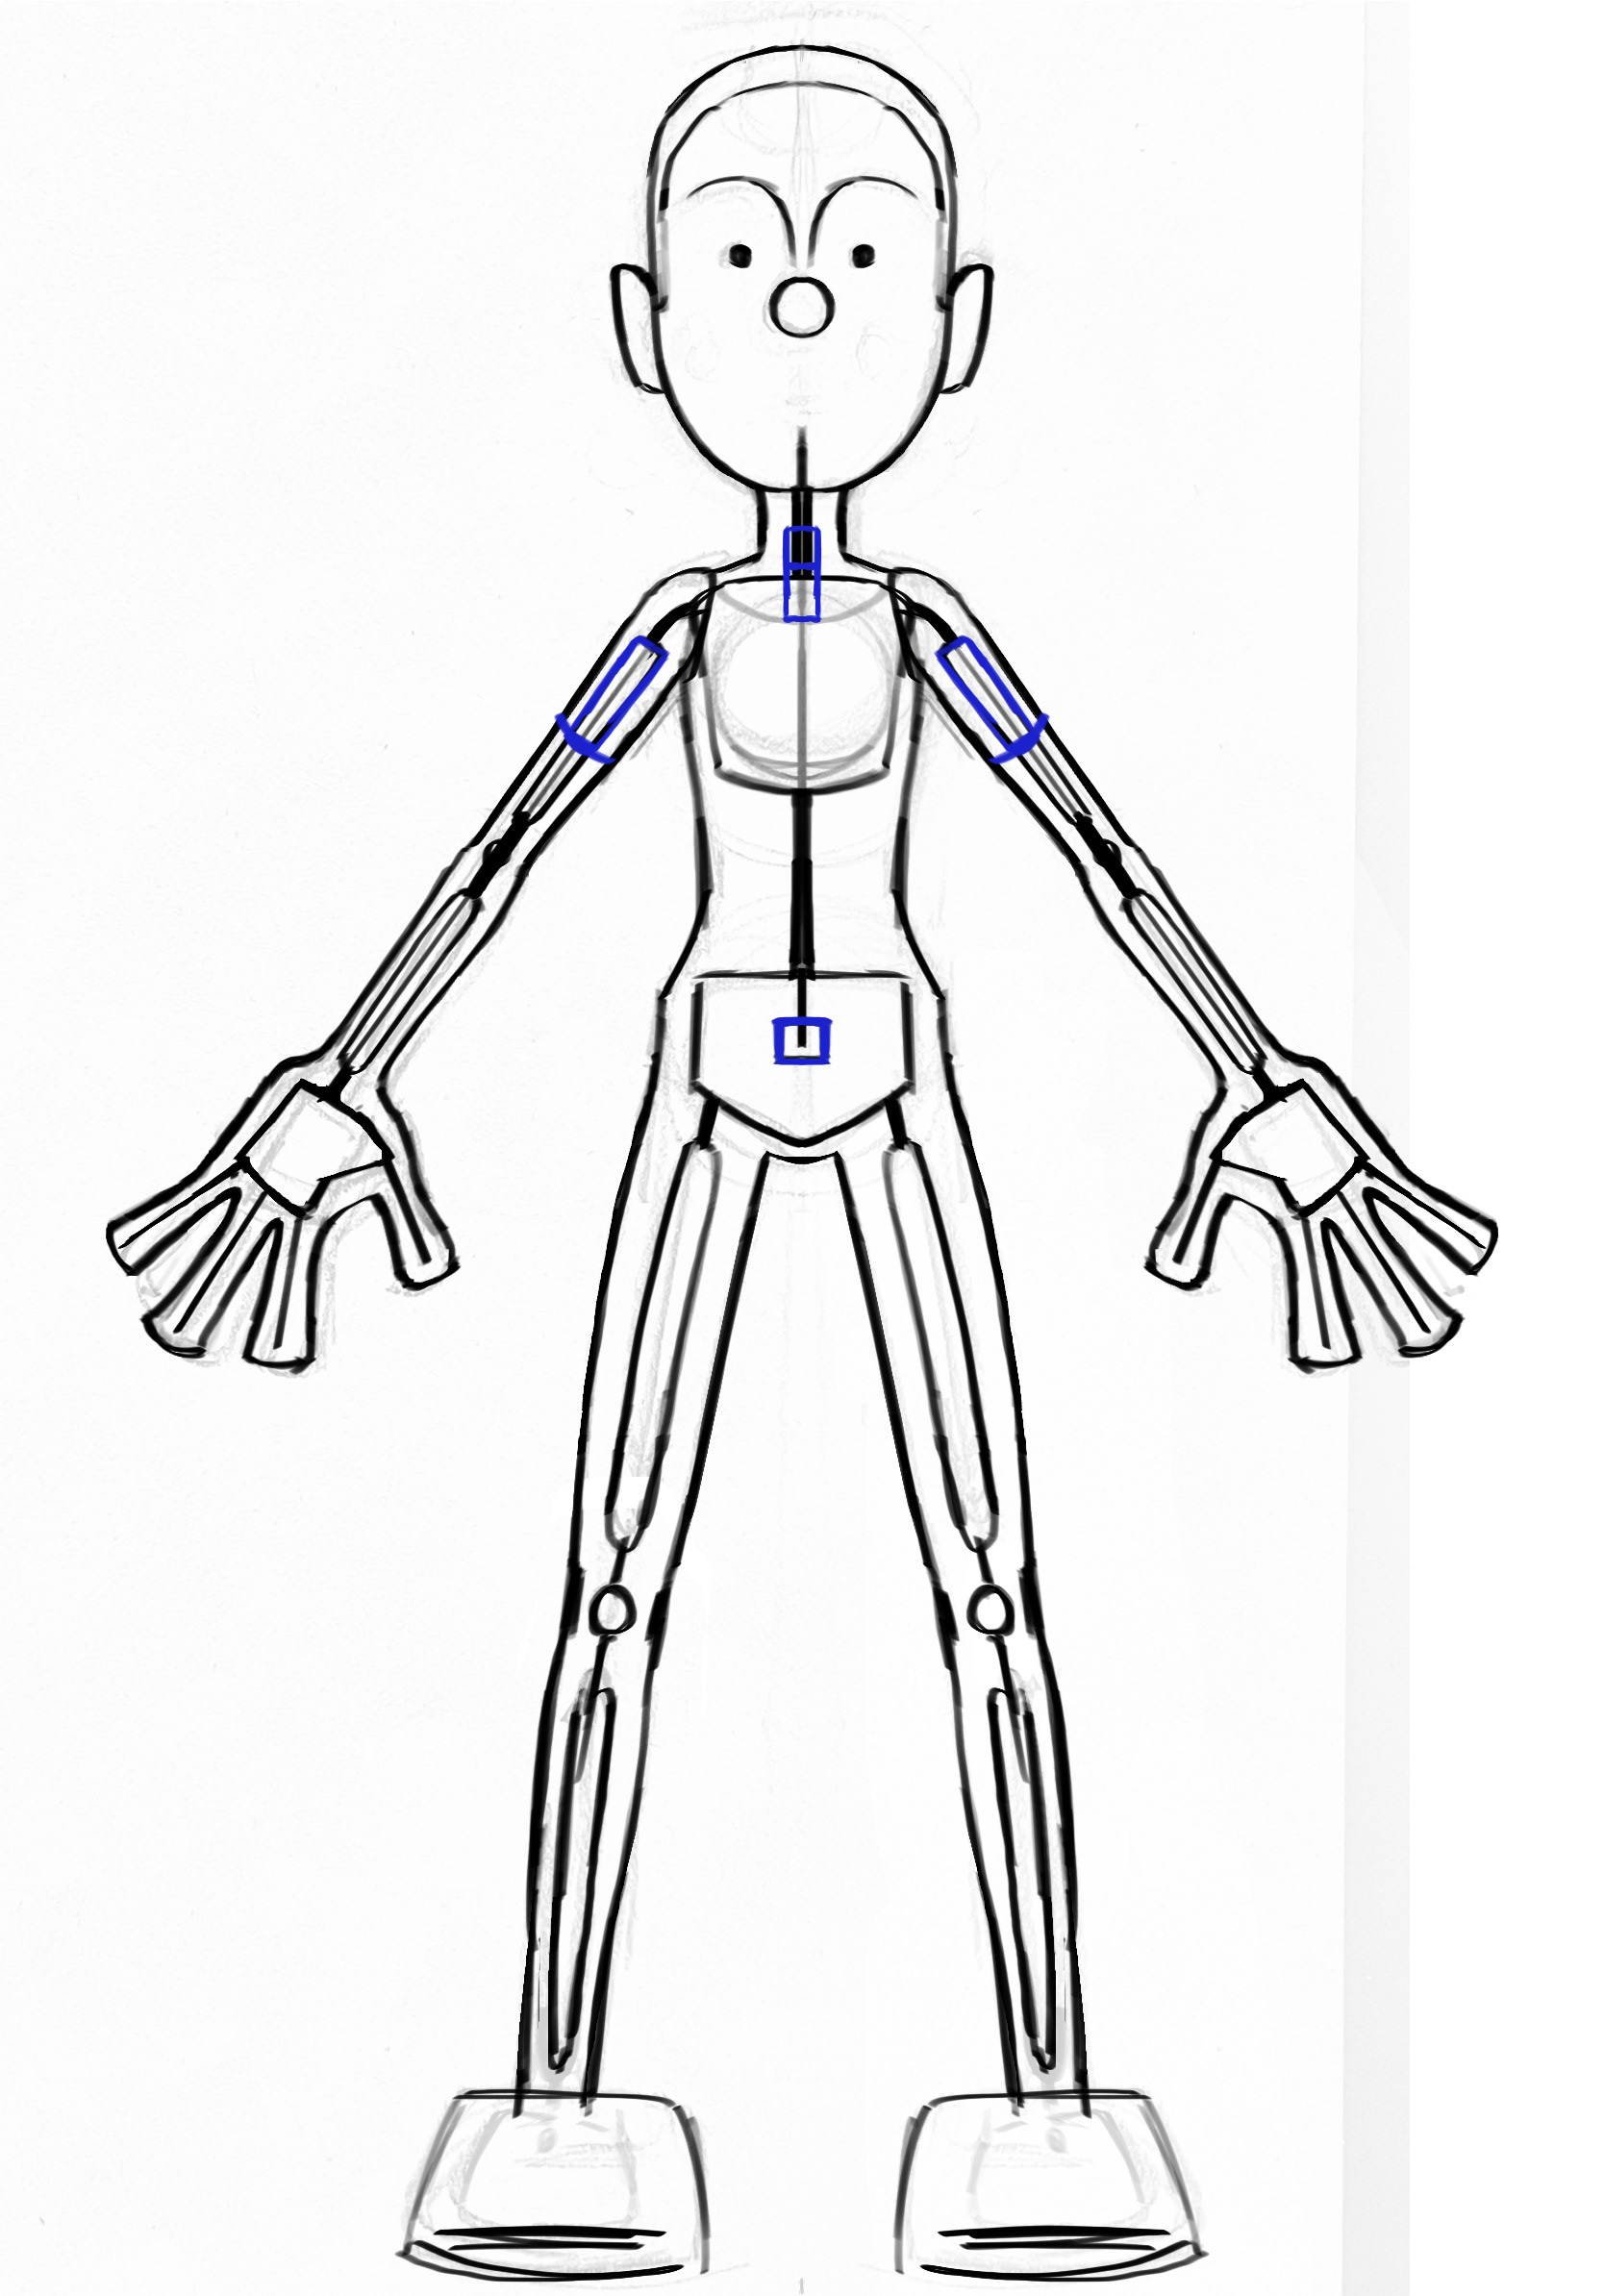
Dina scale sheet by Ashley Johnsgaard, 2026
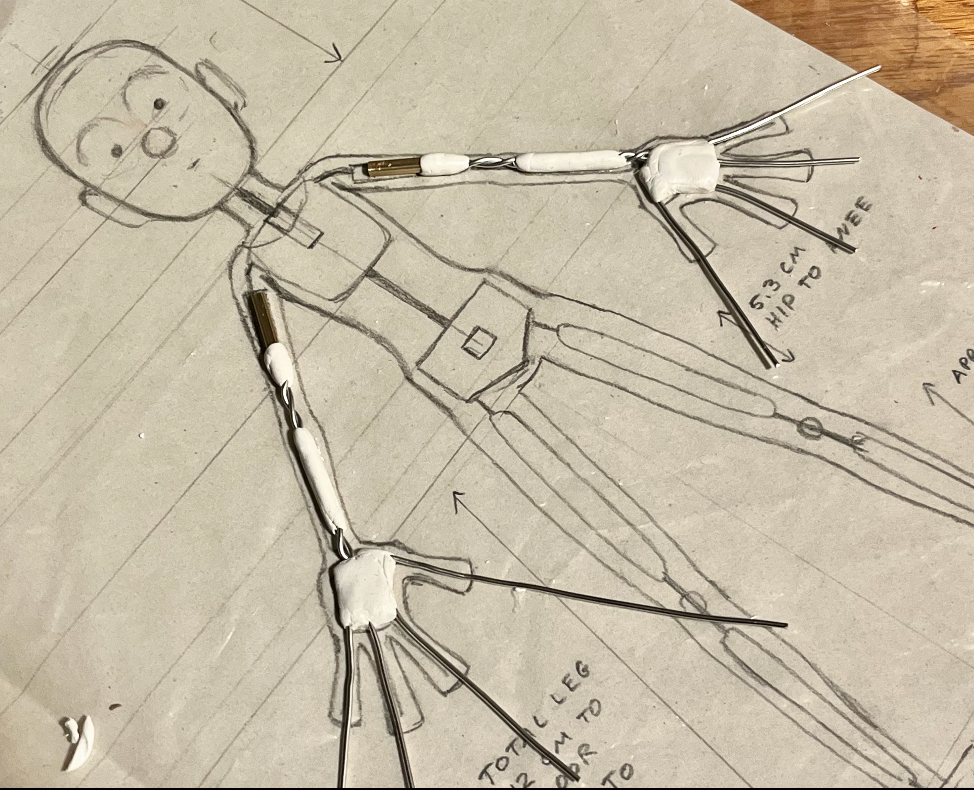
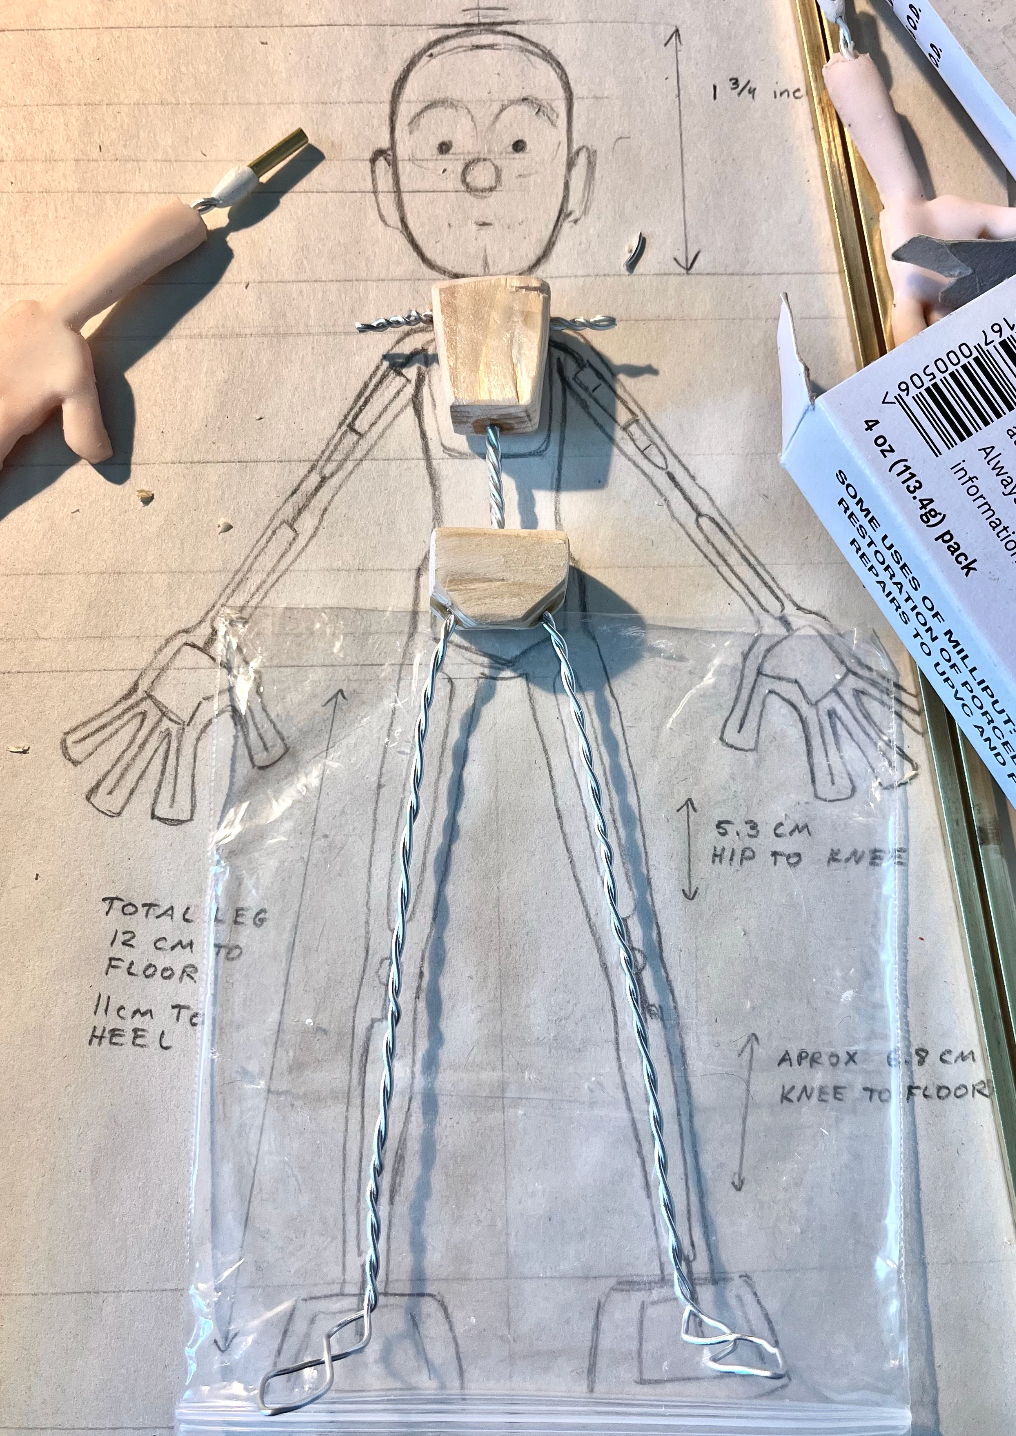
Translating character concepts into puppet scale sheets to design and plan Dina's armature.
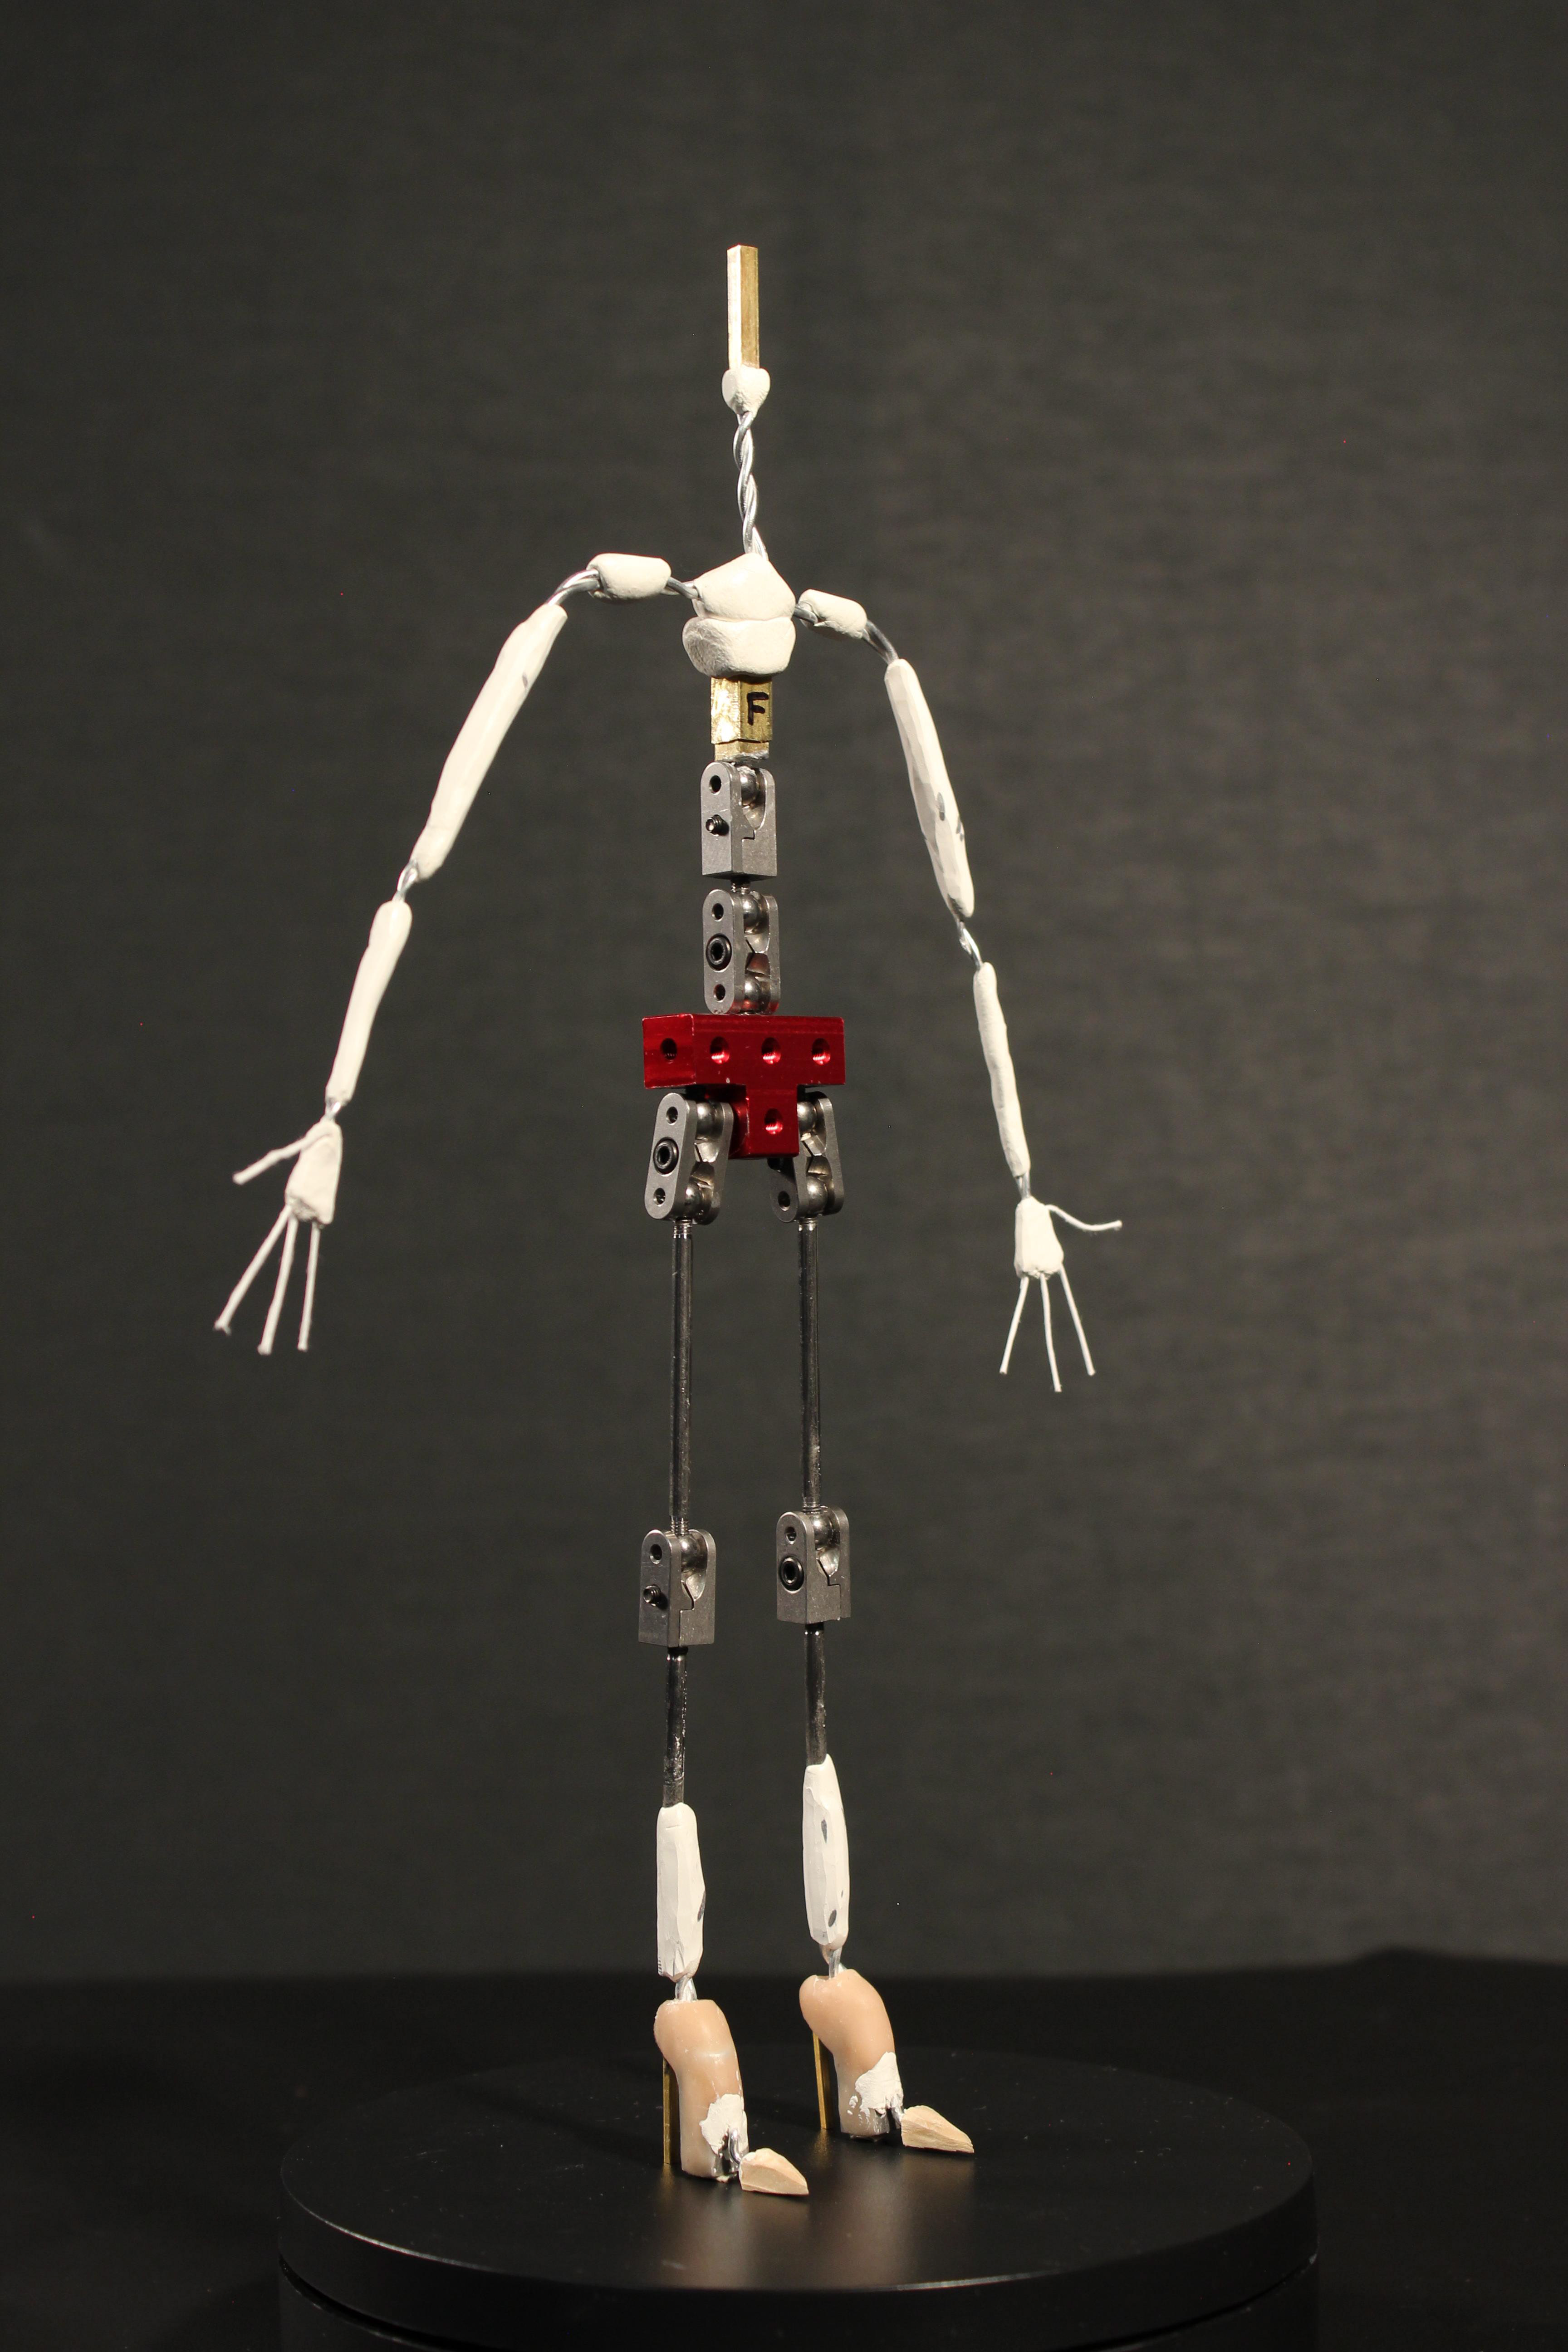
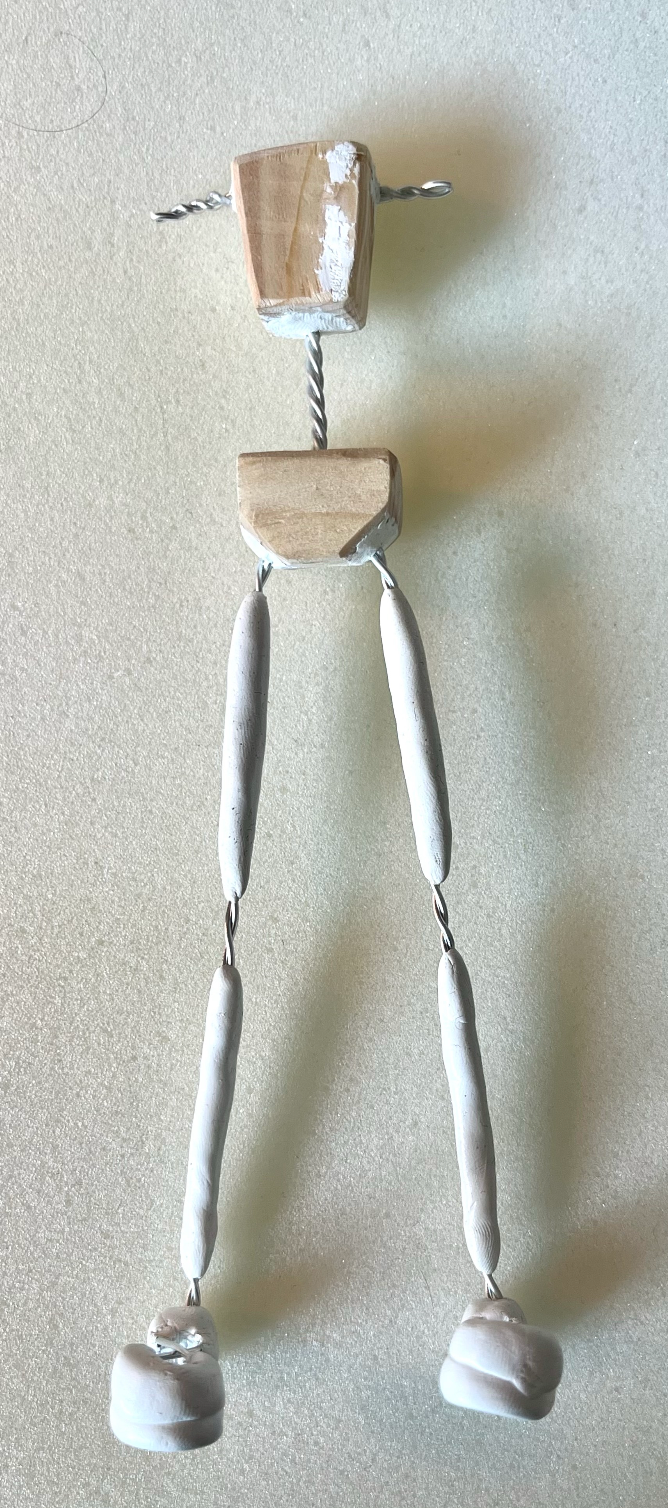
Prioritizing maintaining the puppet's proportions and style from the concept art. This meant using a ball-and-socket & wire hybrid armature, which allowed for thin enough wrists, ankles, and neck by supplementing with wire.
I also had to design brass replacement parts for areas that would be casted in silicone, which would also accommodate any breaks that occur during the shooting process.
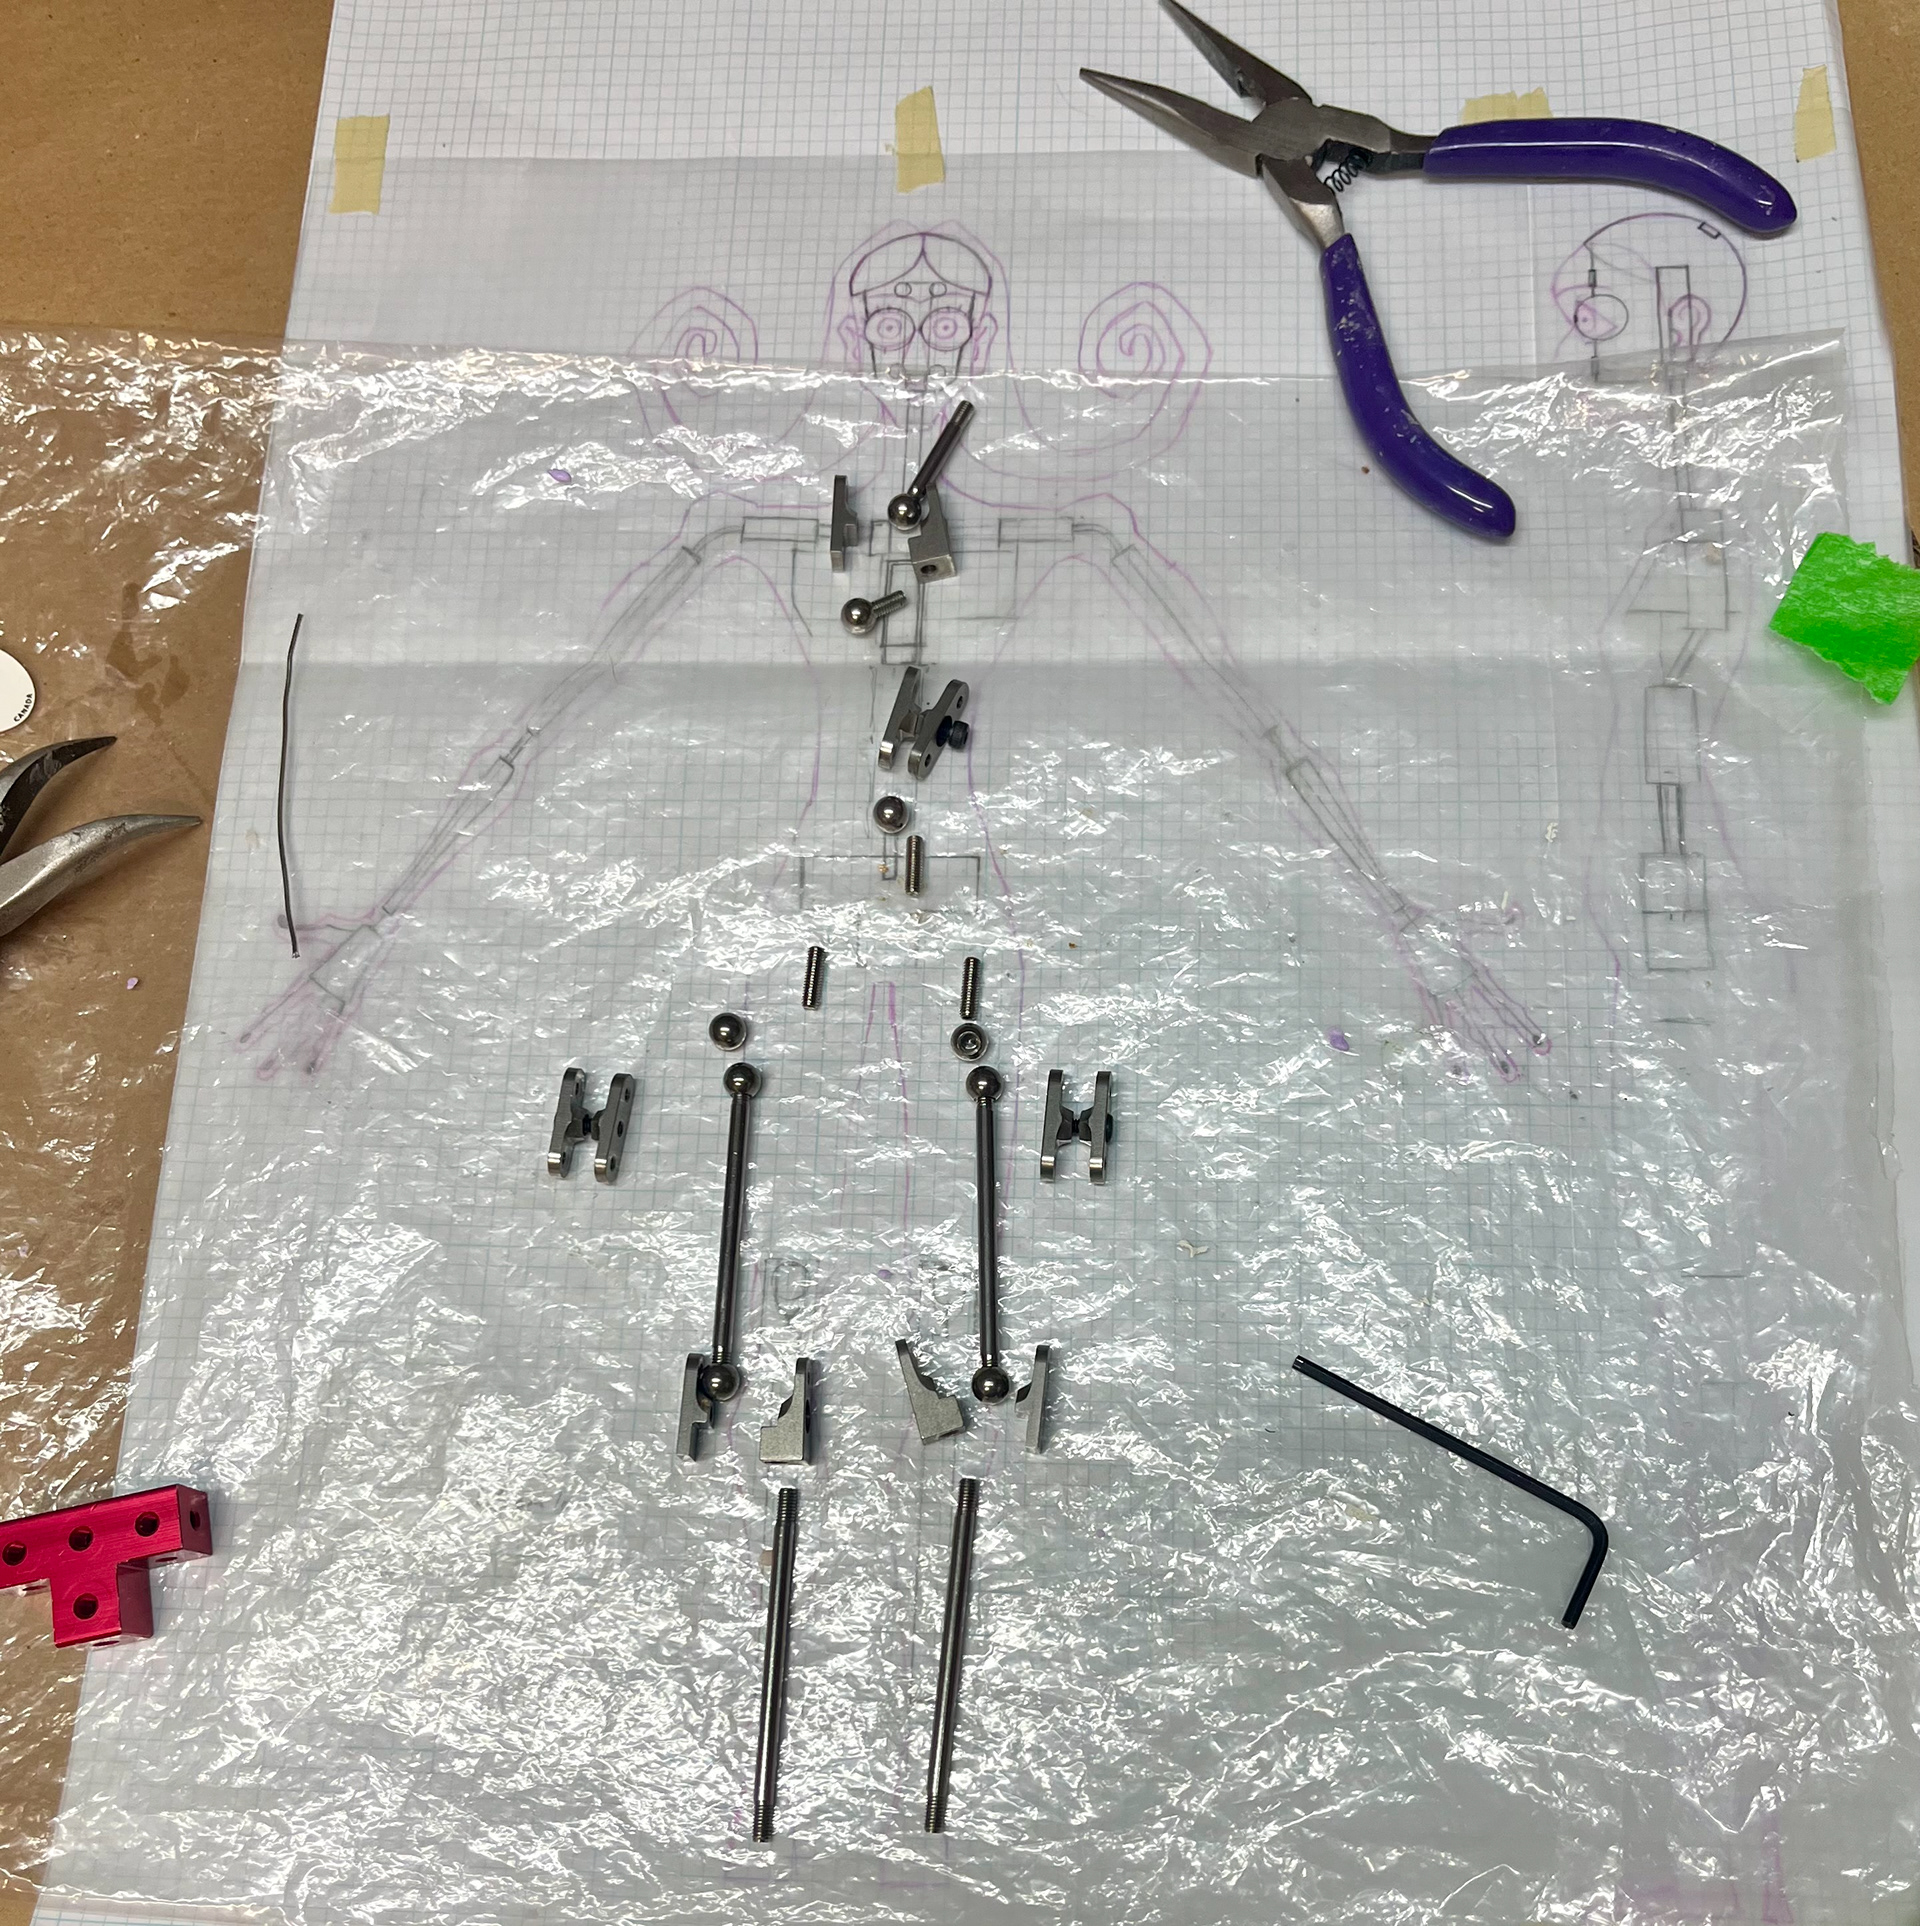
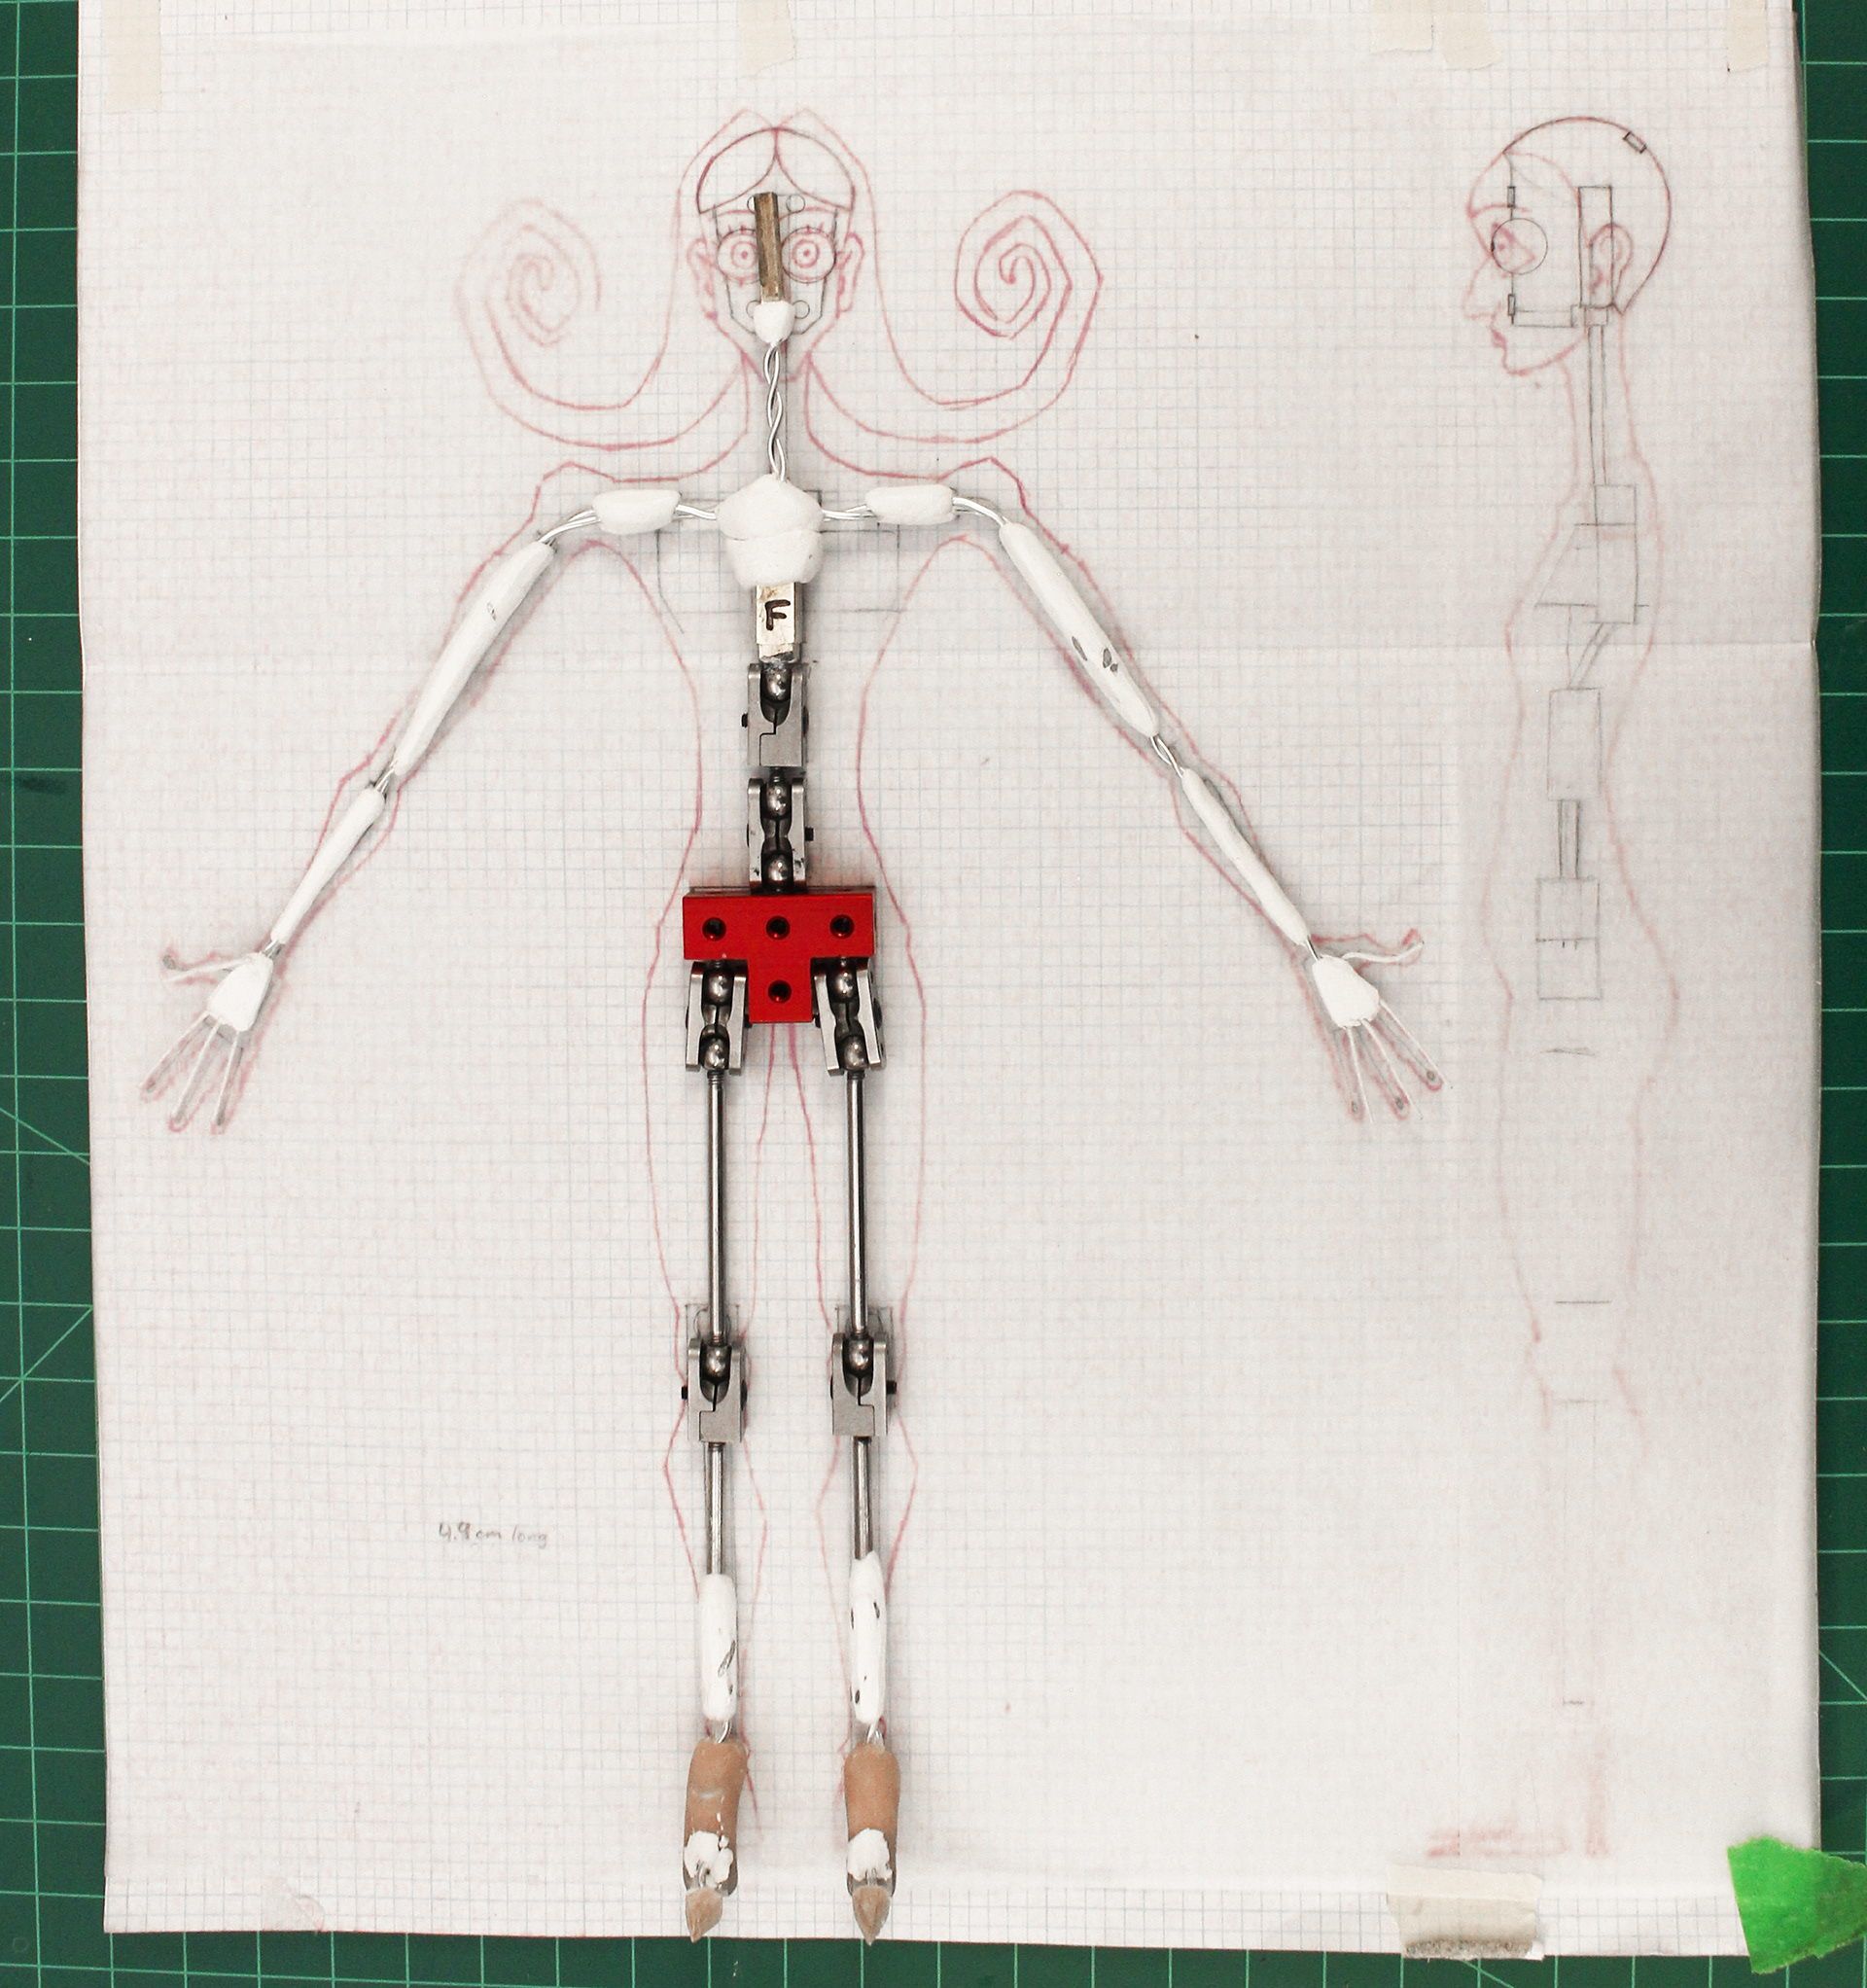

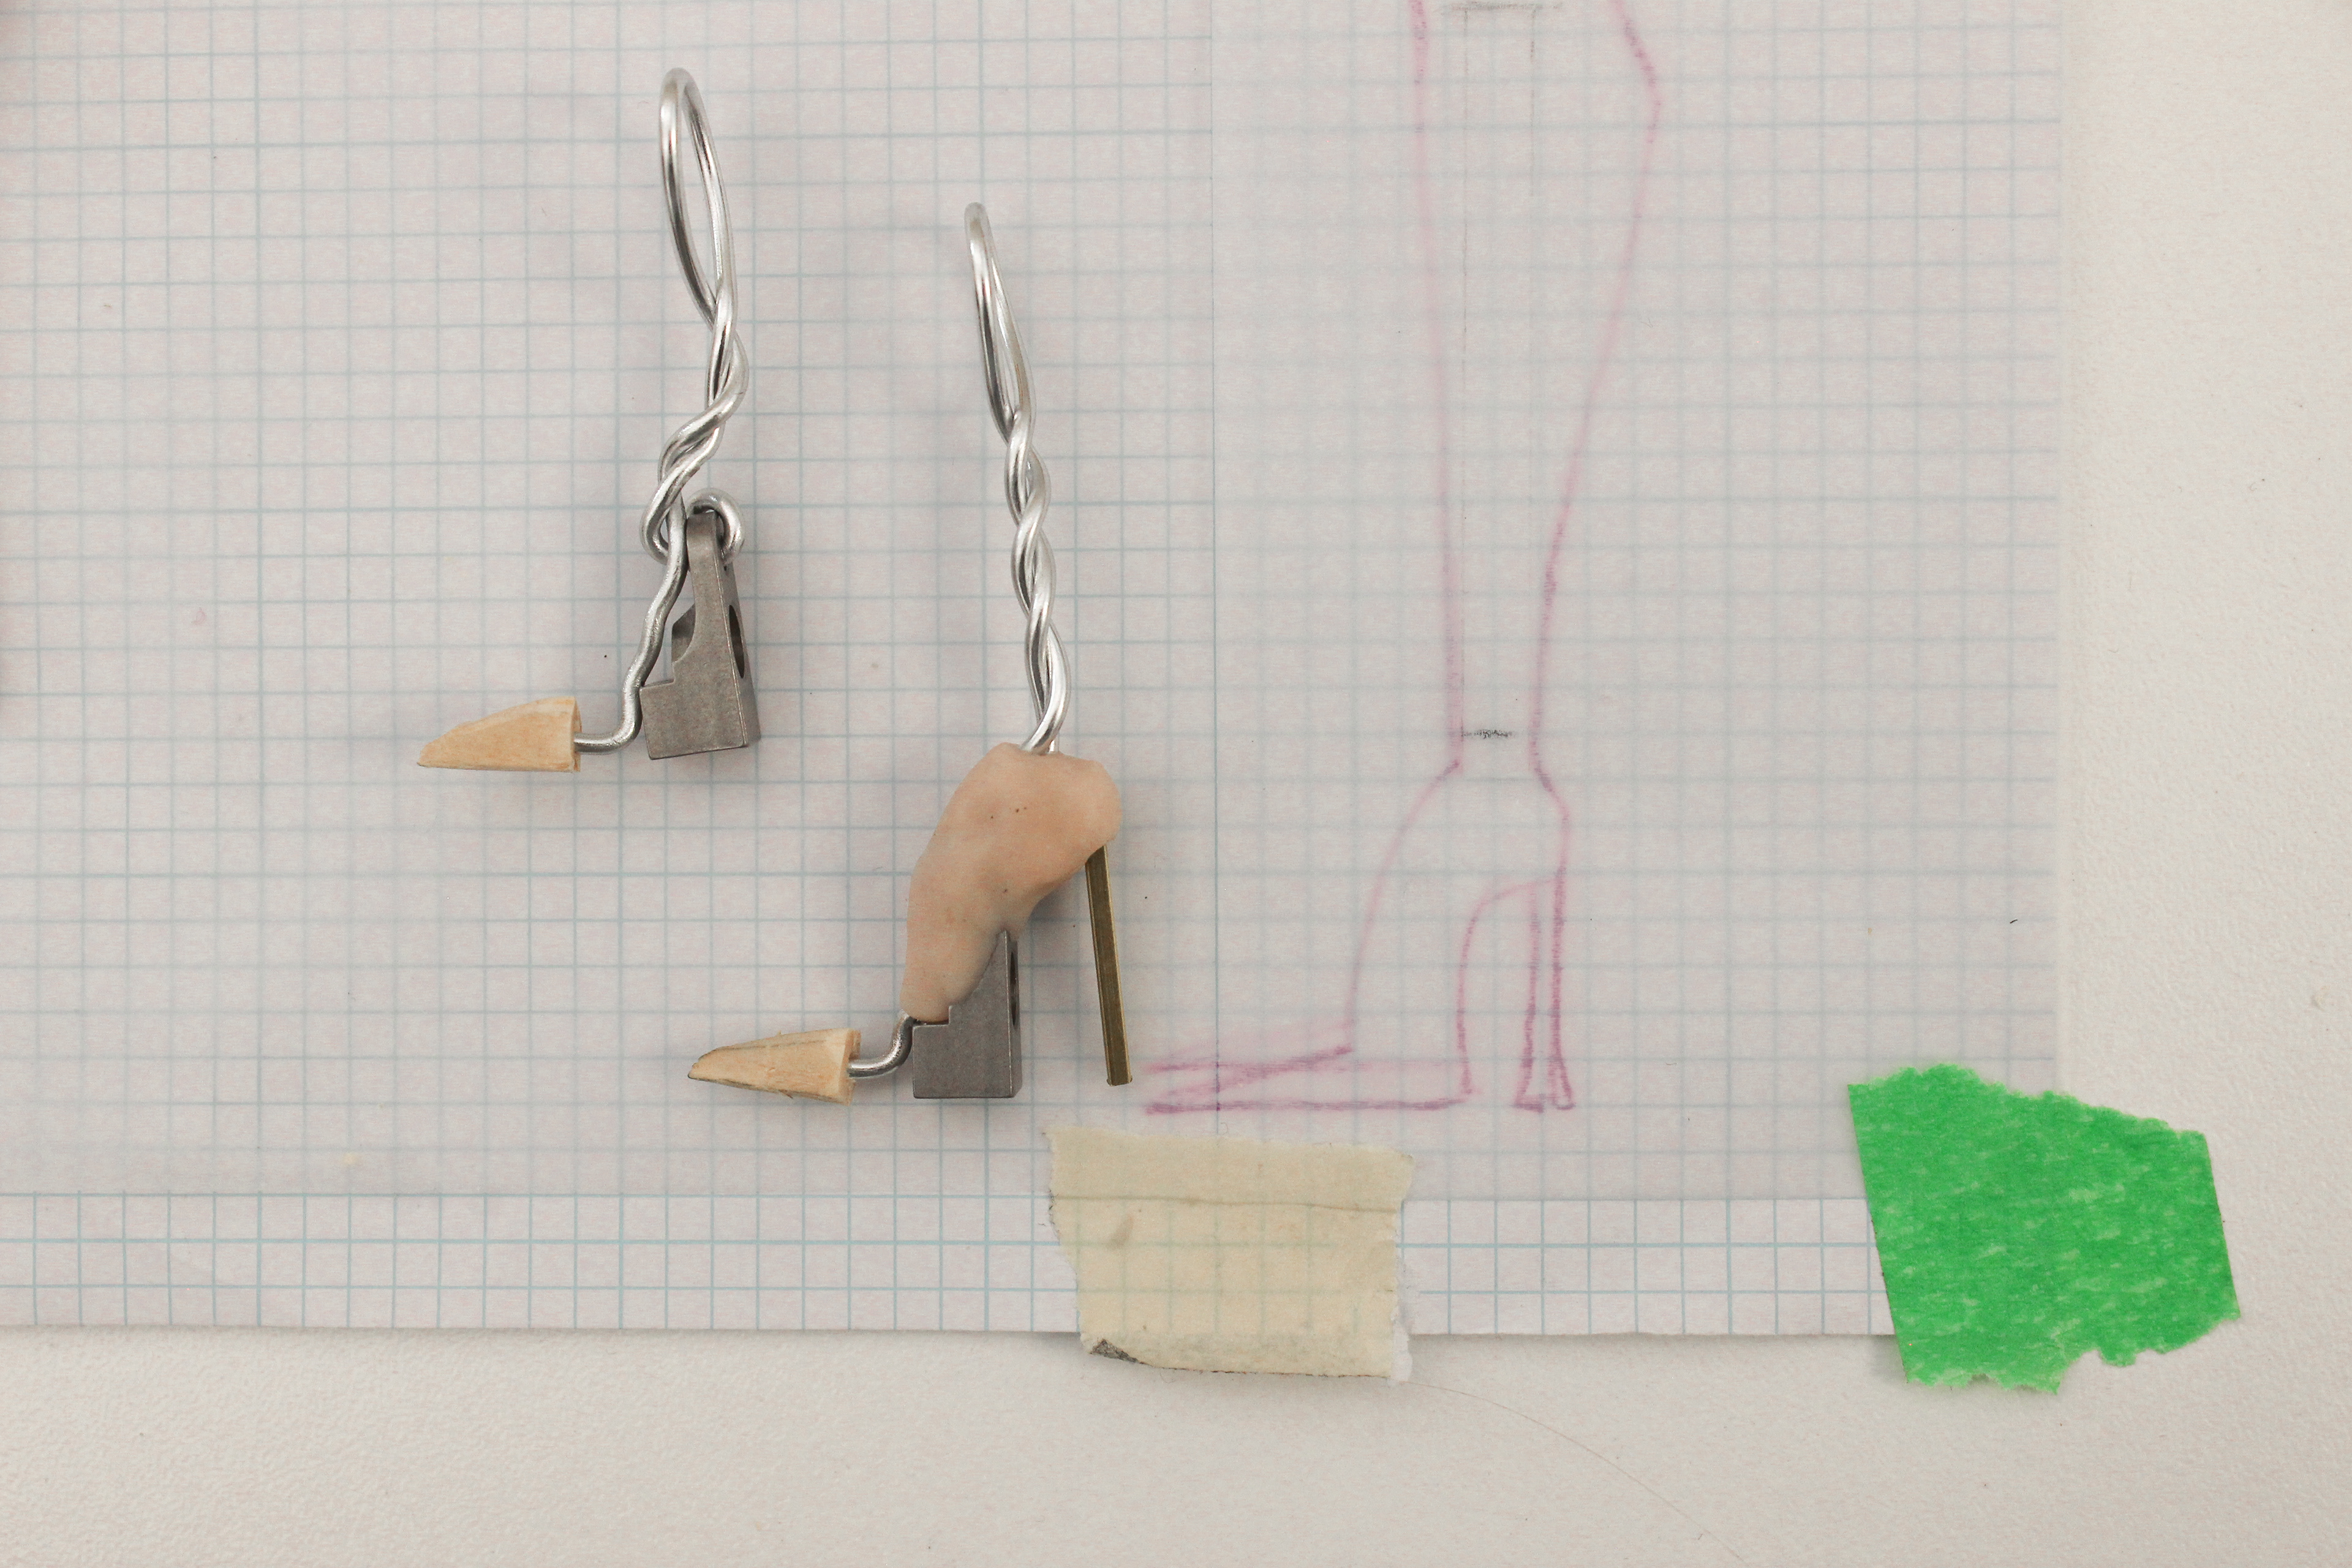
Using ball and socket parts for larger areas of the puppet, and wire and epoxy putty for thinner, replaceable parts. Dina's shoes are a combination of wood for toes, epoxy putty, brass heels, and a machined joint part for the ball of the foot which contains a threaded hole for tie-downs.
Head Modelling, Prototyping, CAD, and 3D Printing:
I was the lead CG Puppet Modeller and head of 3D printing for the film. This senior project is the first to use 3D printed replacement faces for stop motion animation at Emily Carr University, so I independently created our pipeline and workflow through trial and error.
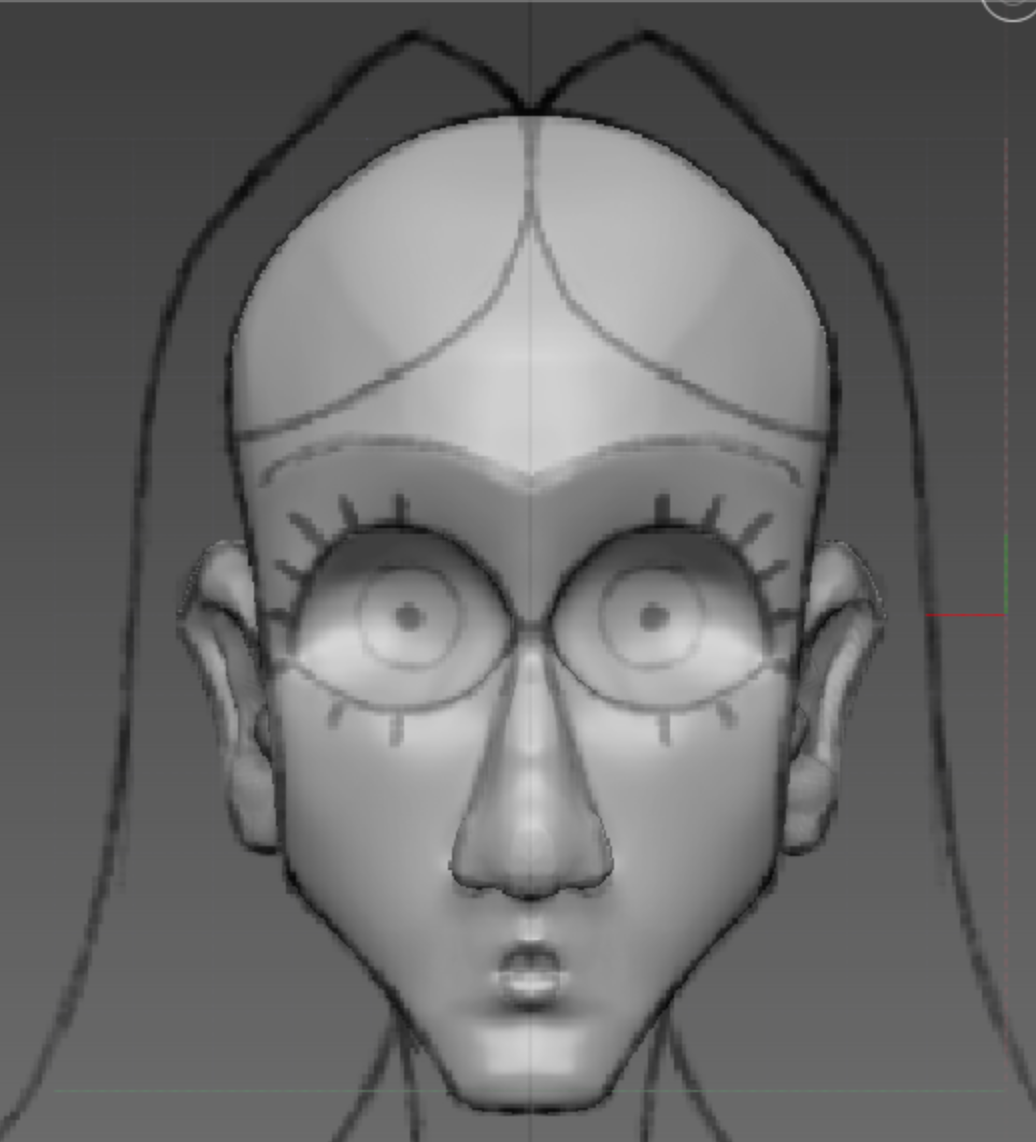
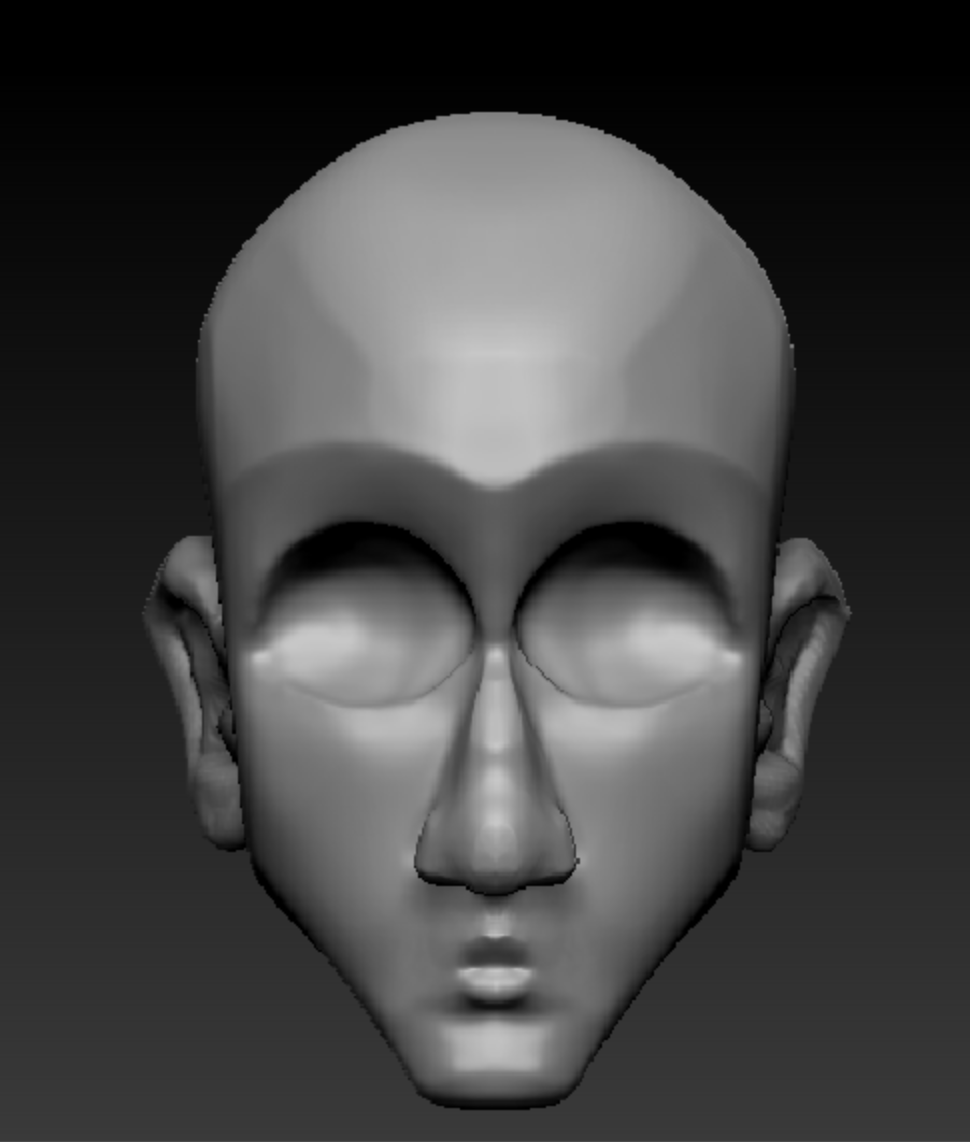
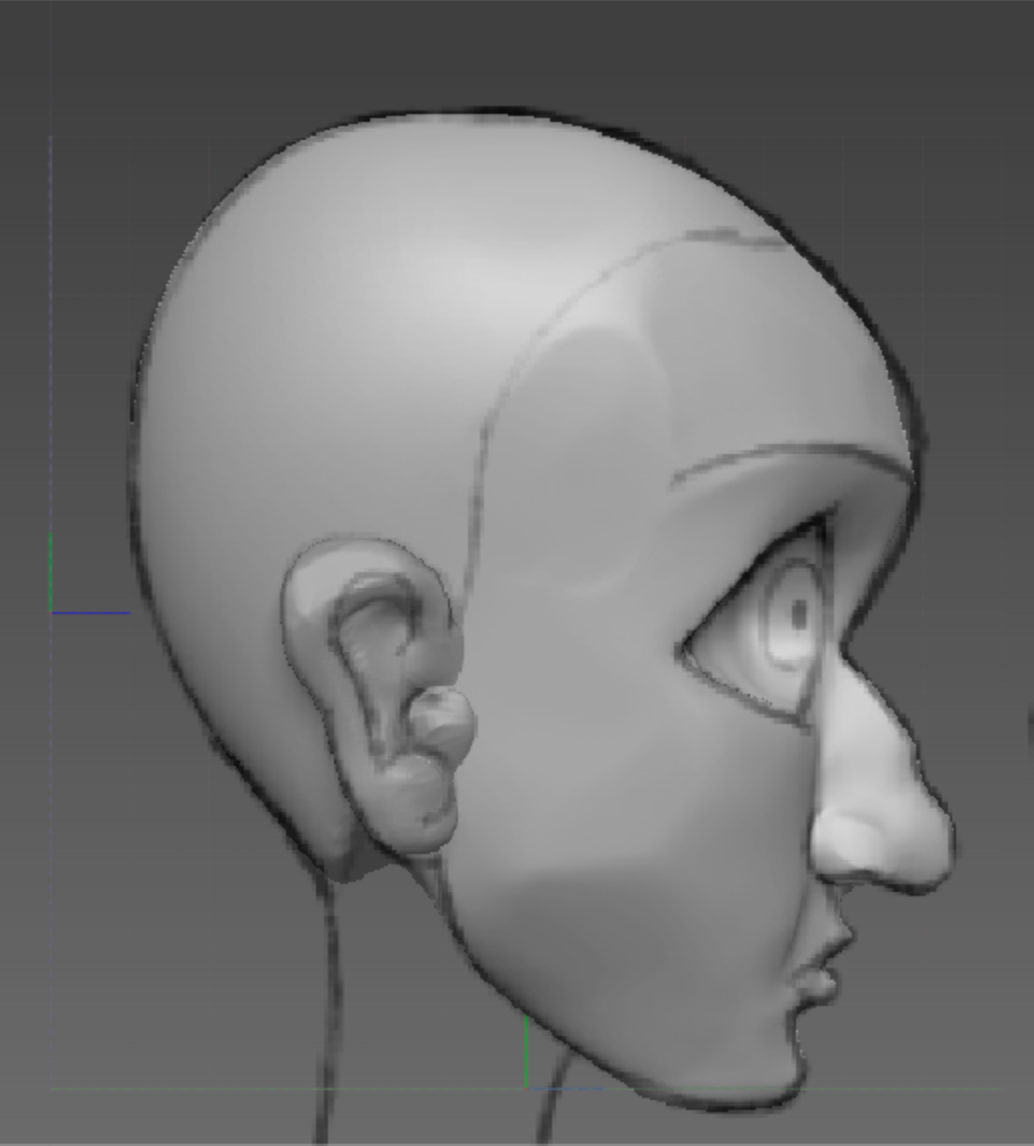
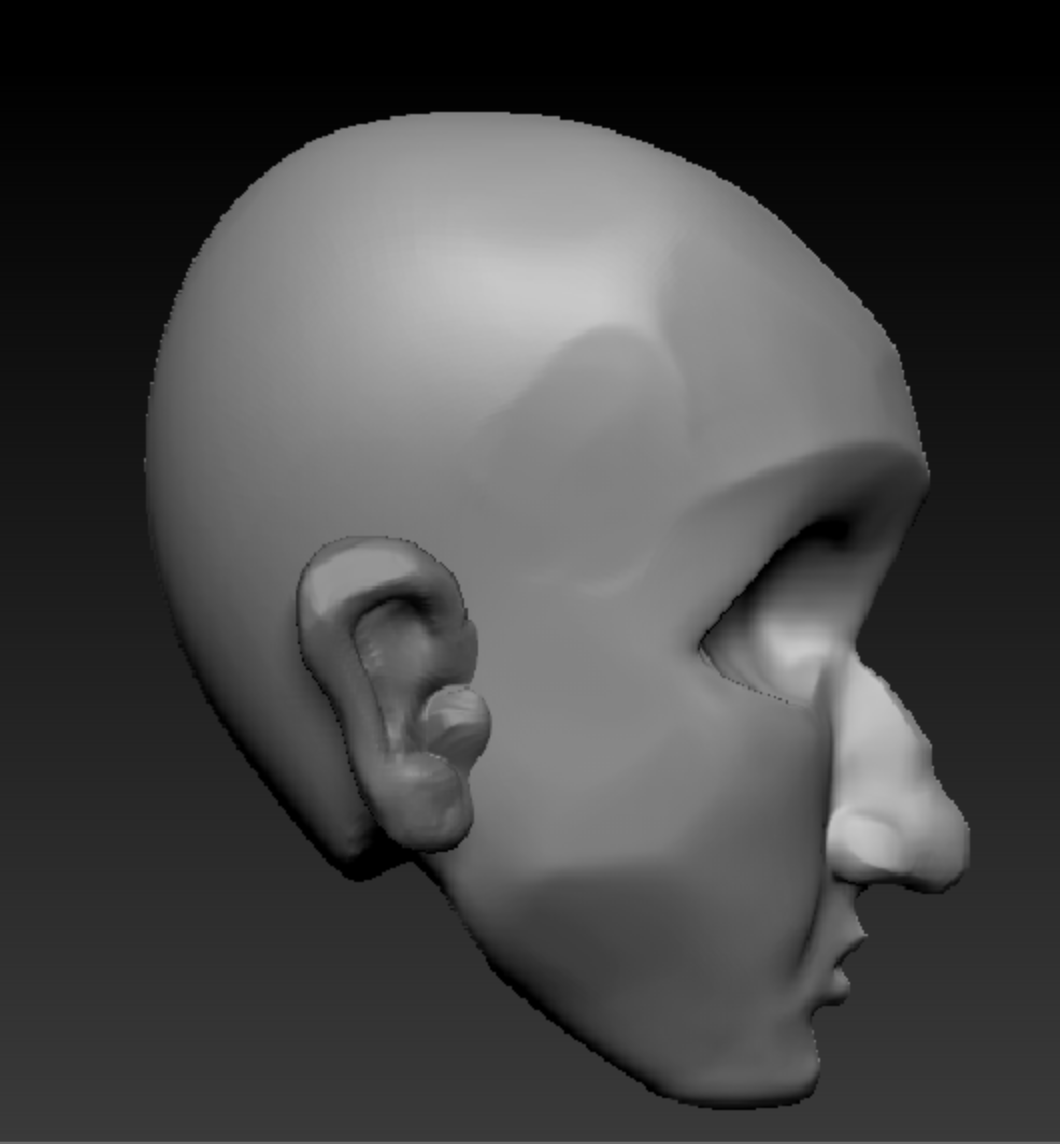
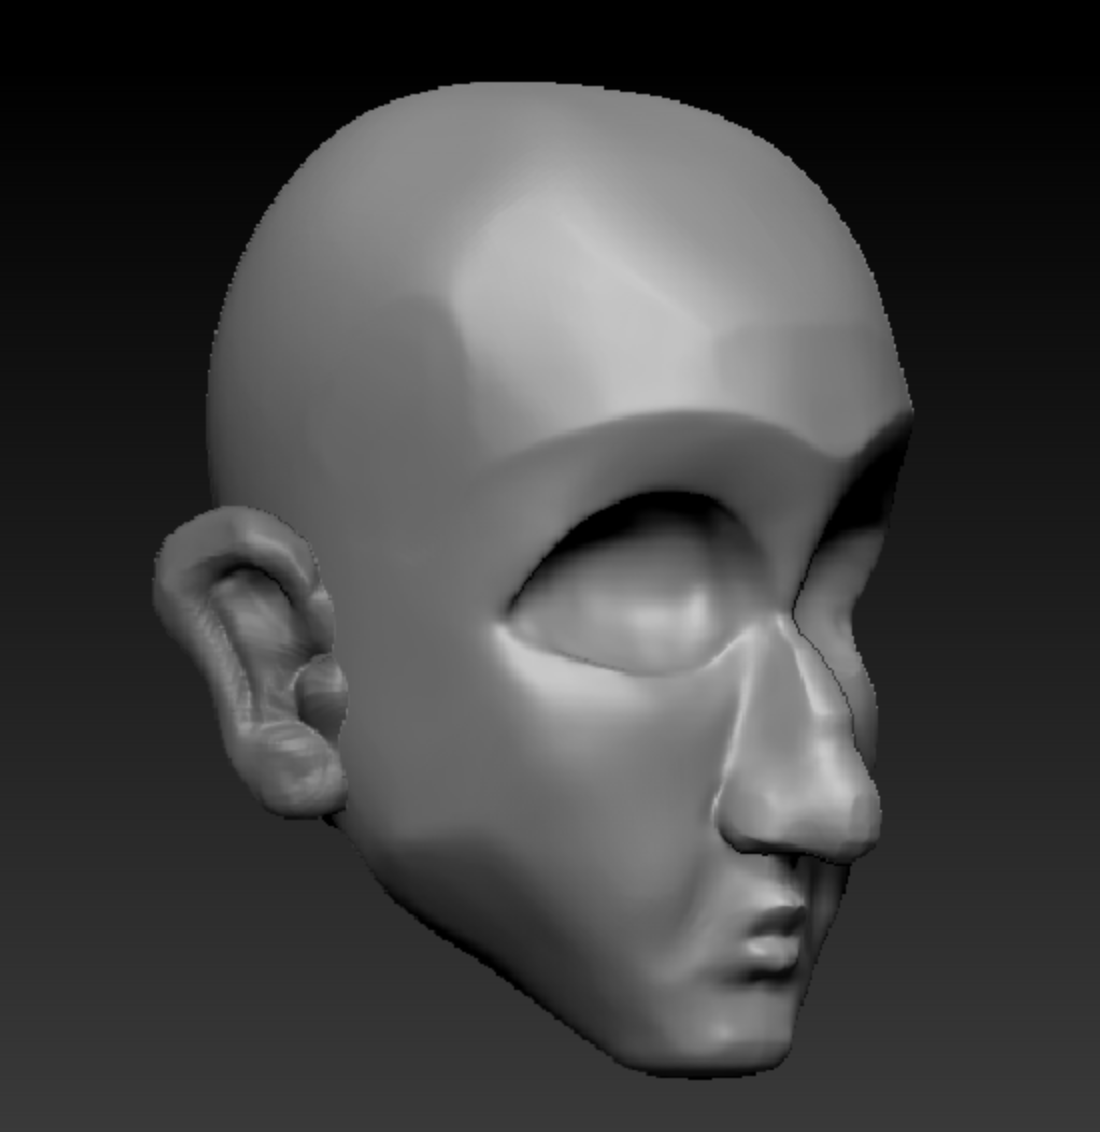
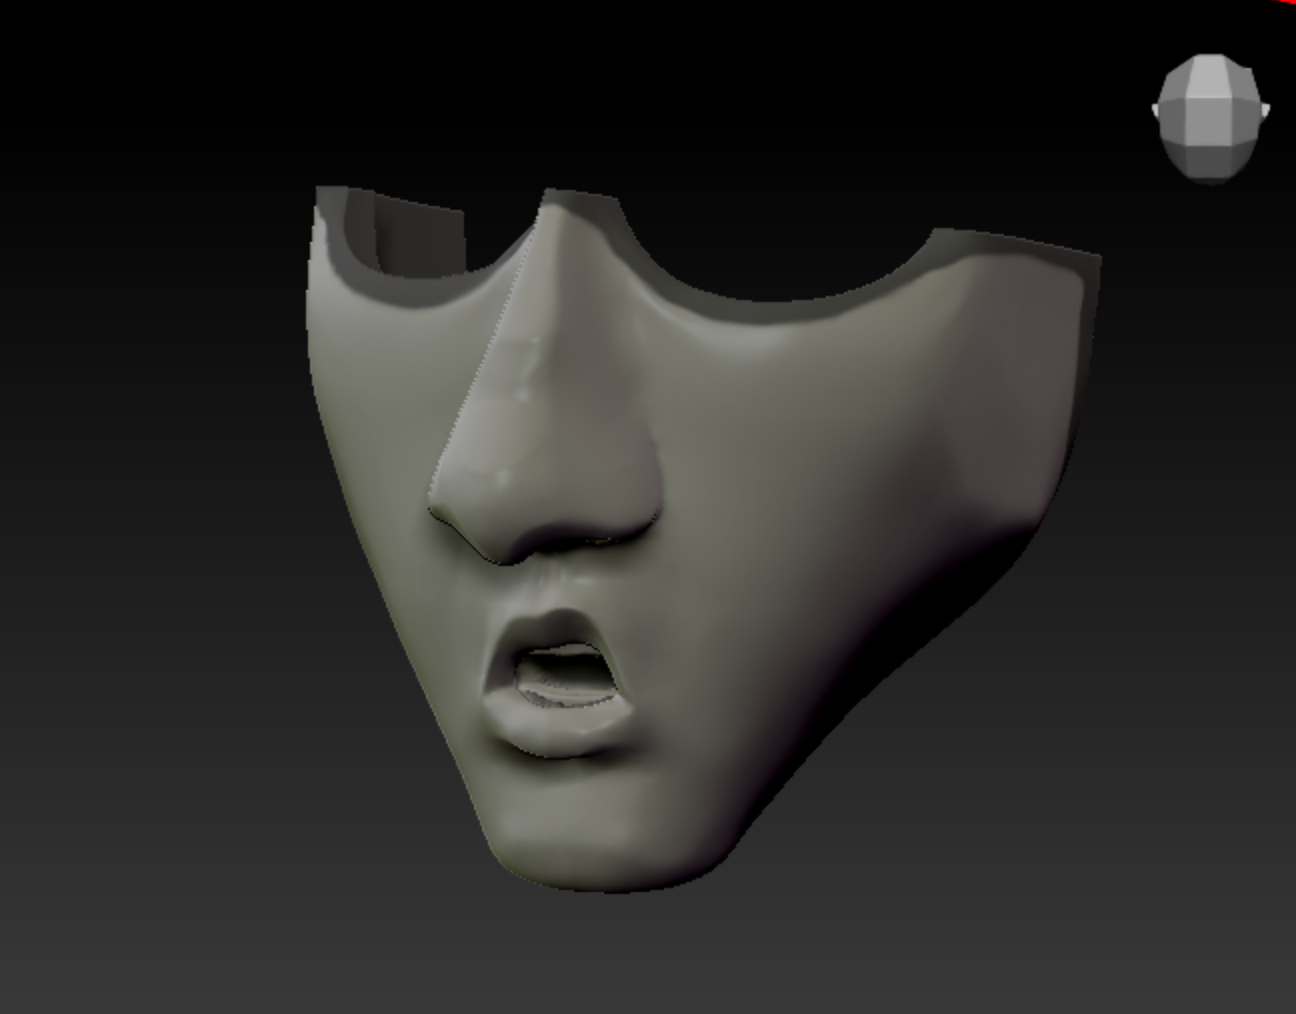
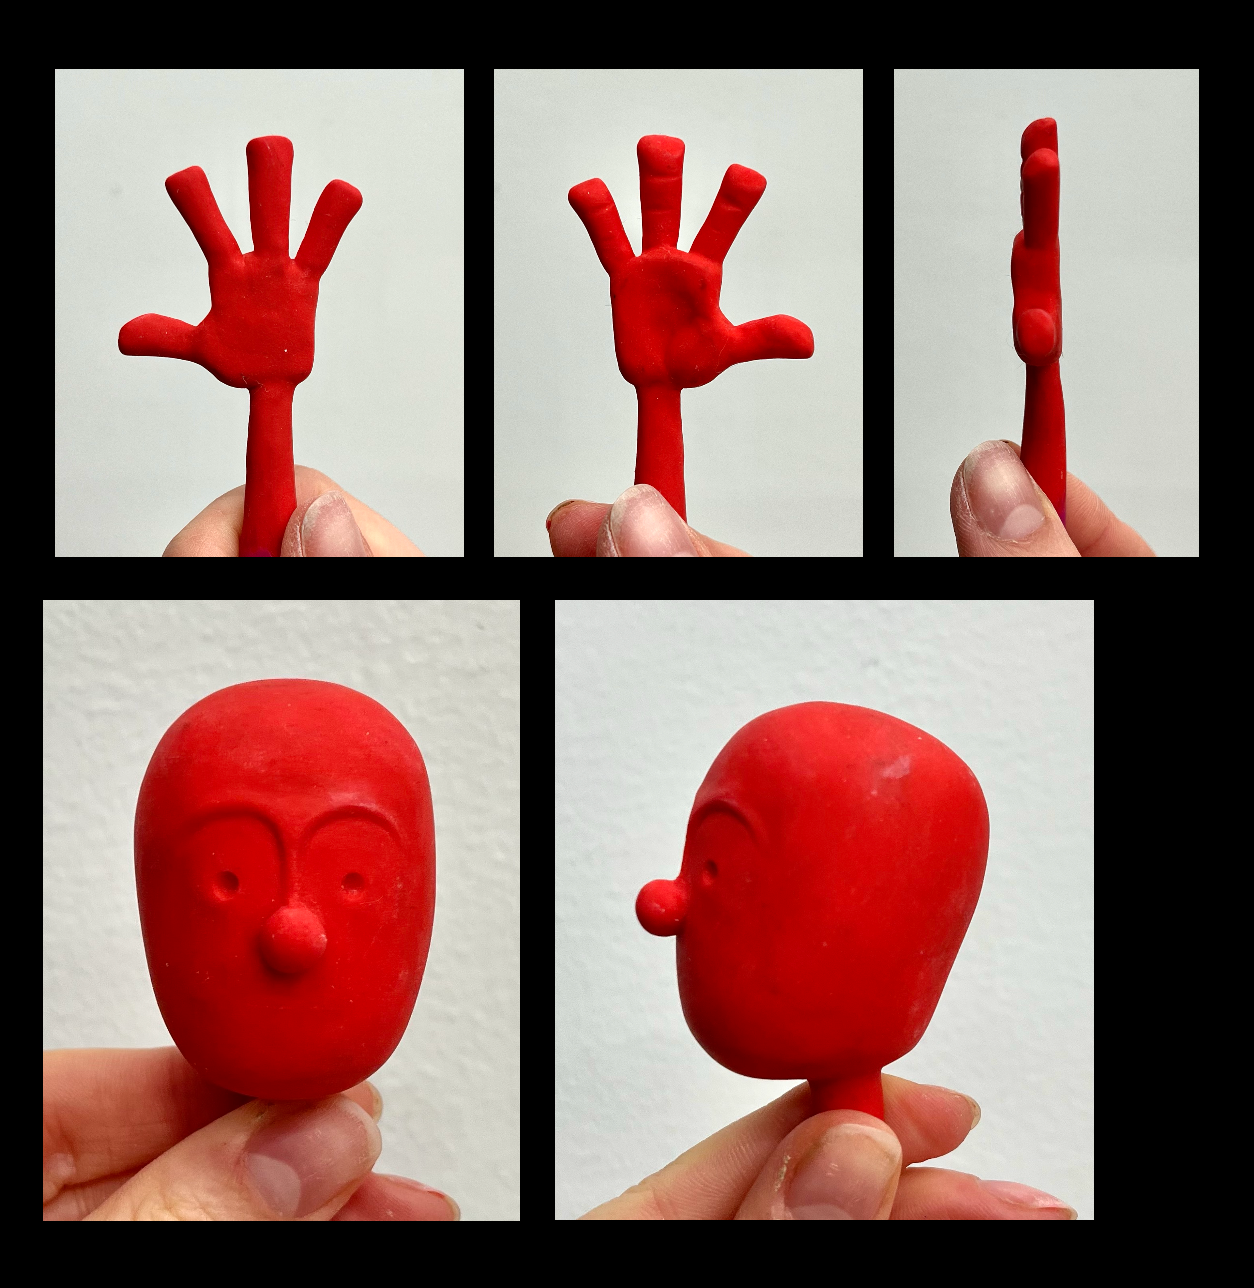
Sculpting puppet heads in Zbrush: Blocking, keeping on model to puppet, consistent design translation between 2D and 3D styles, creating functional puppet masks out of organic sculpts, utilizing masks and layers to create blend shapes that preserve faces that fit against the puppet's head block.

Tracking blend shape values for prints used in each shot.
Since all animation was with blend shapes in Zbrush, I created a print management system to track blend shape values between each shot to avoid duplicate prints. This was done with making value charts on paper, which was a bit archaic but worked for the production's needs.
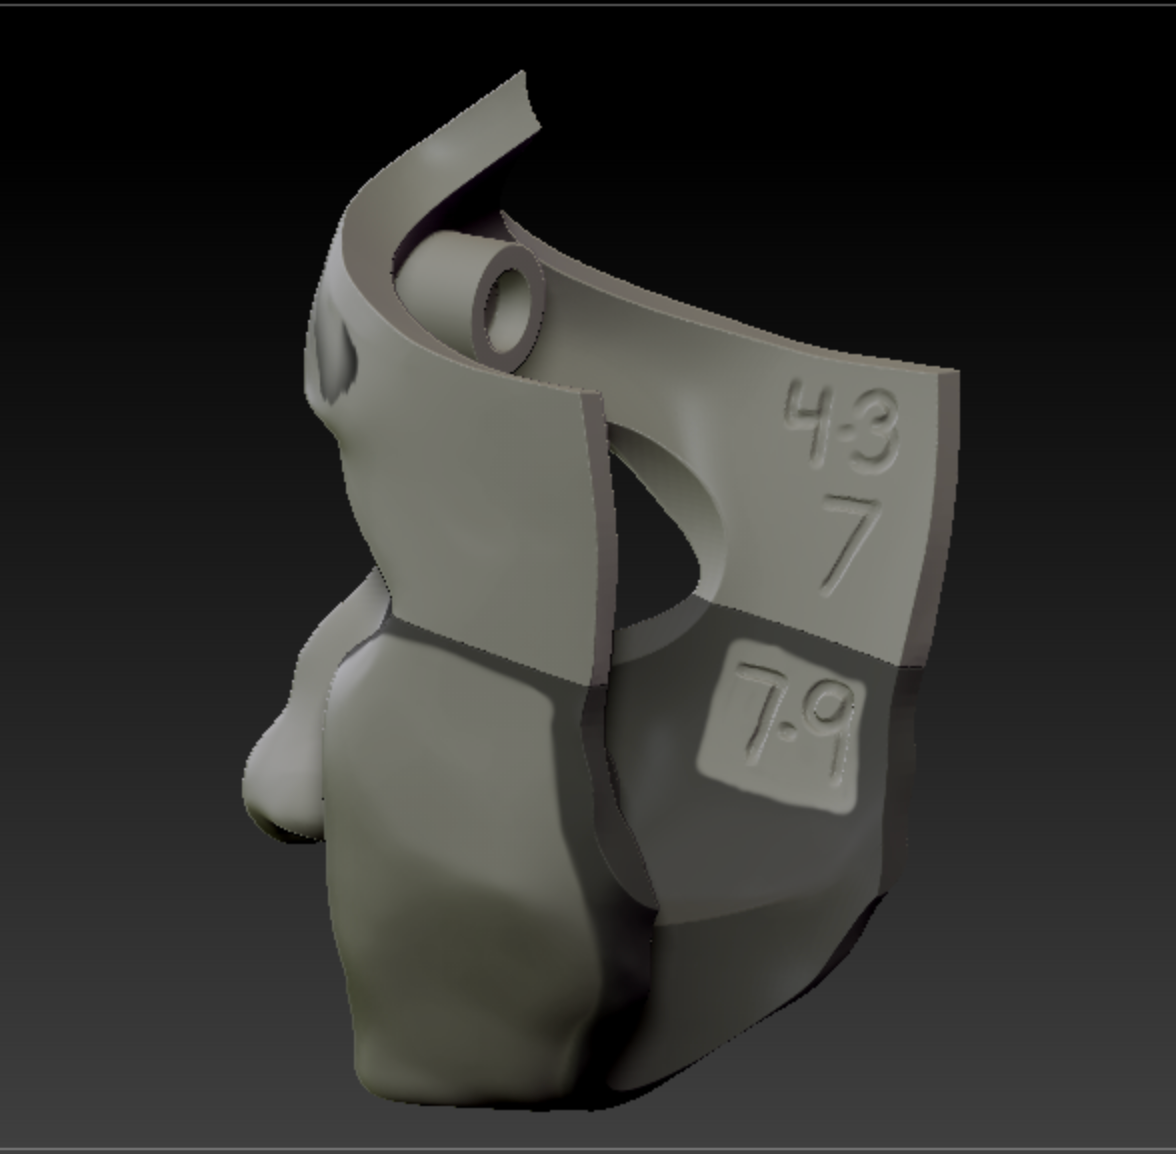
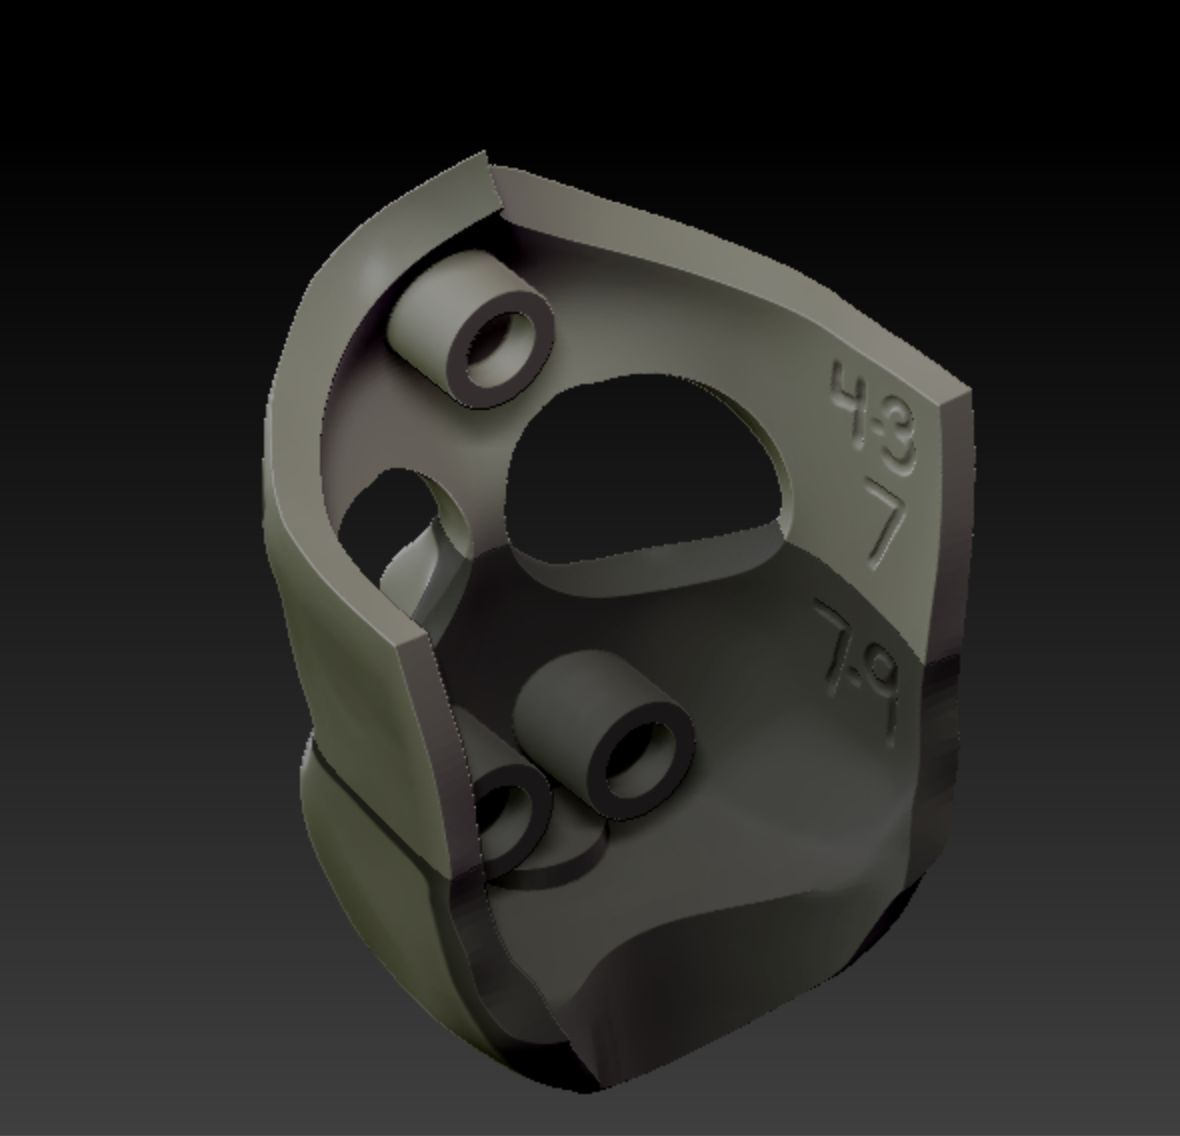
I sorted prints by numbering systems engraved in each print, split into upper and lower halves (scene, shot, and print sequence numbers).
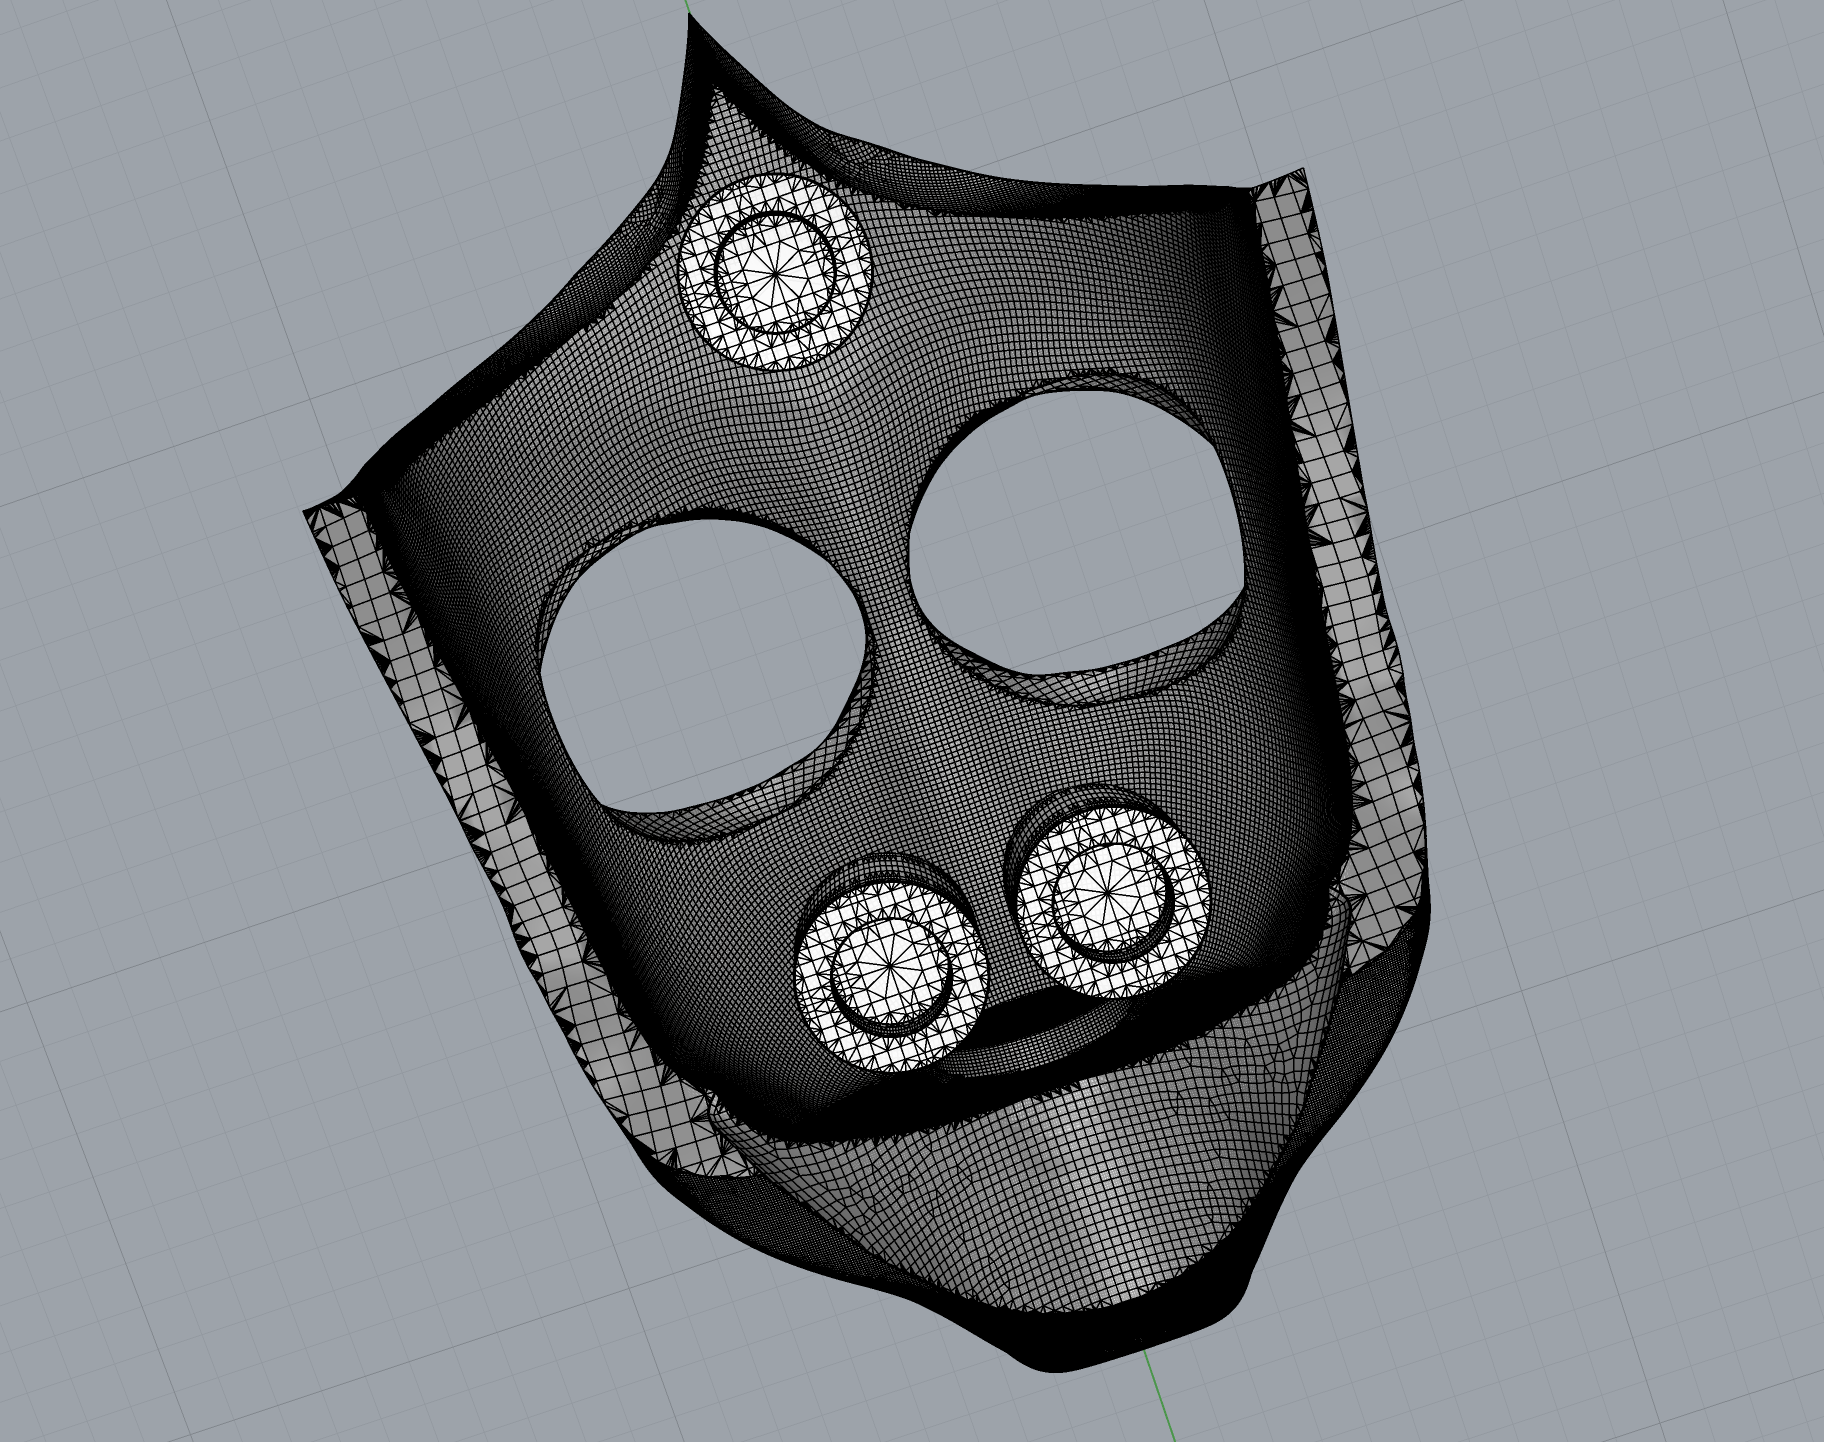
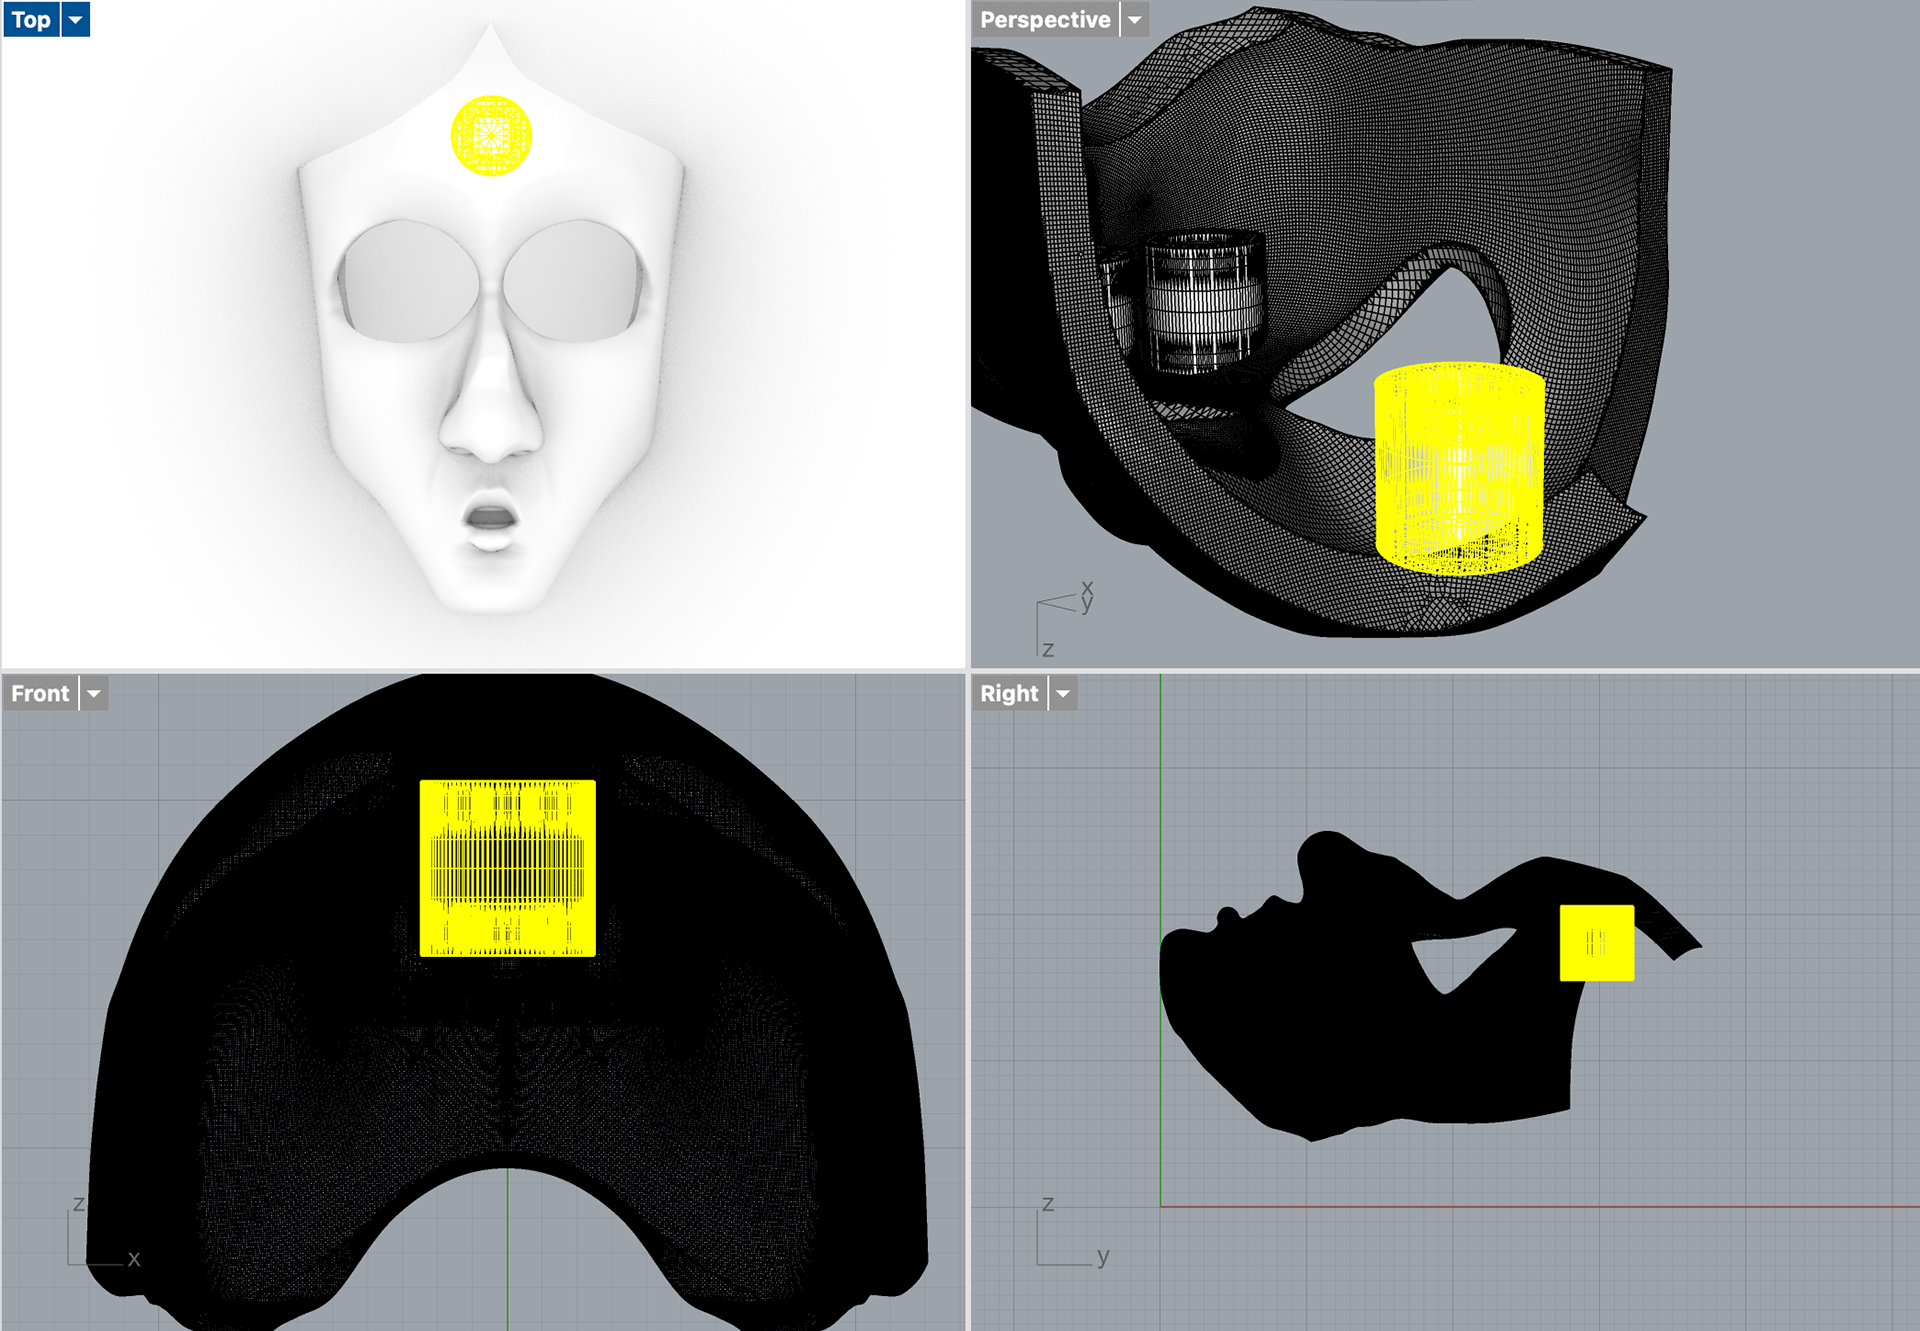
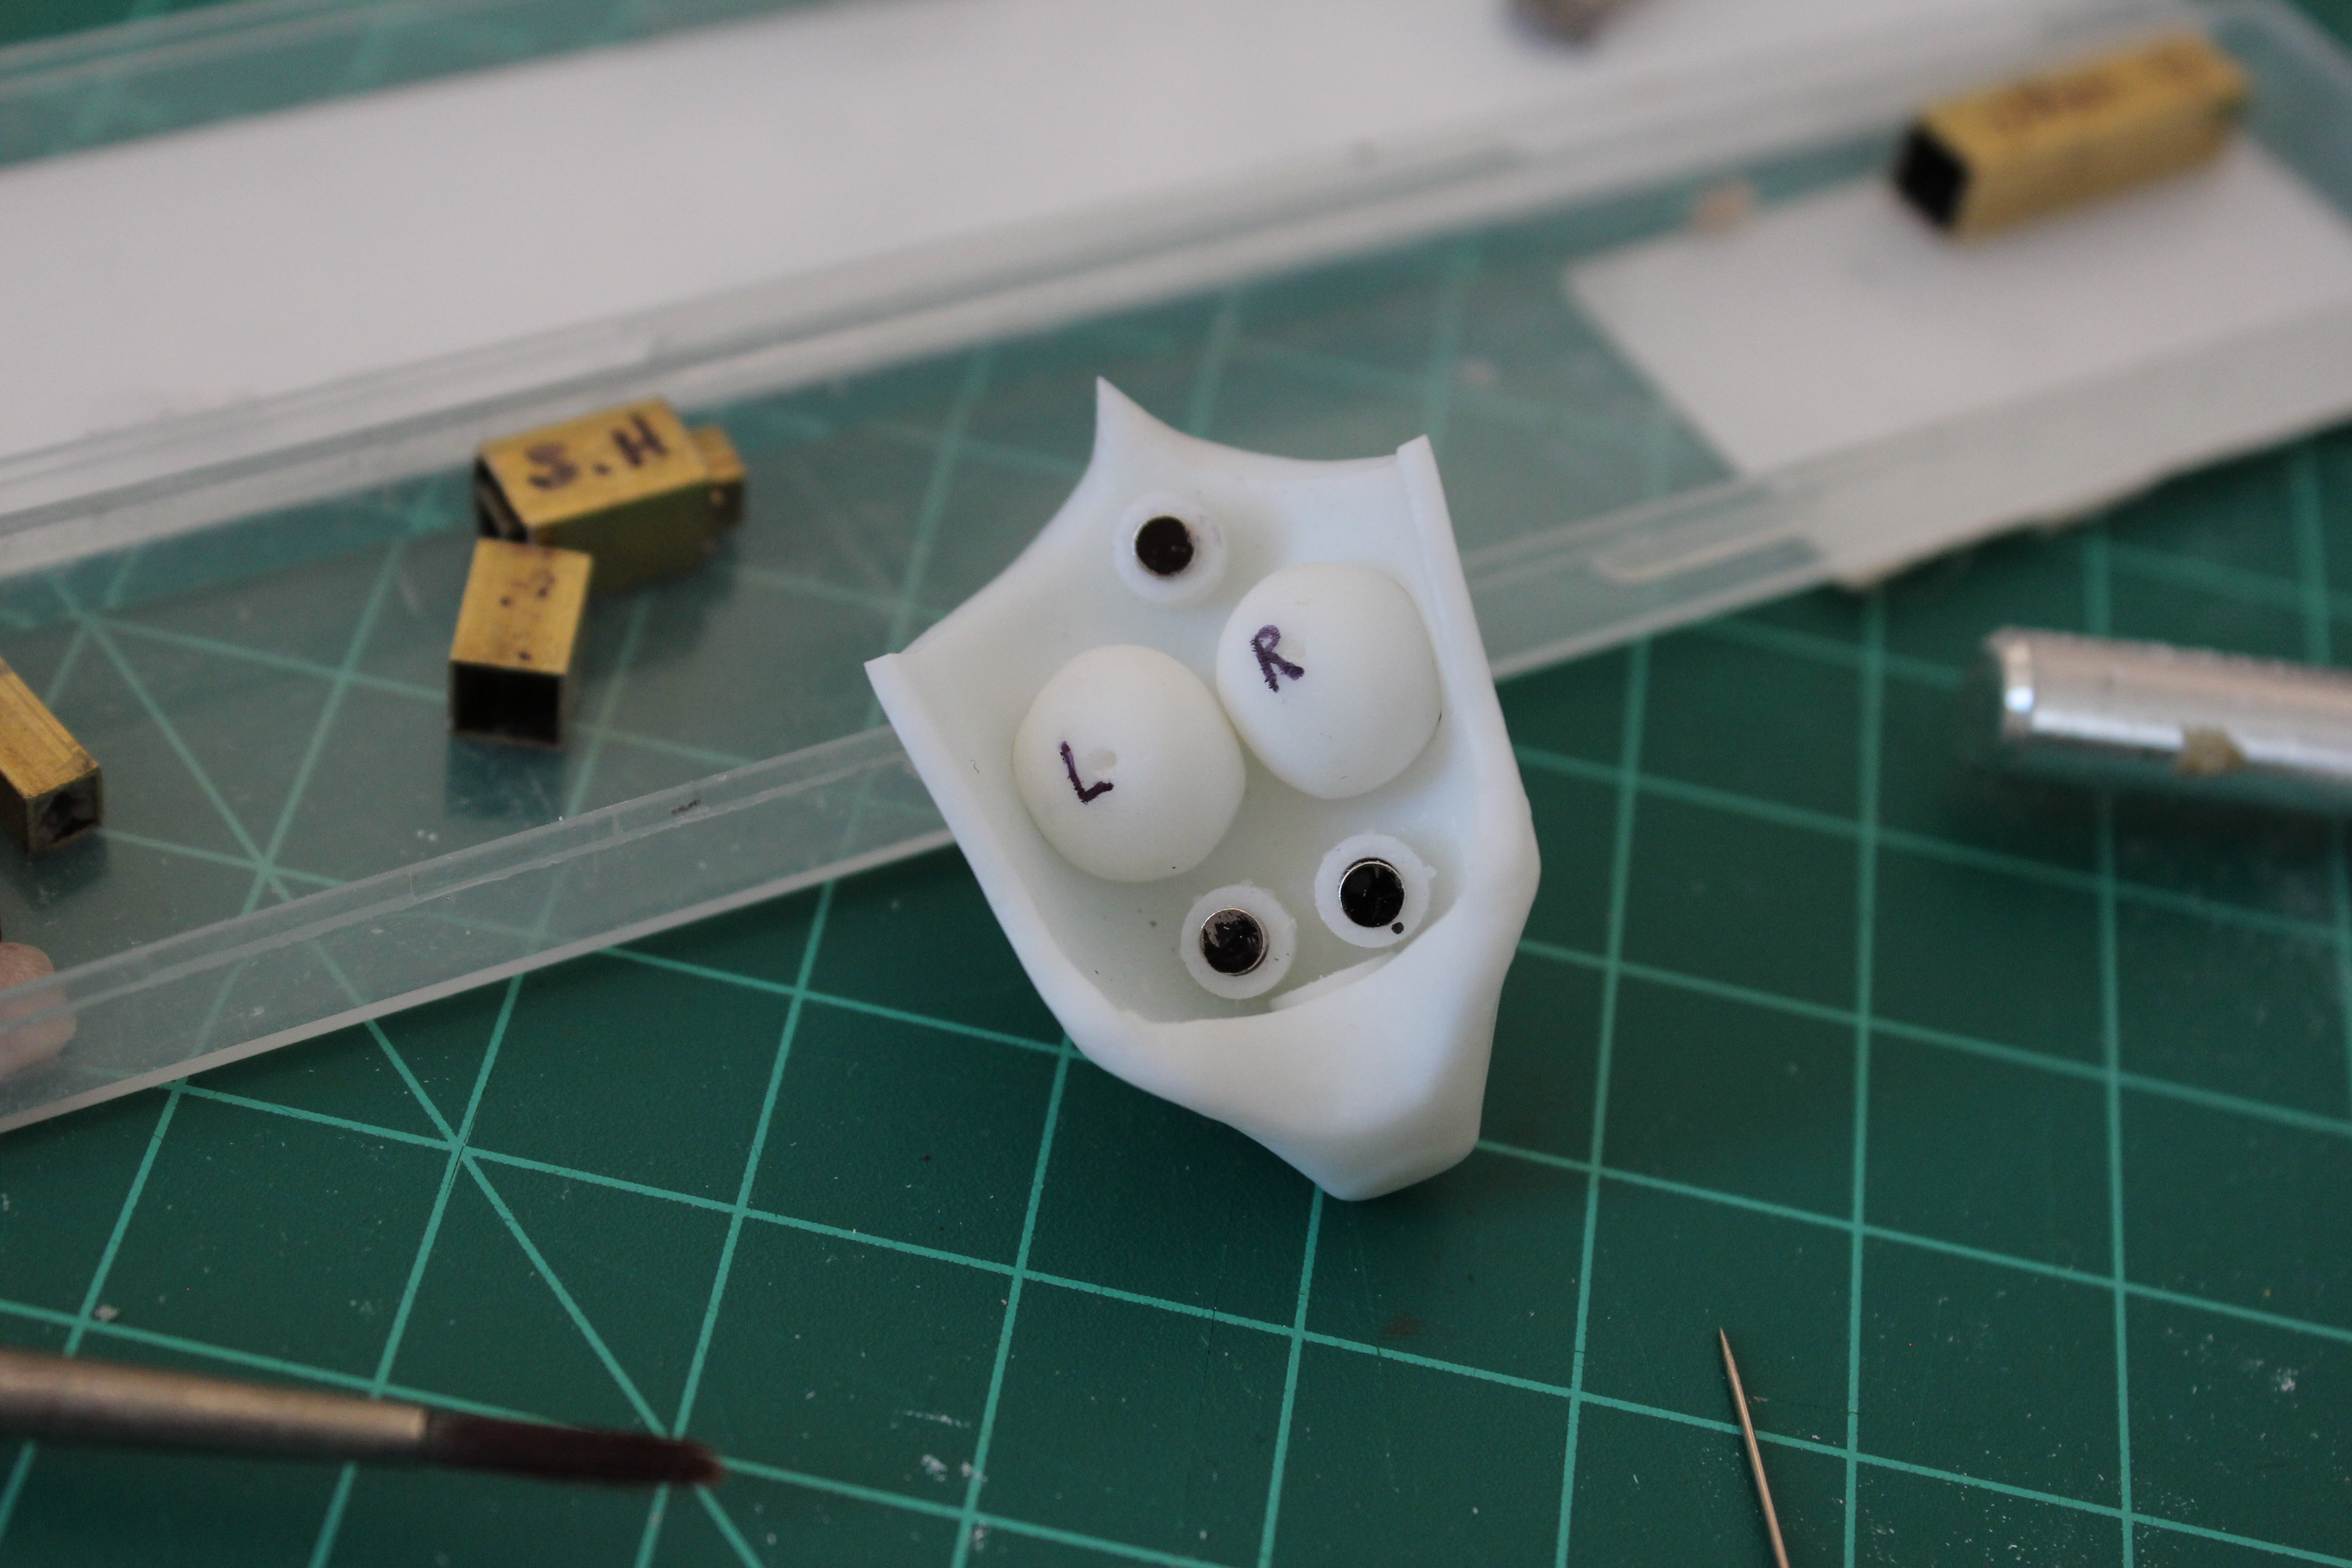
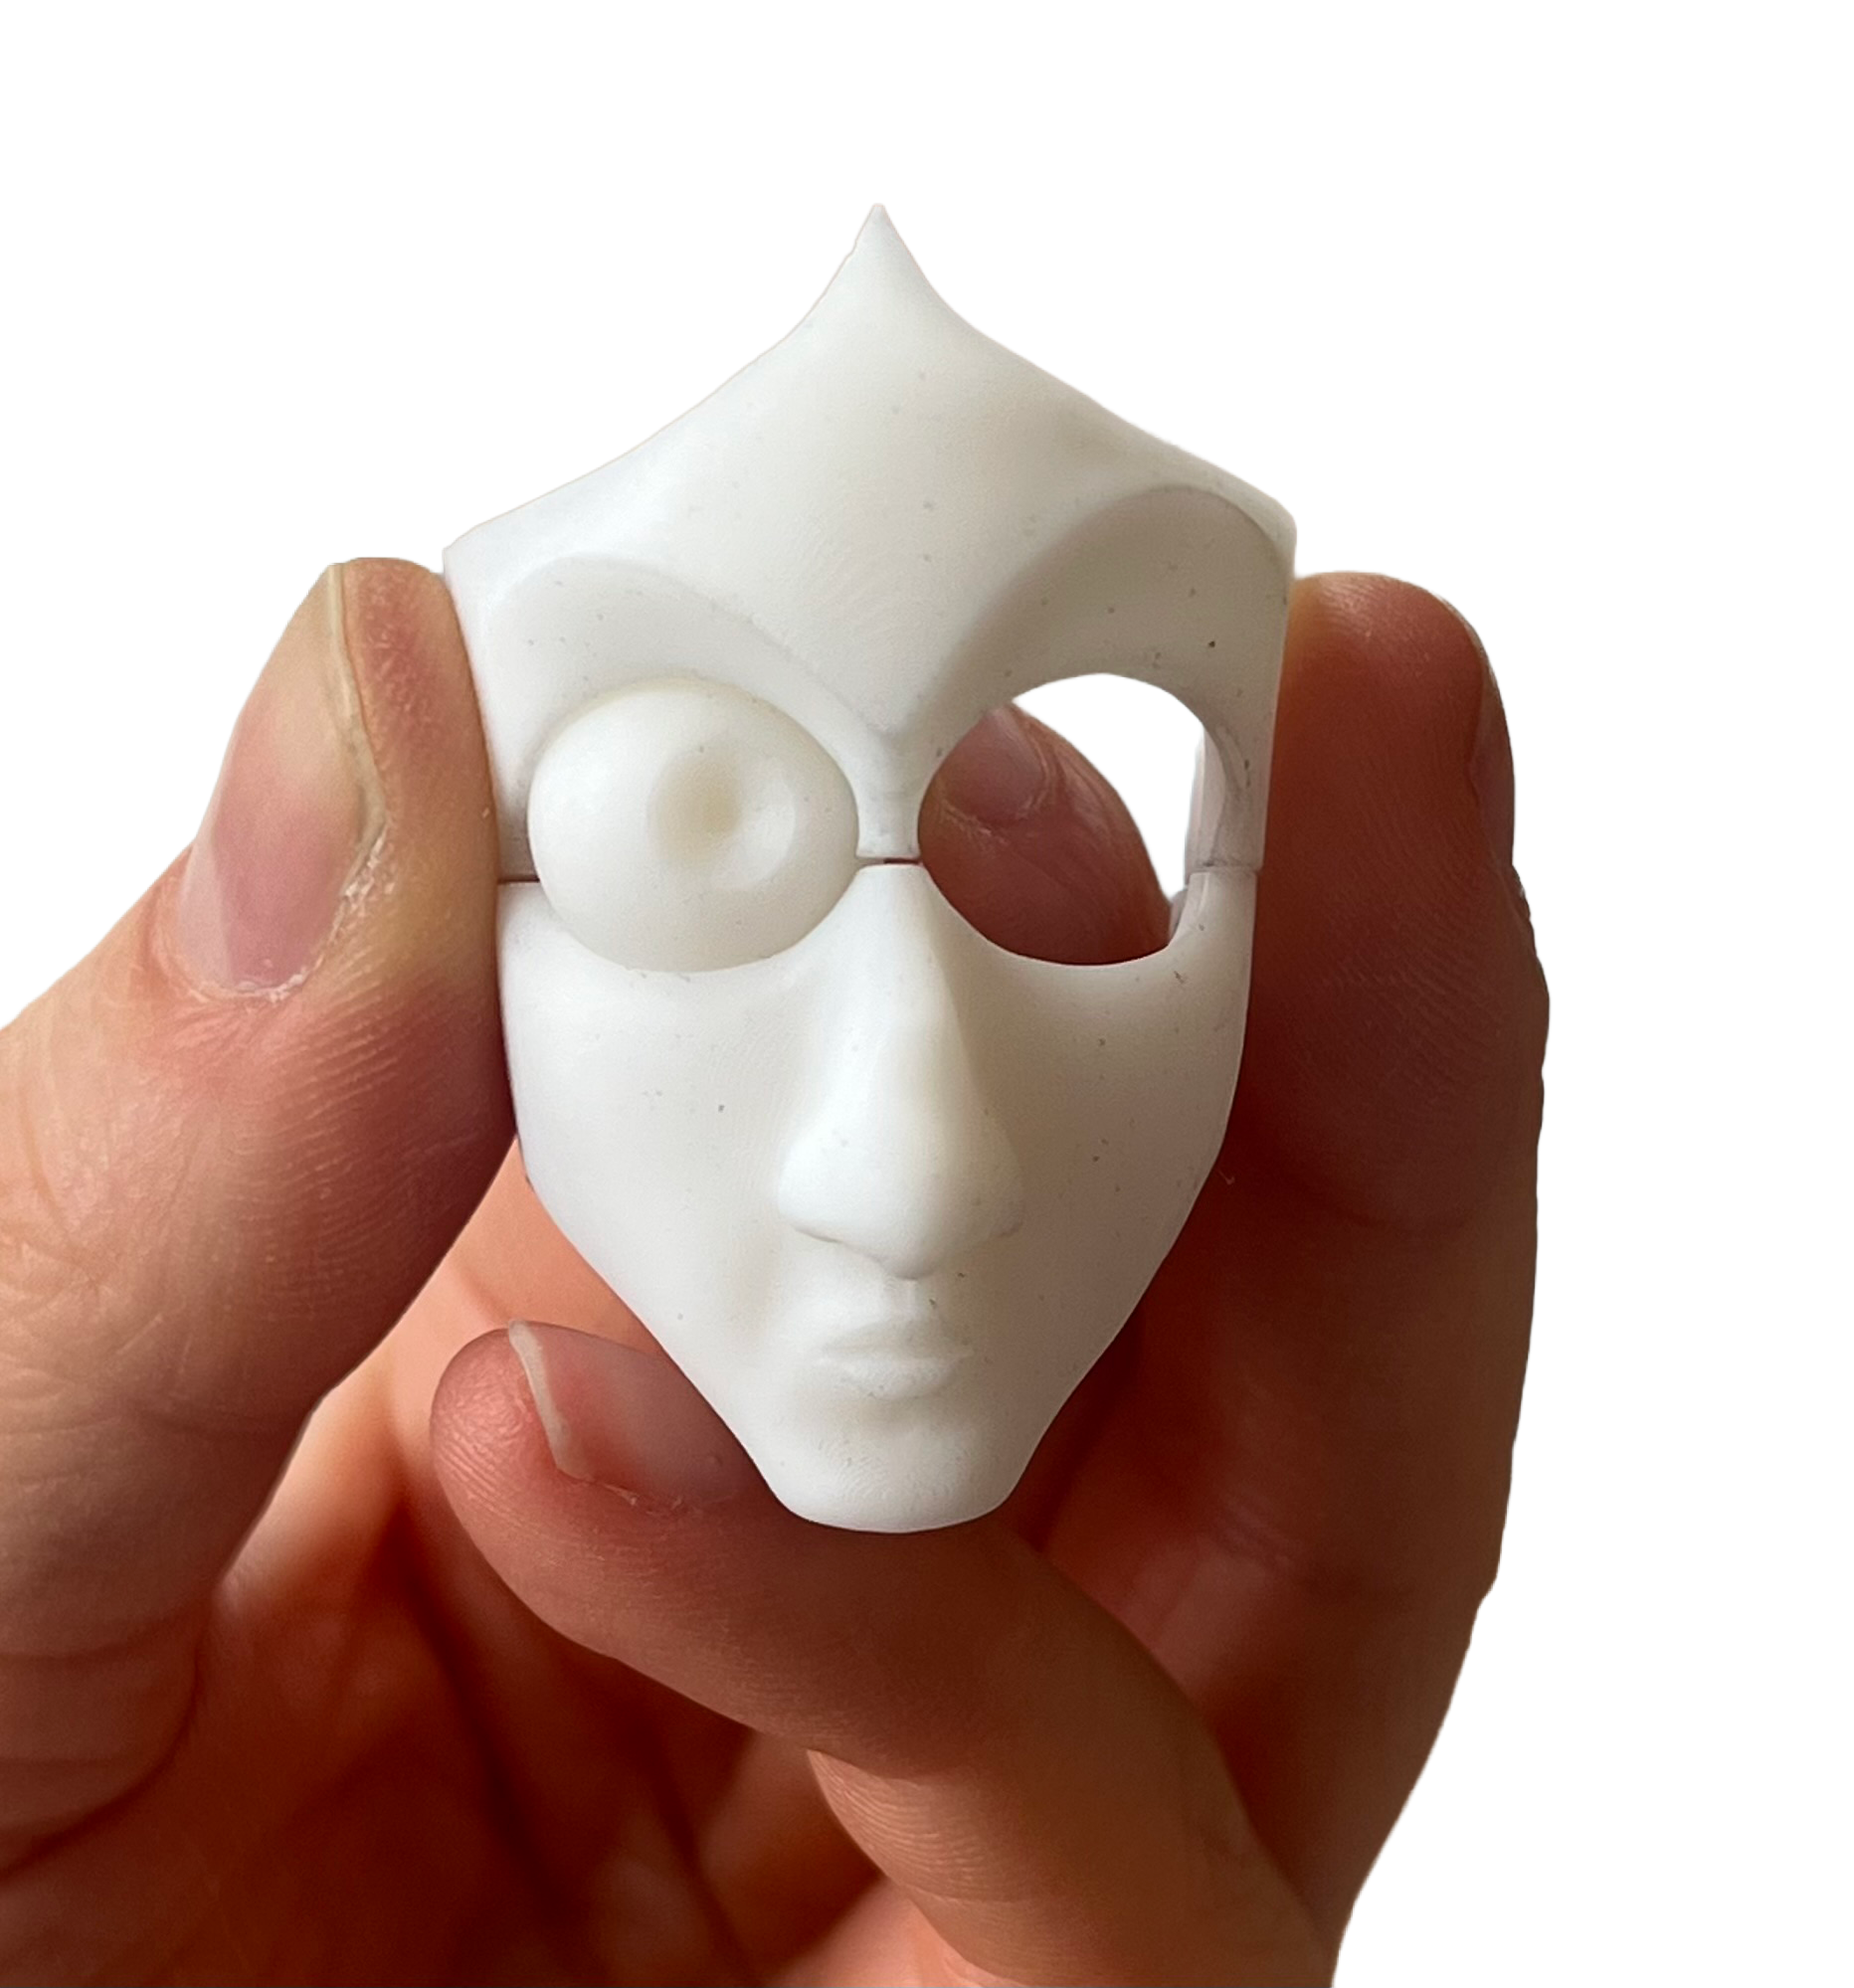
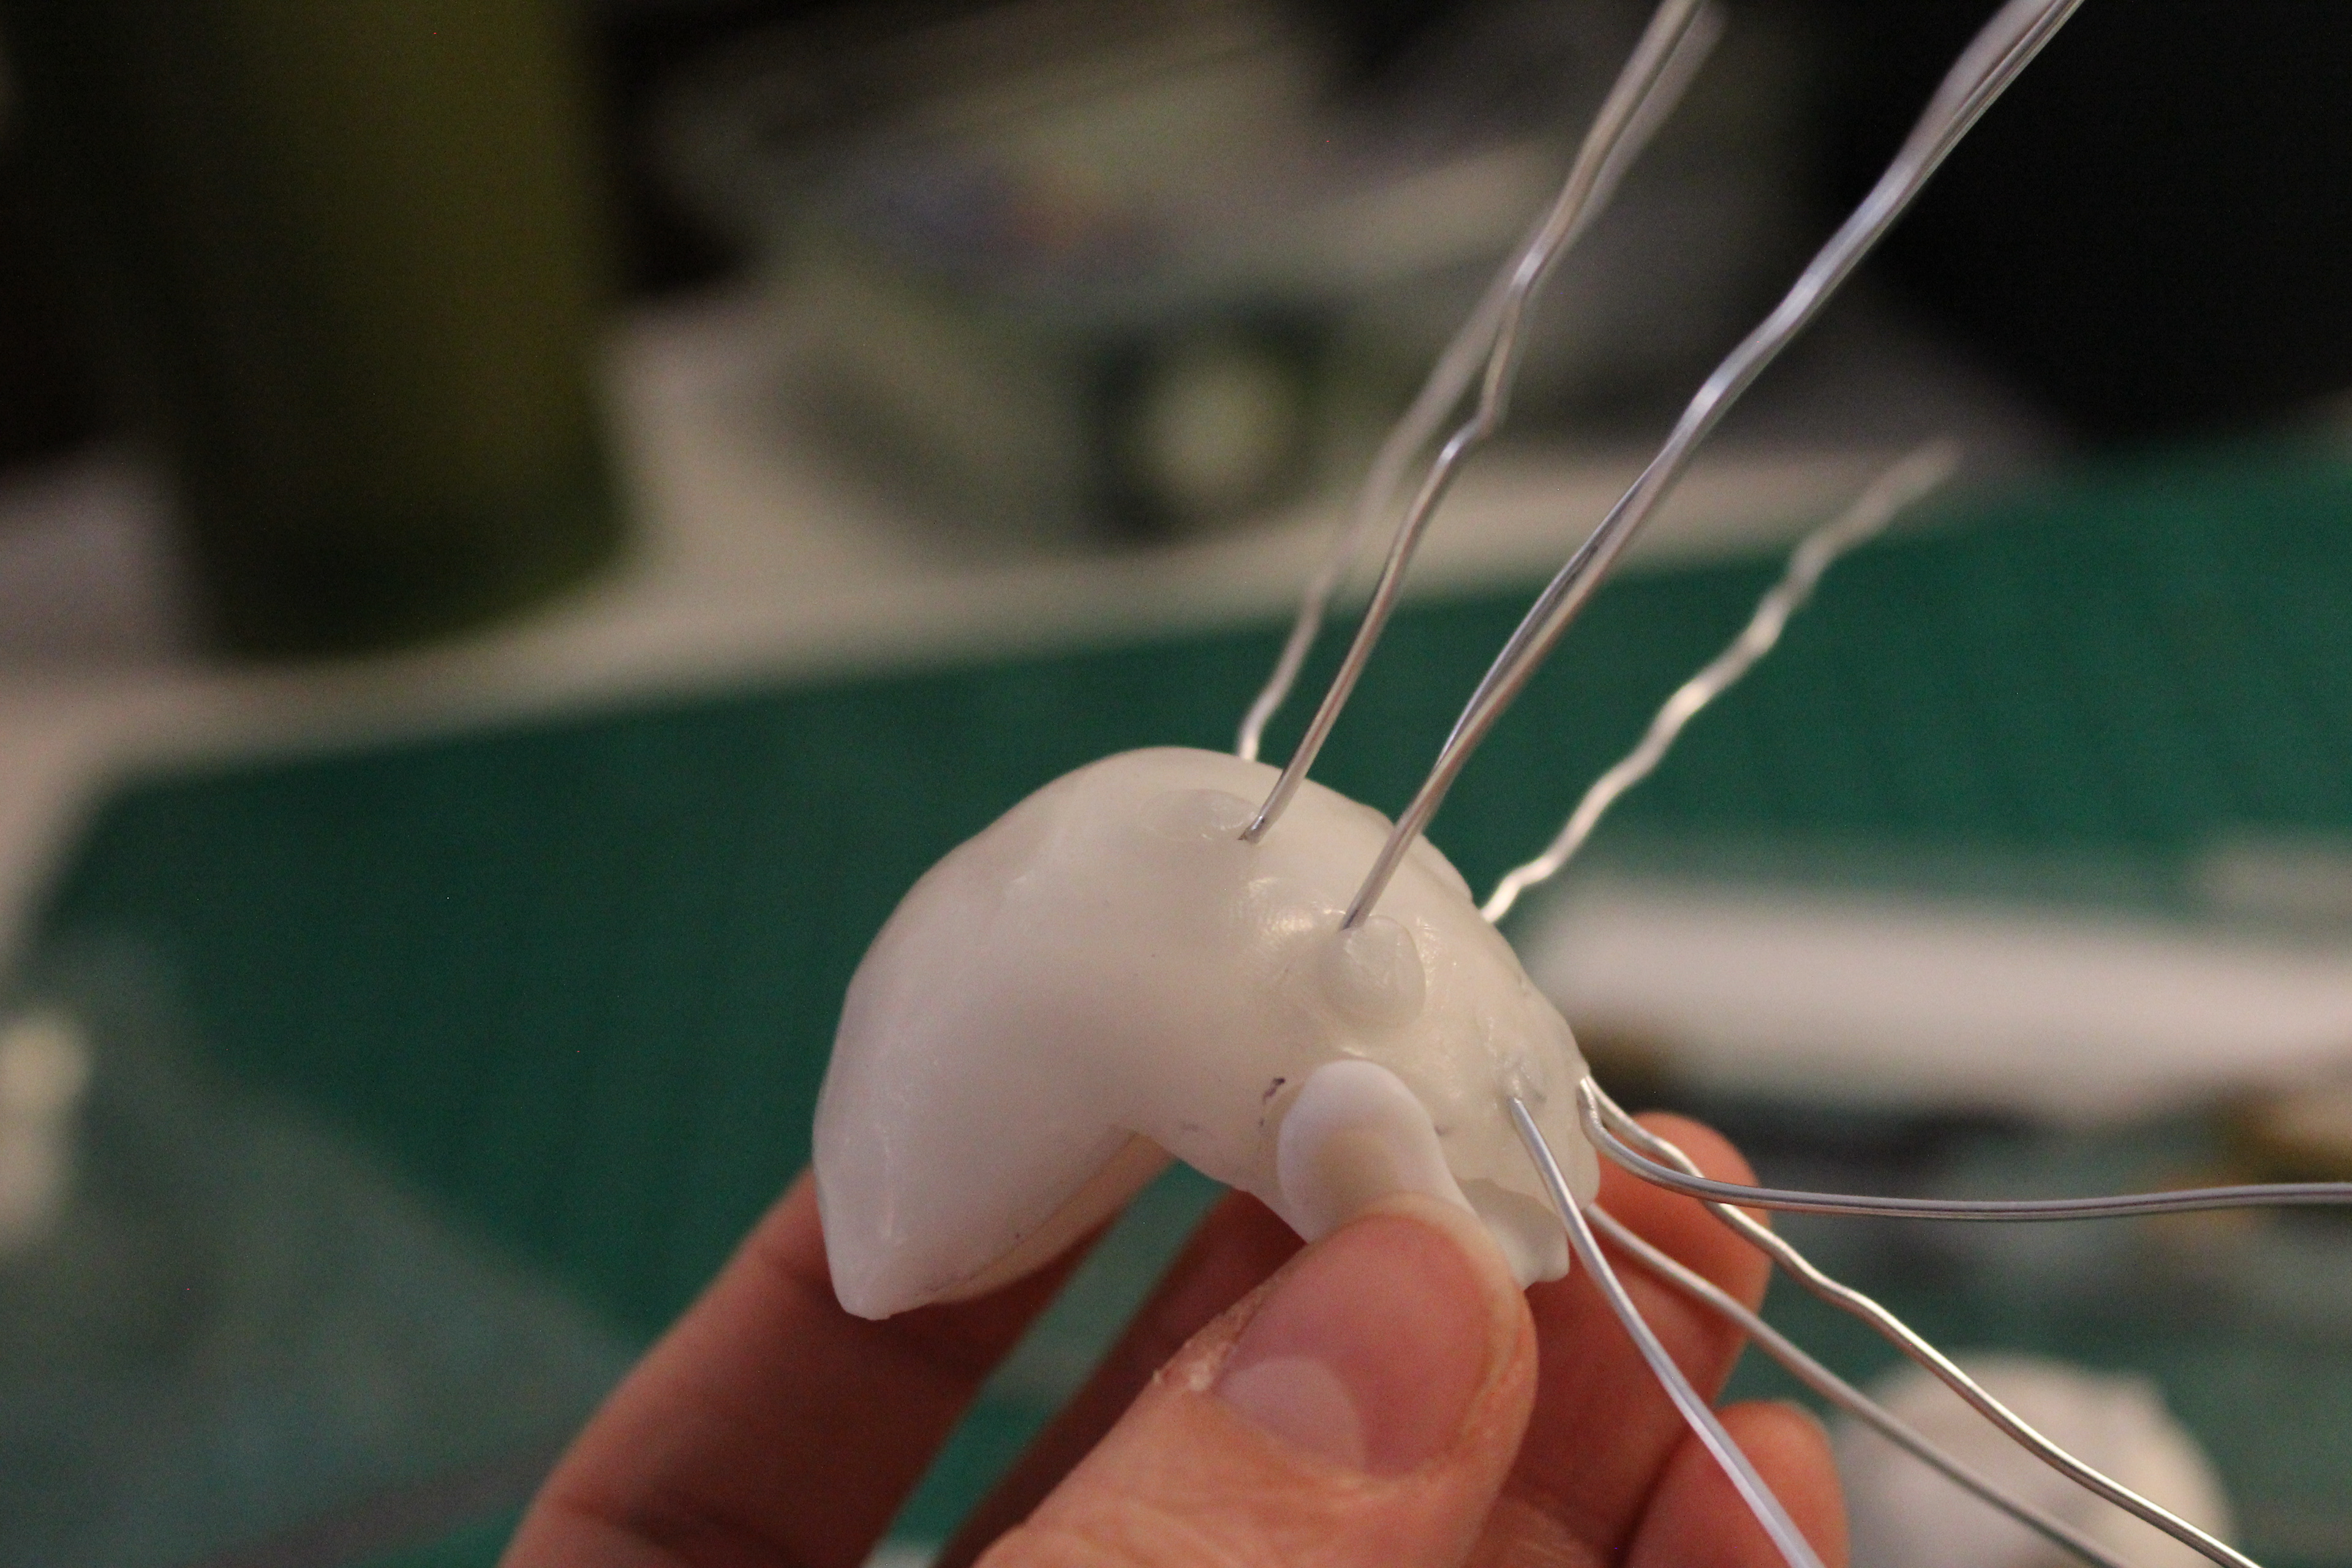
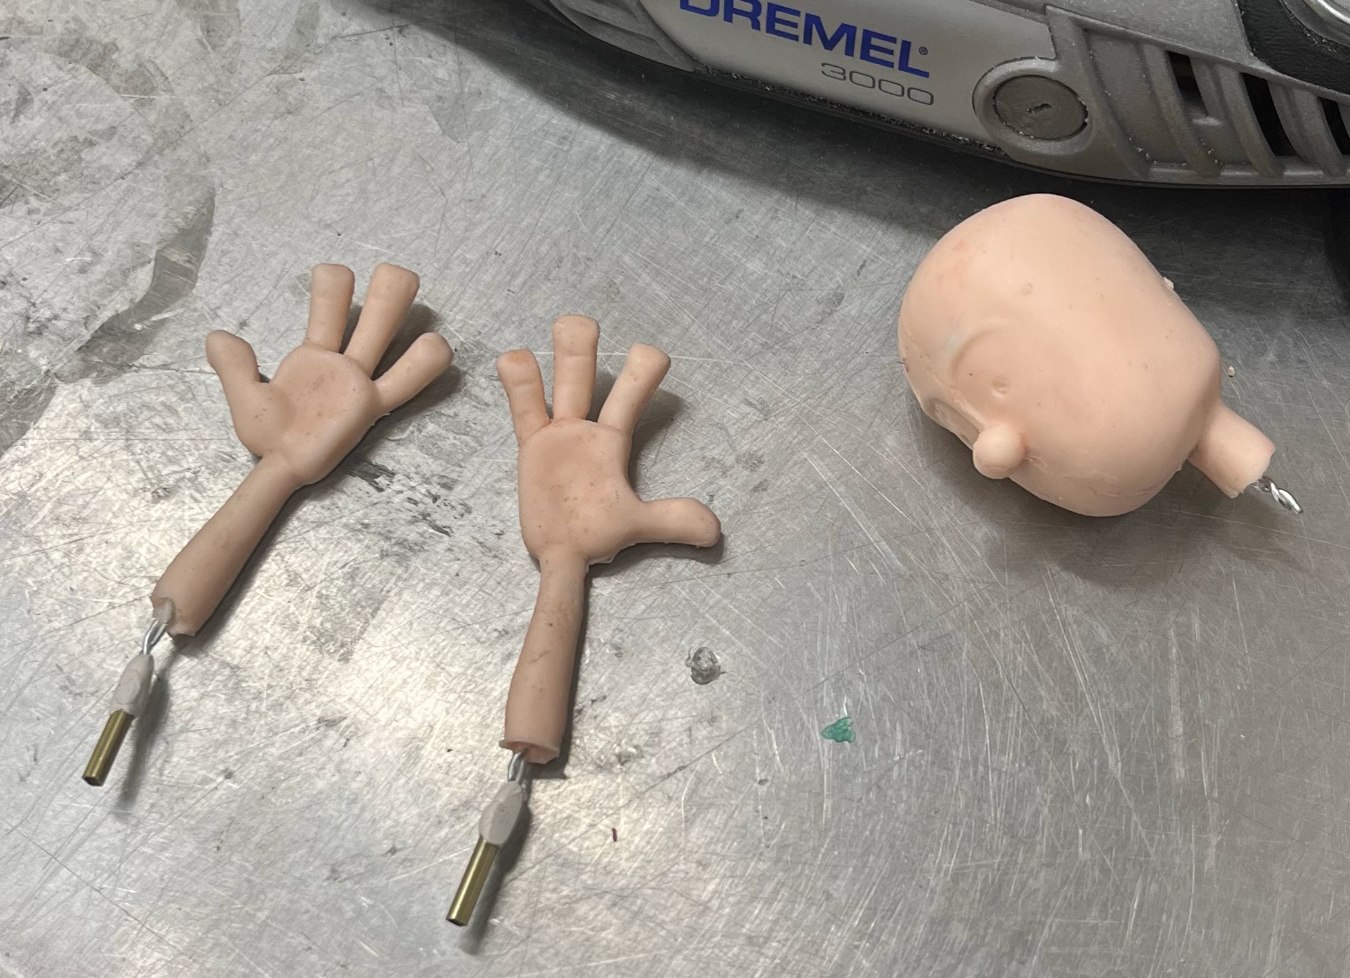
After the sculpted base mask was complete in Zbrush, I brought it into Rhino to add magnet fittings for the mask prints. The cylinders to house the magnets were scaled with printing tolerances for a push-fit.
Once our test prints were at a scale that we were happy with, I used it as a base to form the puppets head block with using thermoplastic.
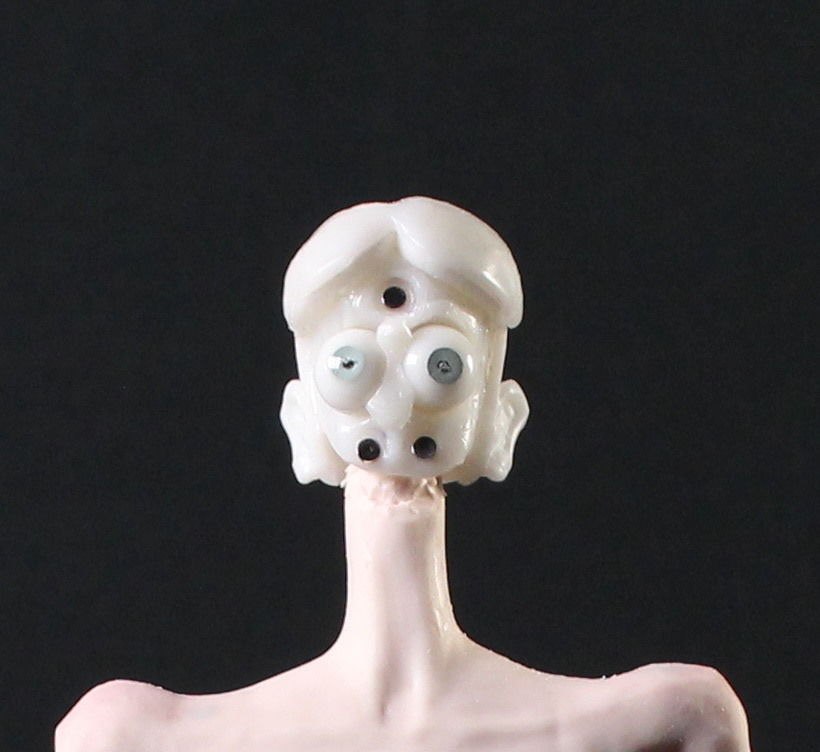
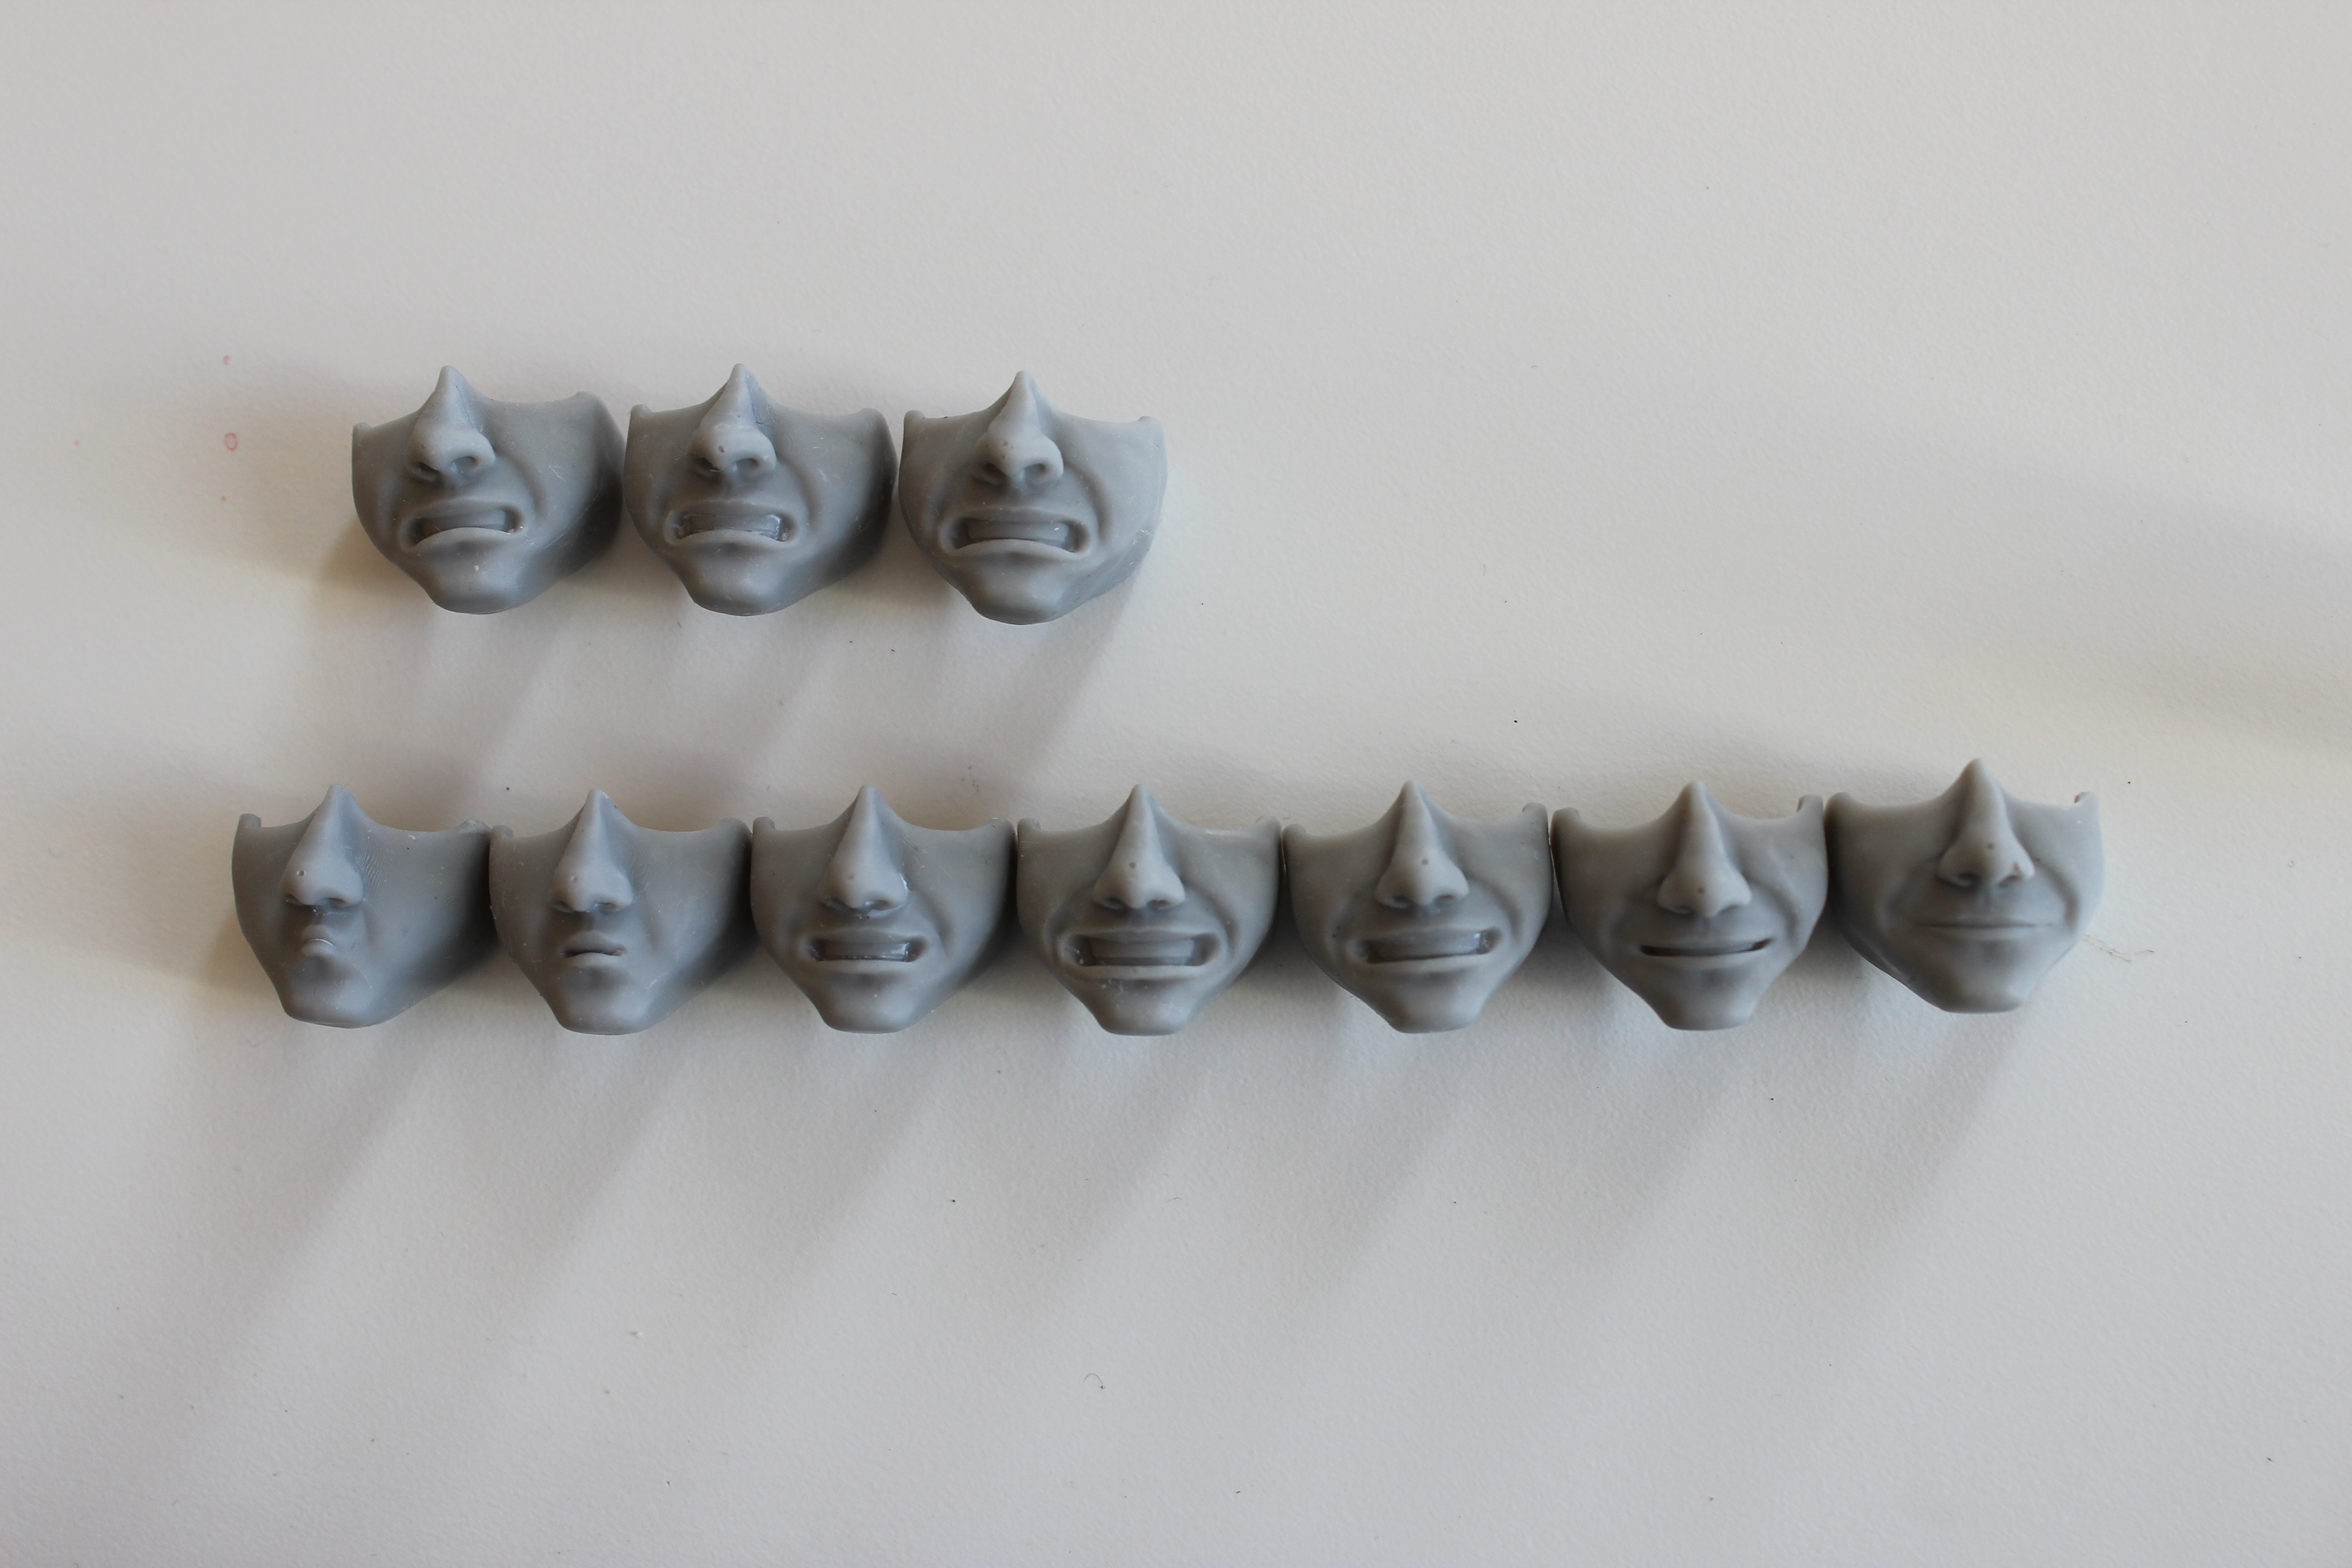
Once the head block was finalized, I proceeded with masks split into upper and lower halves to save time and printing costs for the production.
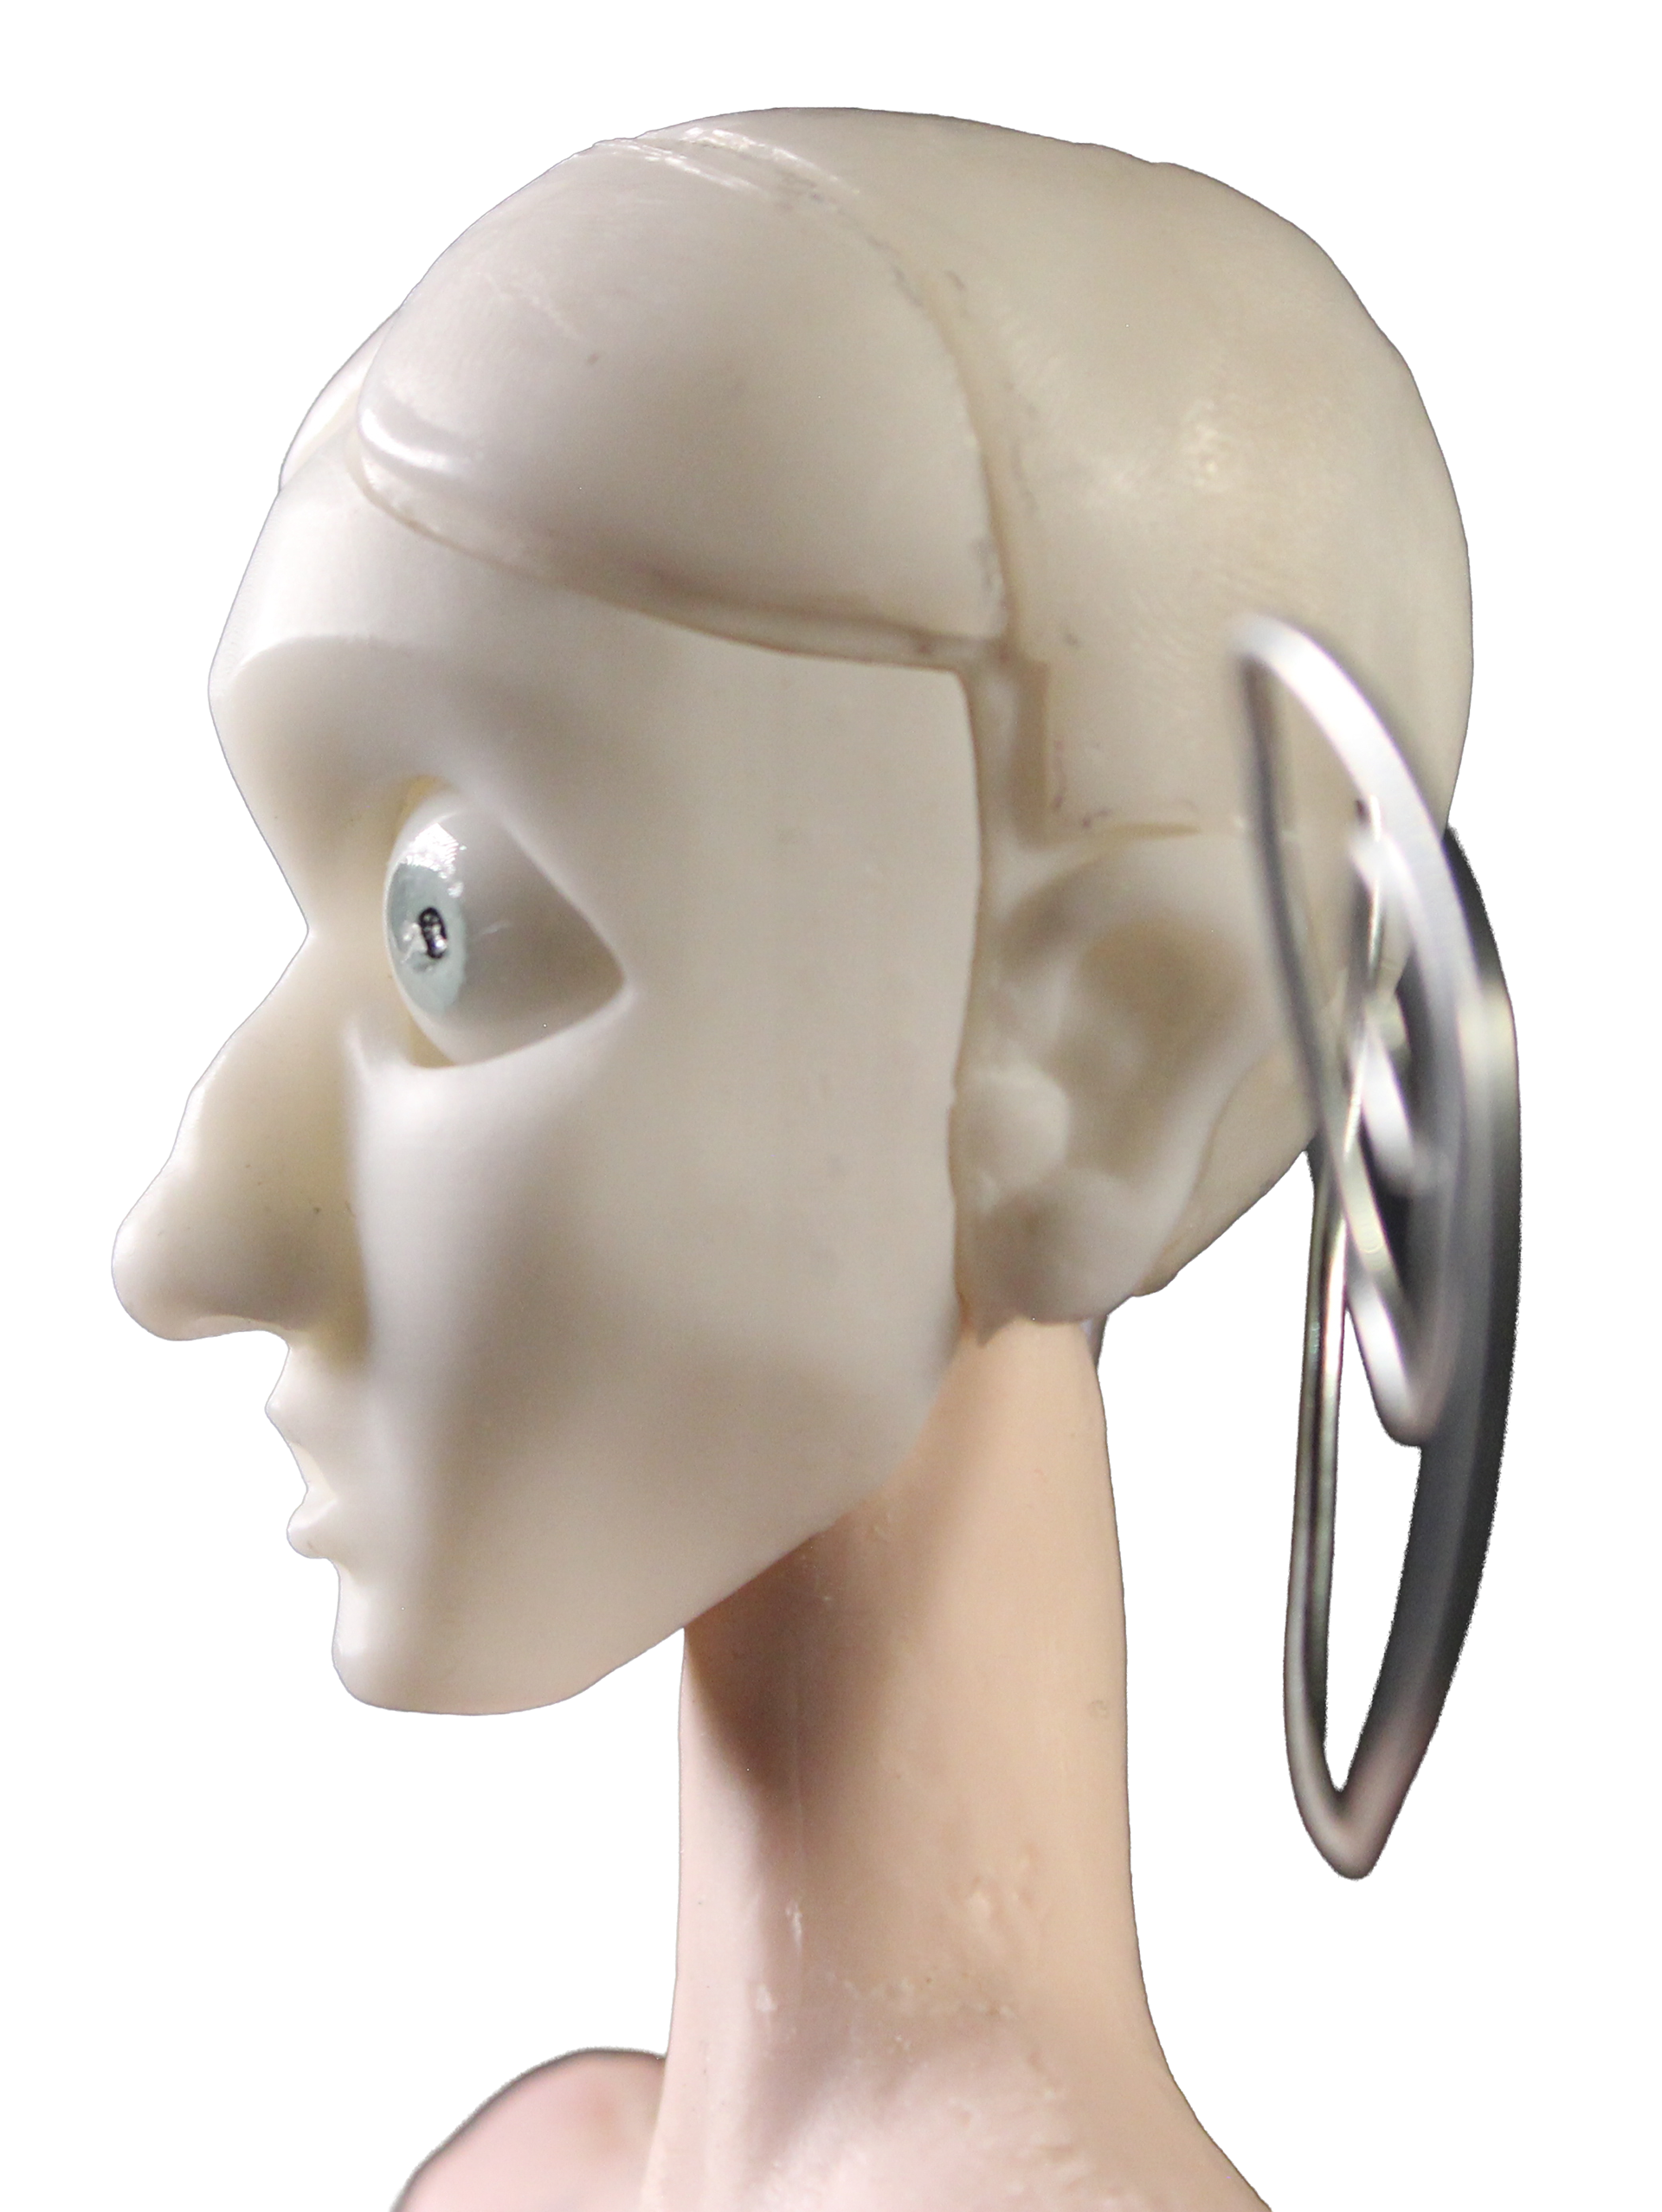
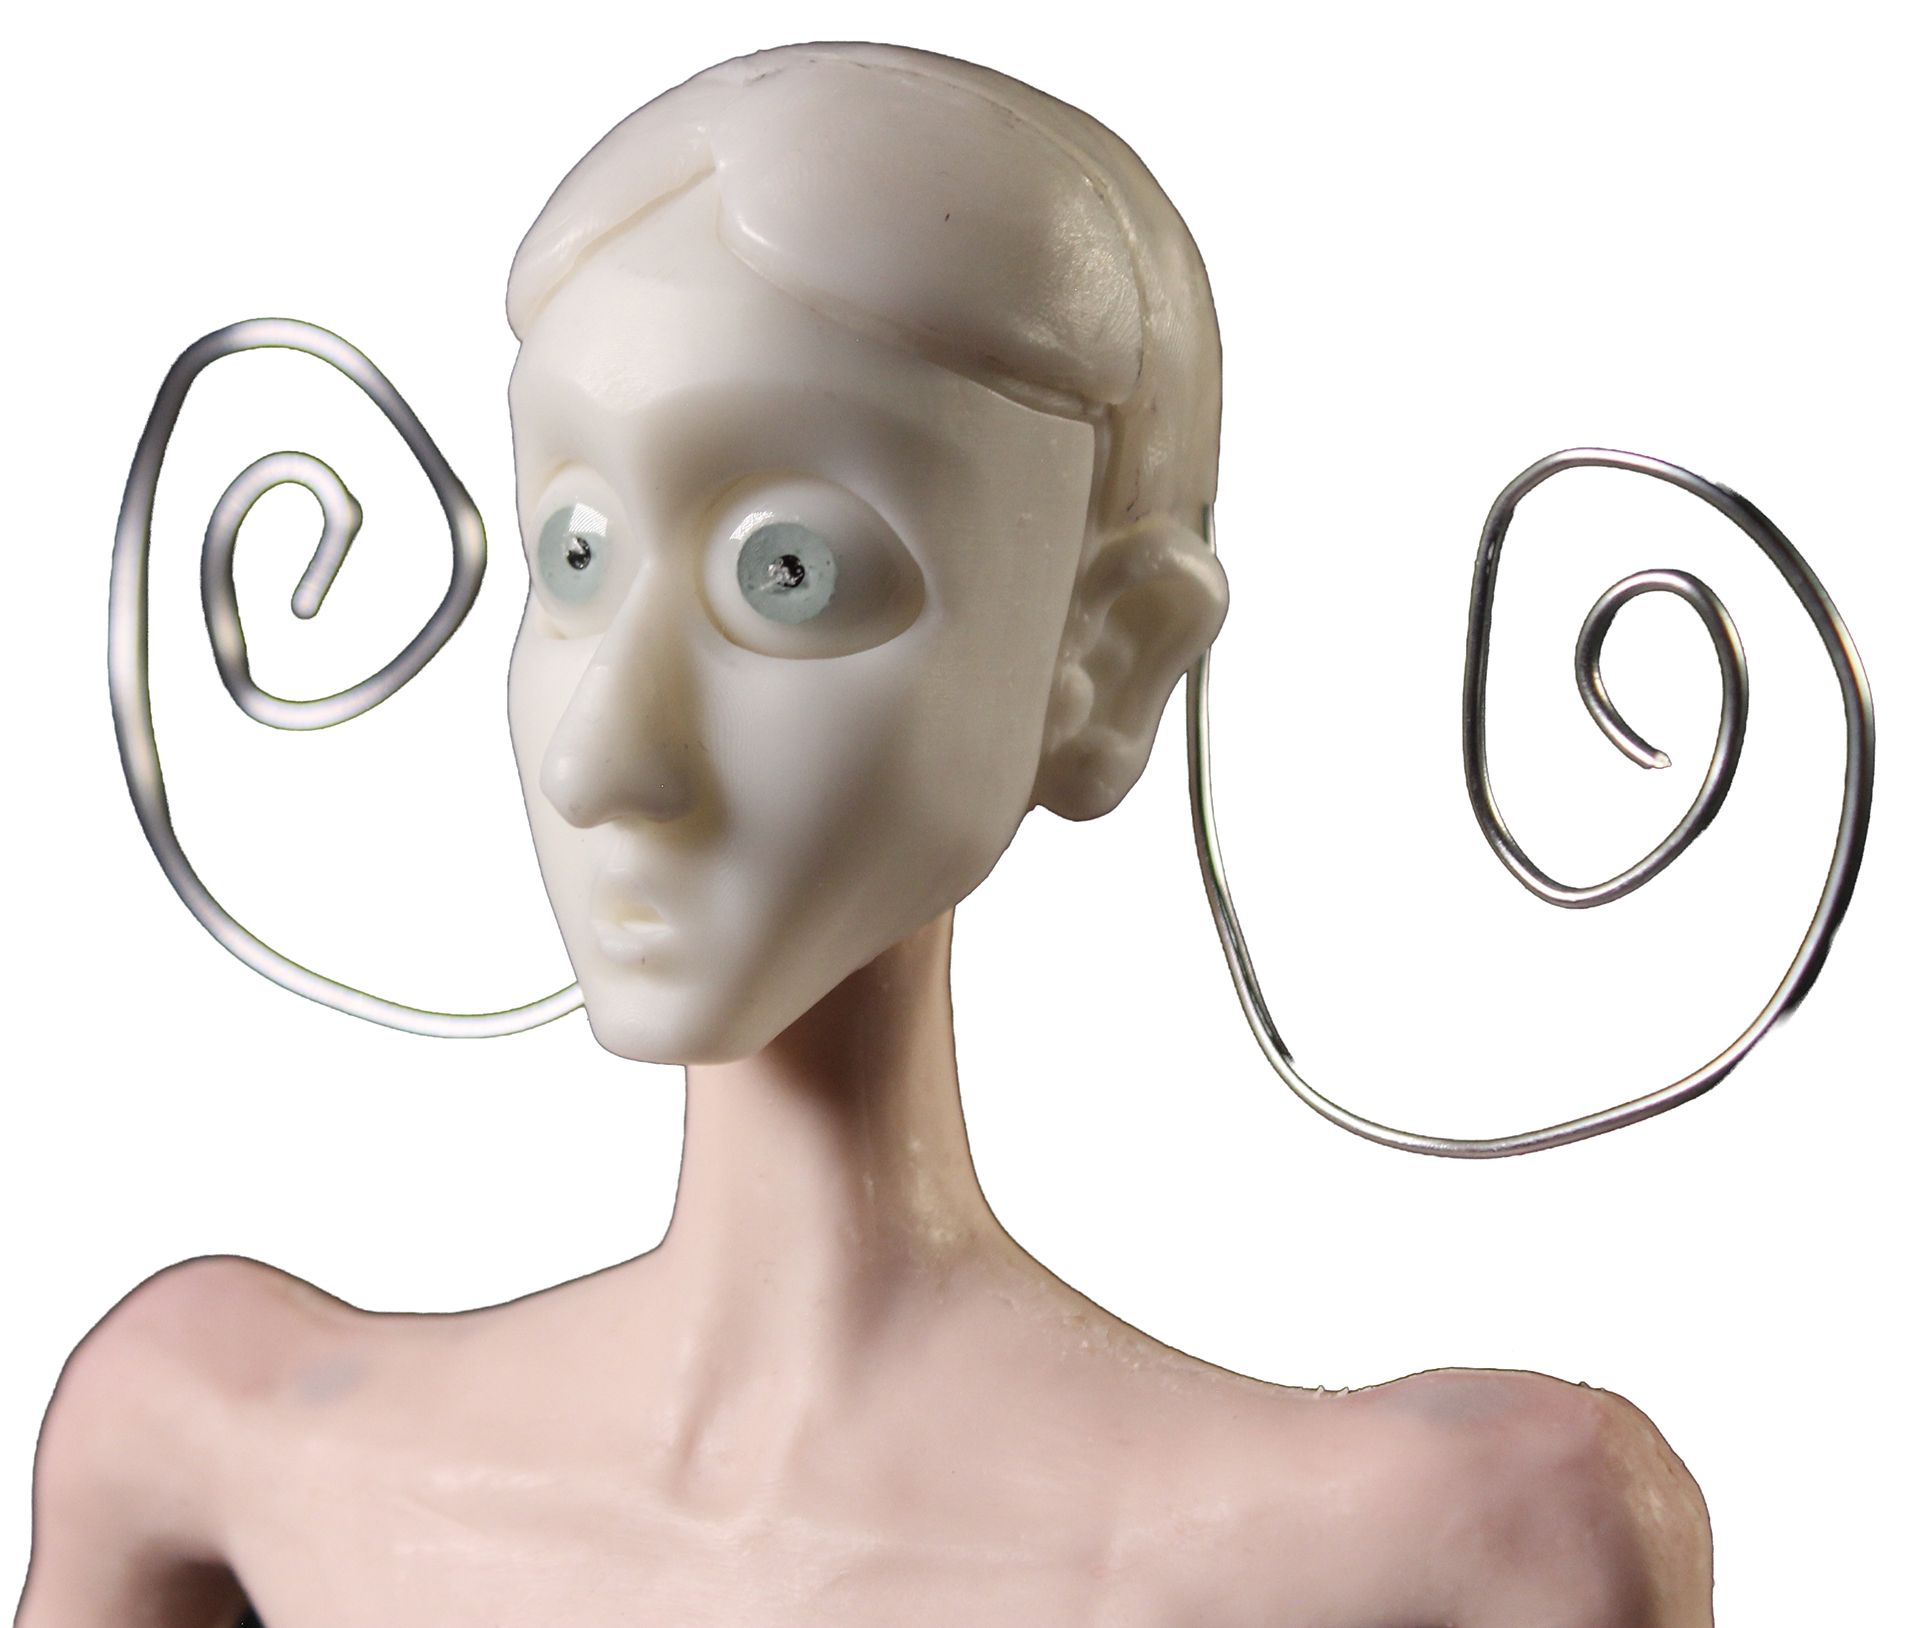
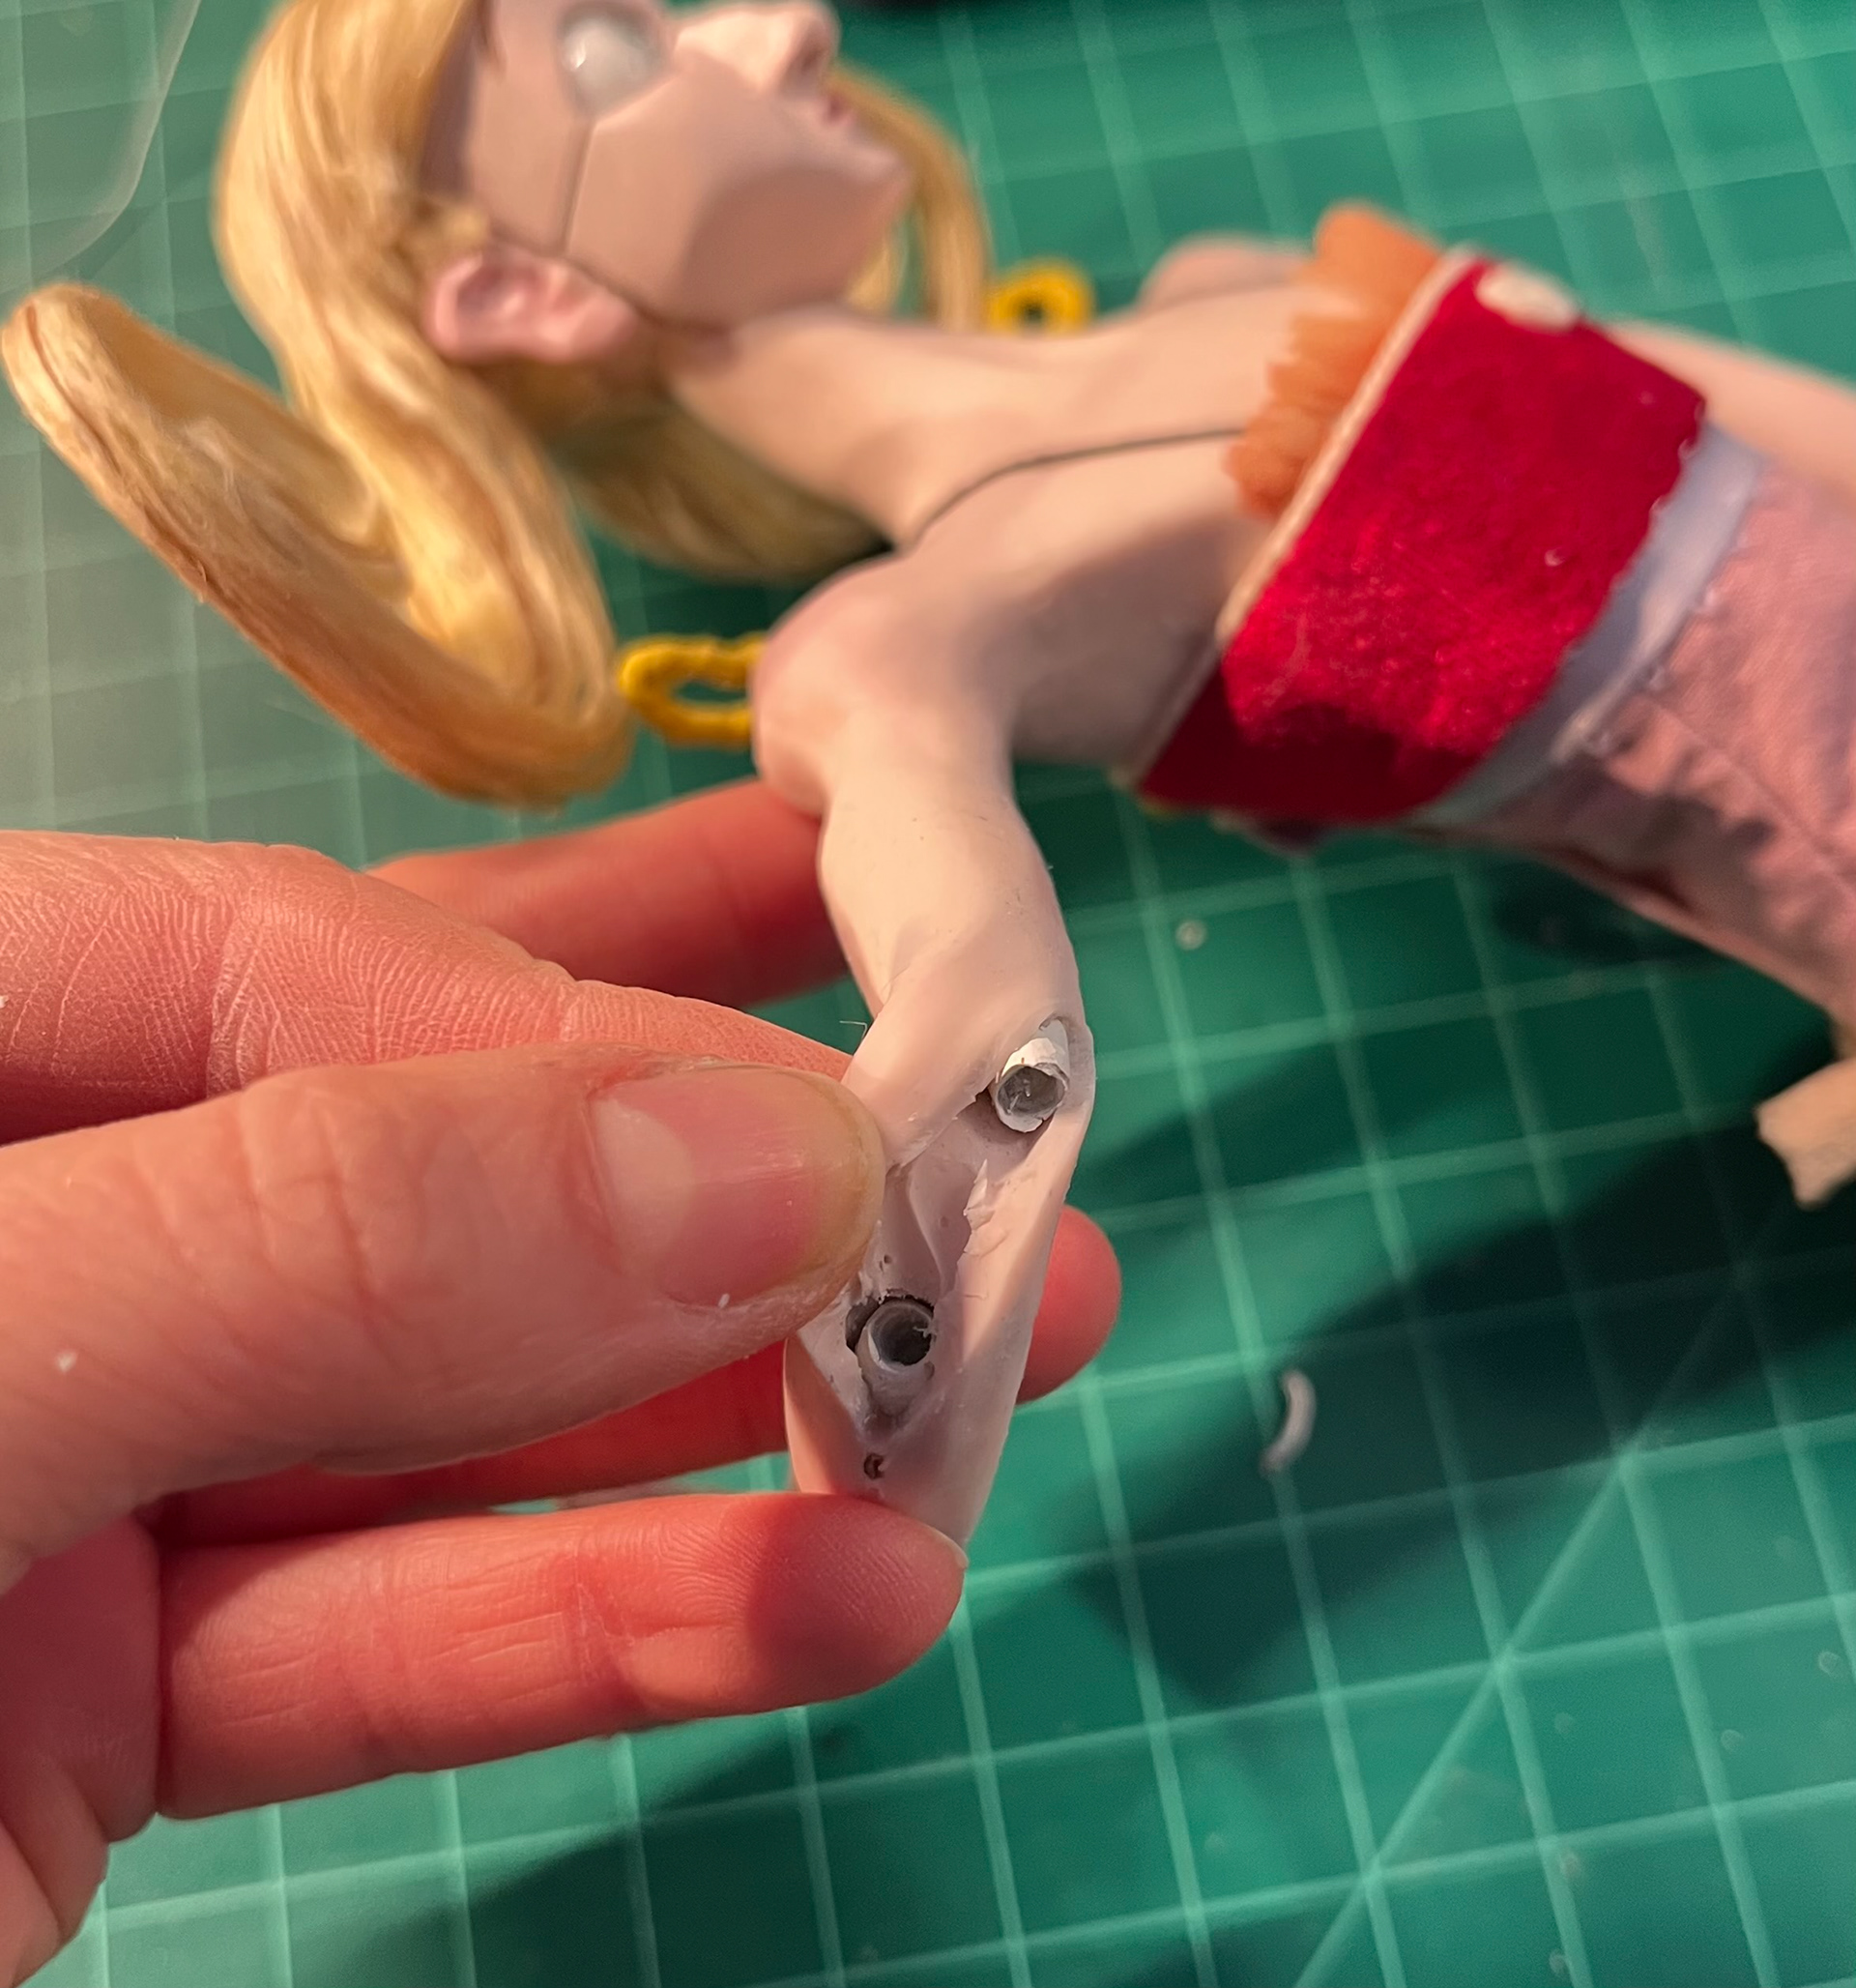
Hair Armature and Wig Caps:
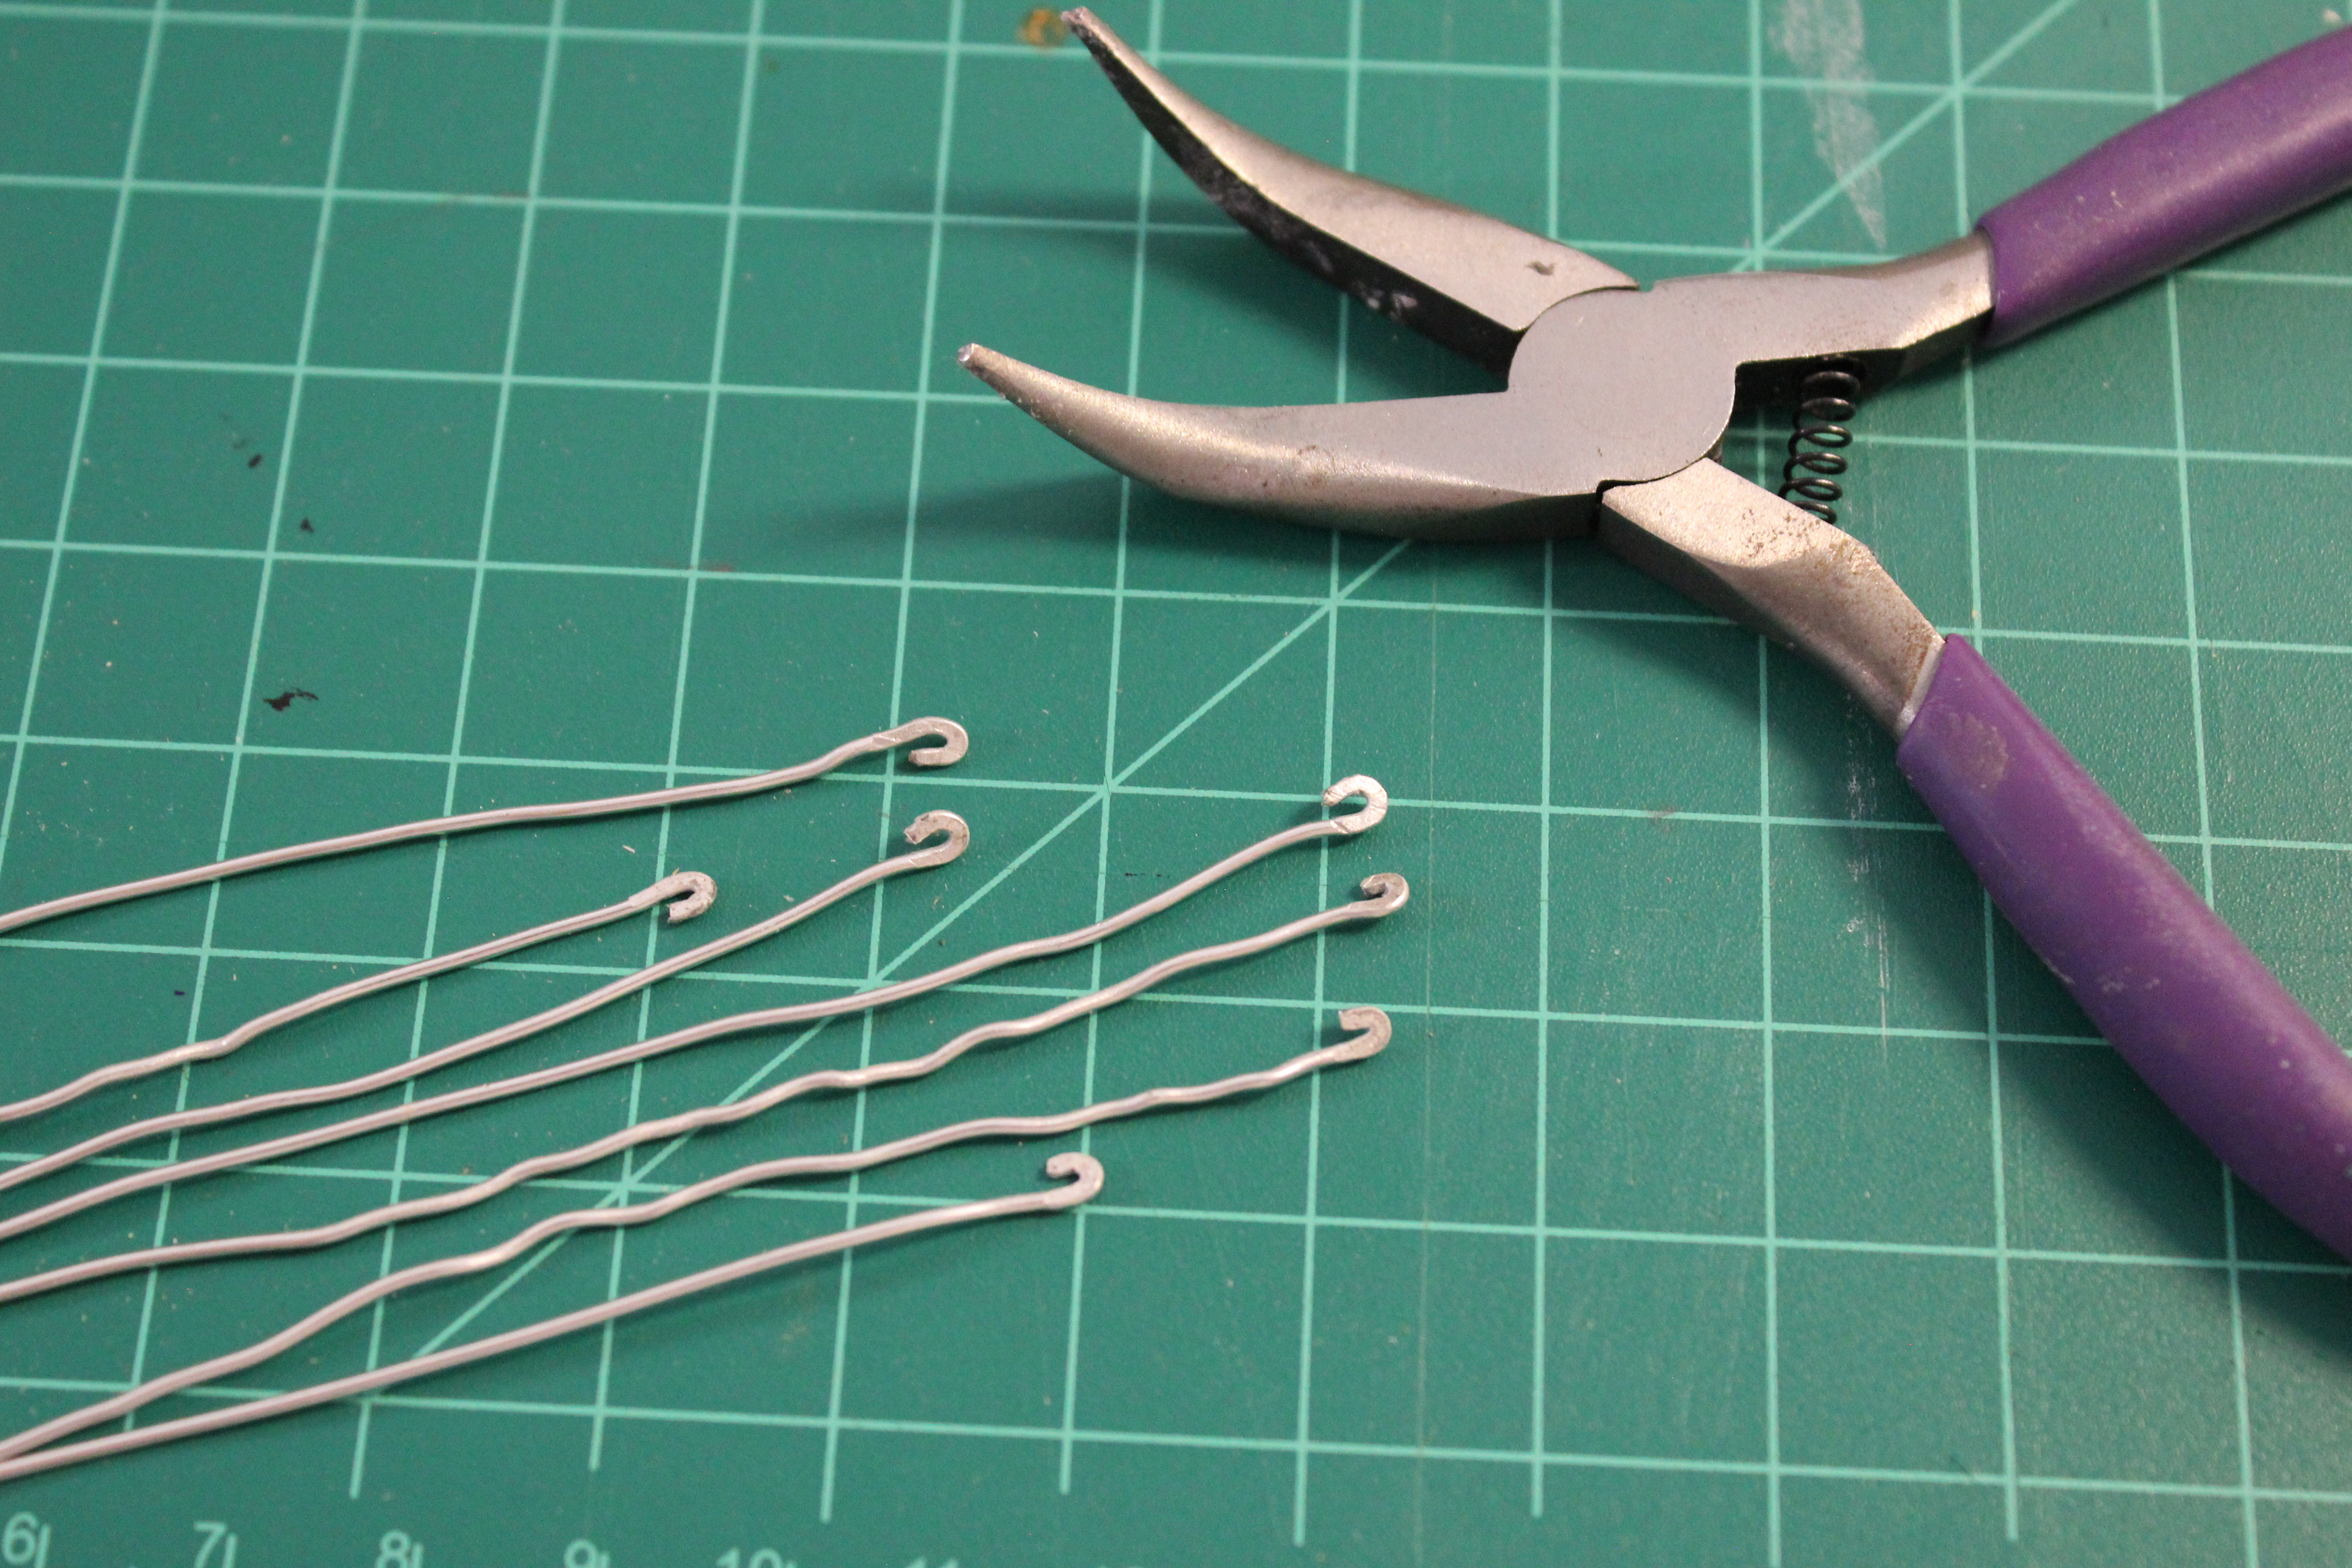
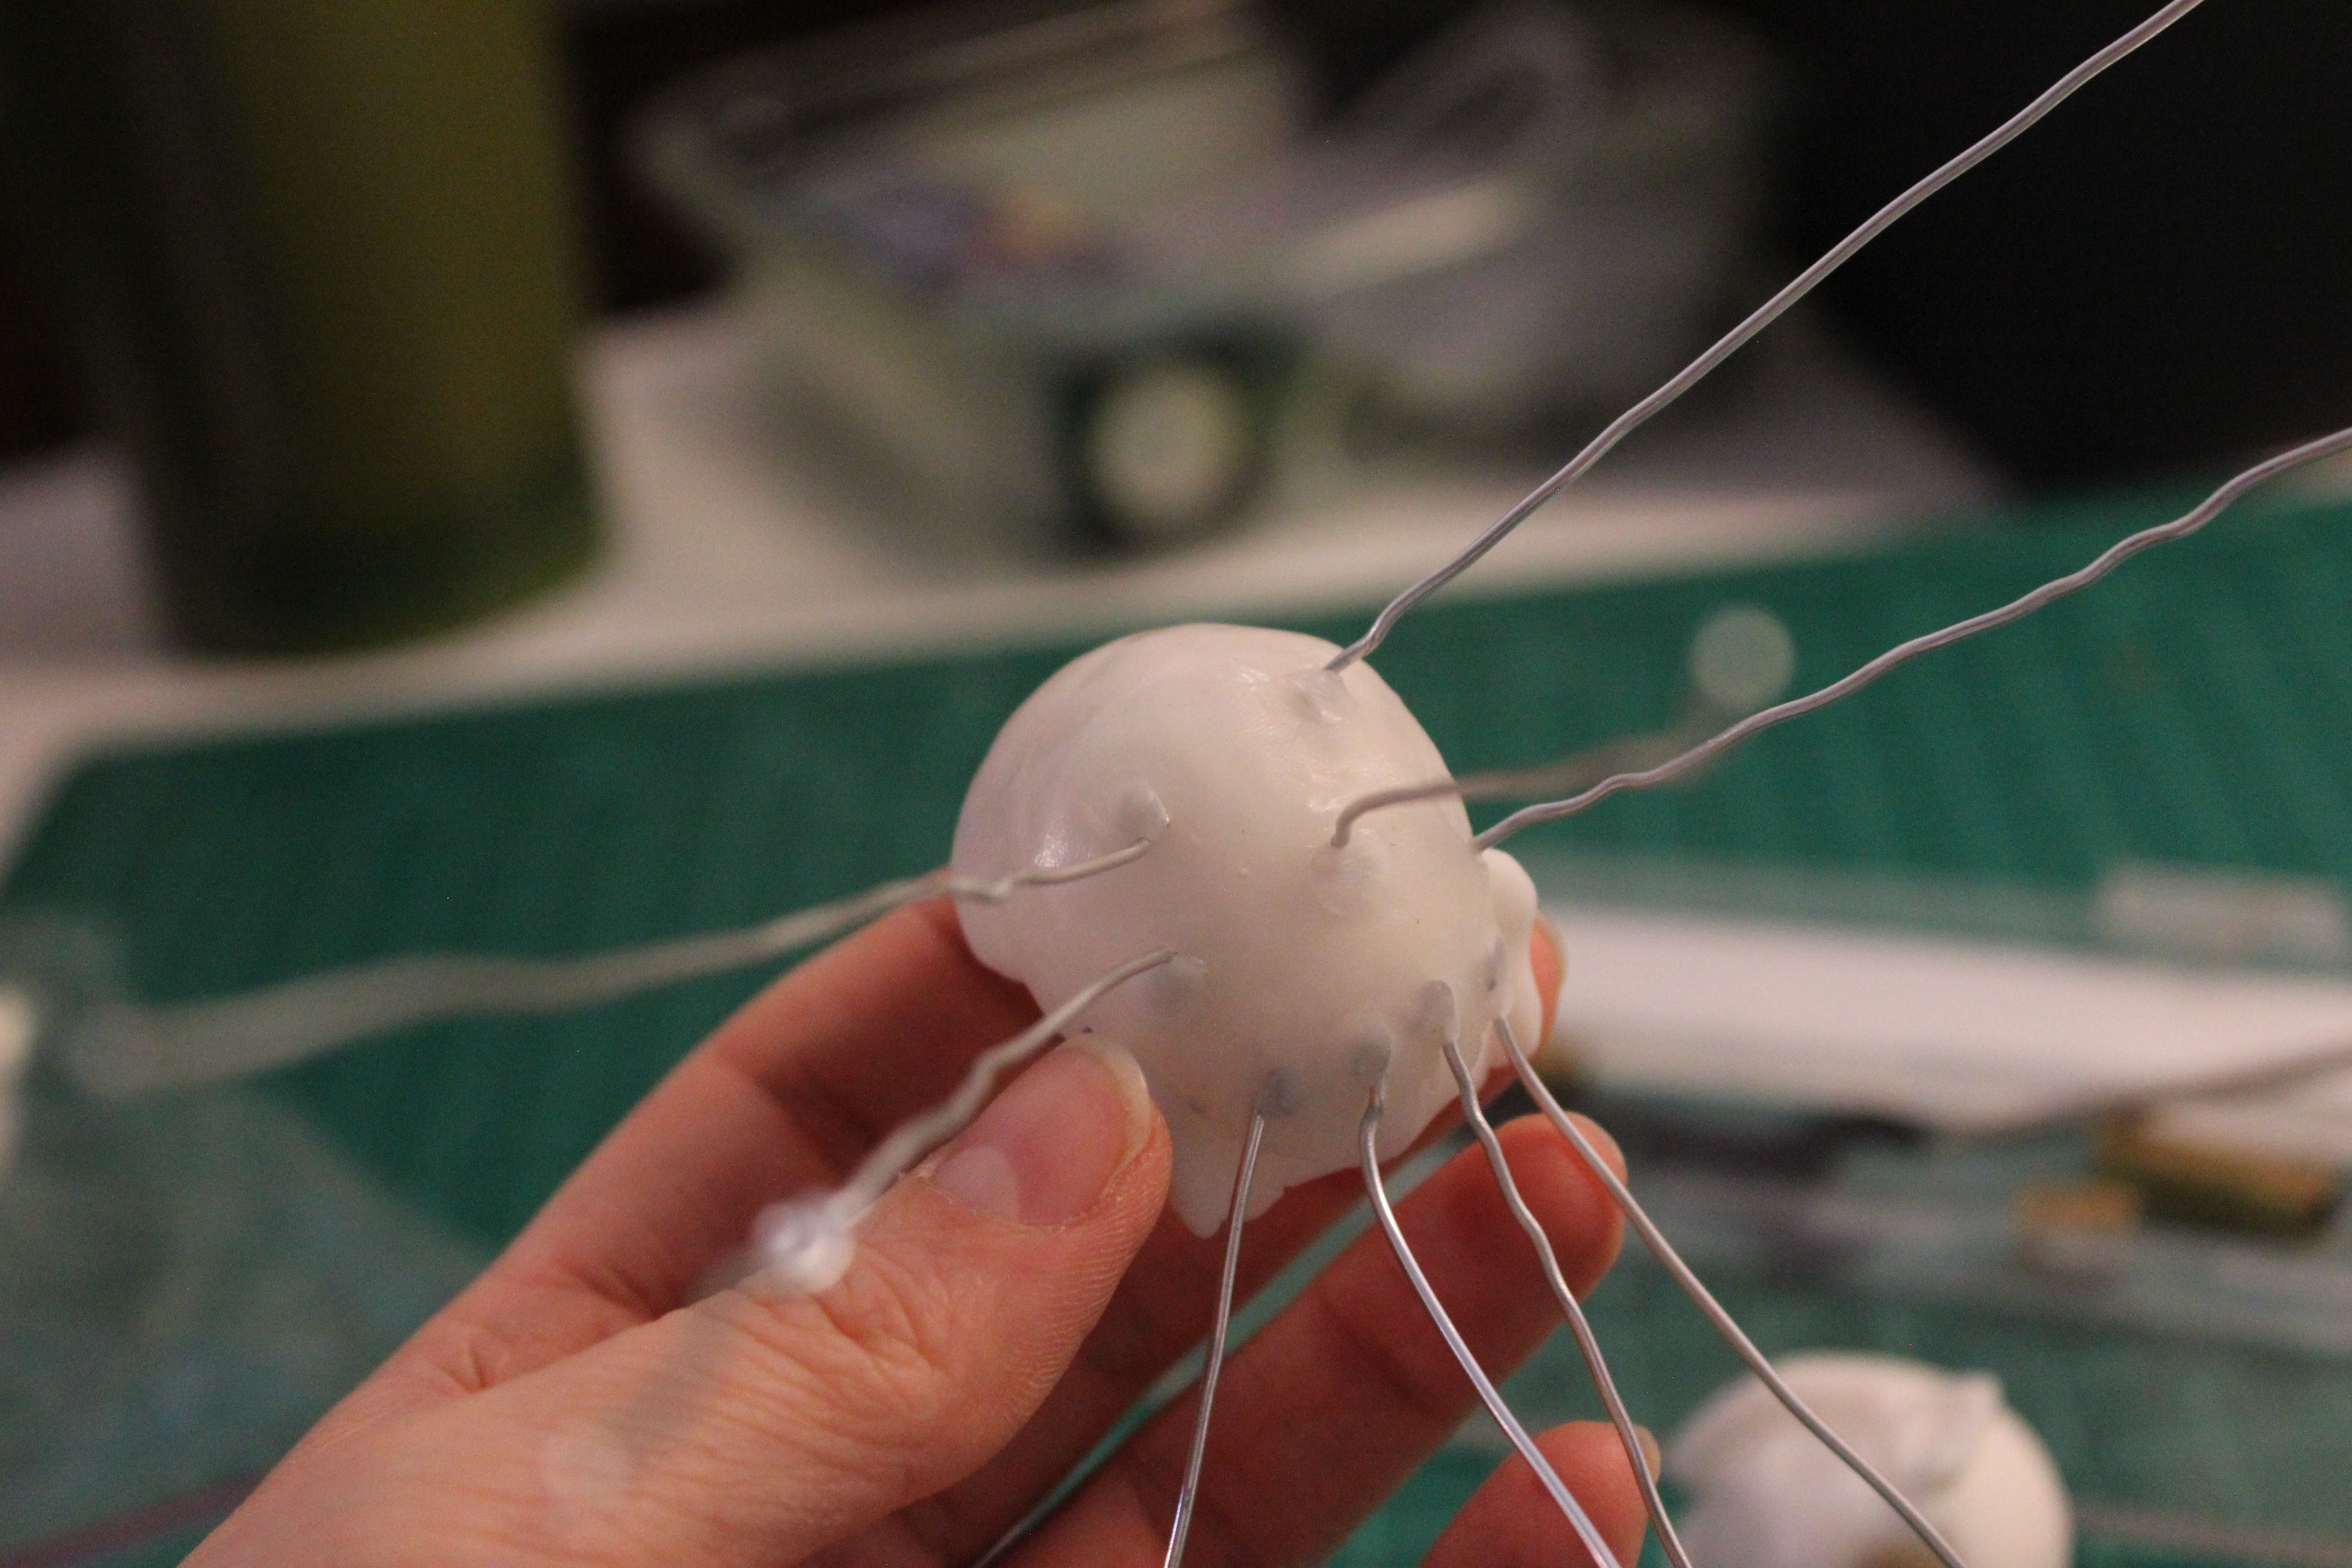
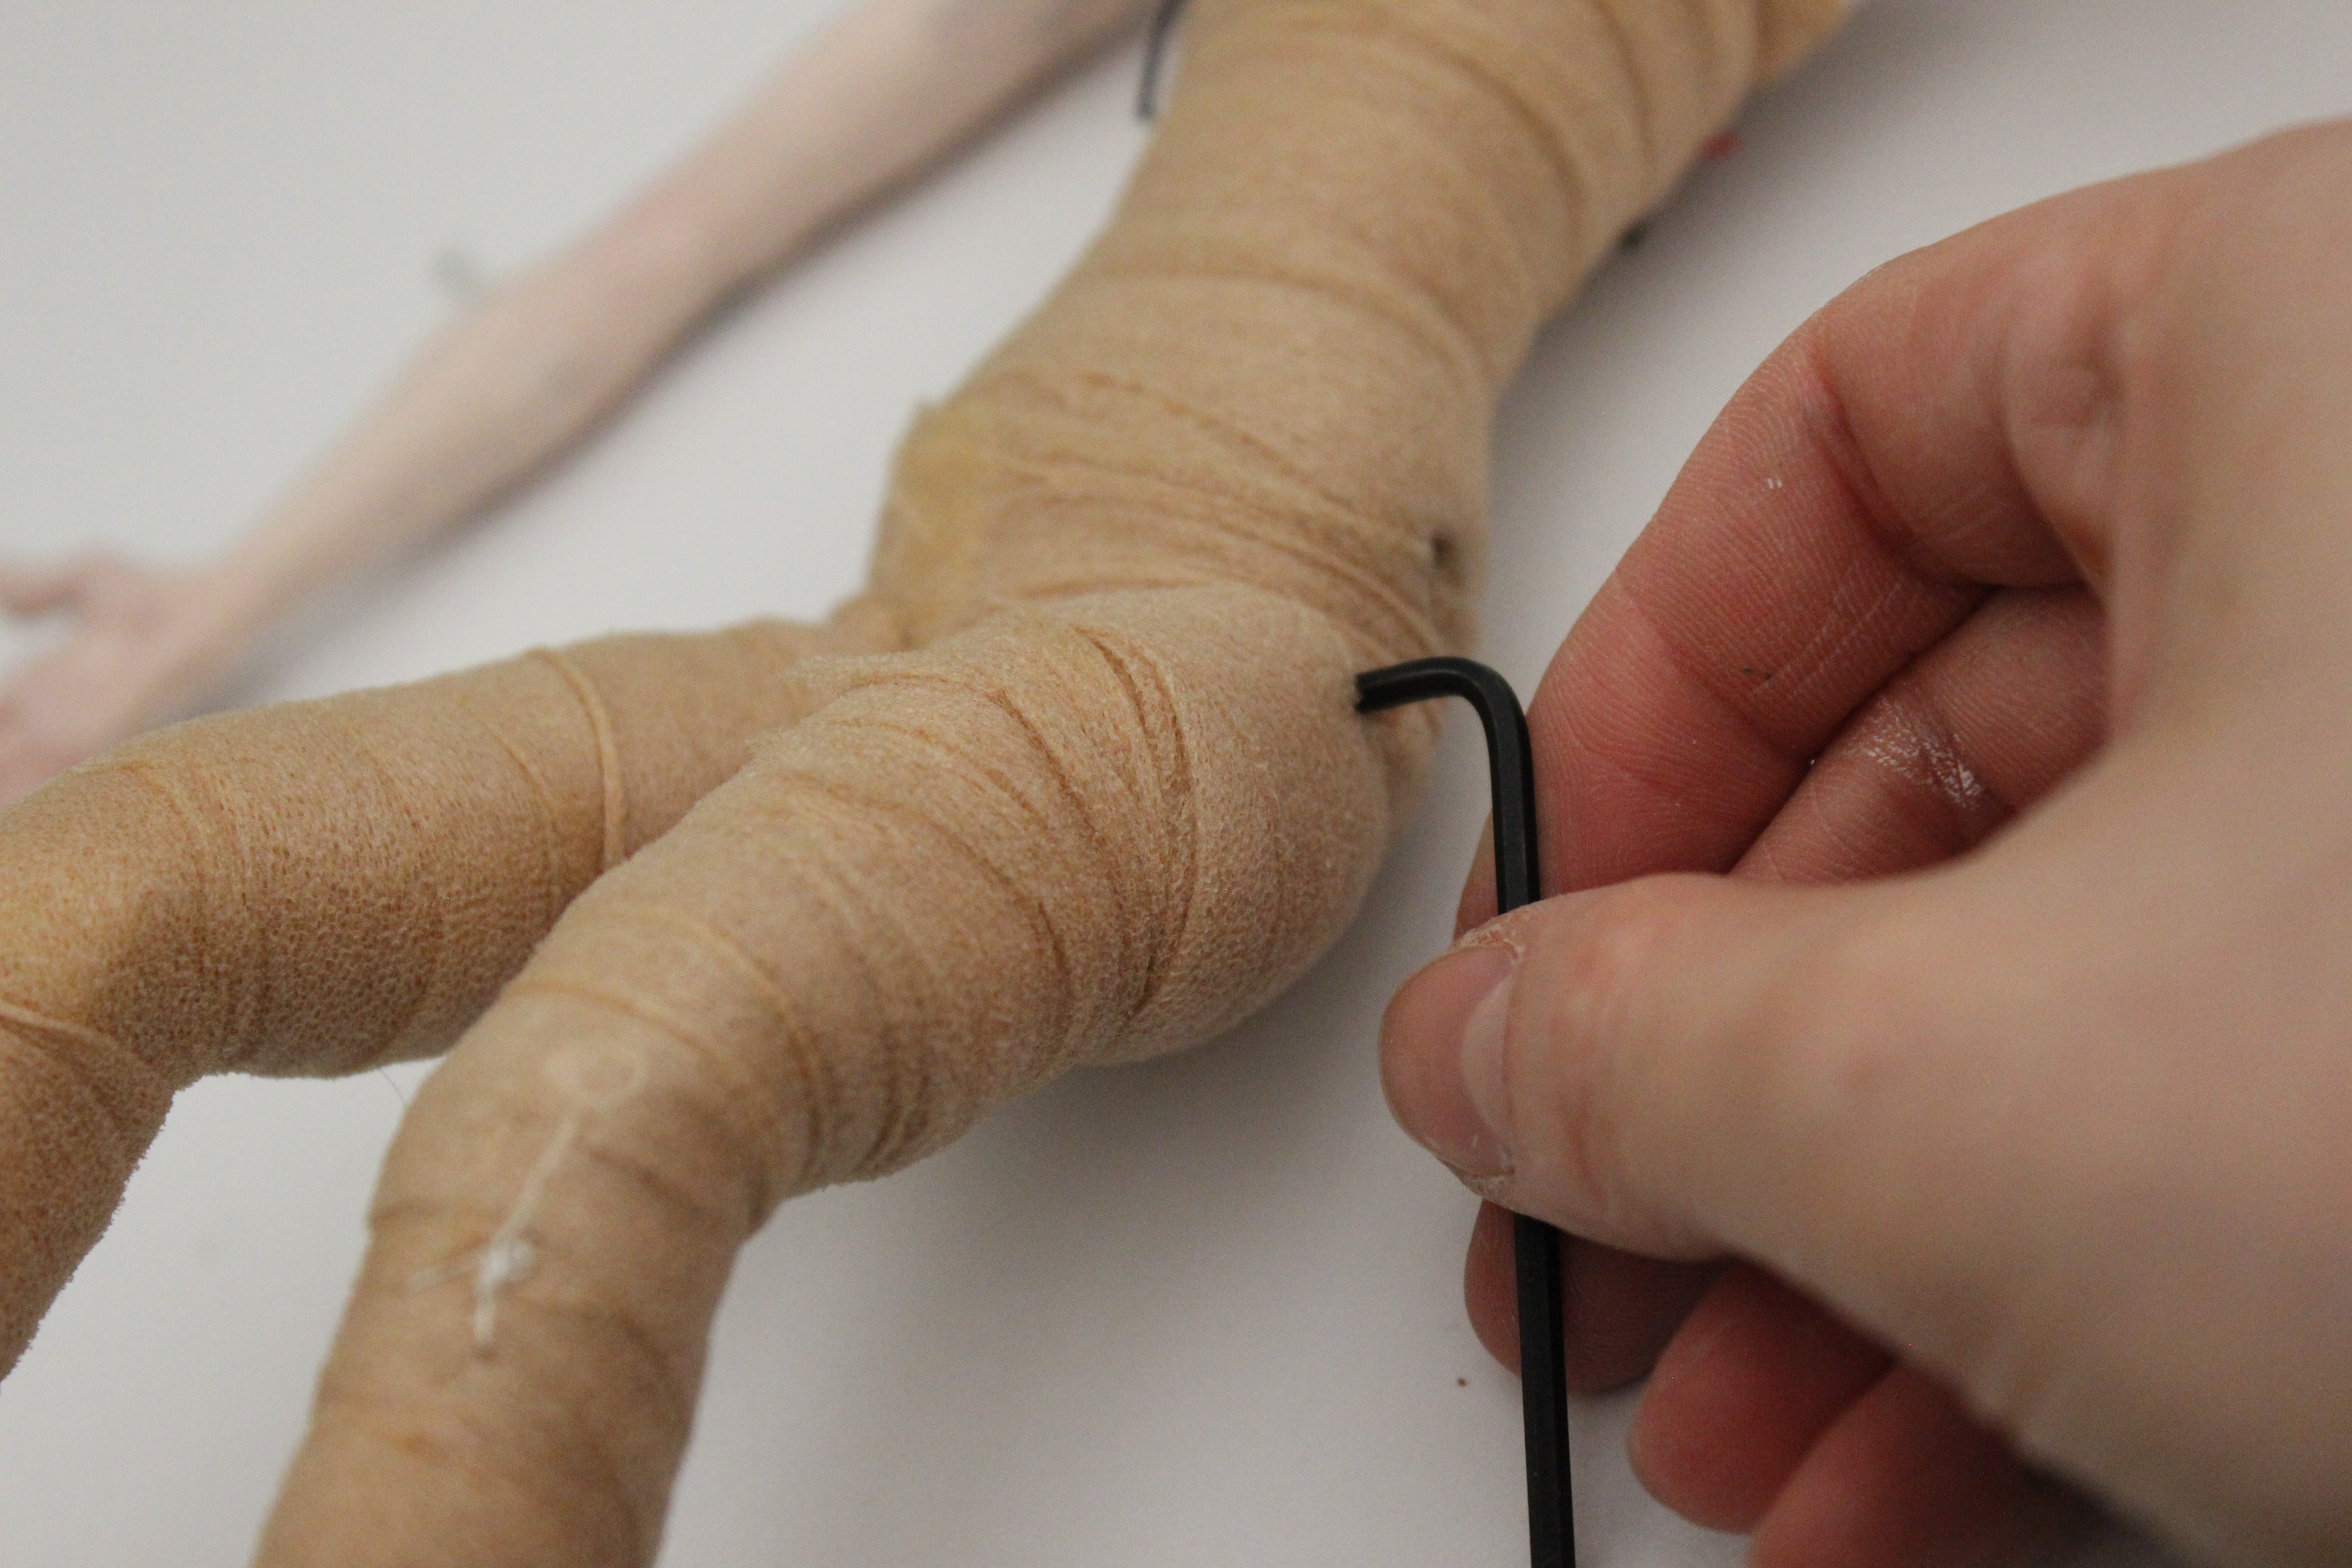
Building two different wig caps with thermoplastic molded around the base 3D head print. Aluminum wire is twisted and flattened into a hook shape to strongly embed into the plastic and avoid slipping out.
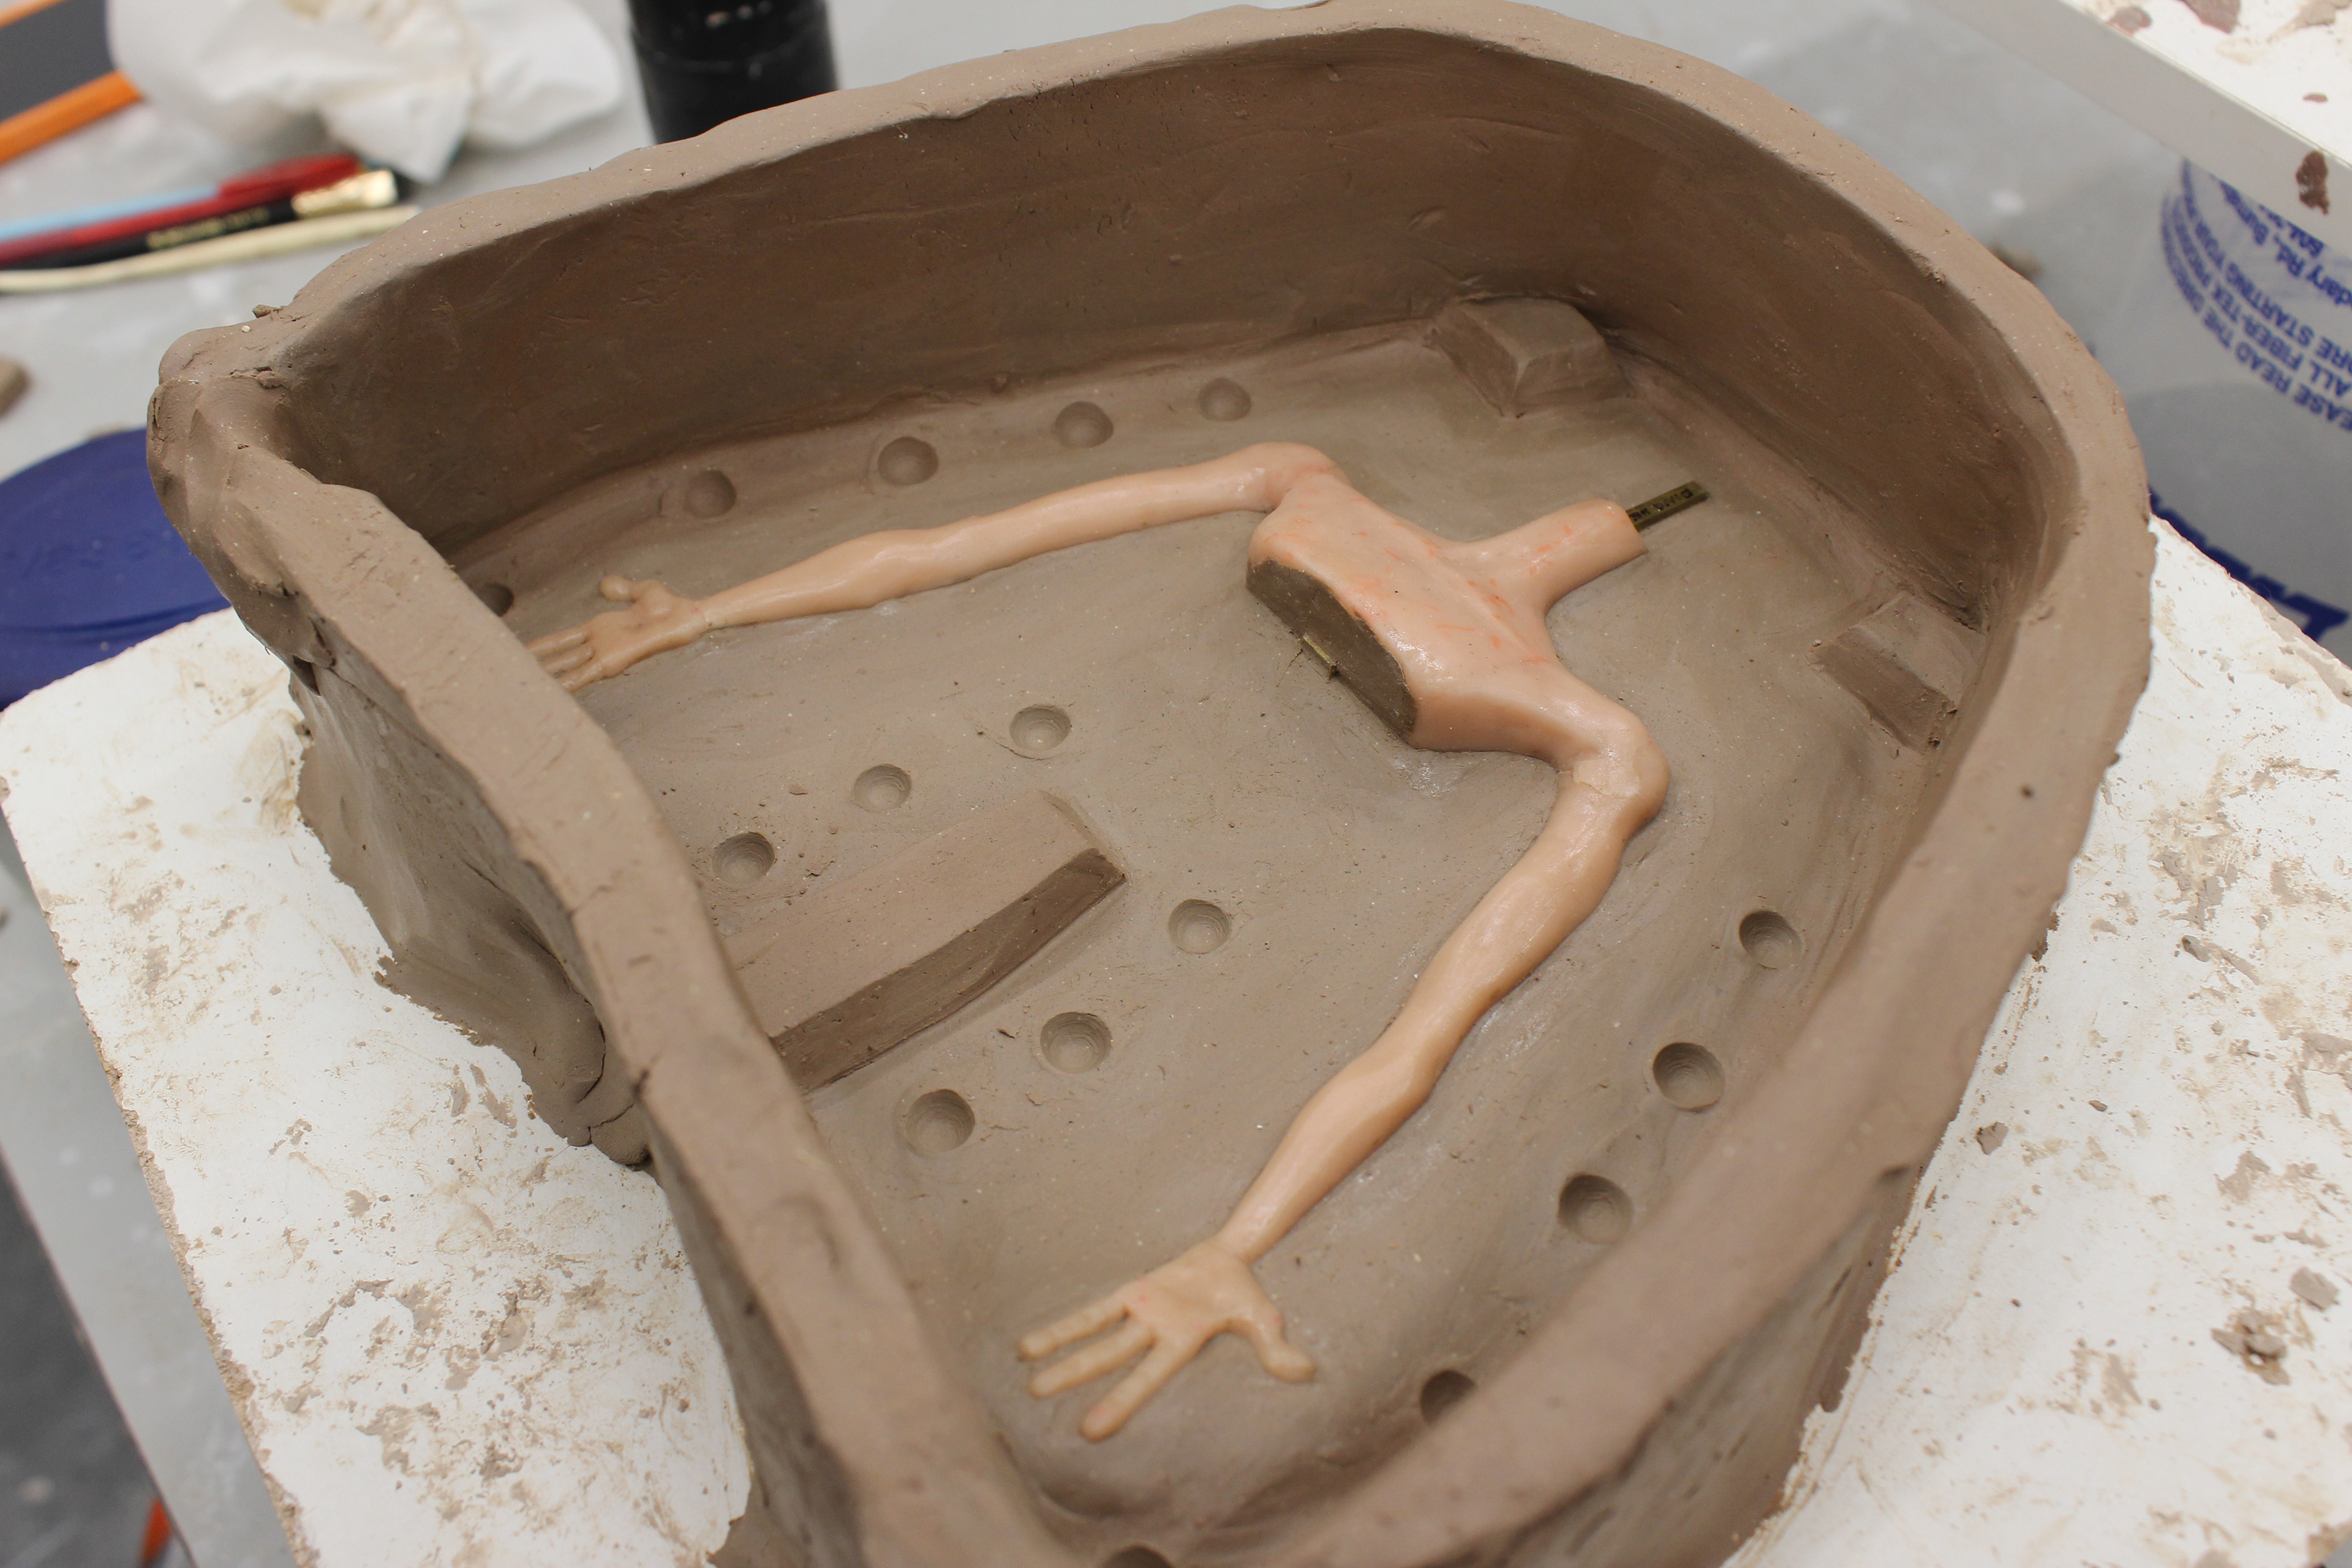
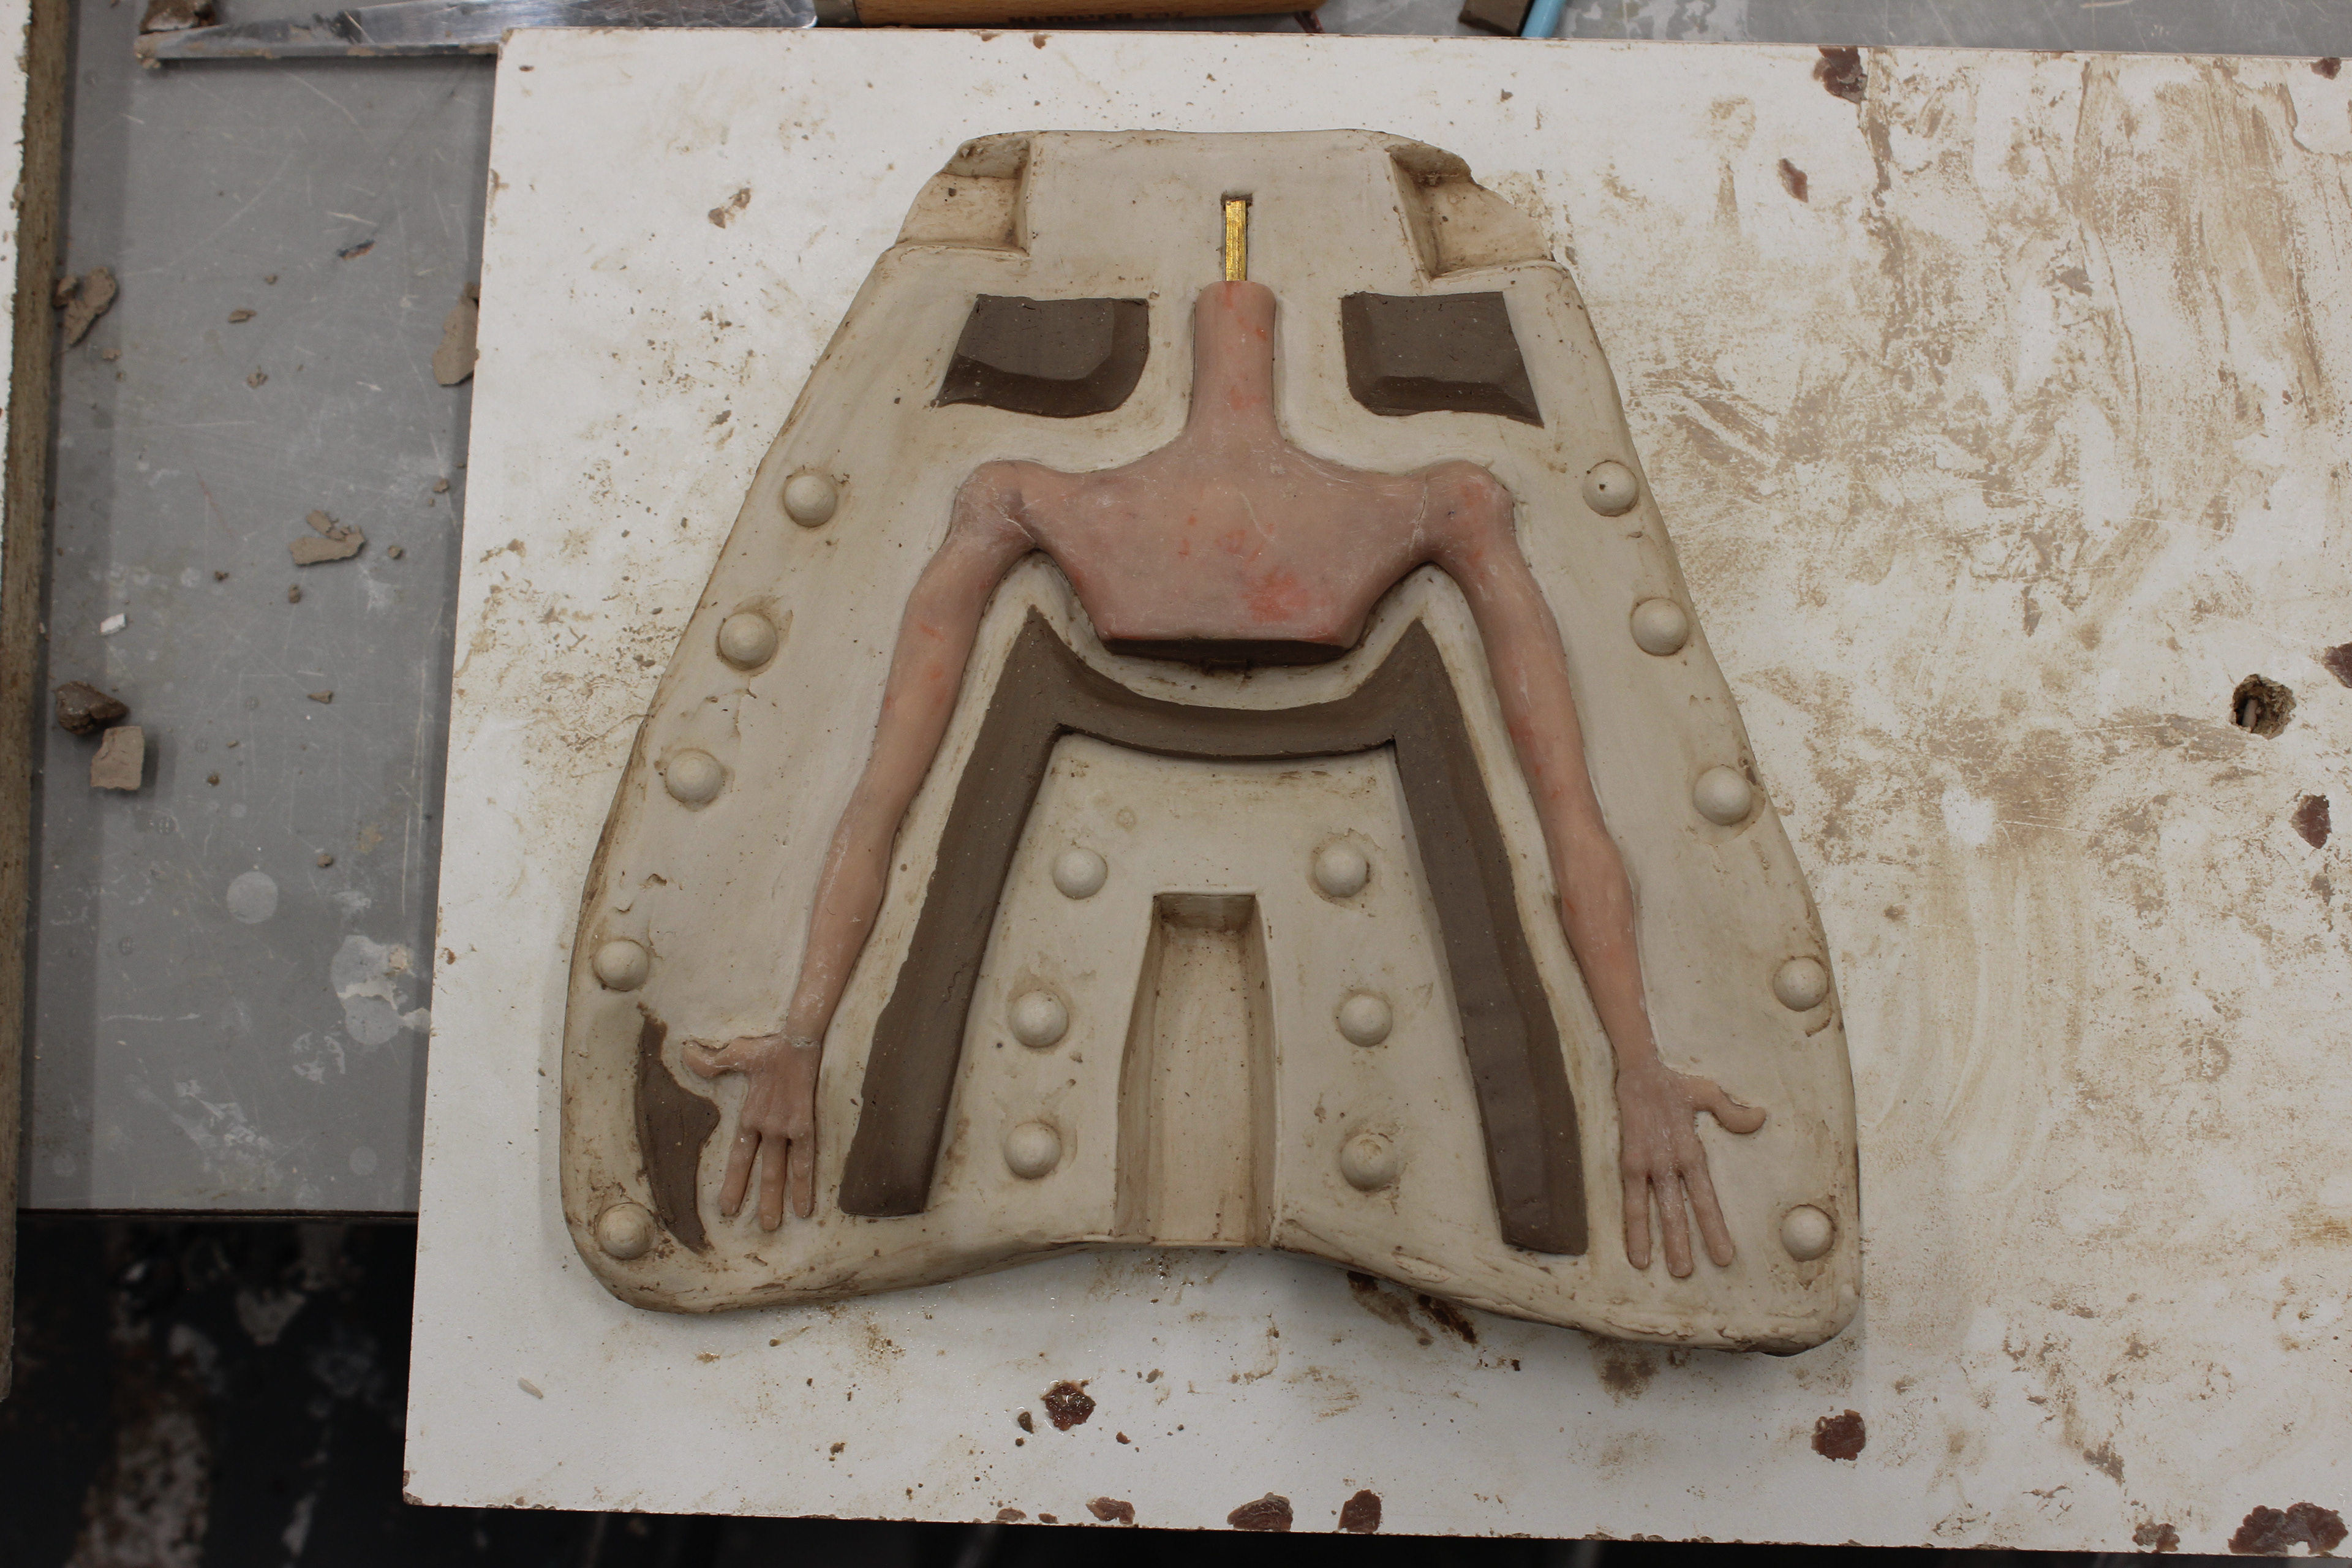
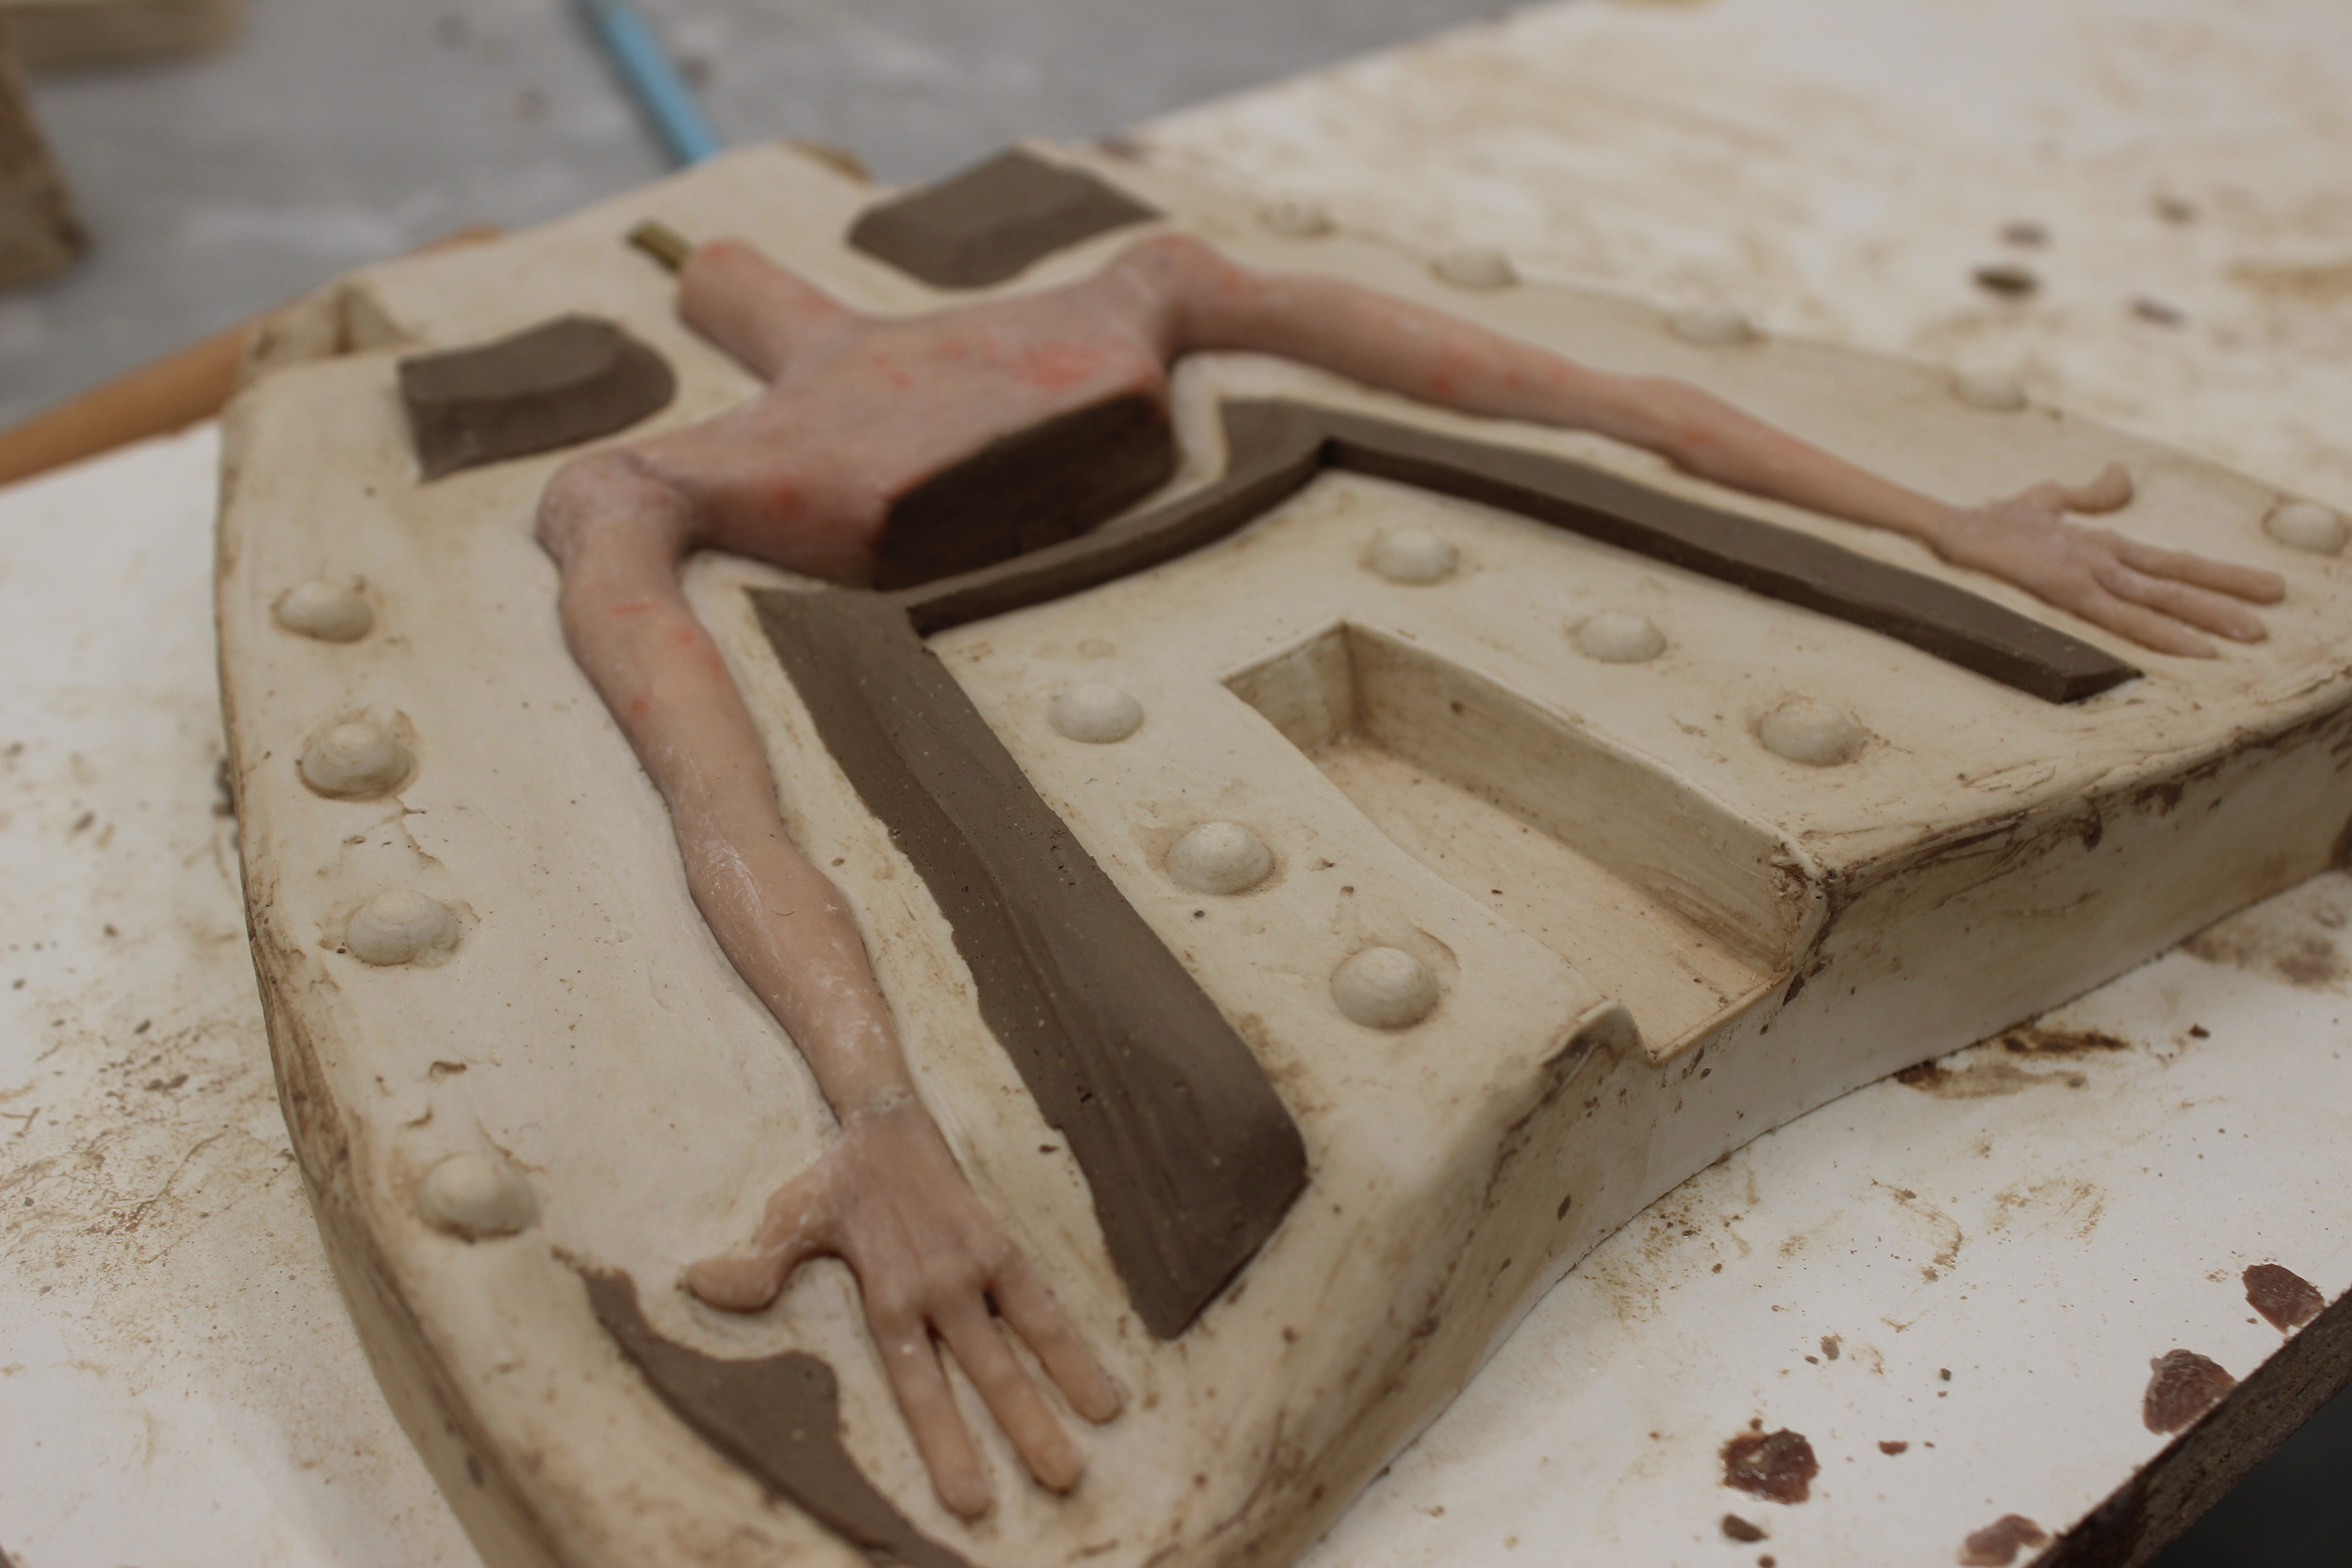
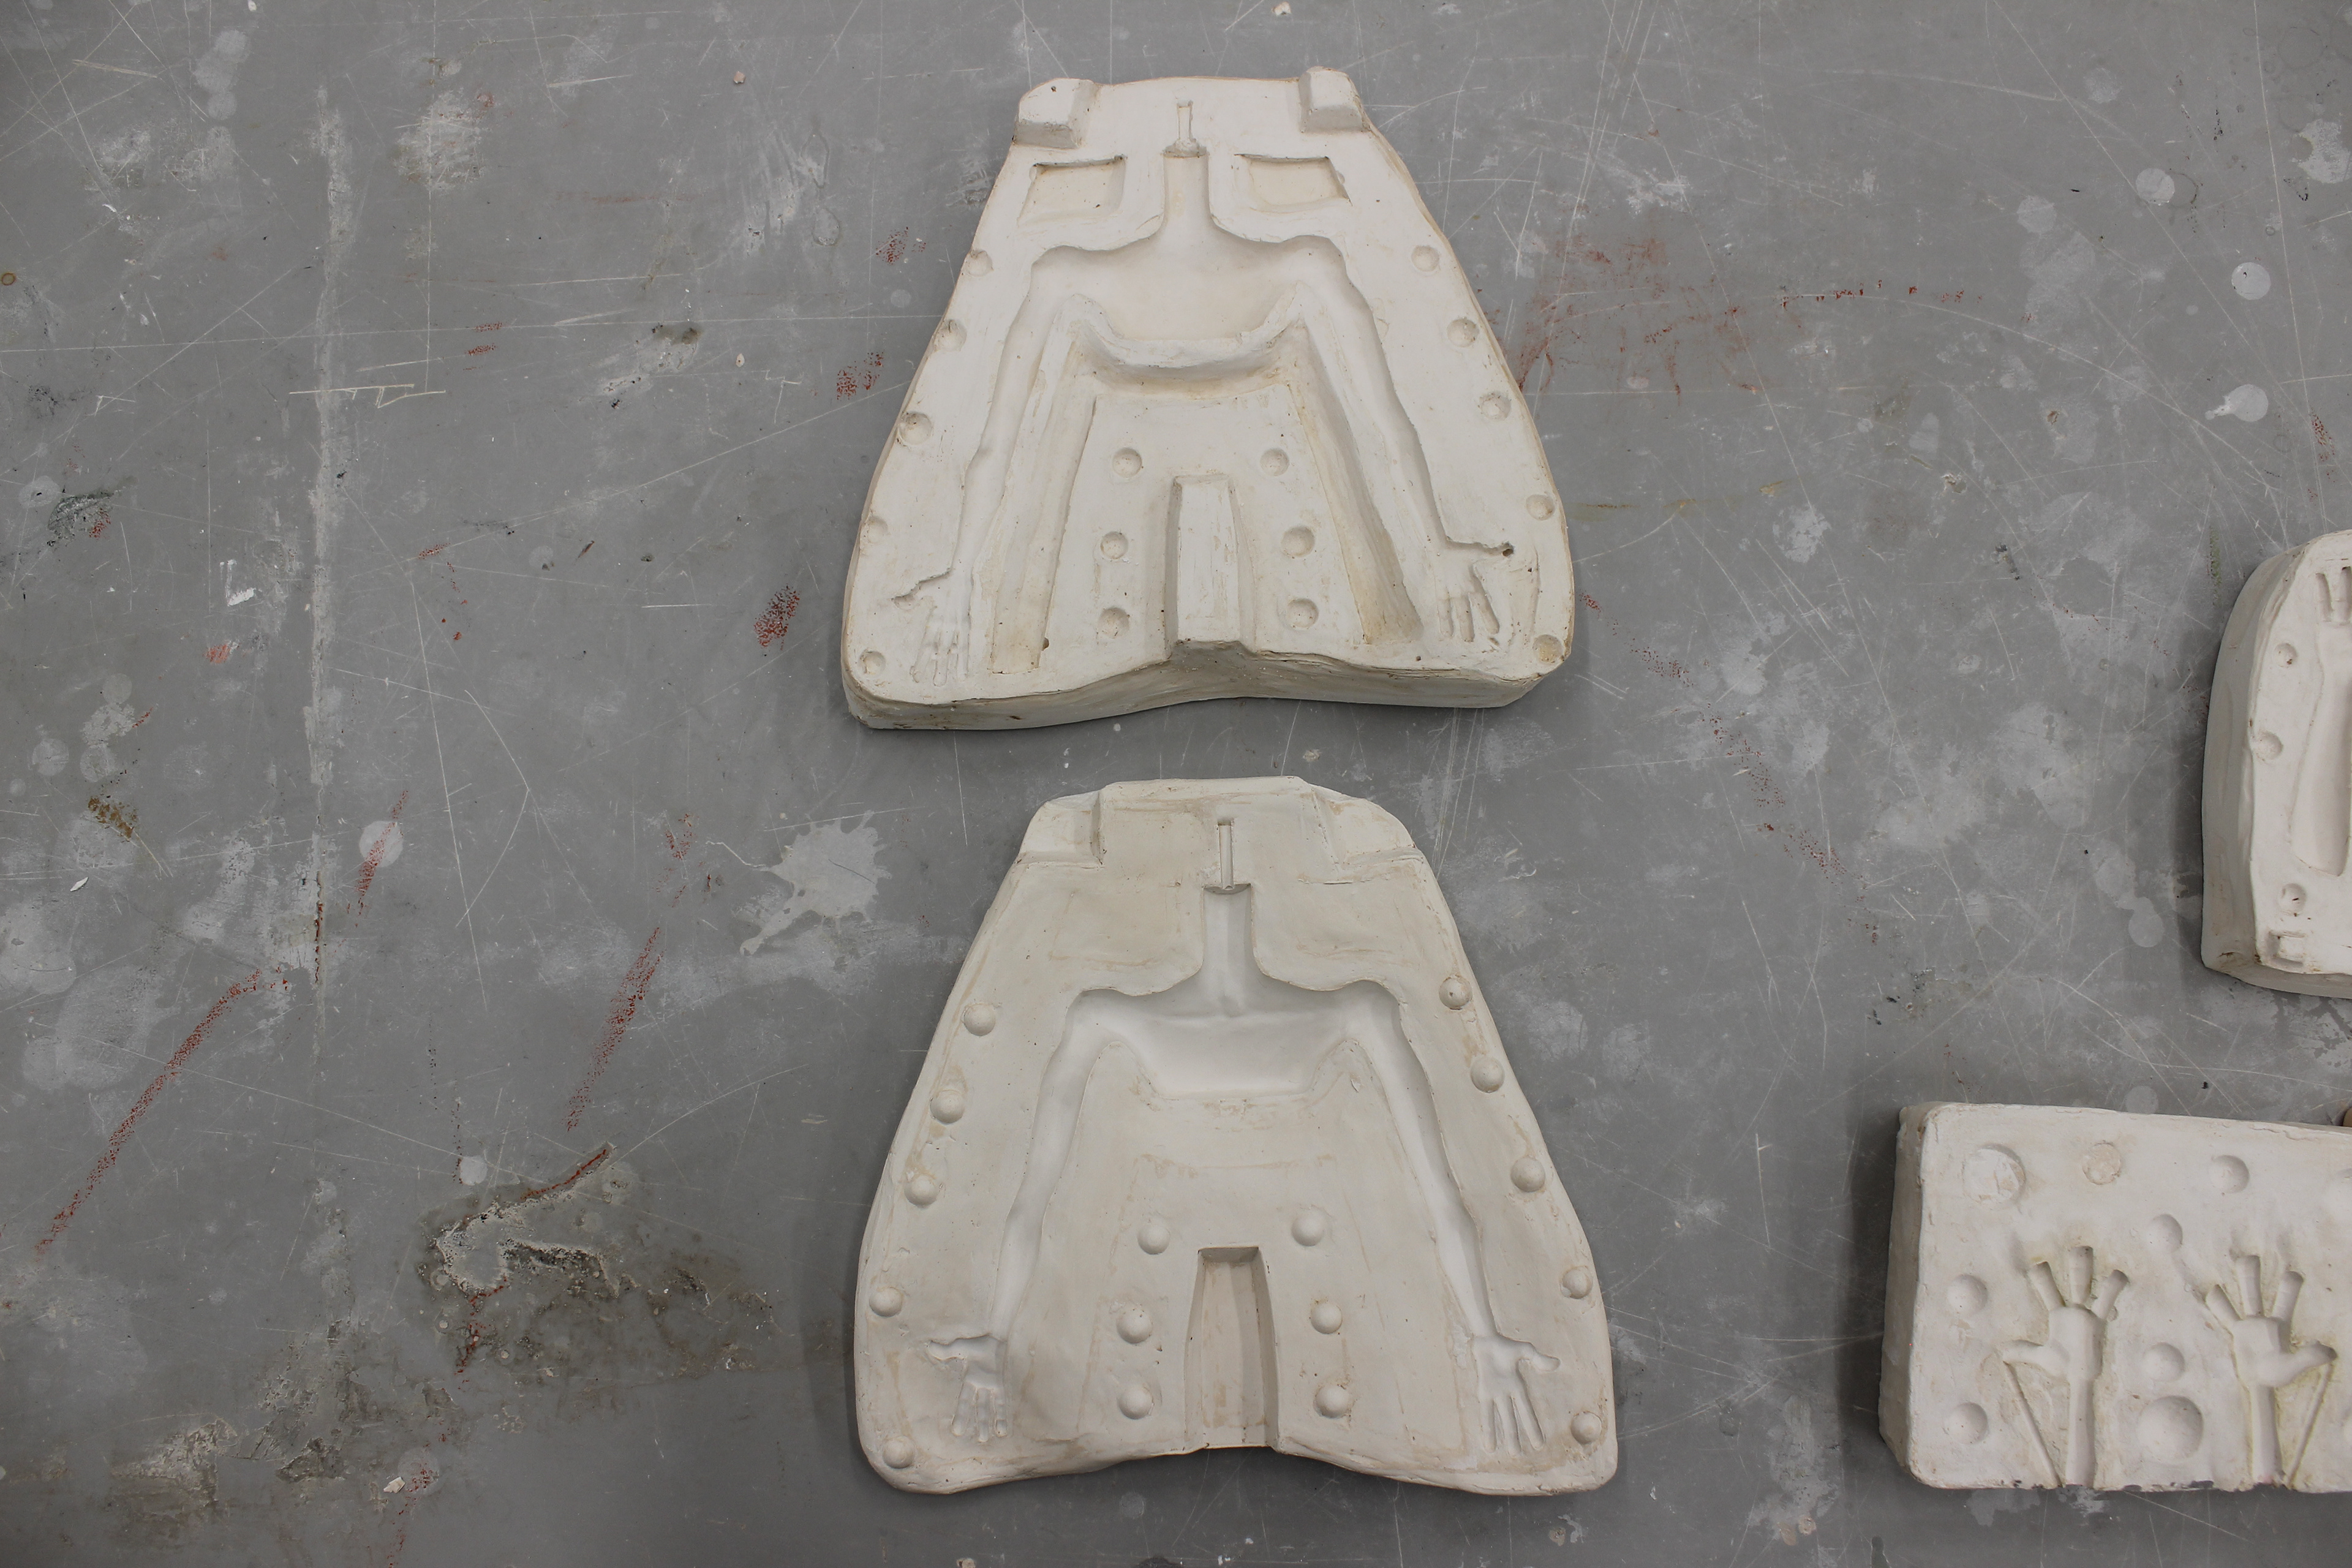
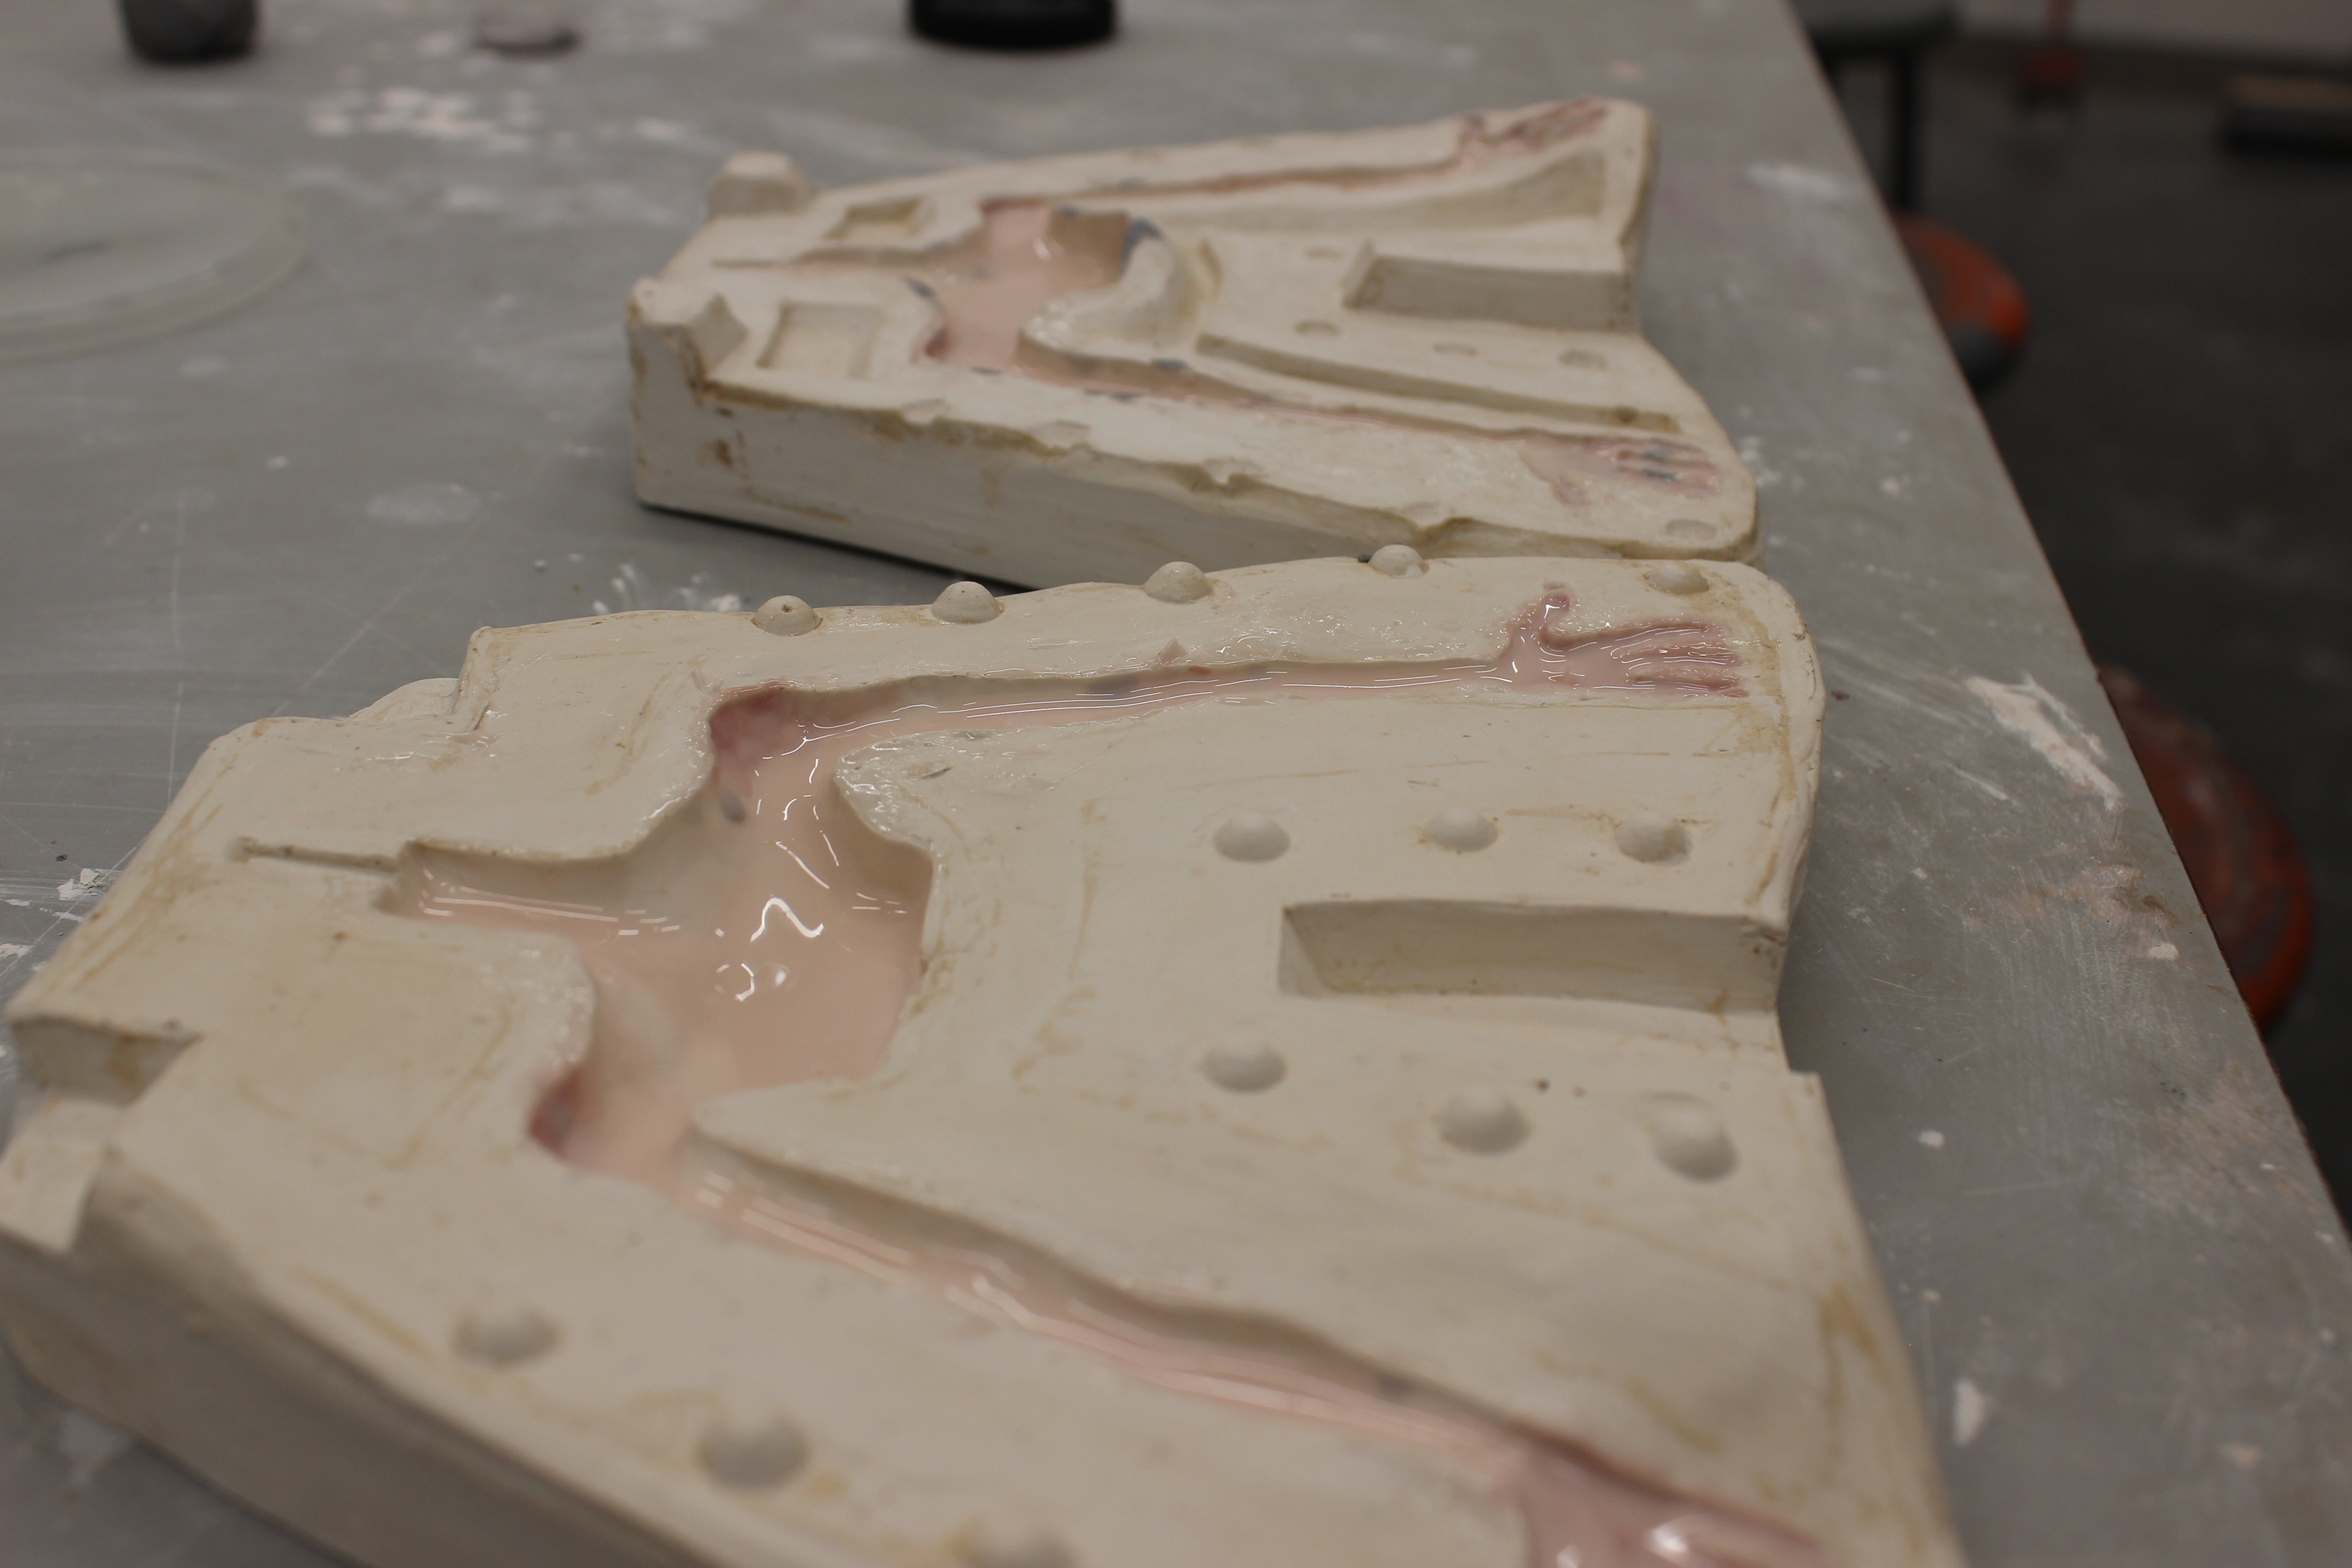
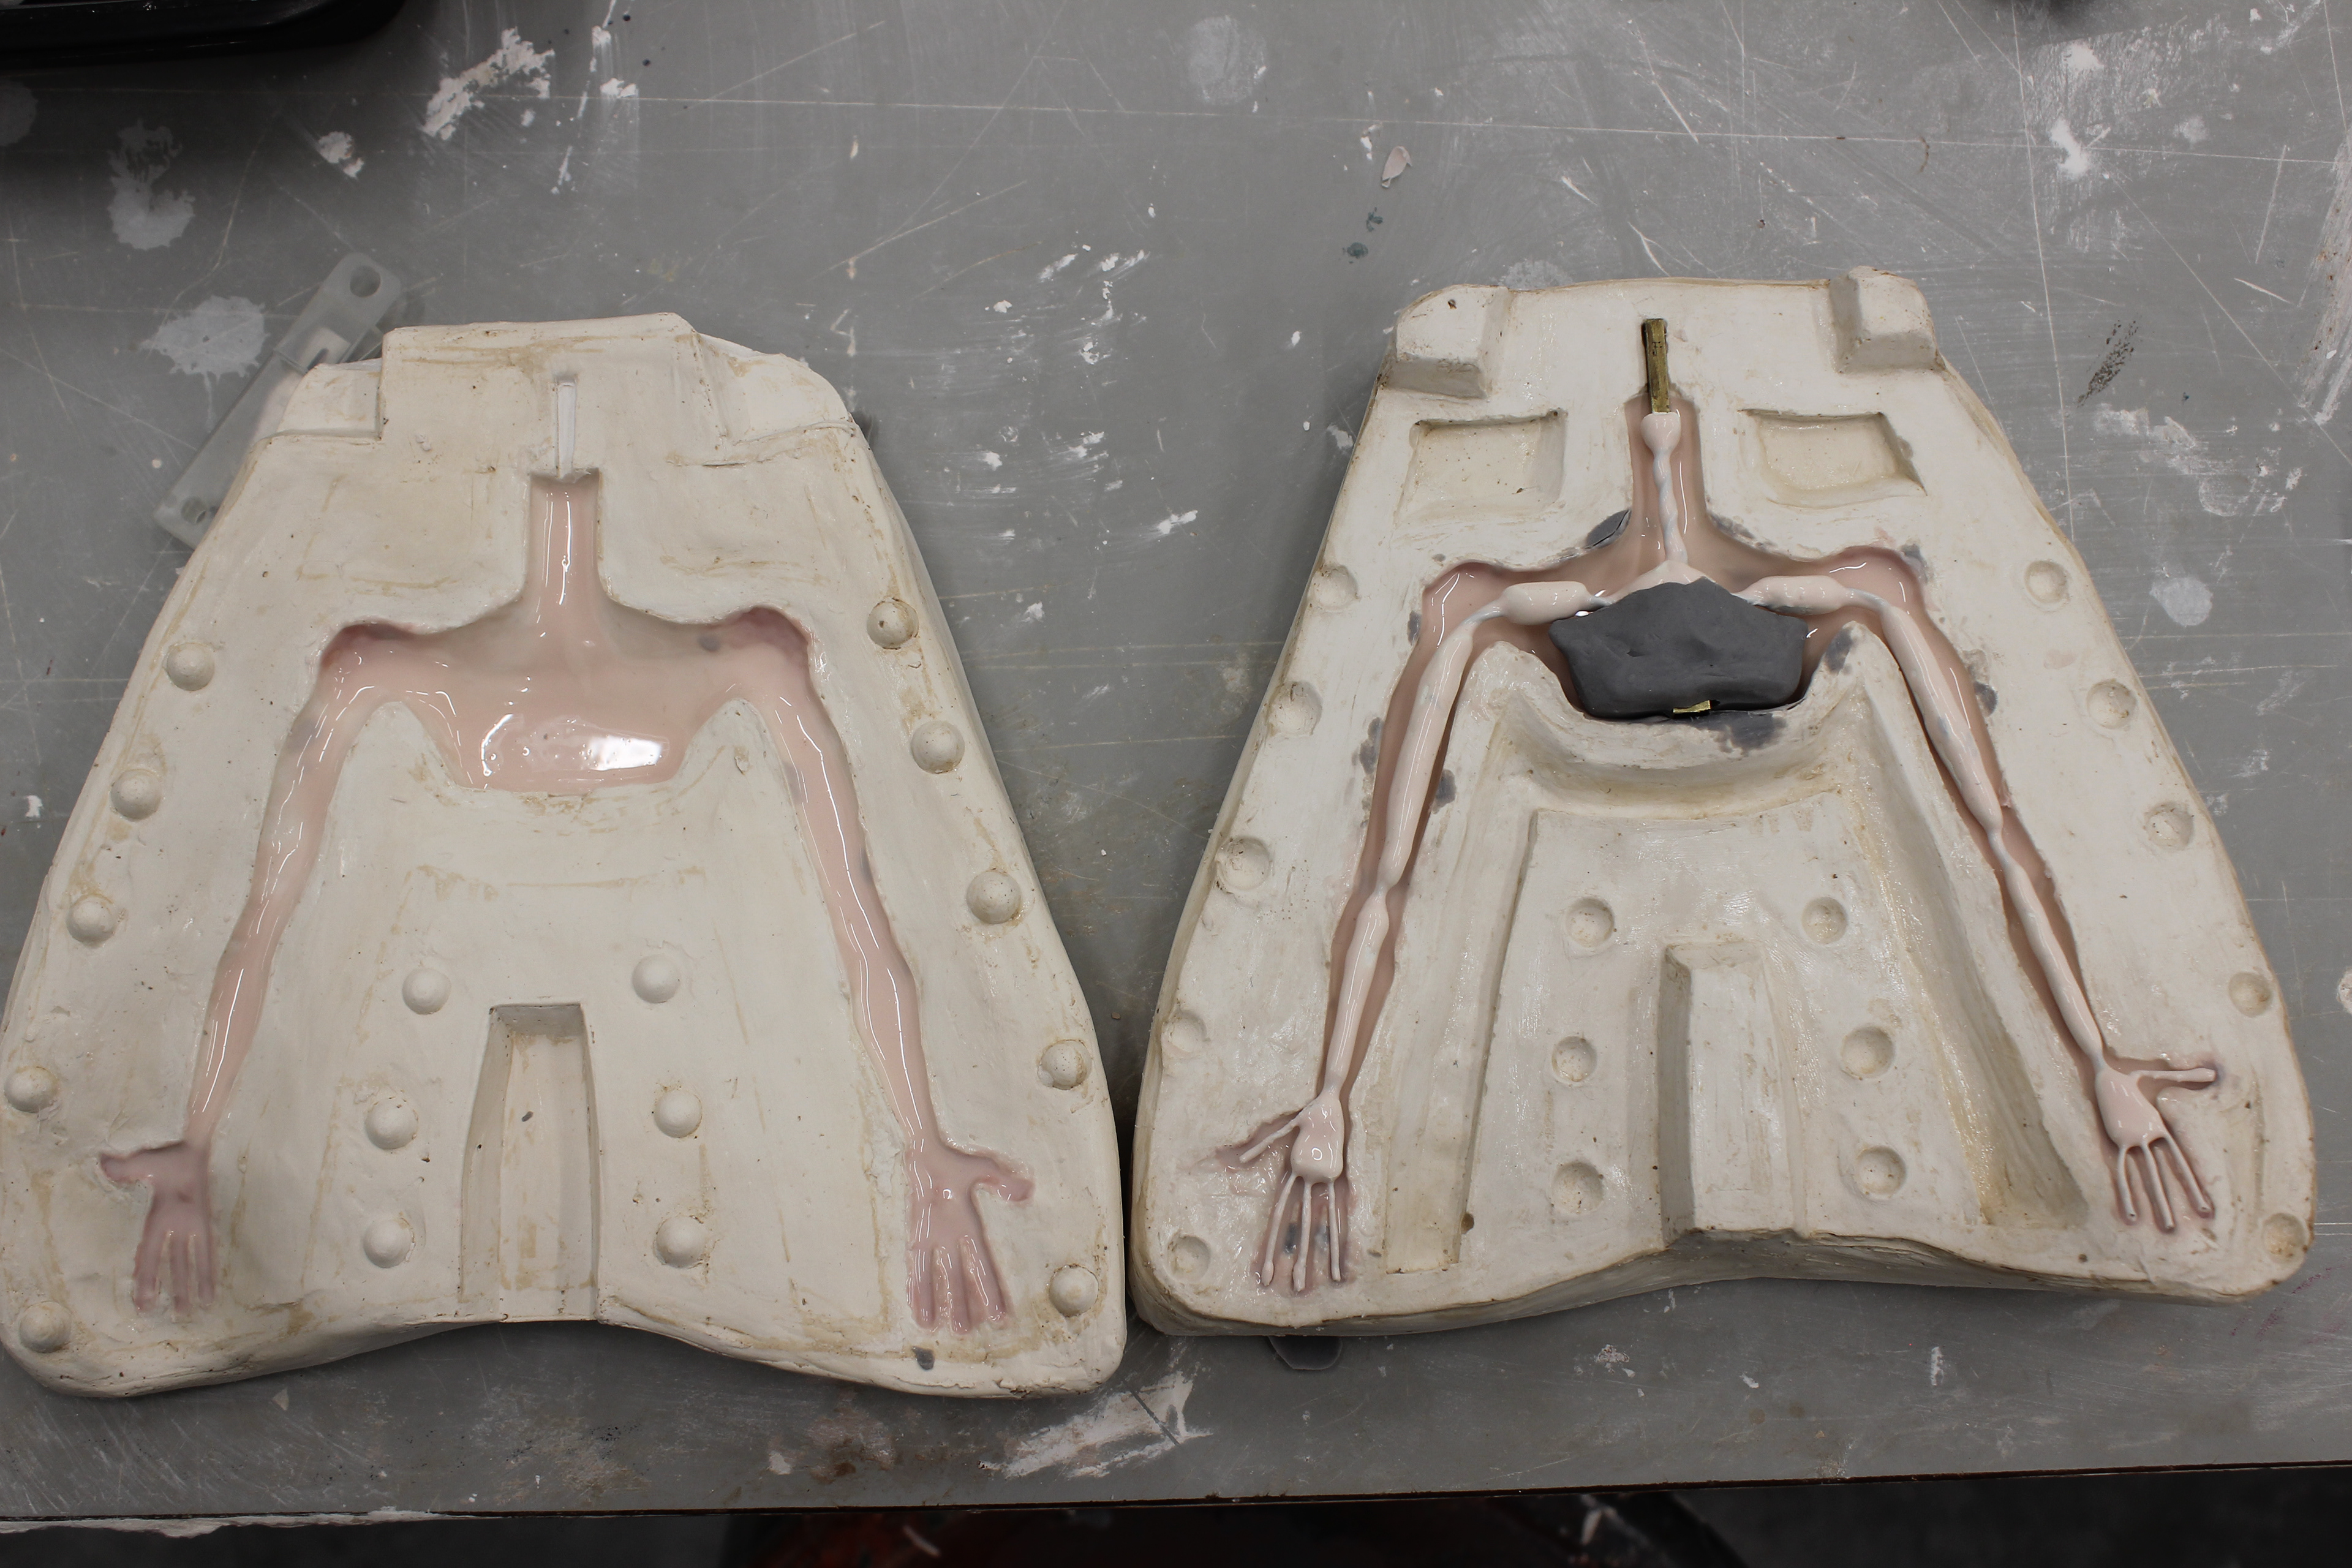
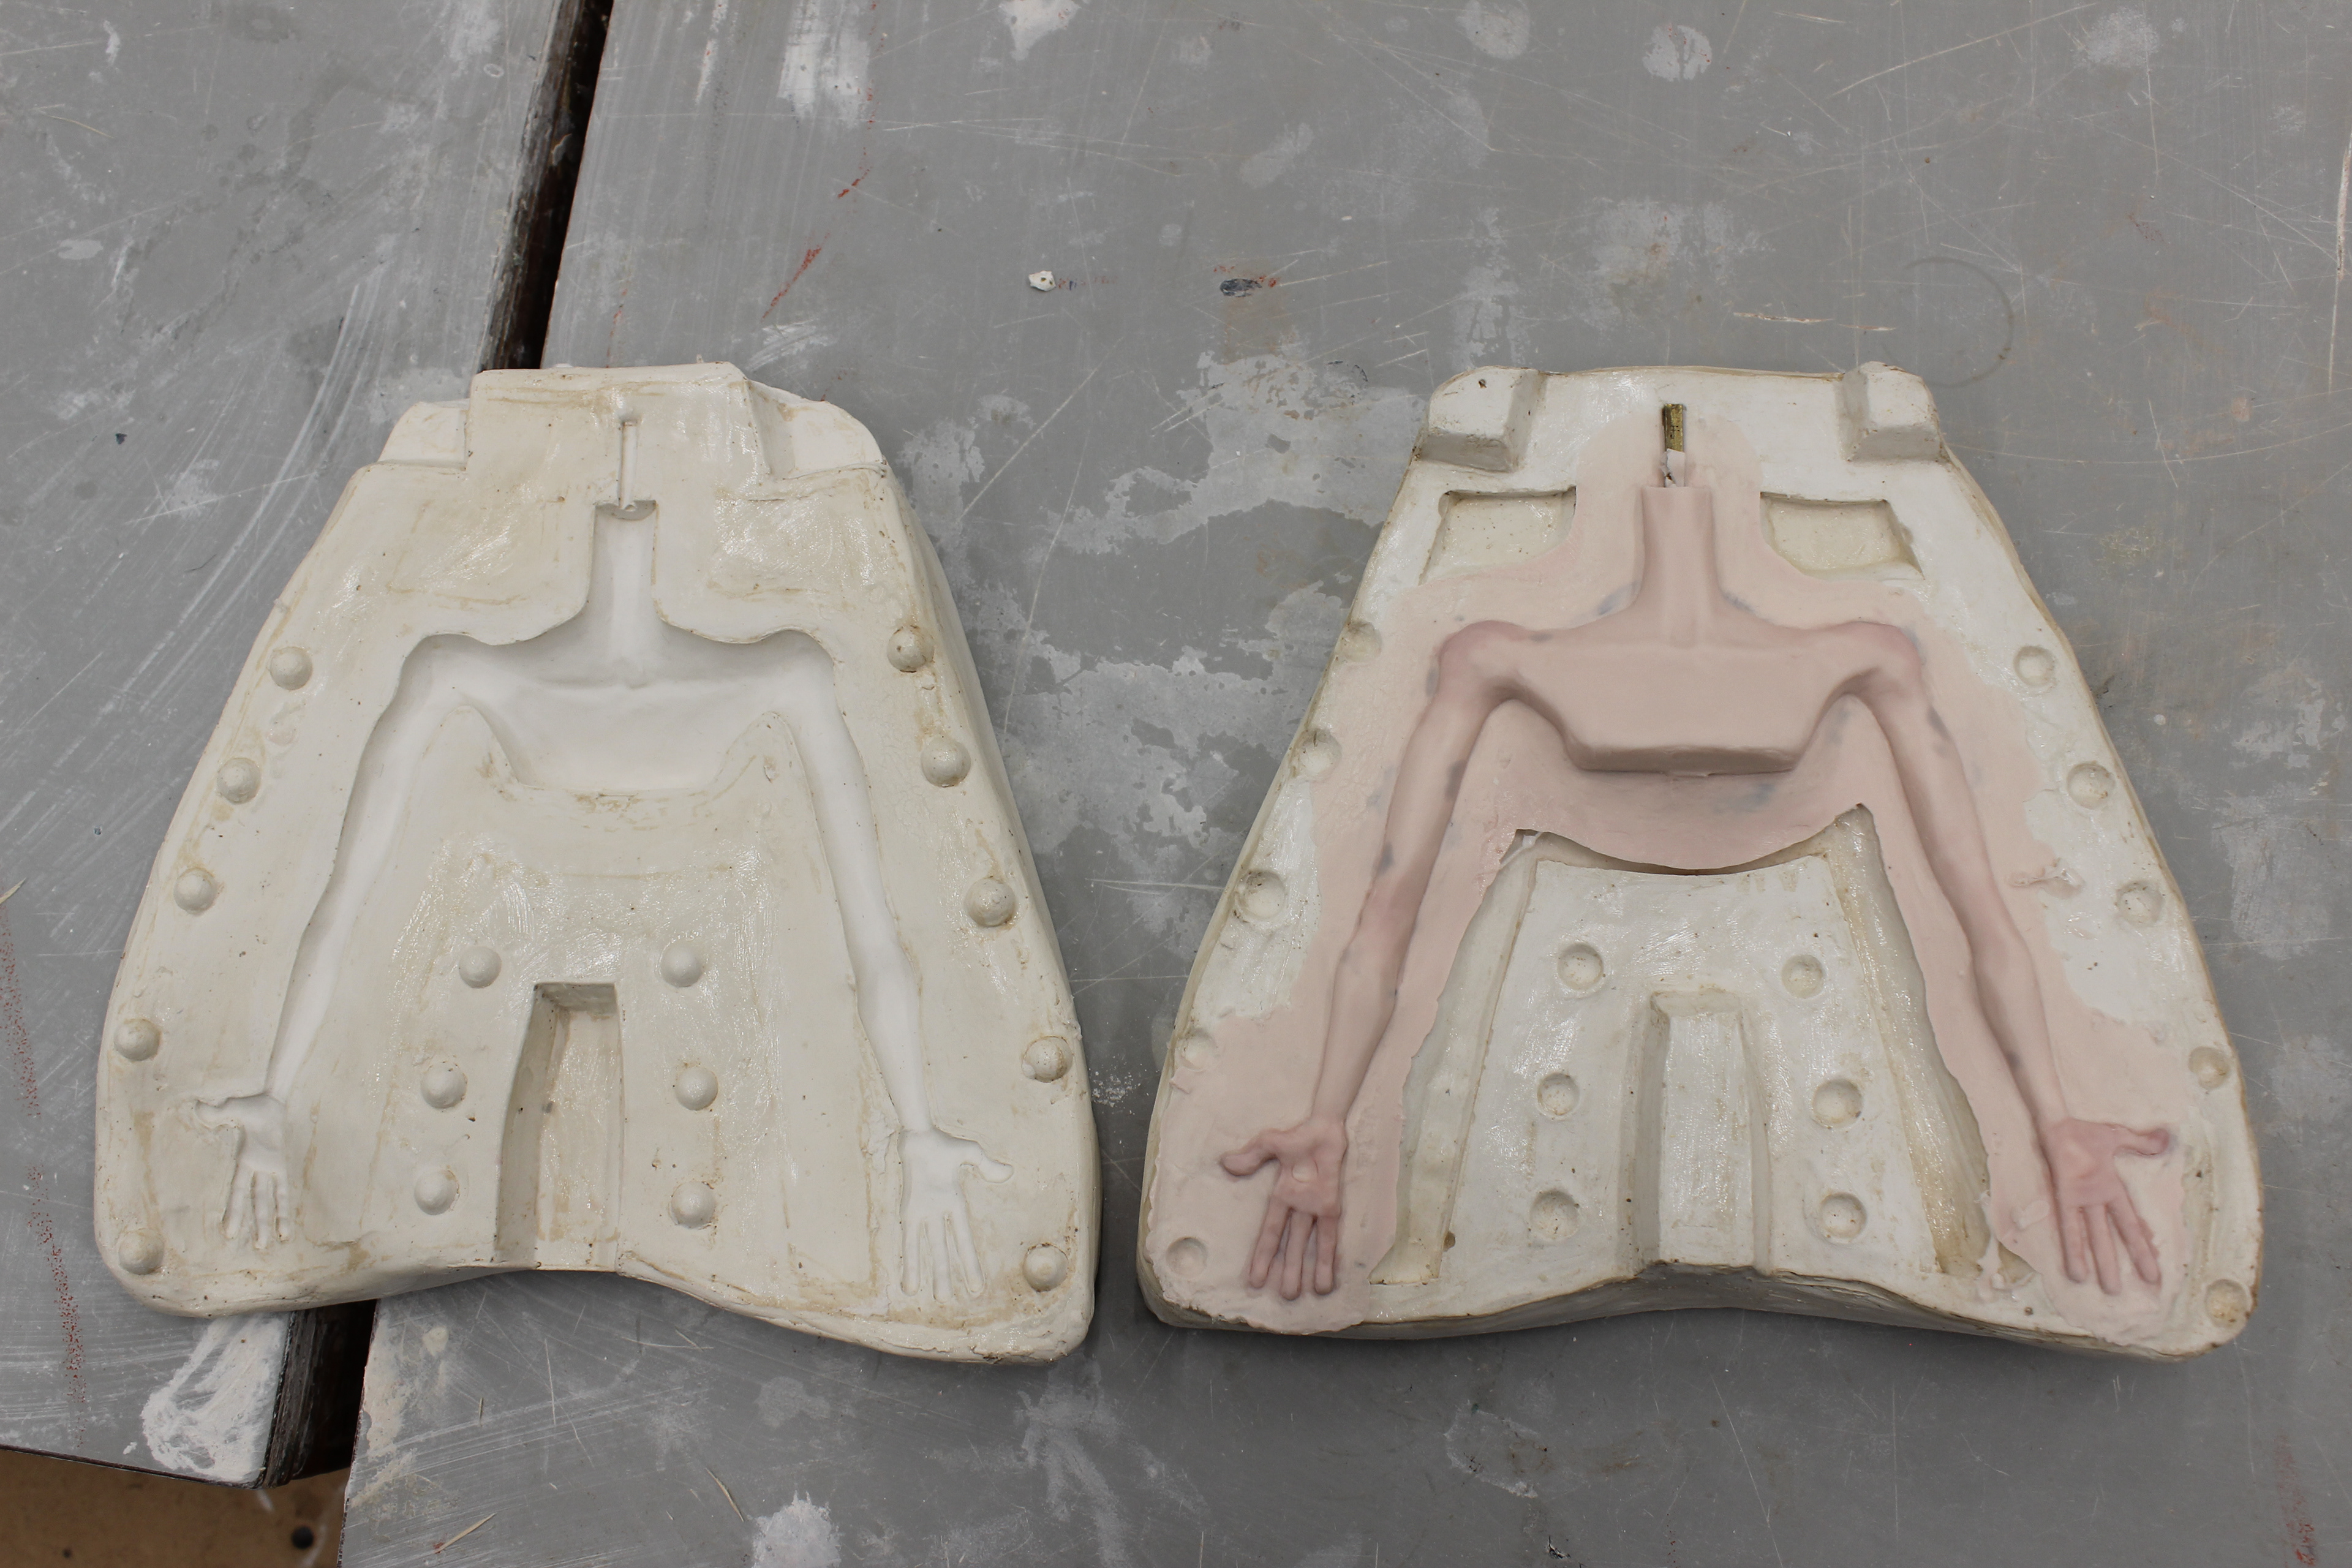
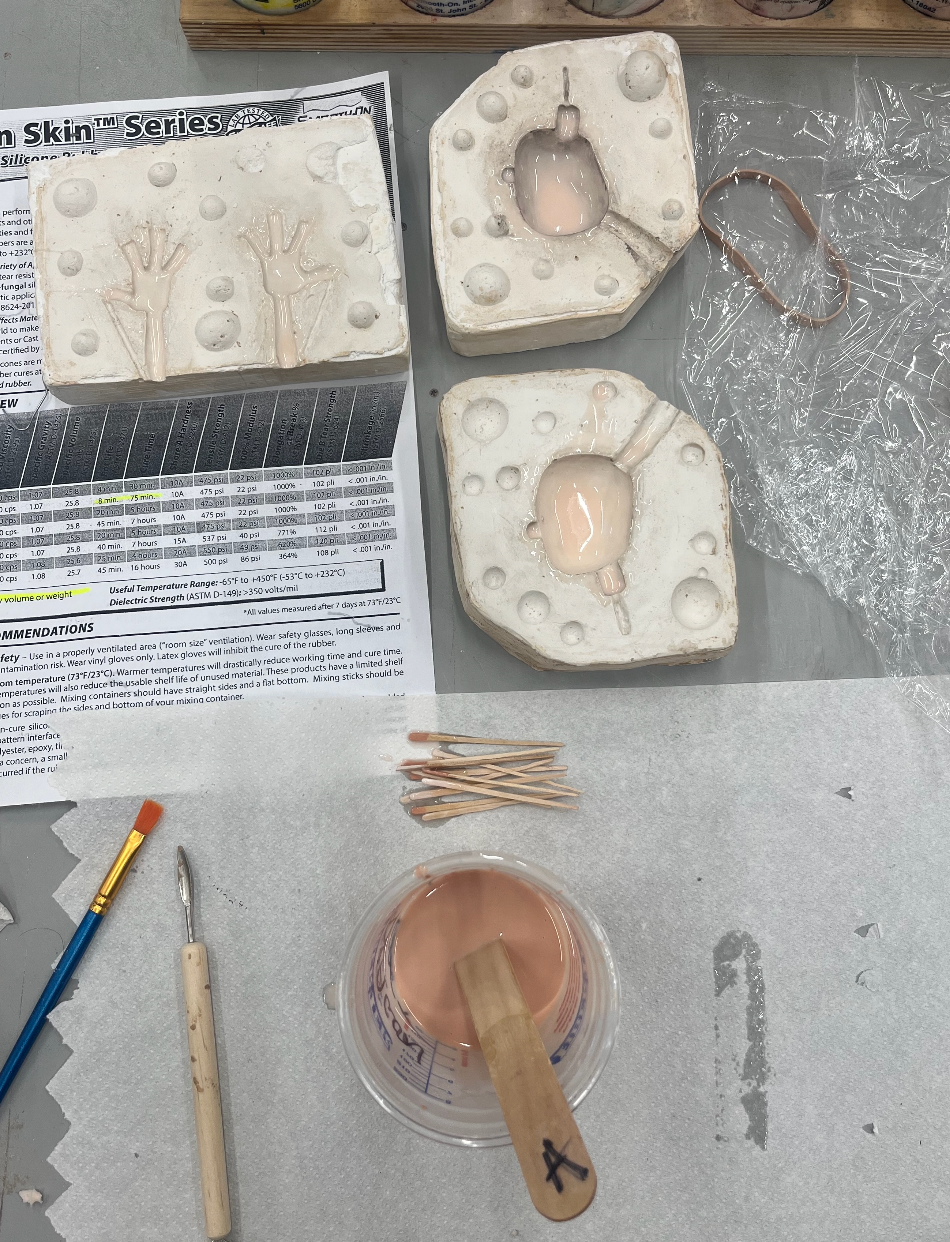
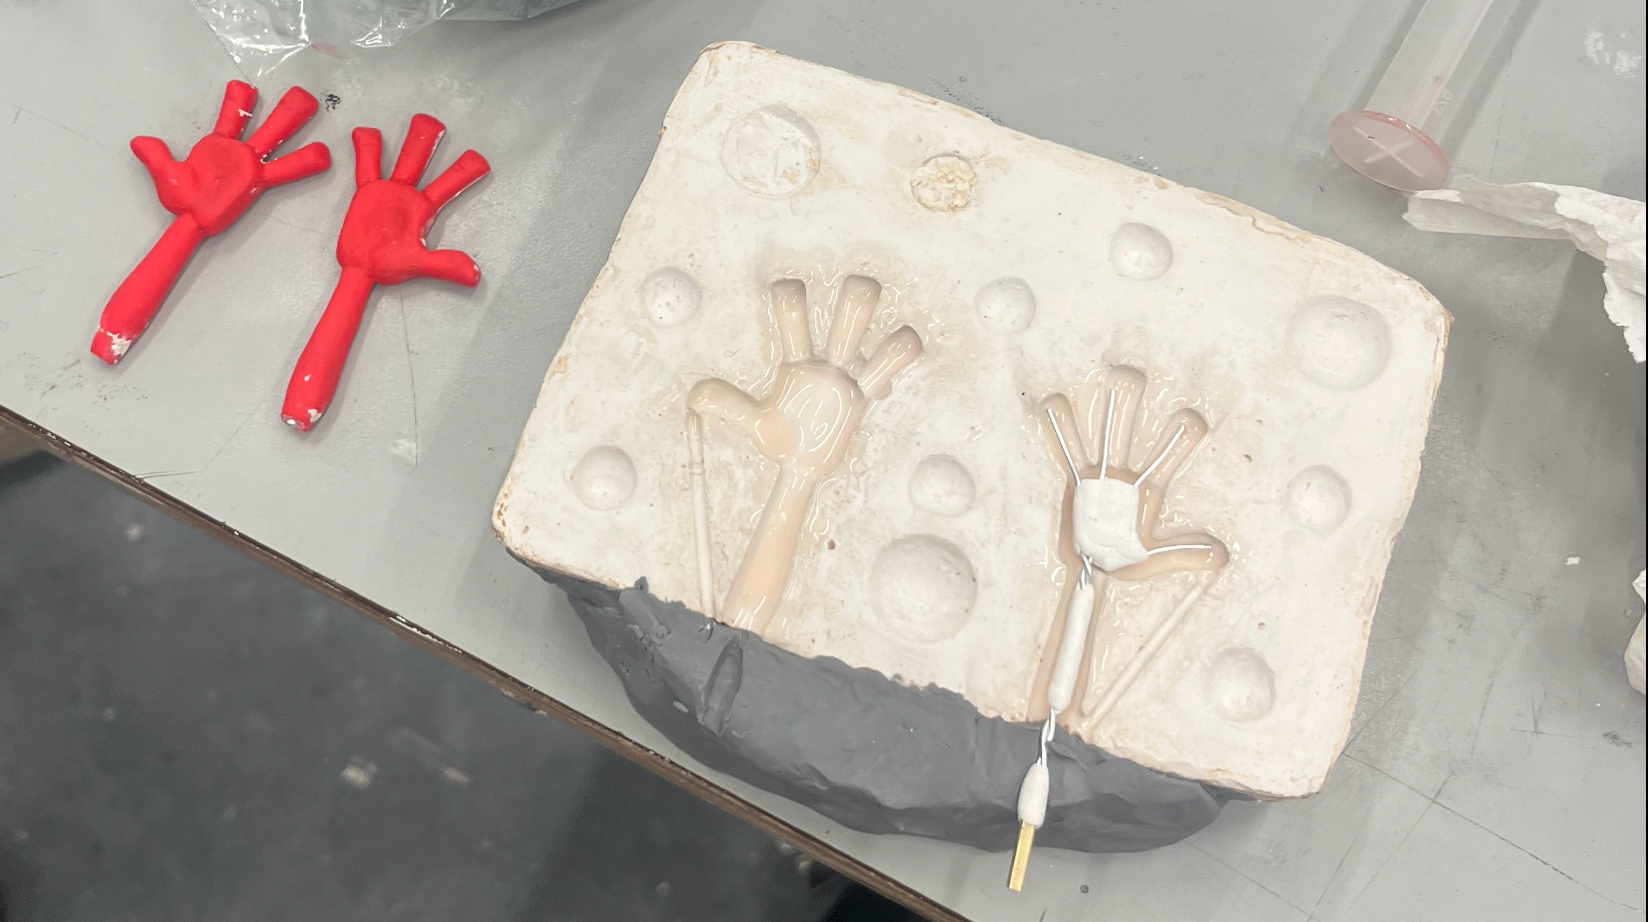
Moldmaking:
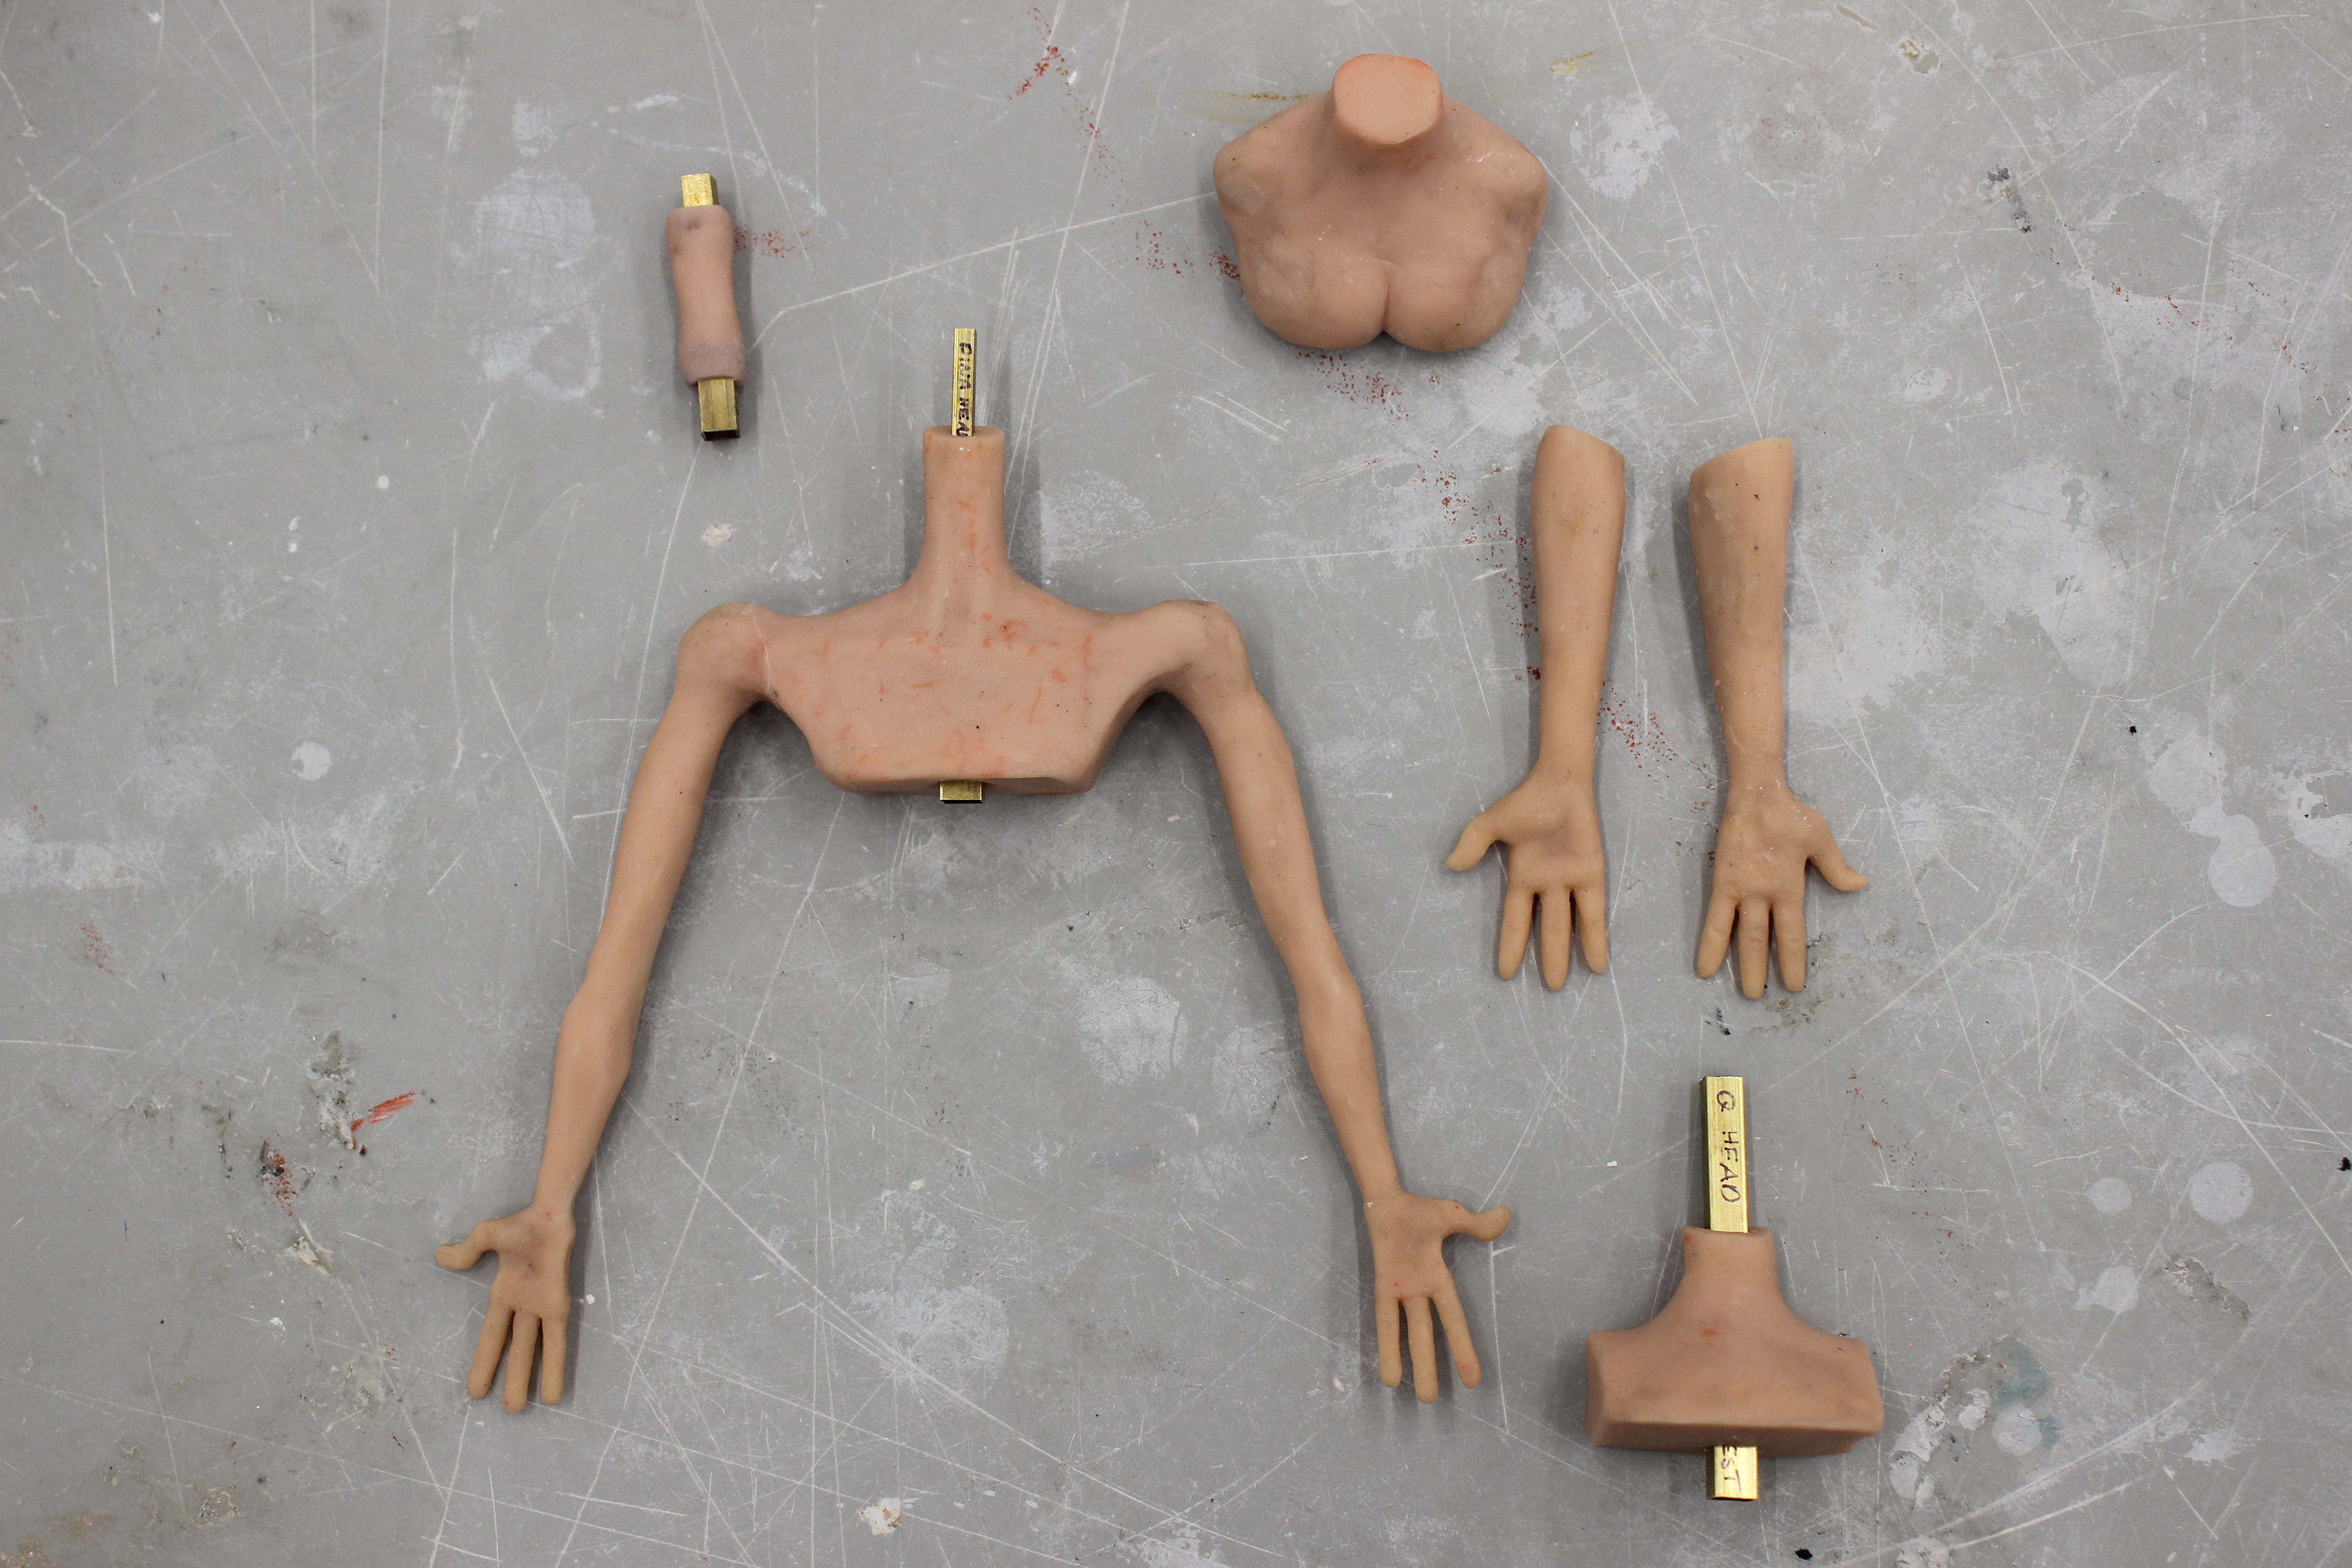
Making a 2-Part Mold for Dina's upper body, using brass in the polymer clay sculpts to provide registration keys for the armature to align properly when casting. For the mold I used a variety of mold keys to ensure proper alignment and a clean cast. I also added mold vents for silicone overflow for ease of de-molding.
Casting:
Using Dragon Skin Fast for quick brush on layers to add skin flushes and bruises to her skin. I then did an opaque brush on coat directly on the armature to hide any visible wire that would be cast close to the surface of the puppet. After that was complete, I casted the rest of the volume using a squish mold technique:

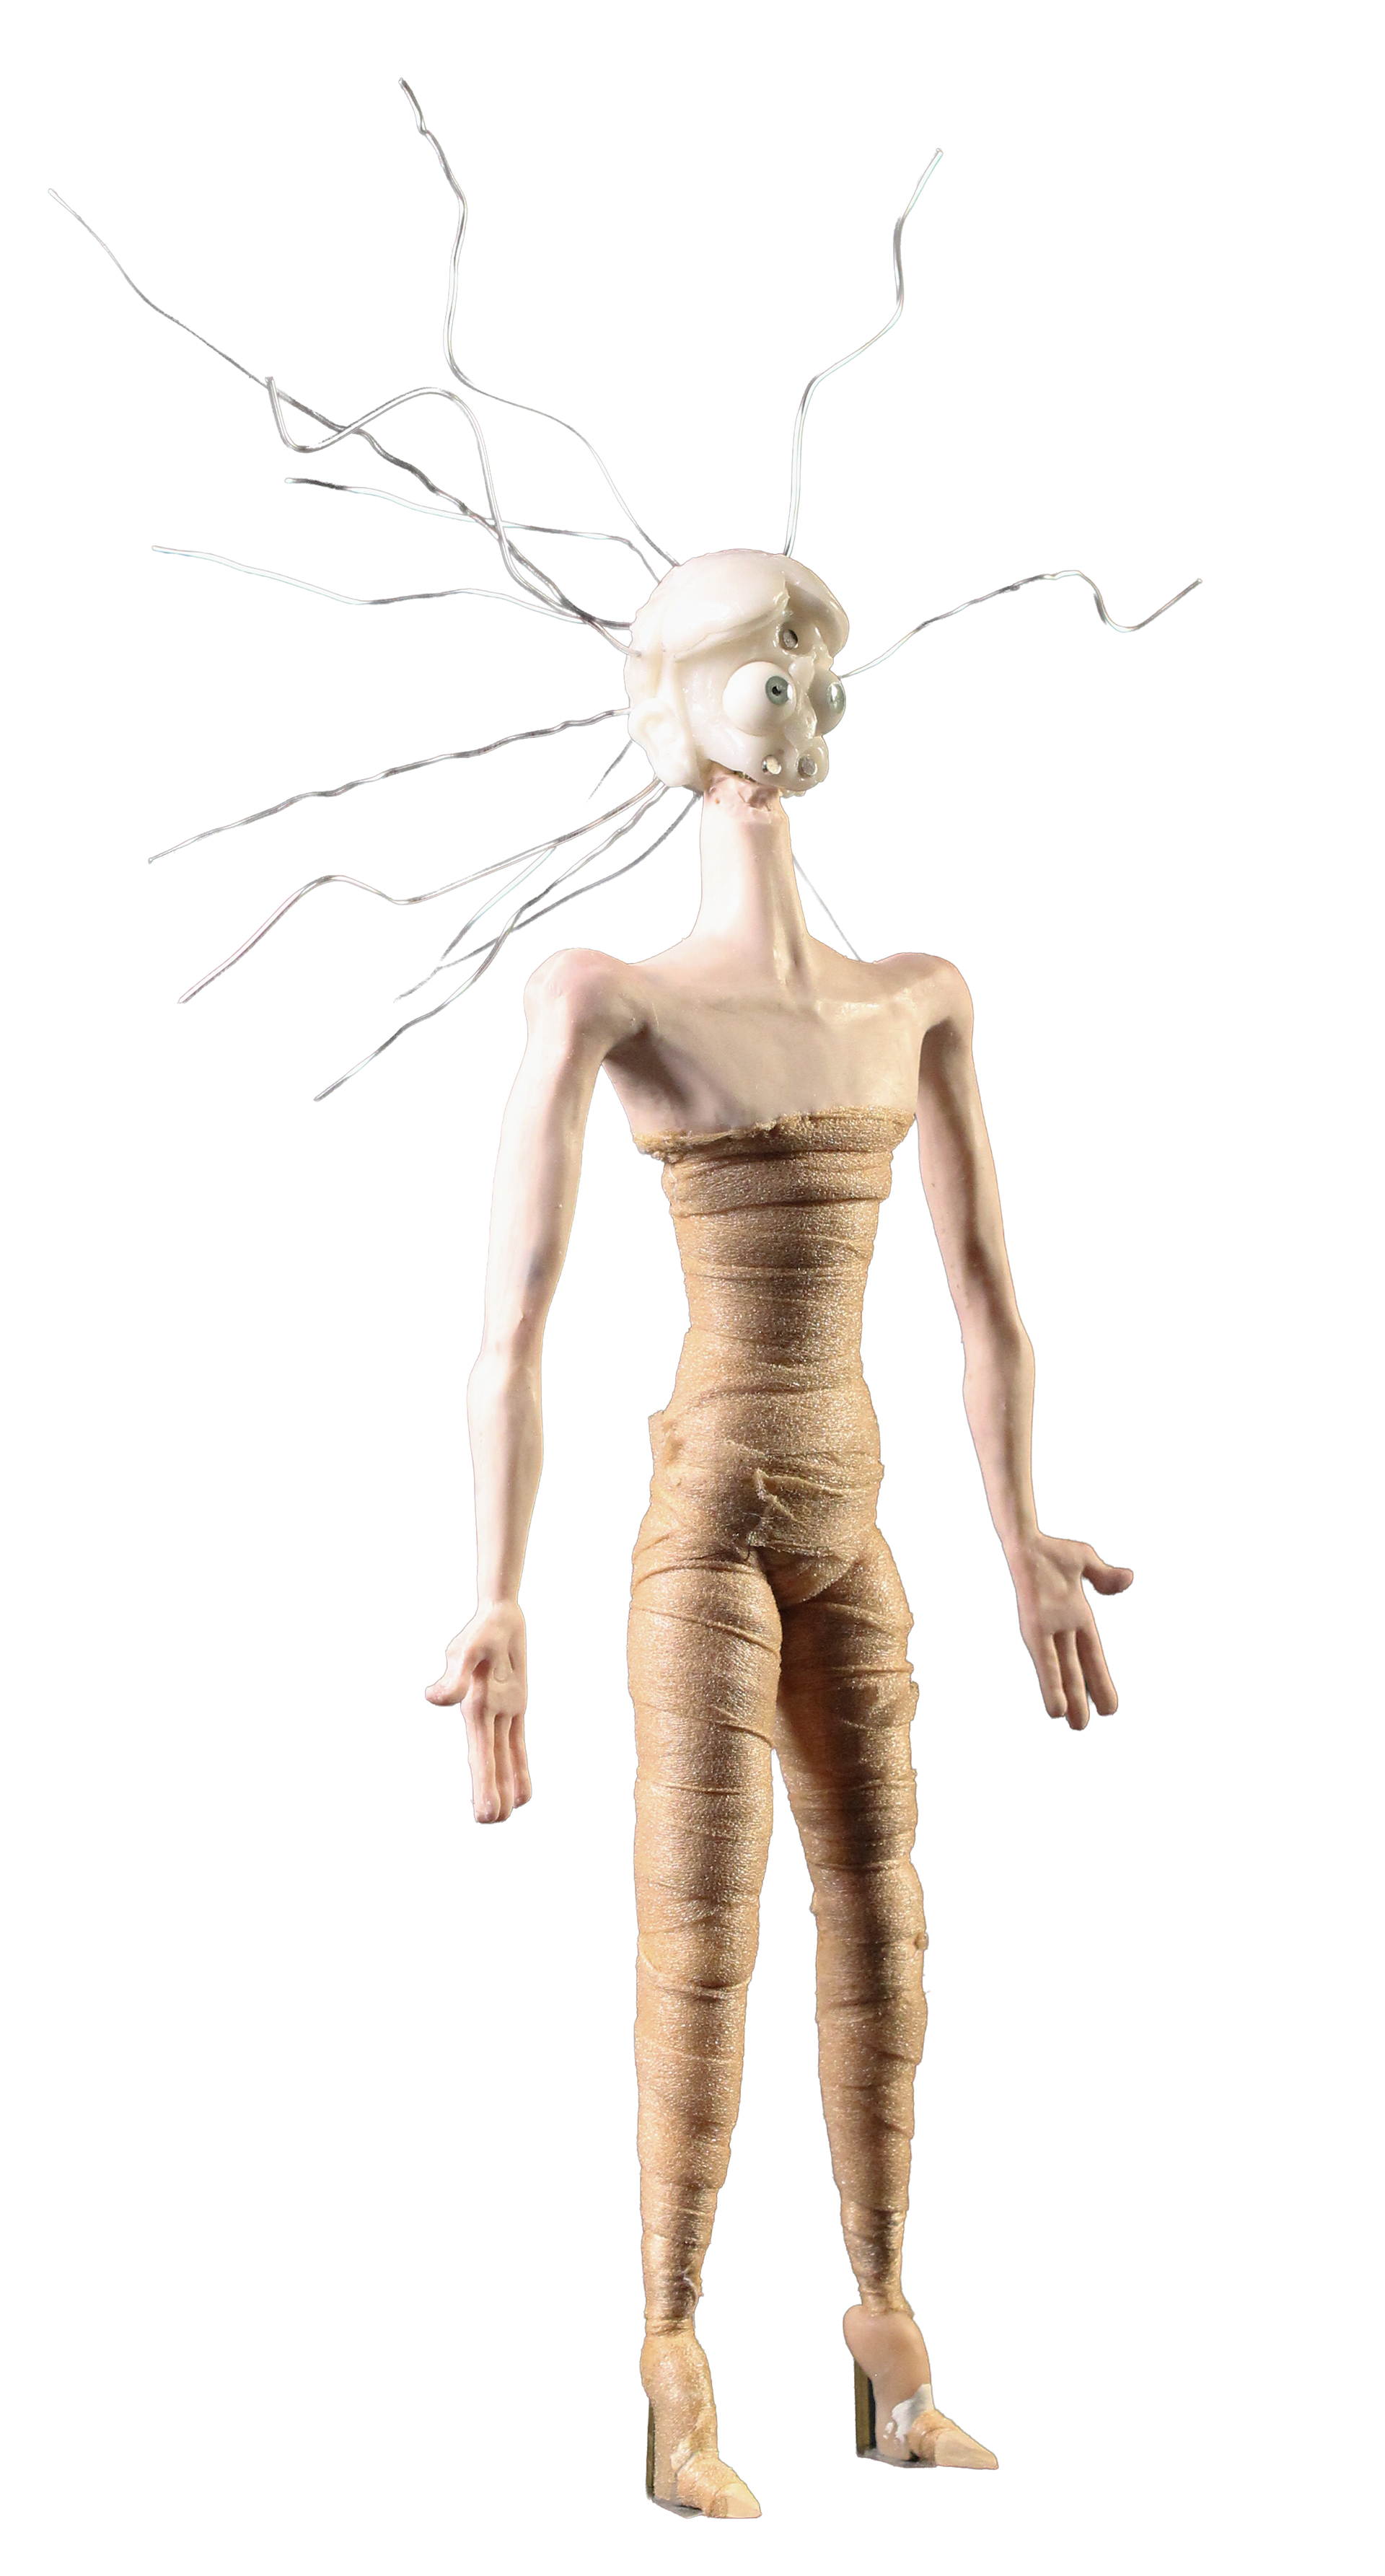
Once the base puppet form was complete, I went back in and tensioned the ball and socket joints with an allen key to better support the body mechanics of the puppet before she was passed off to our costume fabricator.
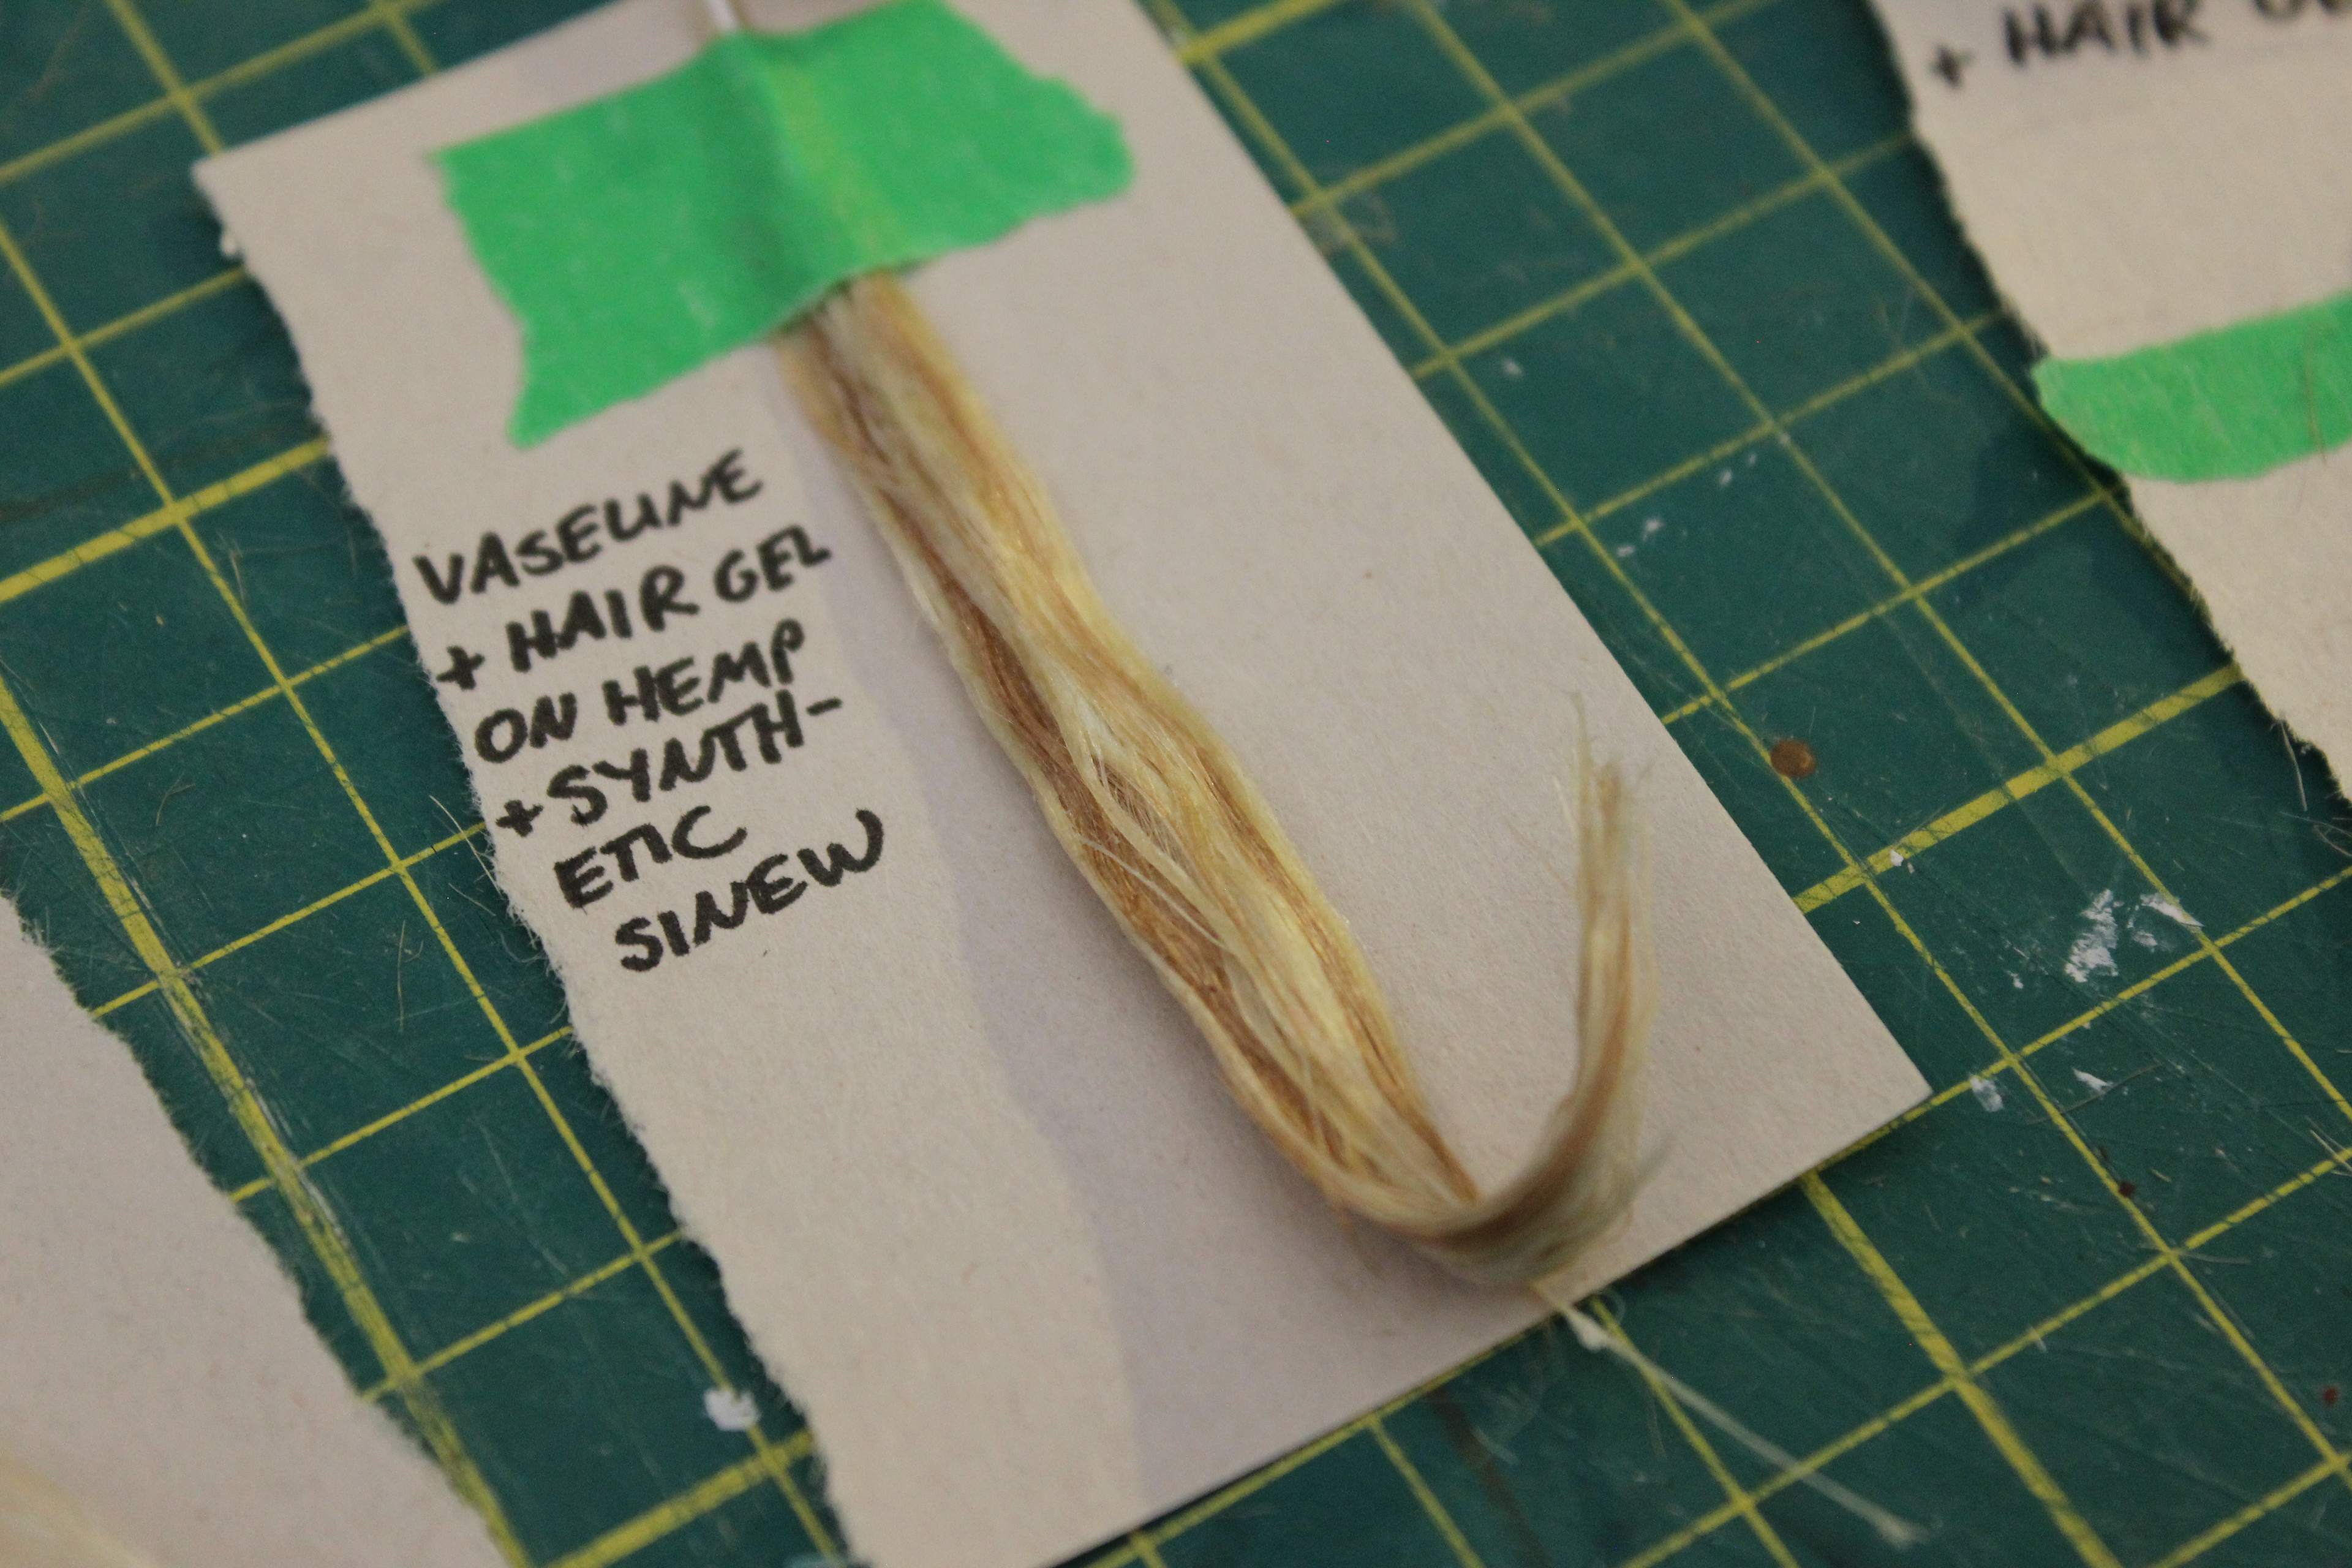
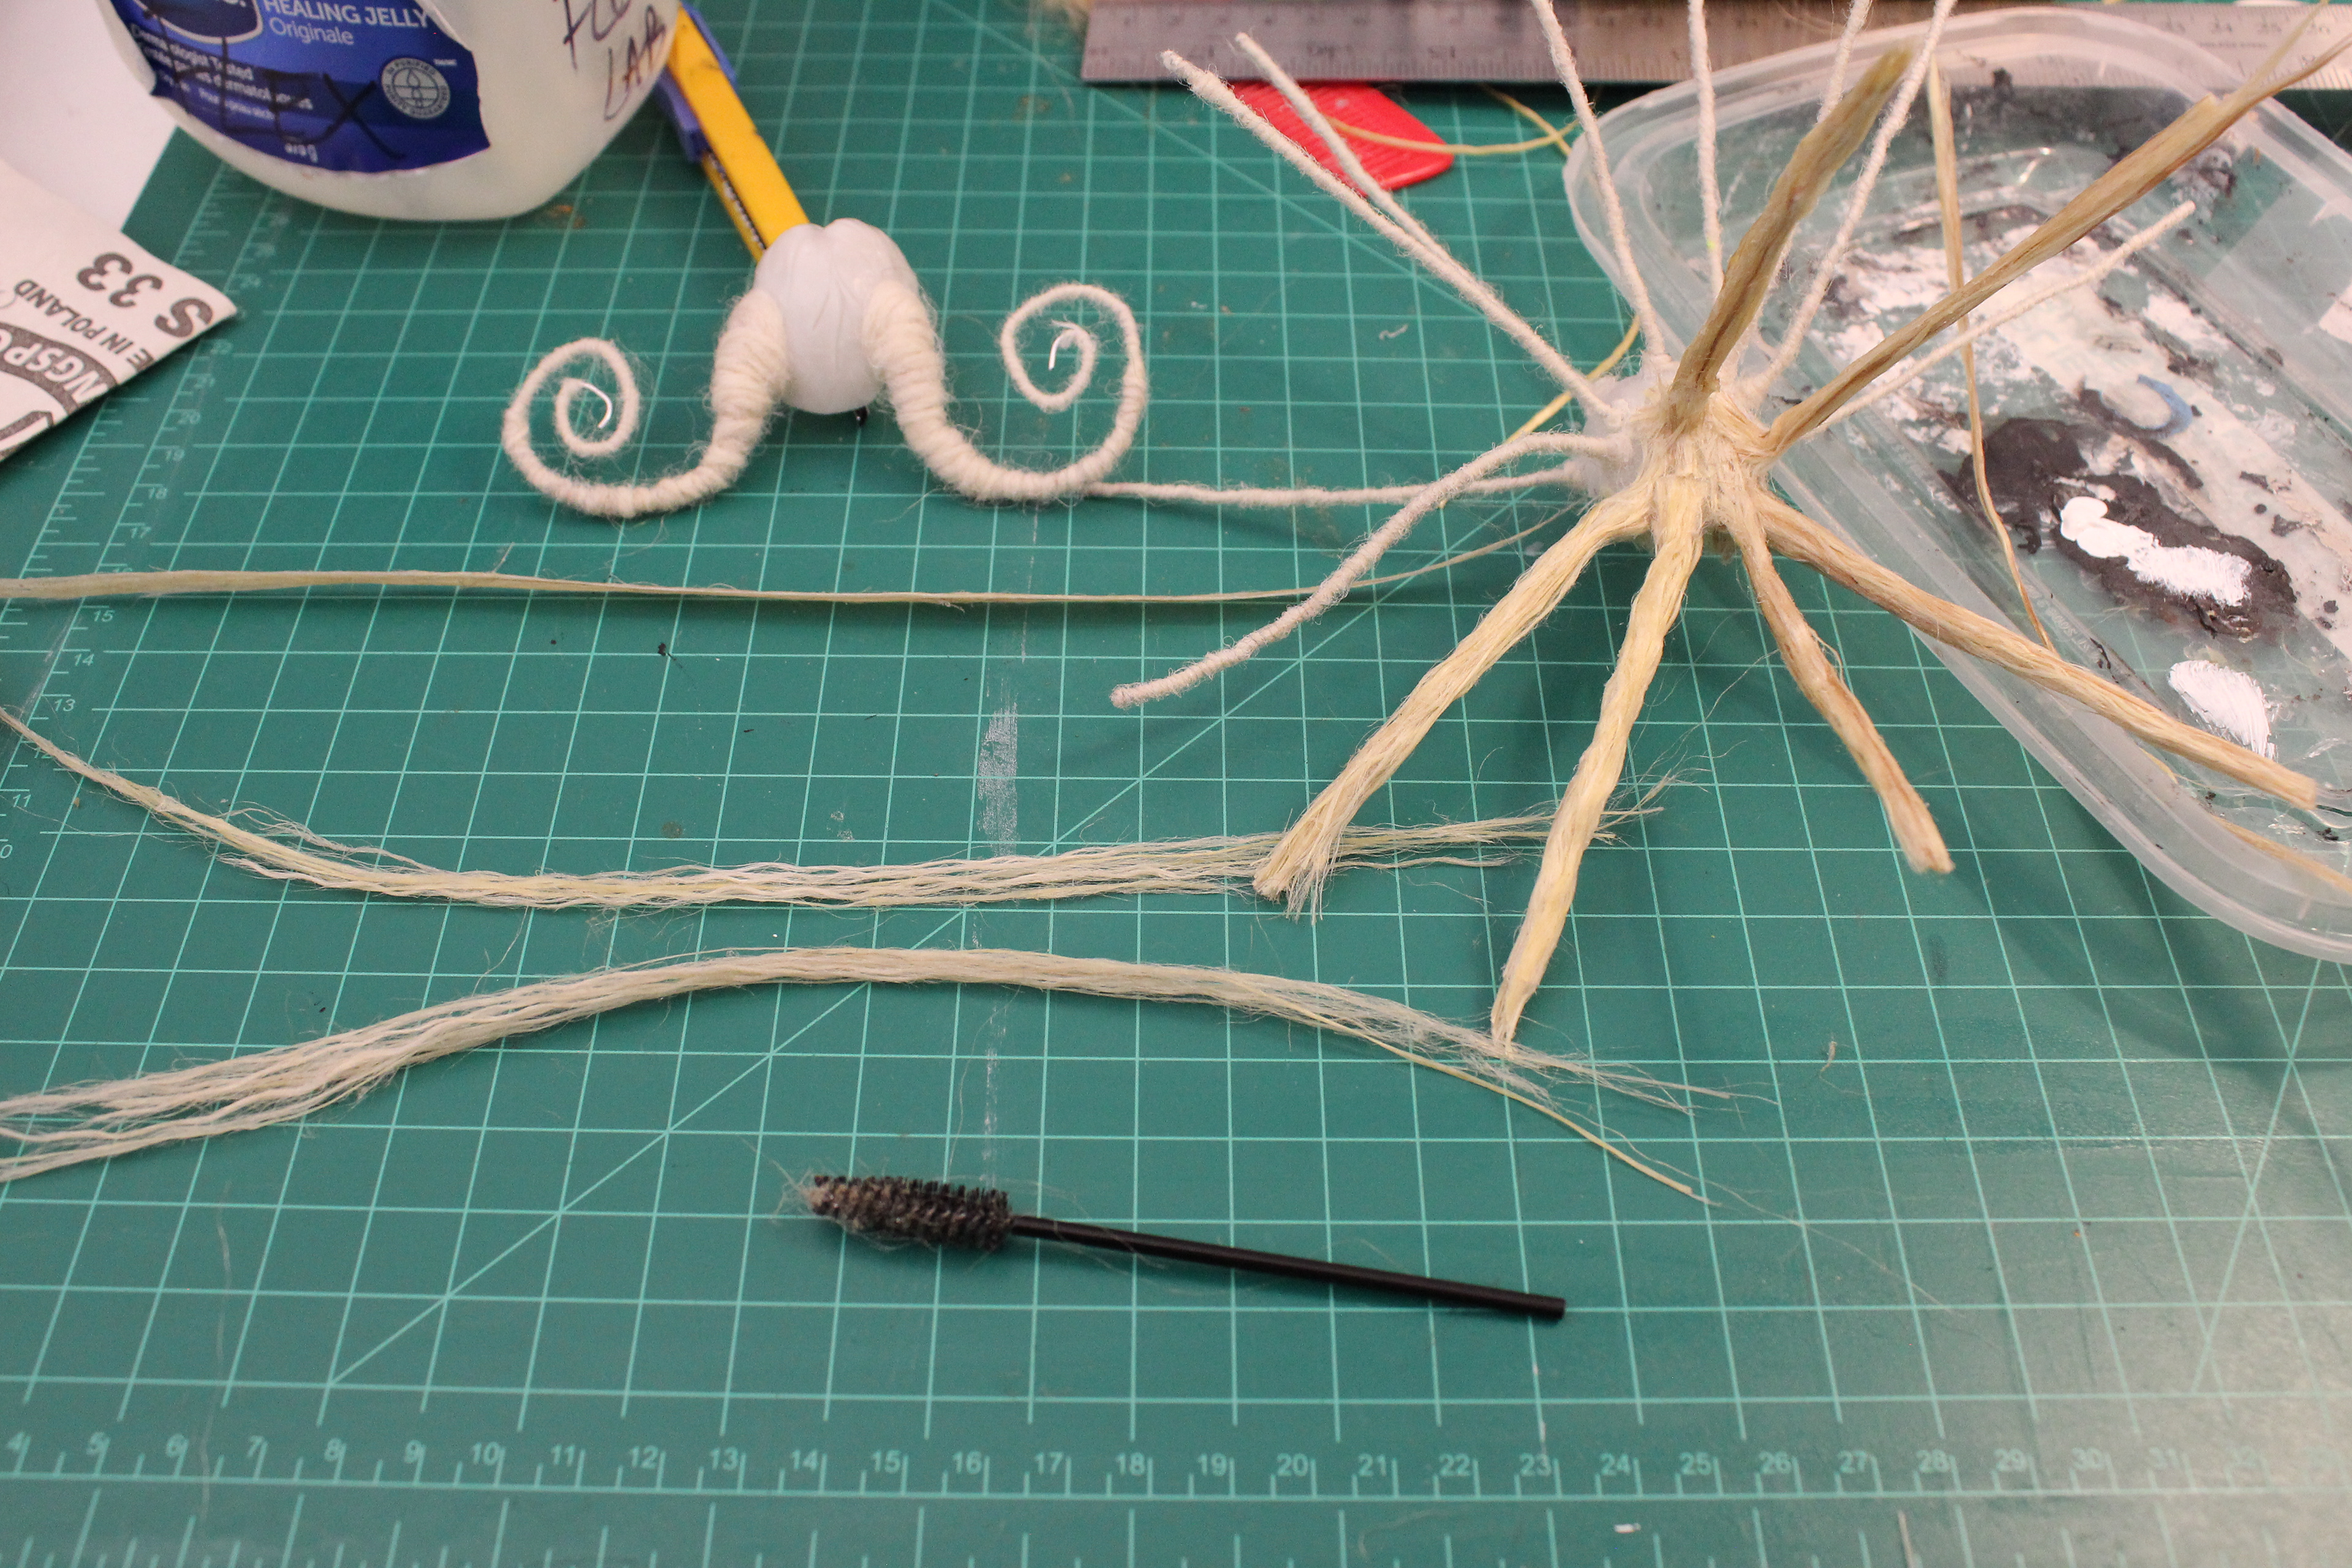
Puppet Hair:
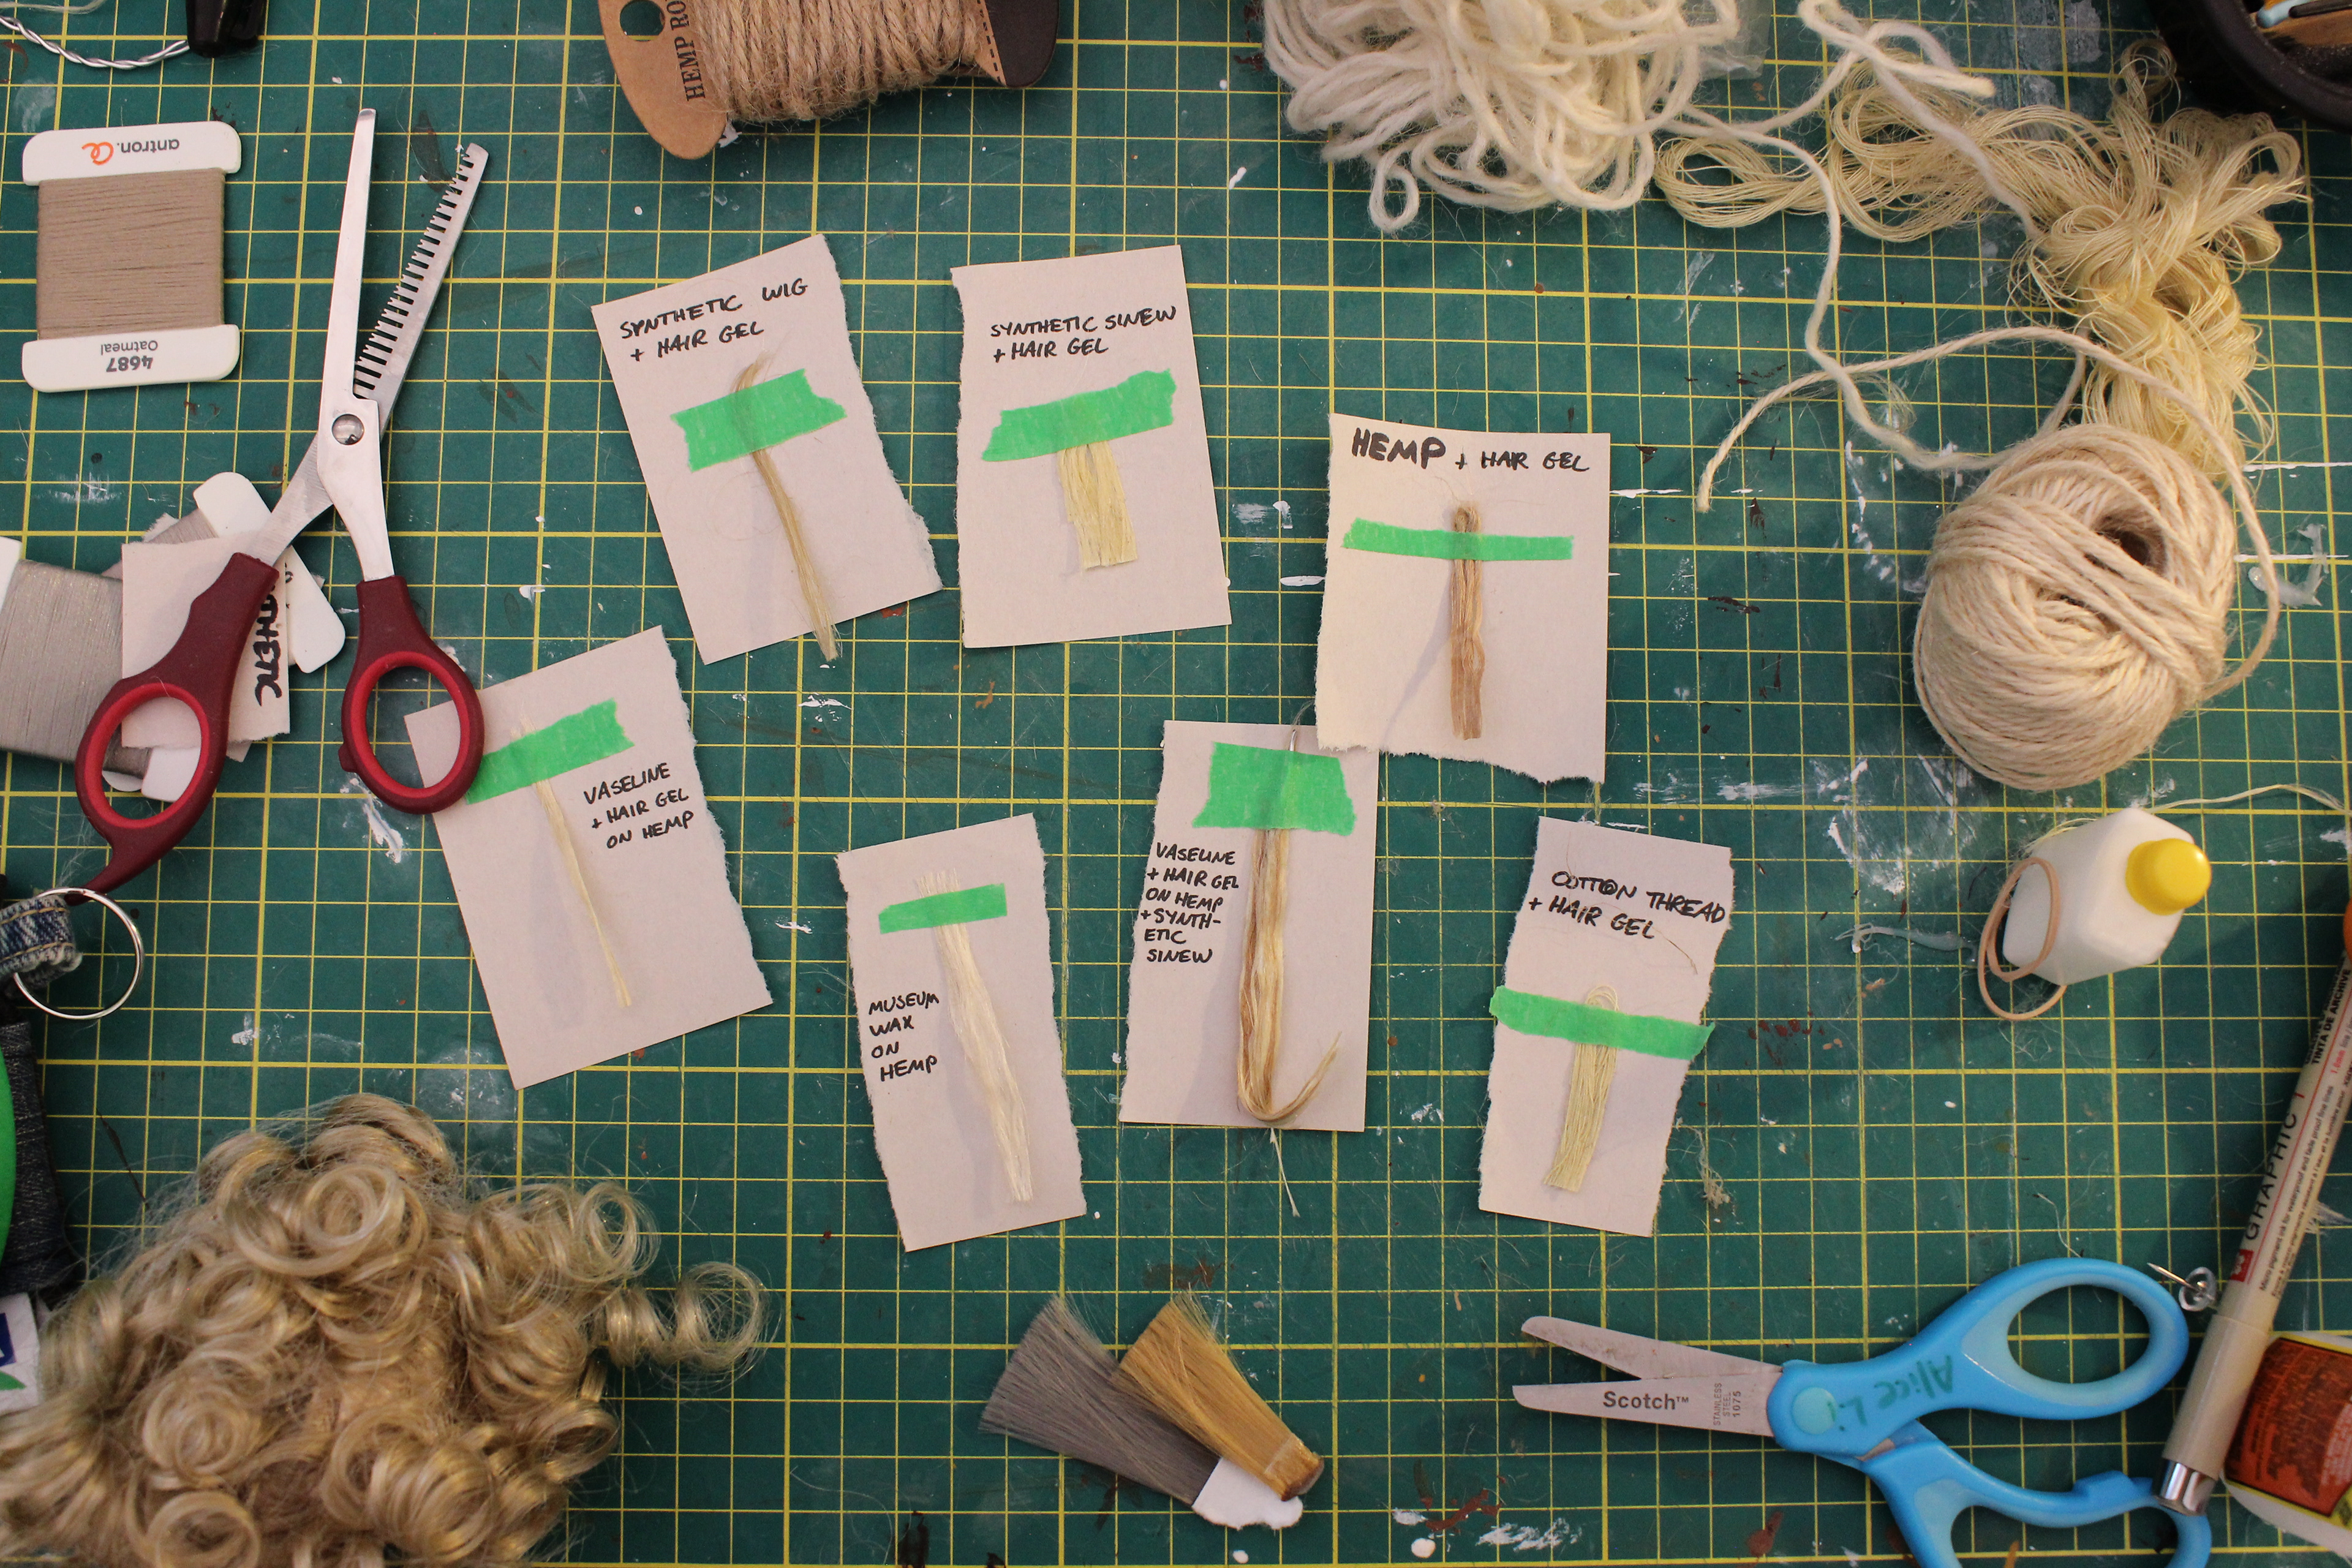
Dina's hair was built in 3 main components: her front bang piece, and two replacement wigs in different styles. I did thorough material testing to find fibres and materials that worked the best for appearance and functionality when animating. We settled on a combination of hemp, synthetic sinew, vaseline, and hair gel.
Replacement wig caps under the camera:
Animation by Ashley Johnsgaard
Armature Repairs:
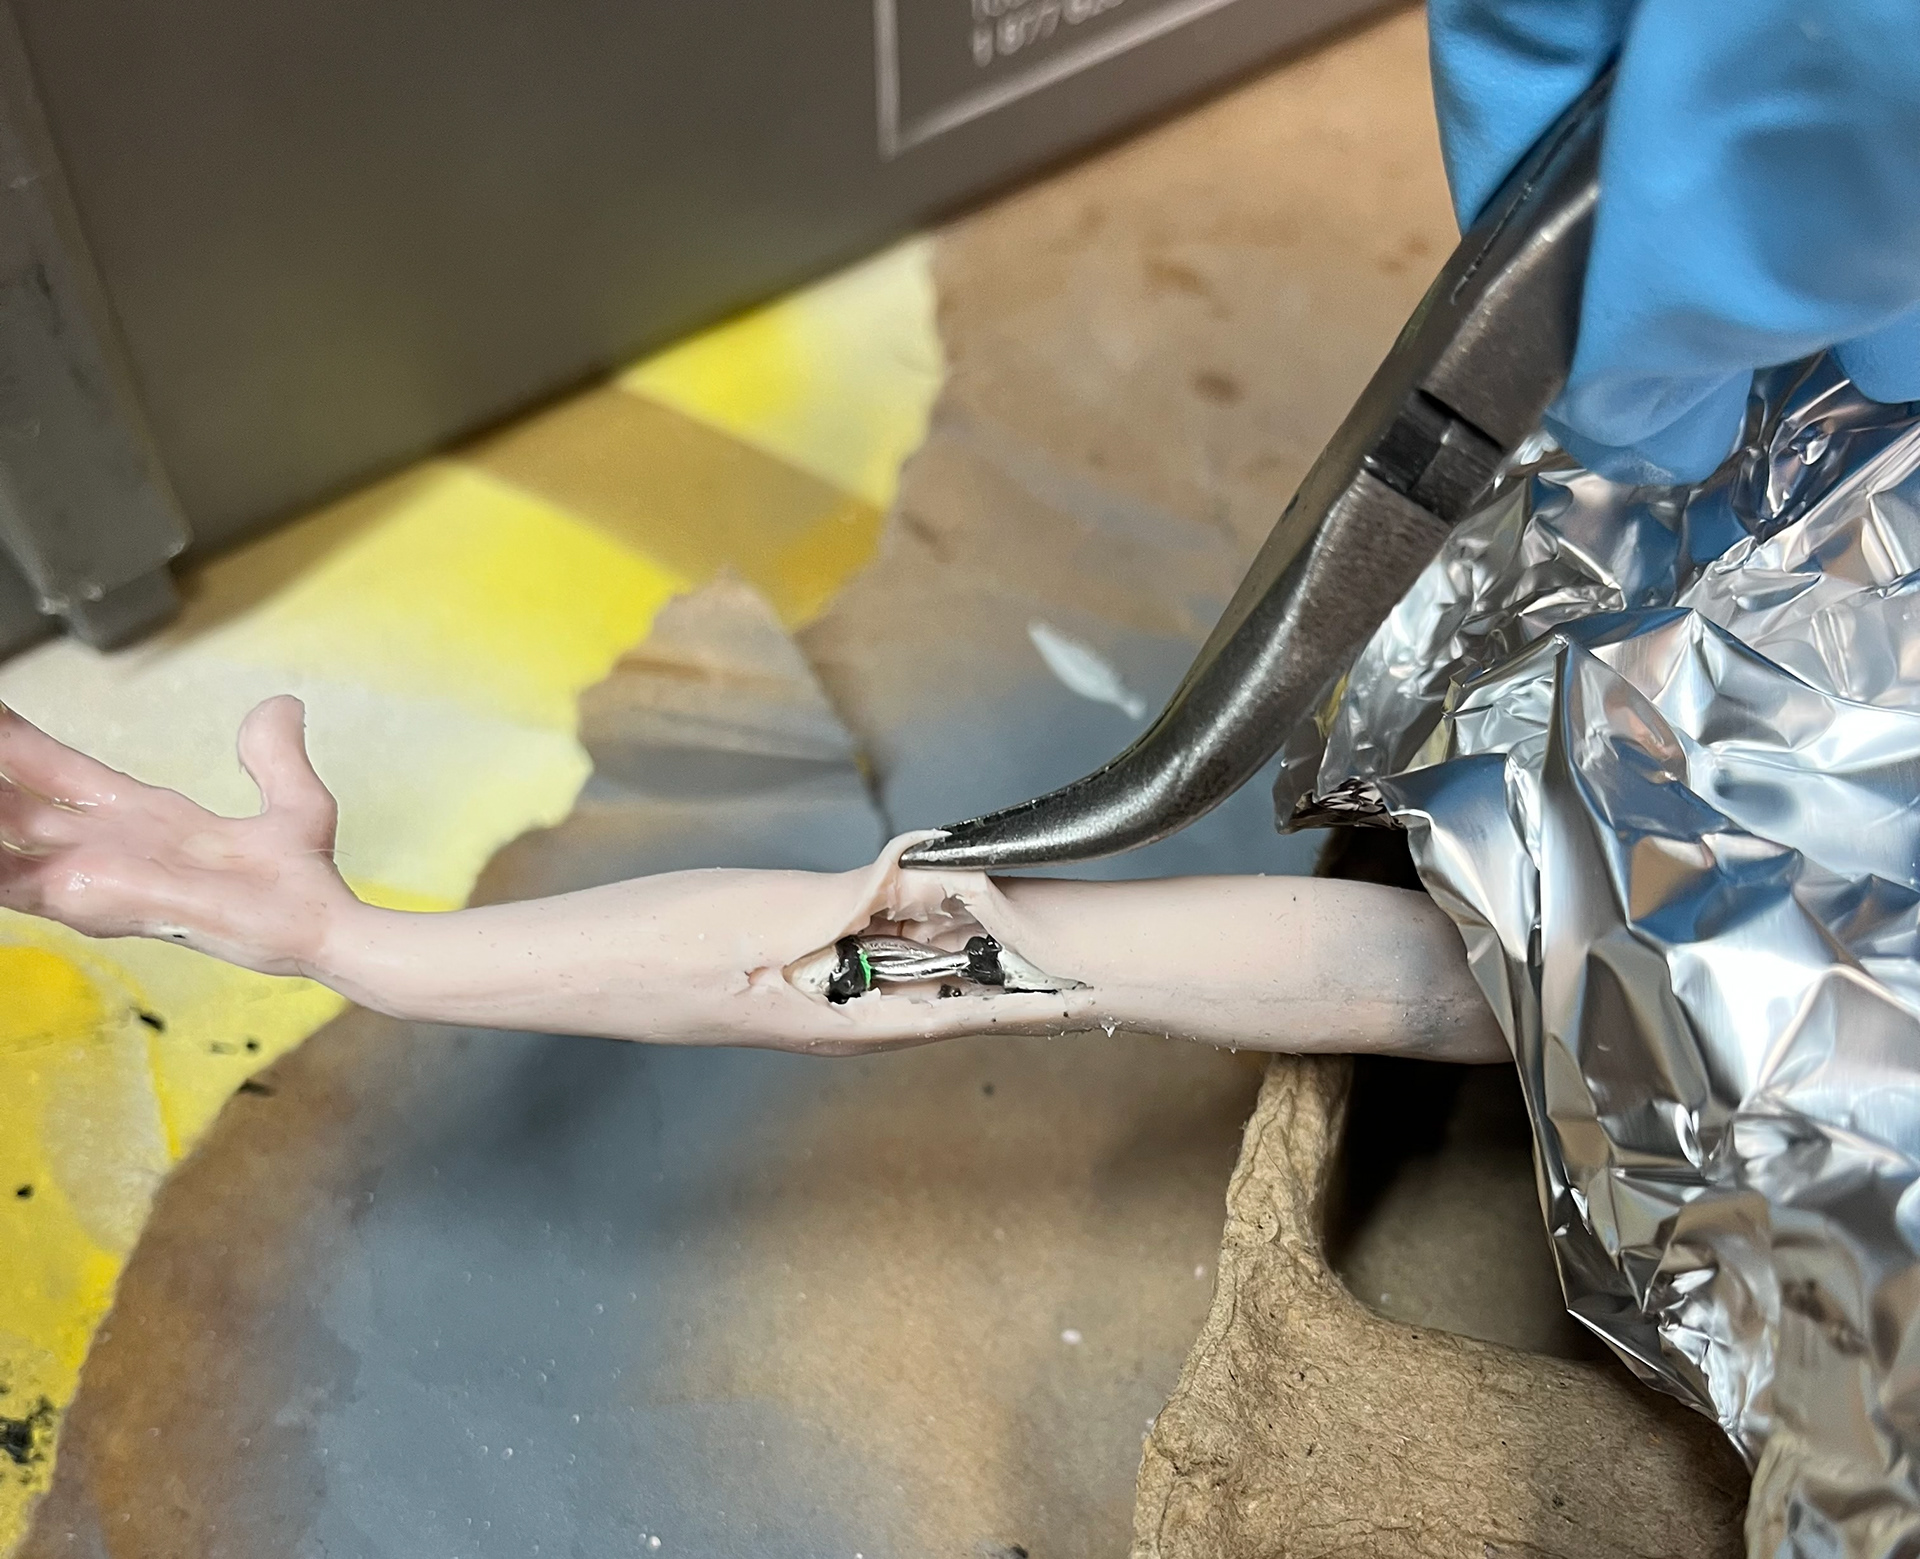
I initially used too small of wire gauge in Dina's elbows as her arms bent against the resistance of the silicone, which caused the arm wires to wear down quicker. To fix this break, I trimmed away the broken wire and drilled new holes for a larger gauge wire to fit into before epoxying the arm back together. I masked out the inside of the silicone arm with tape to protect it from any epoxy.
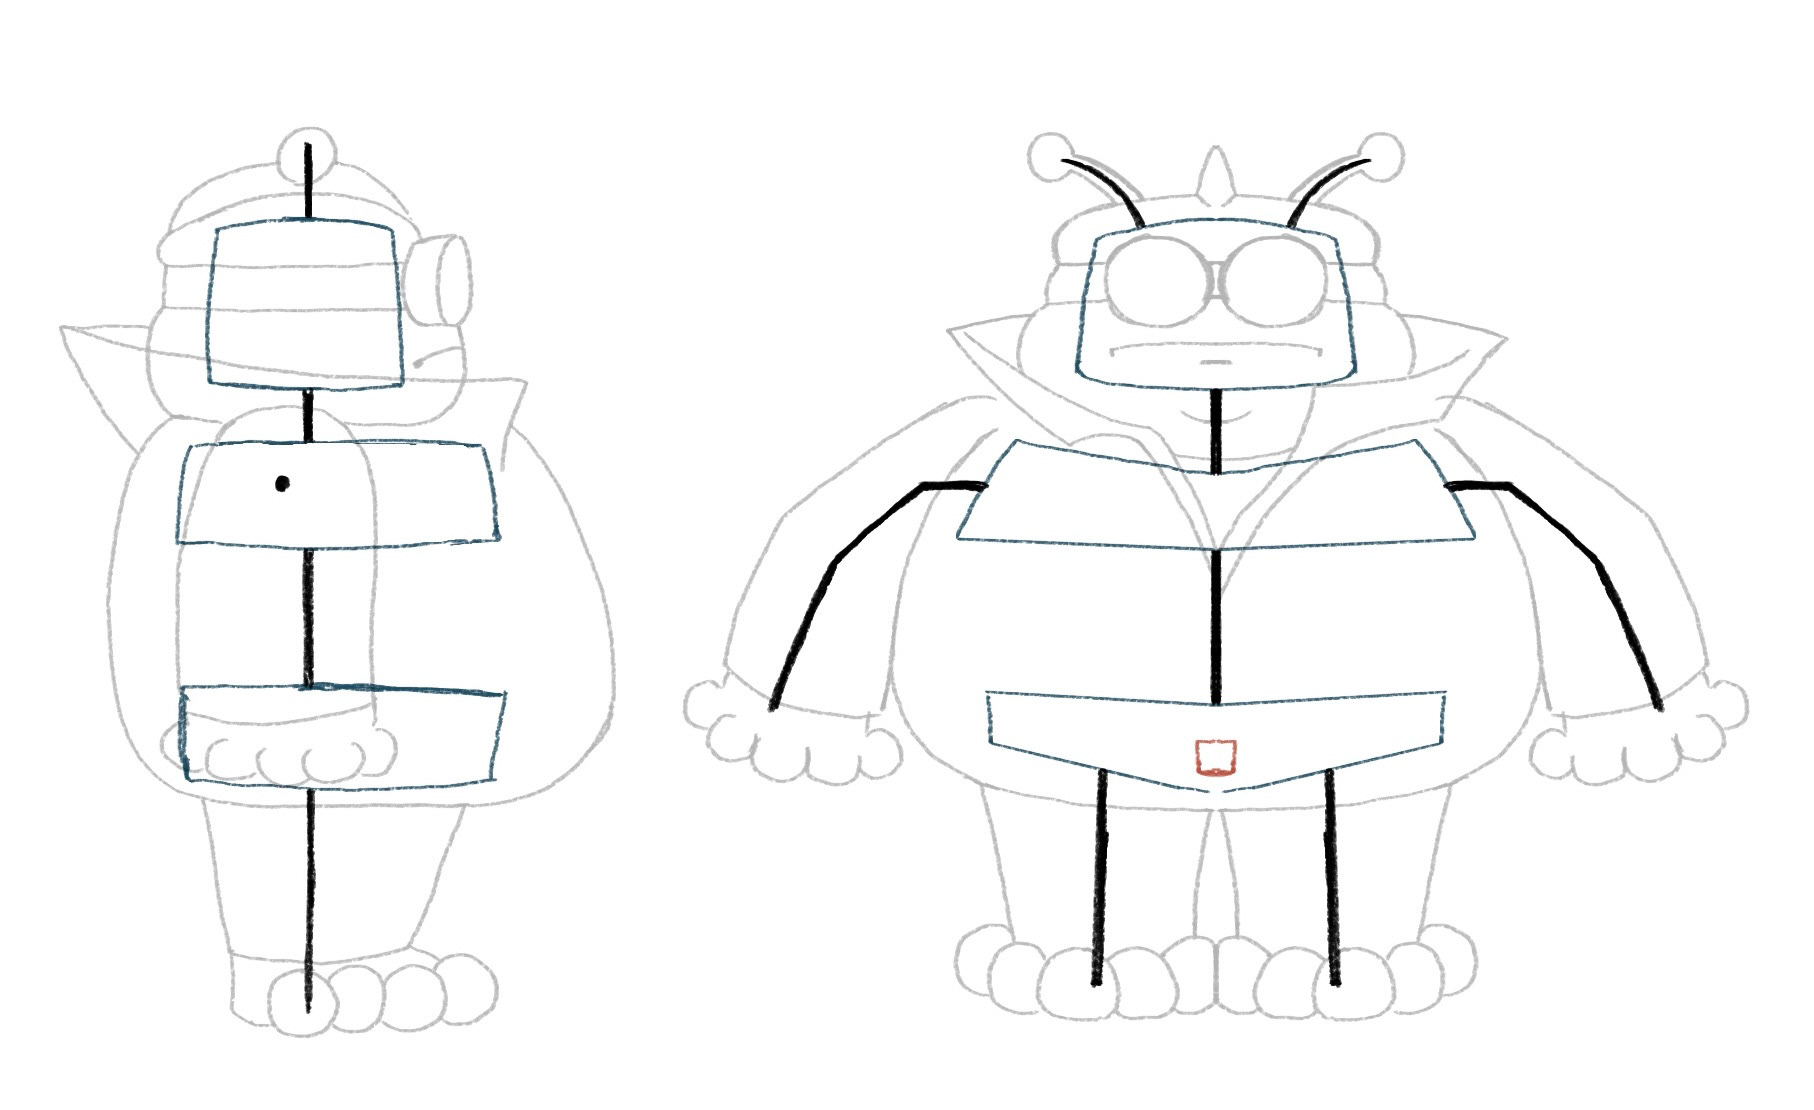
Misc. Puppet Scale Sheets:
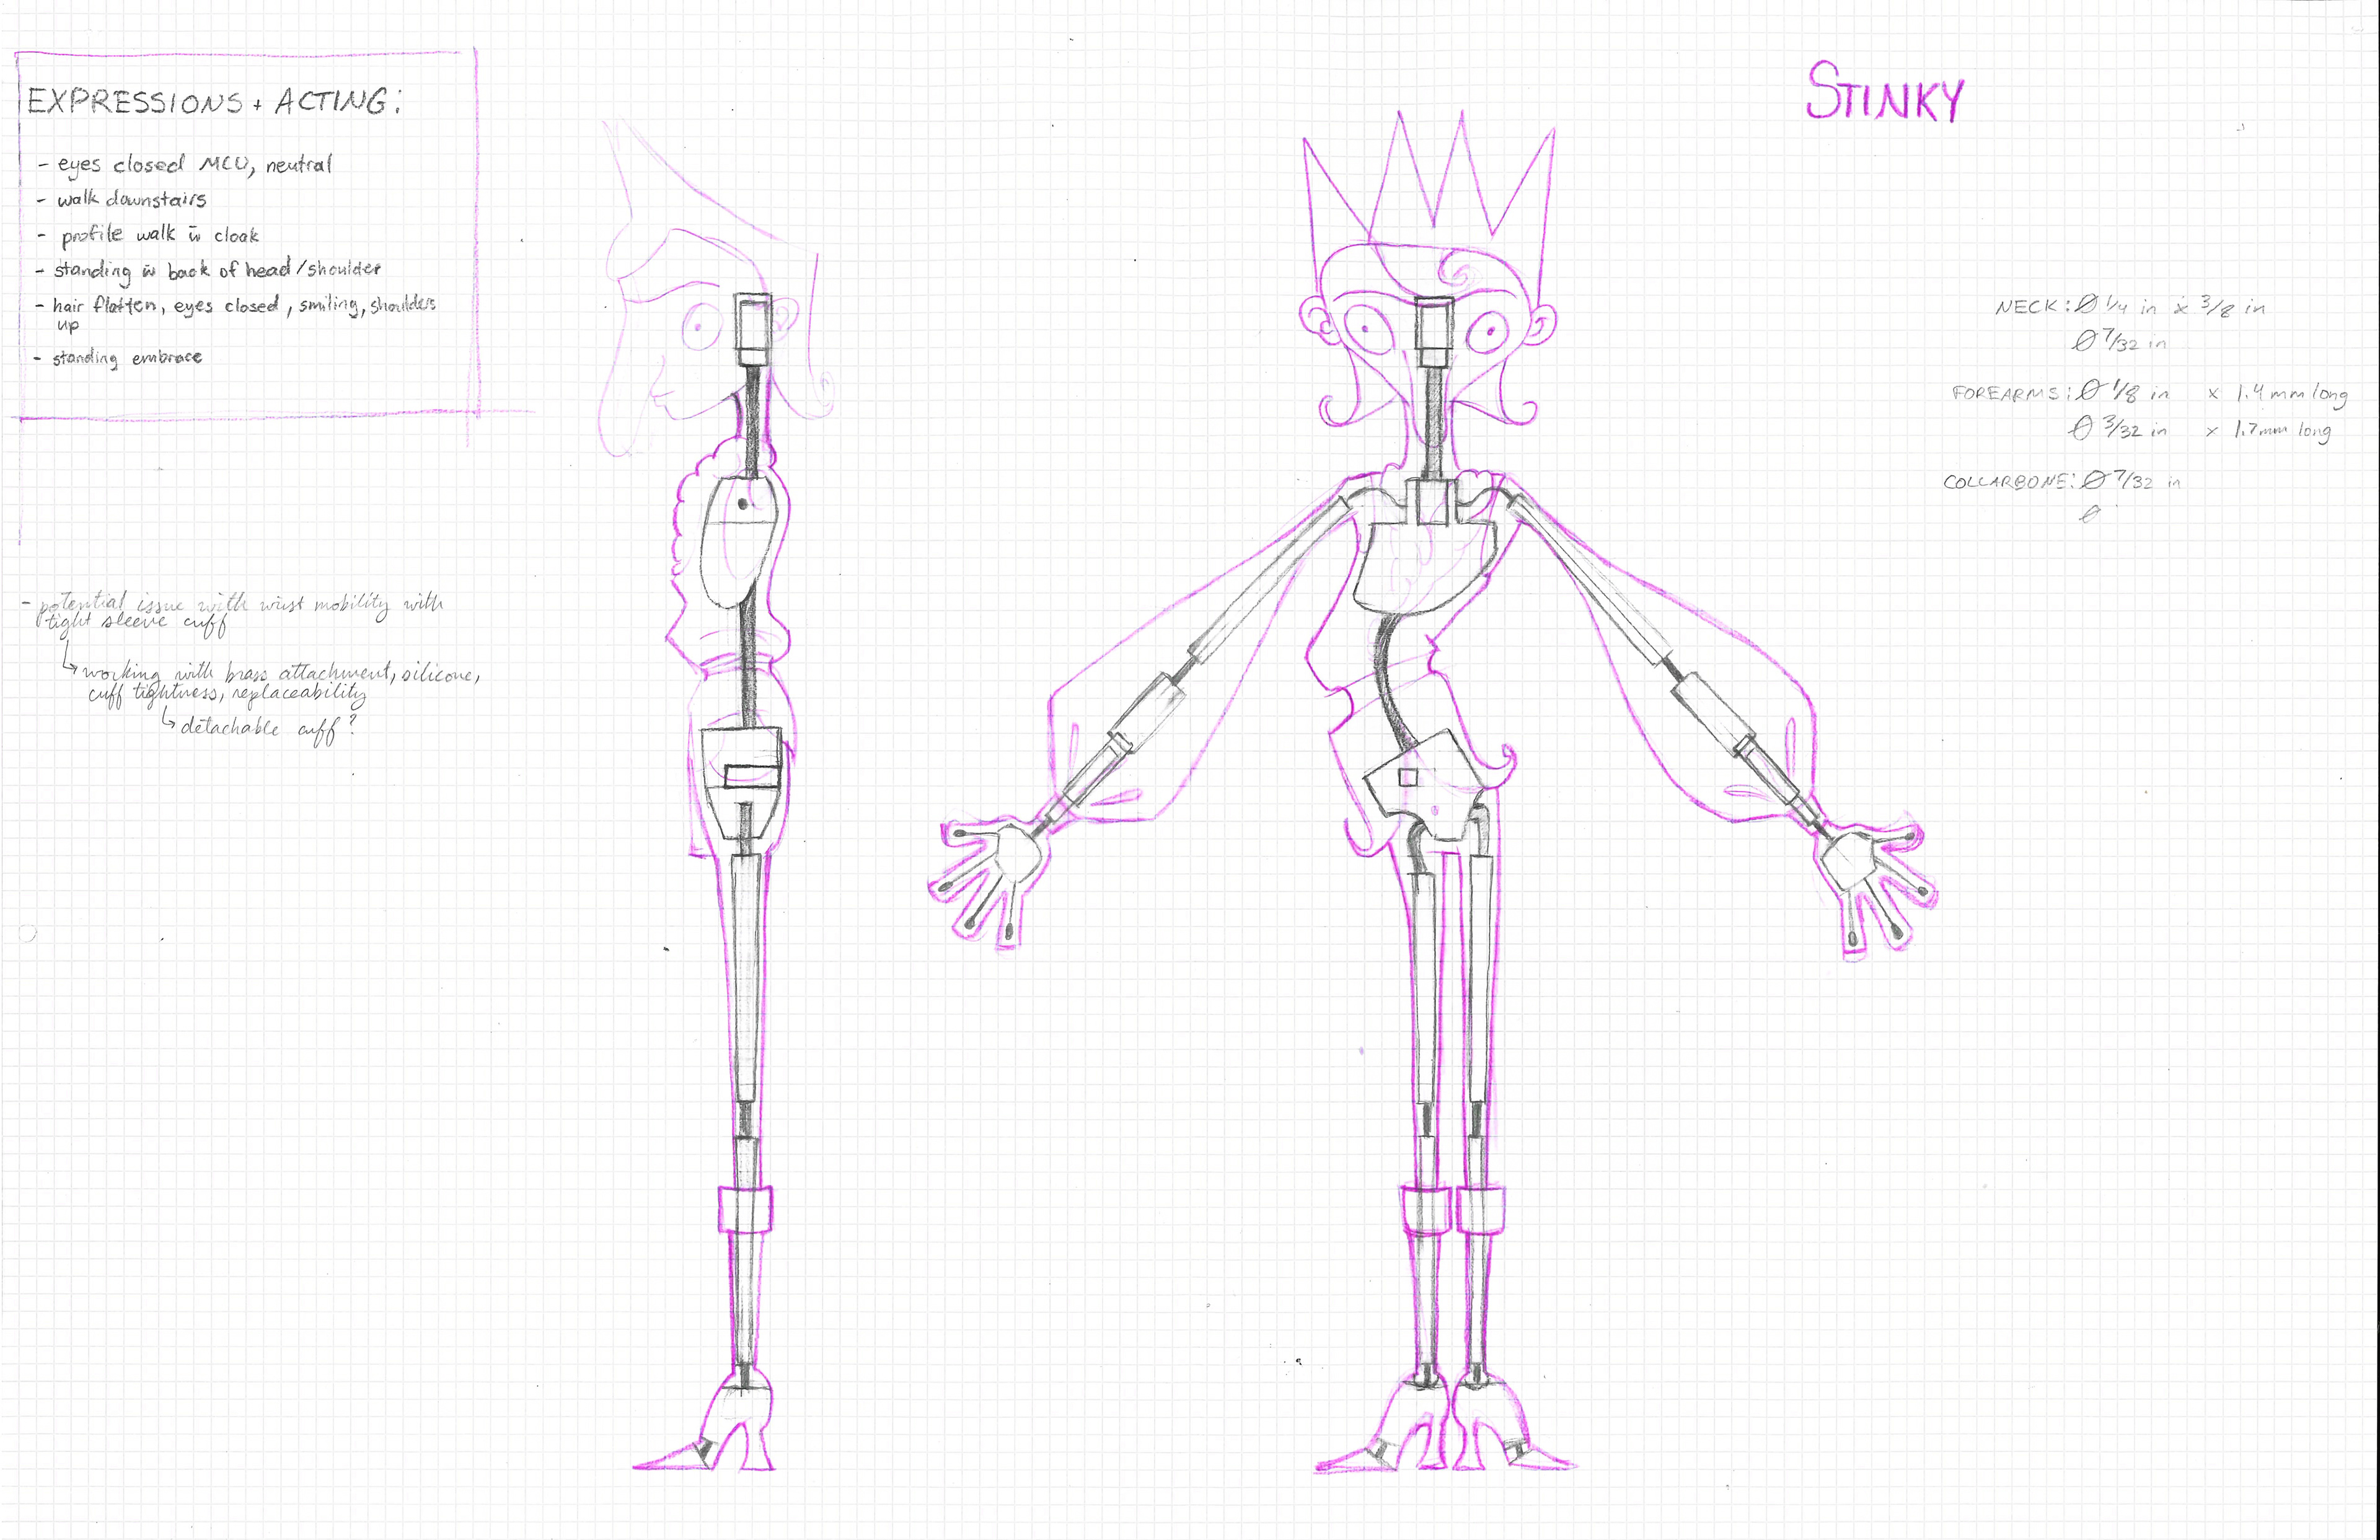
Character concepts are a collaboration with Ella Hiebert and Ashley Johnsgaard. Scale sheets and armature design by Ashley Johnsgaard.
Previous Puppet builds below:
Pilot Puppet
This was my first time making a wire puppet for stop motion animation, as well as my first time doing any sort of moldmaking and silicone casting.
Materials: Aluminum wire, wood, milliput epoxy putty, foam, square brass tubing, silicone, various fabrics/leather.
I started my process with character design and story, developing a female pilot character based off of women in wartime eras.

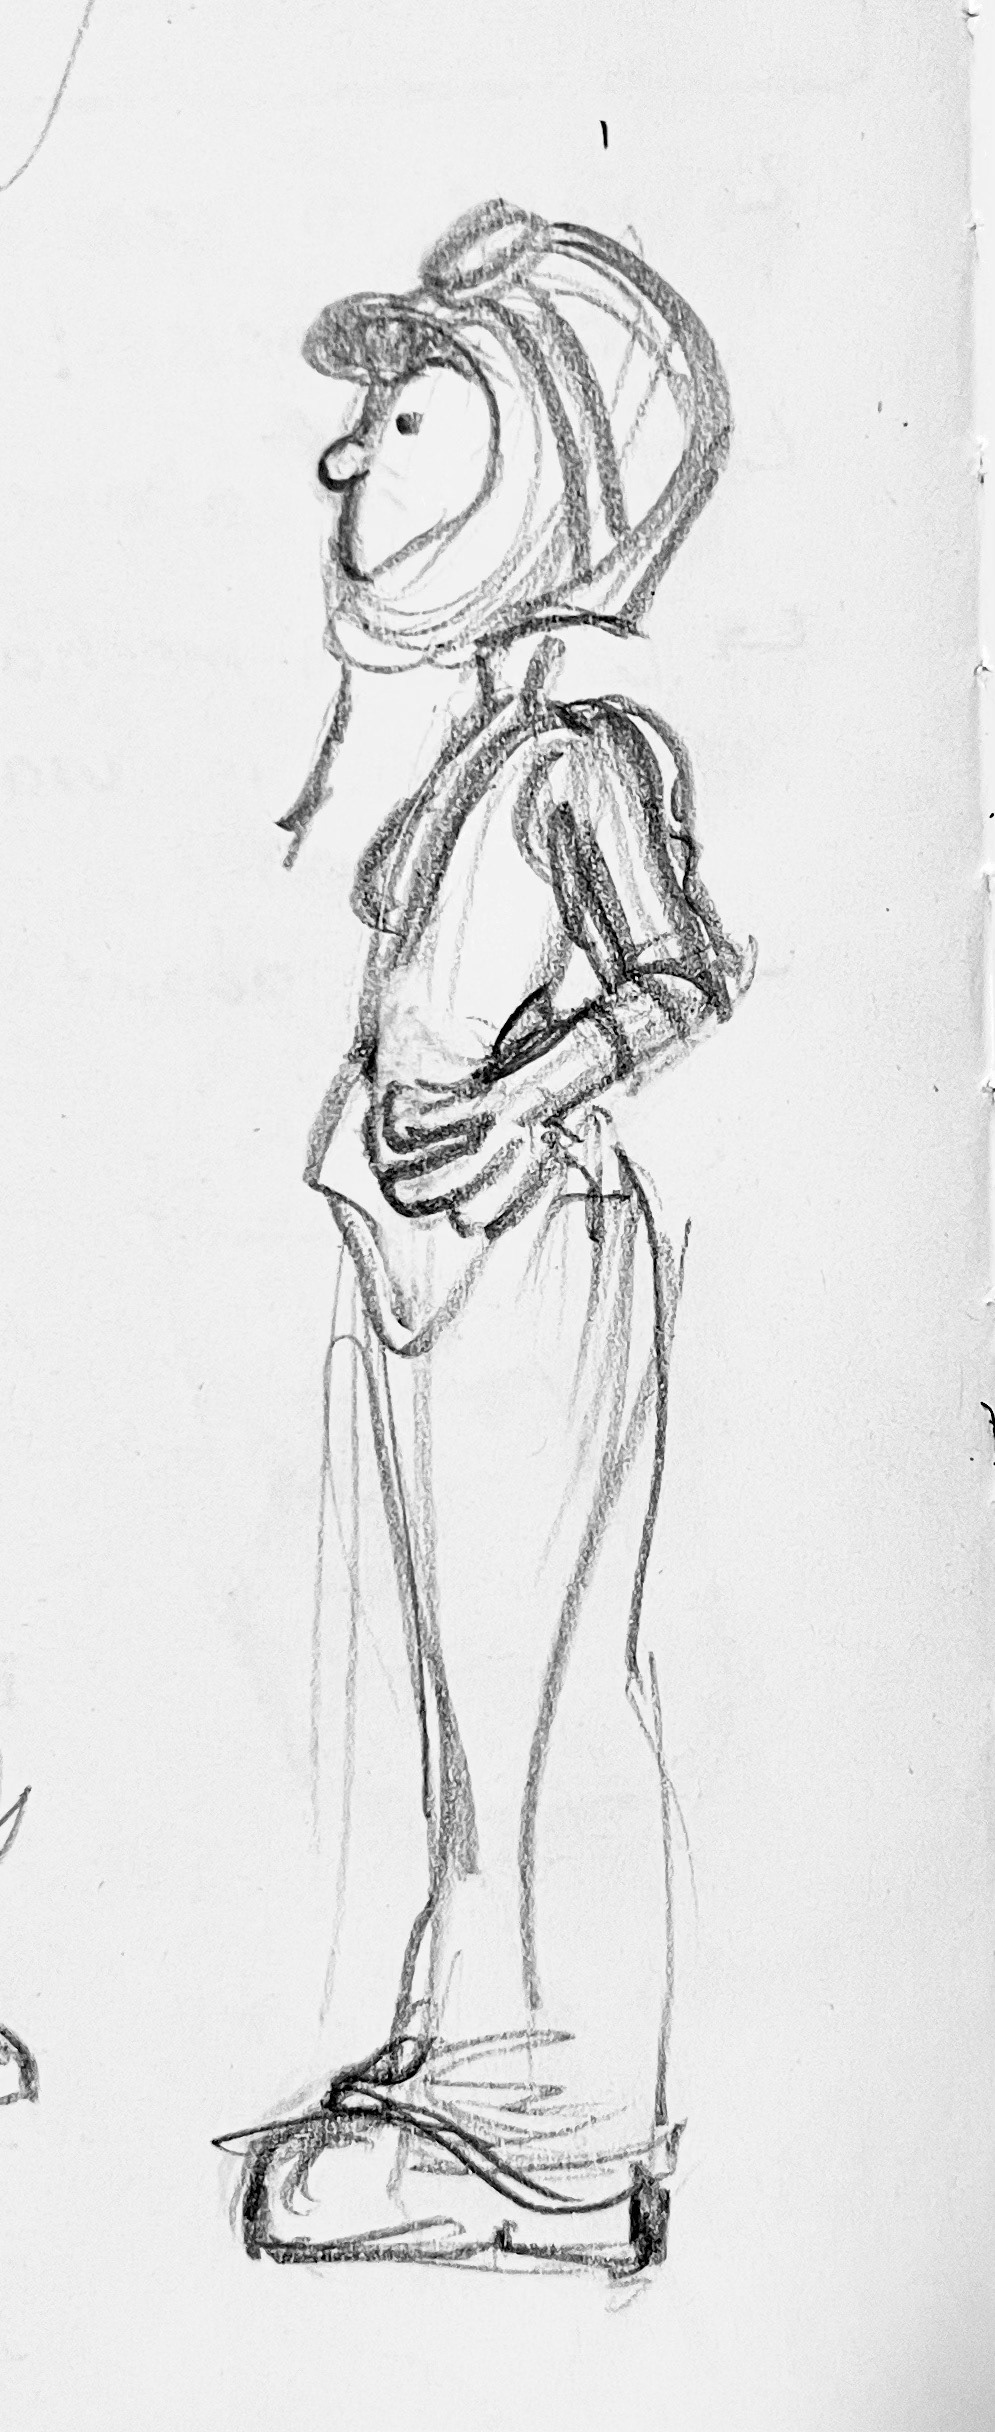
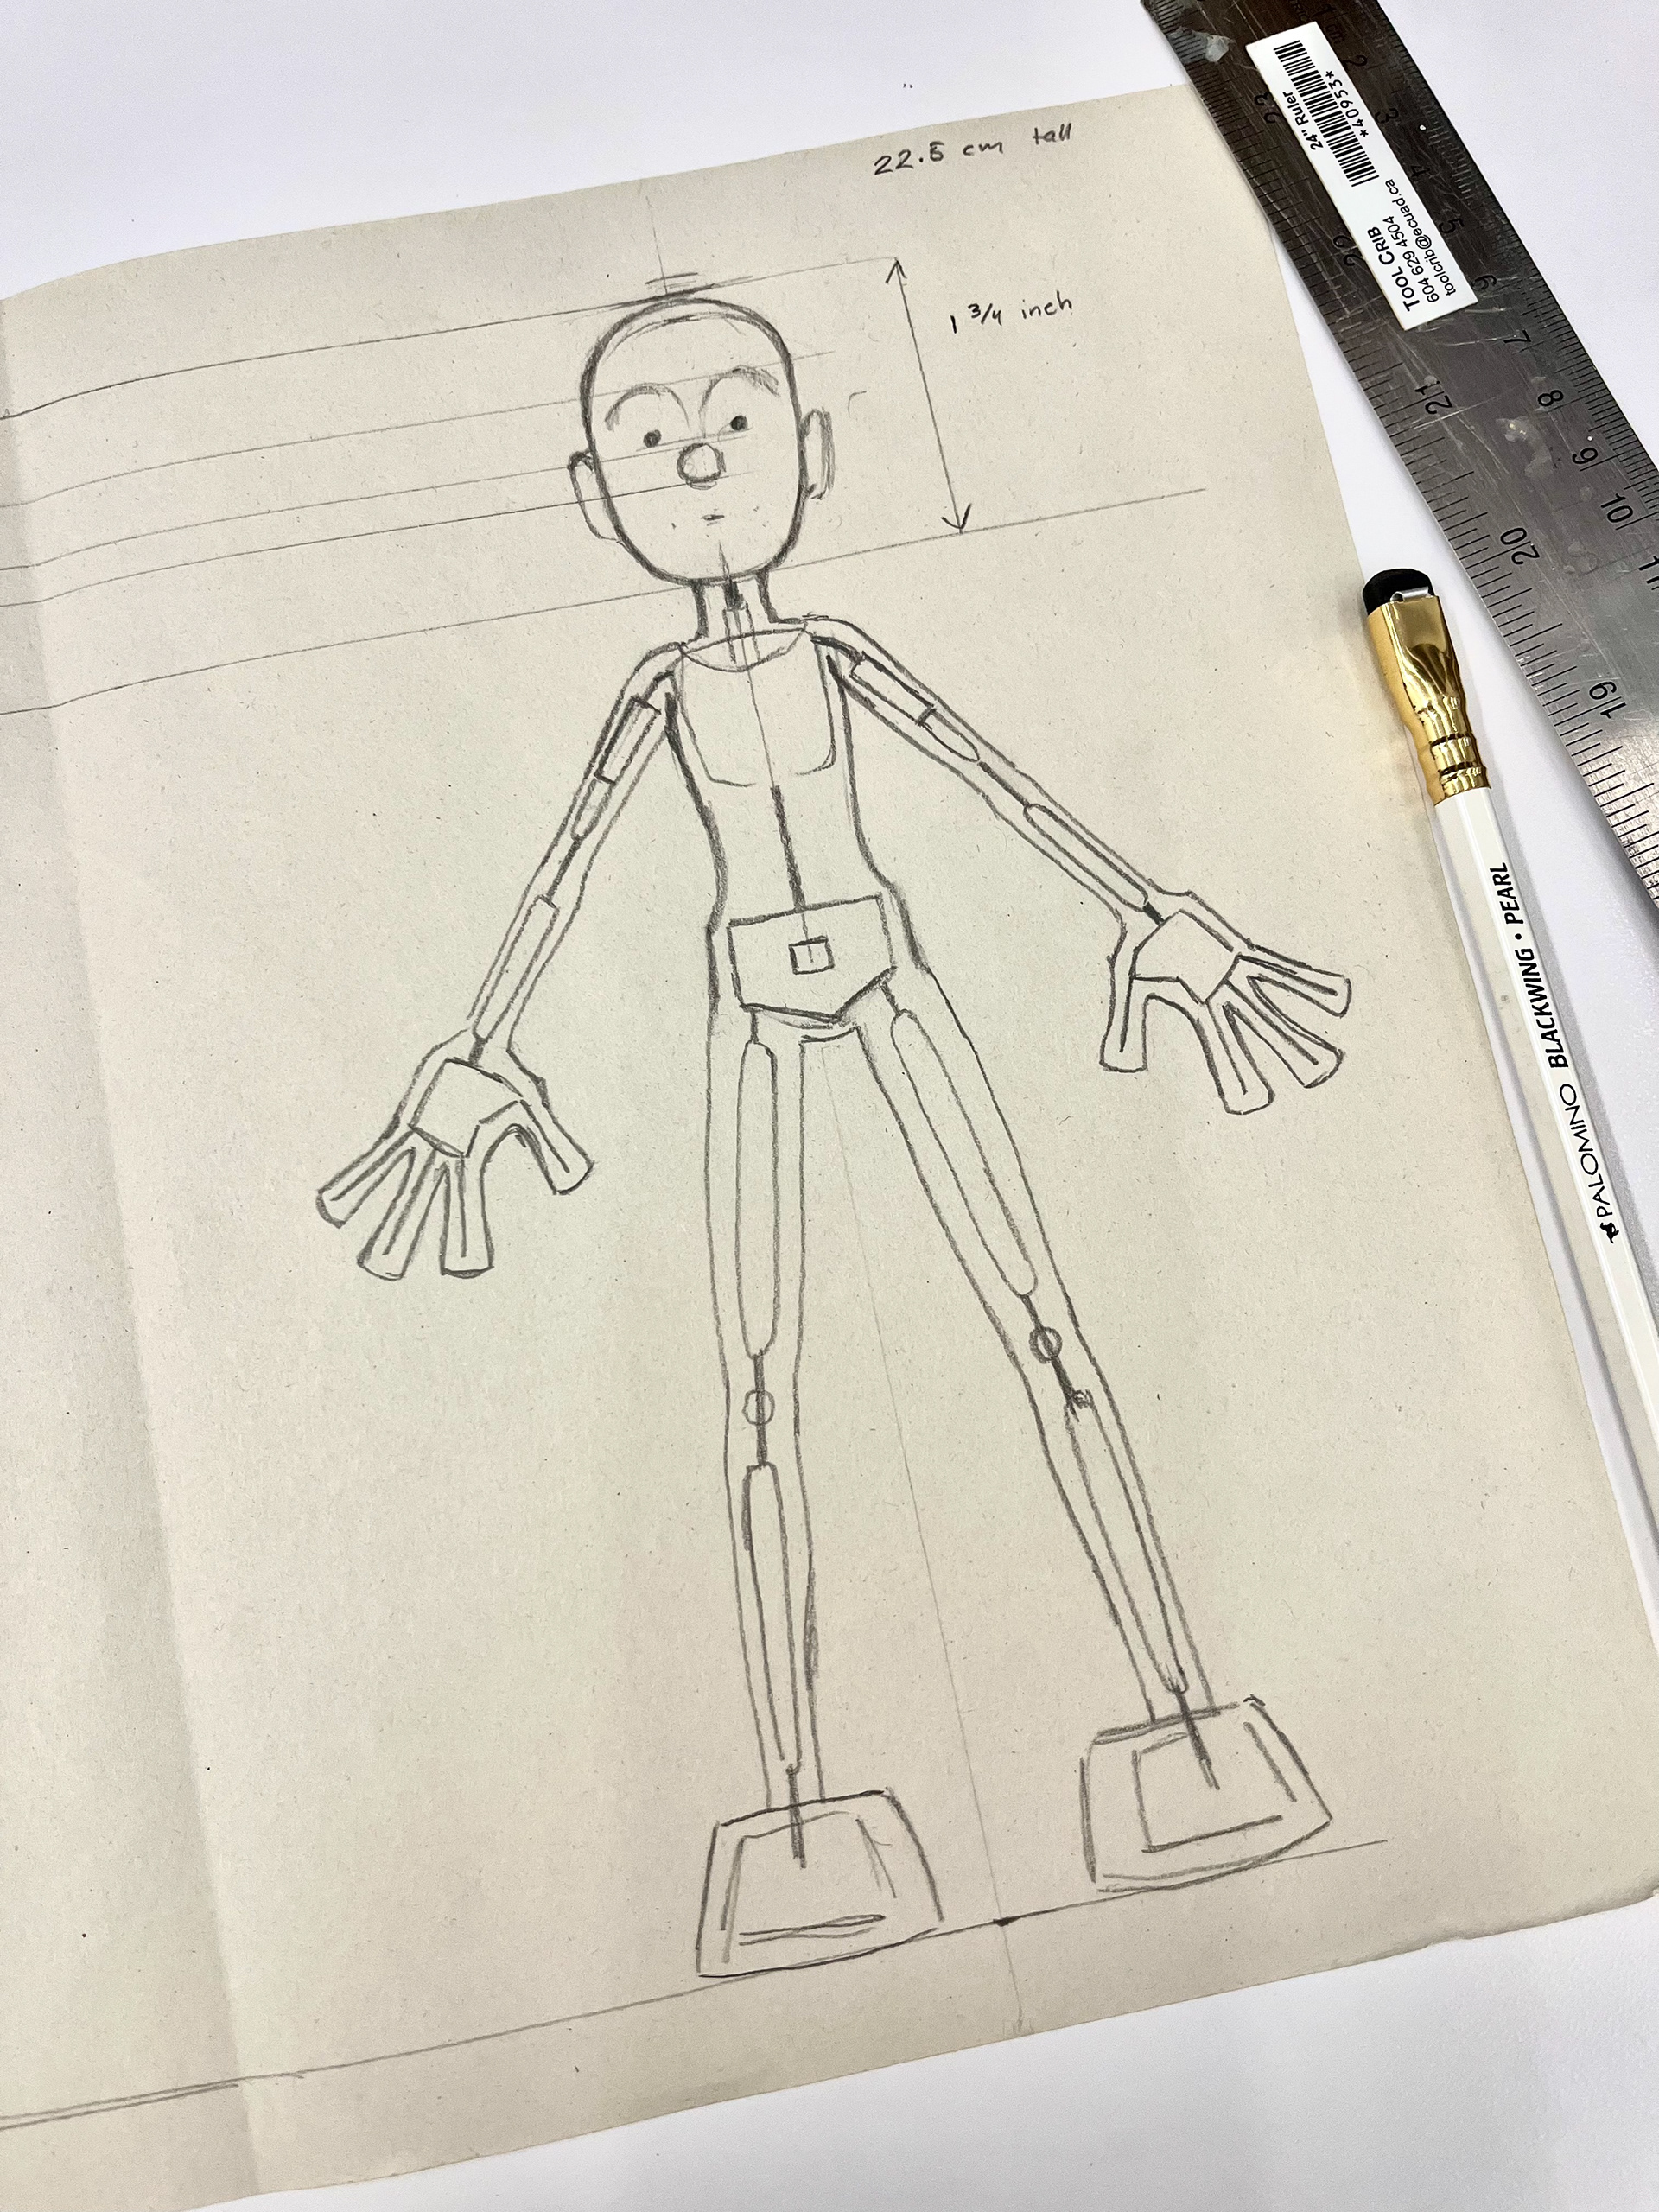
After solidifying the design, I drew up a scale drawing to break down the inner anatomy of the puppet. This allowed me to map out articulation points, "bones" and rigging points.
From there, I started my sculpt for moldmaking out of polymer clay. Knowing that I wanted to cast the head and hands in silicone, I knew that I needed to keep the design relatively simple for the sake of making a 2-part mold.
Armature Building: Aluminum Wire and Wood

Silicone Casting: Squish Mold with Brush on Layer
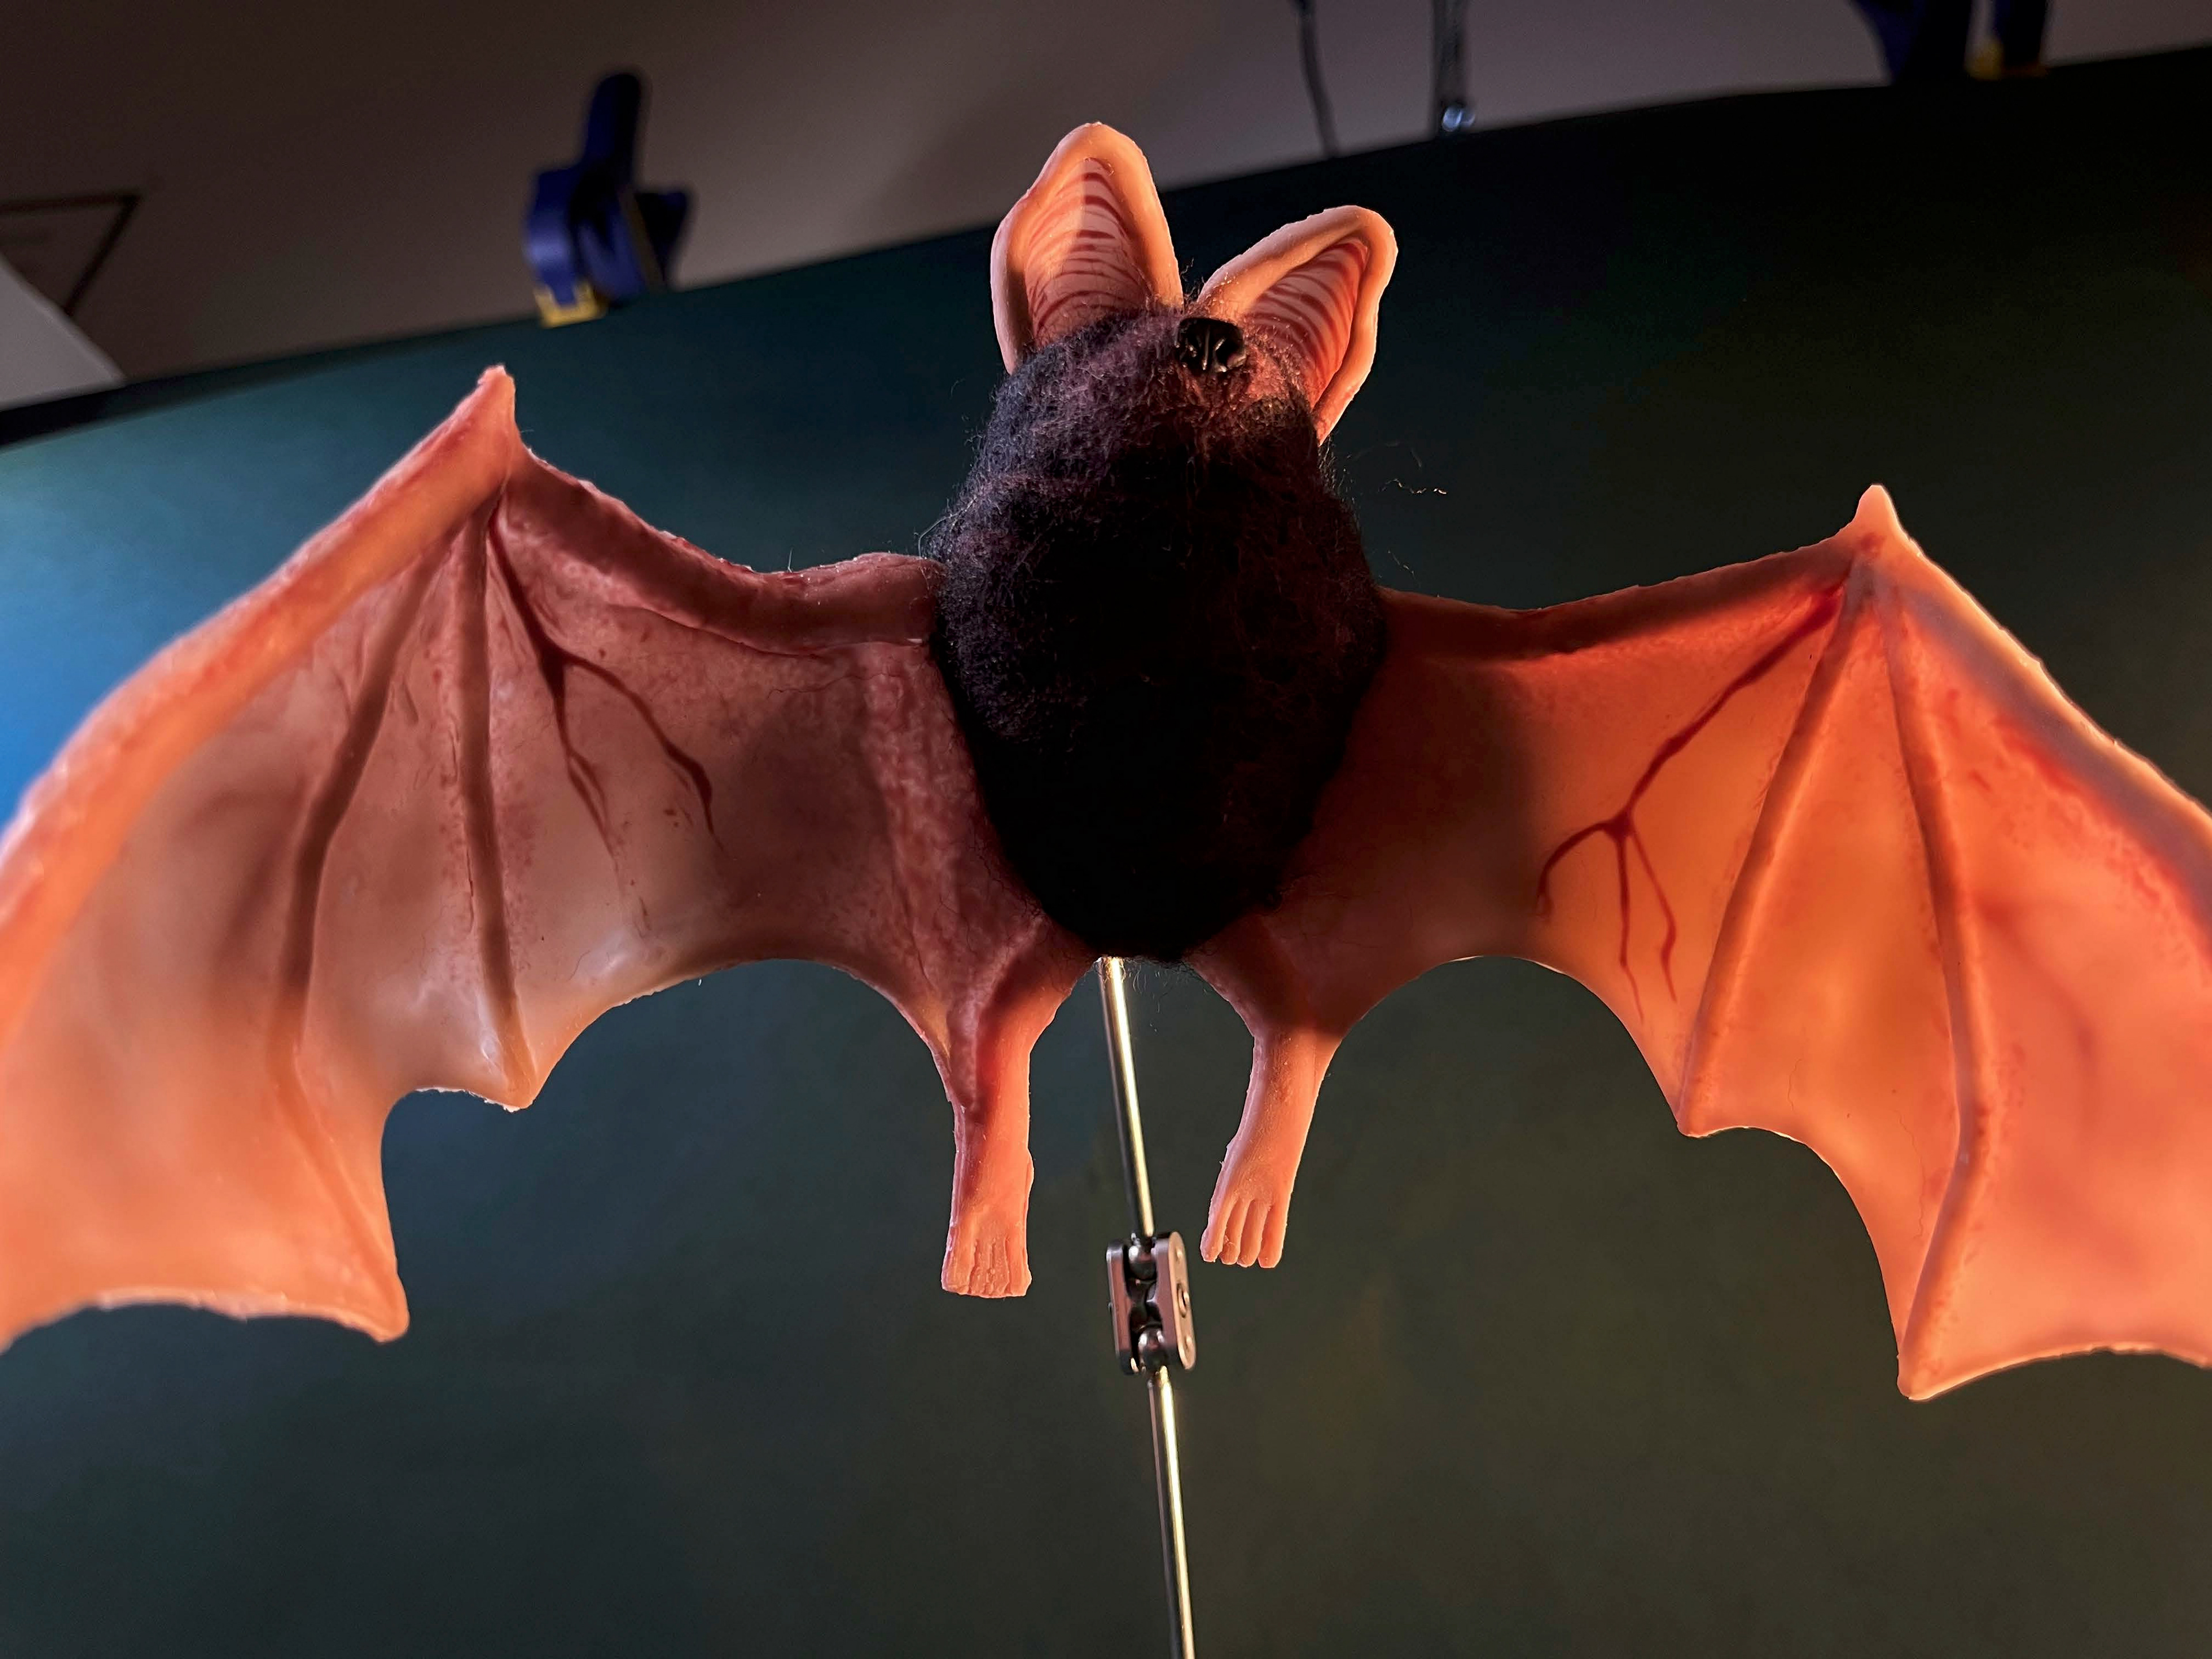
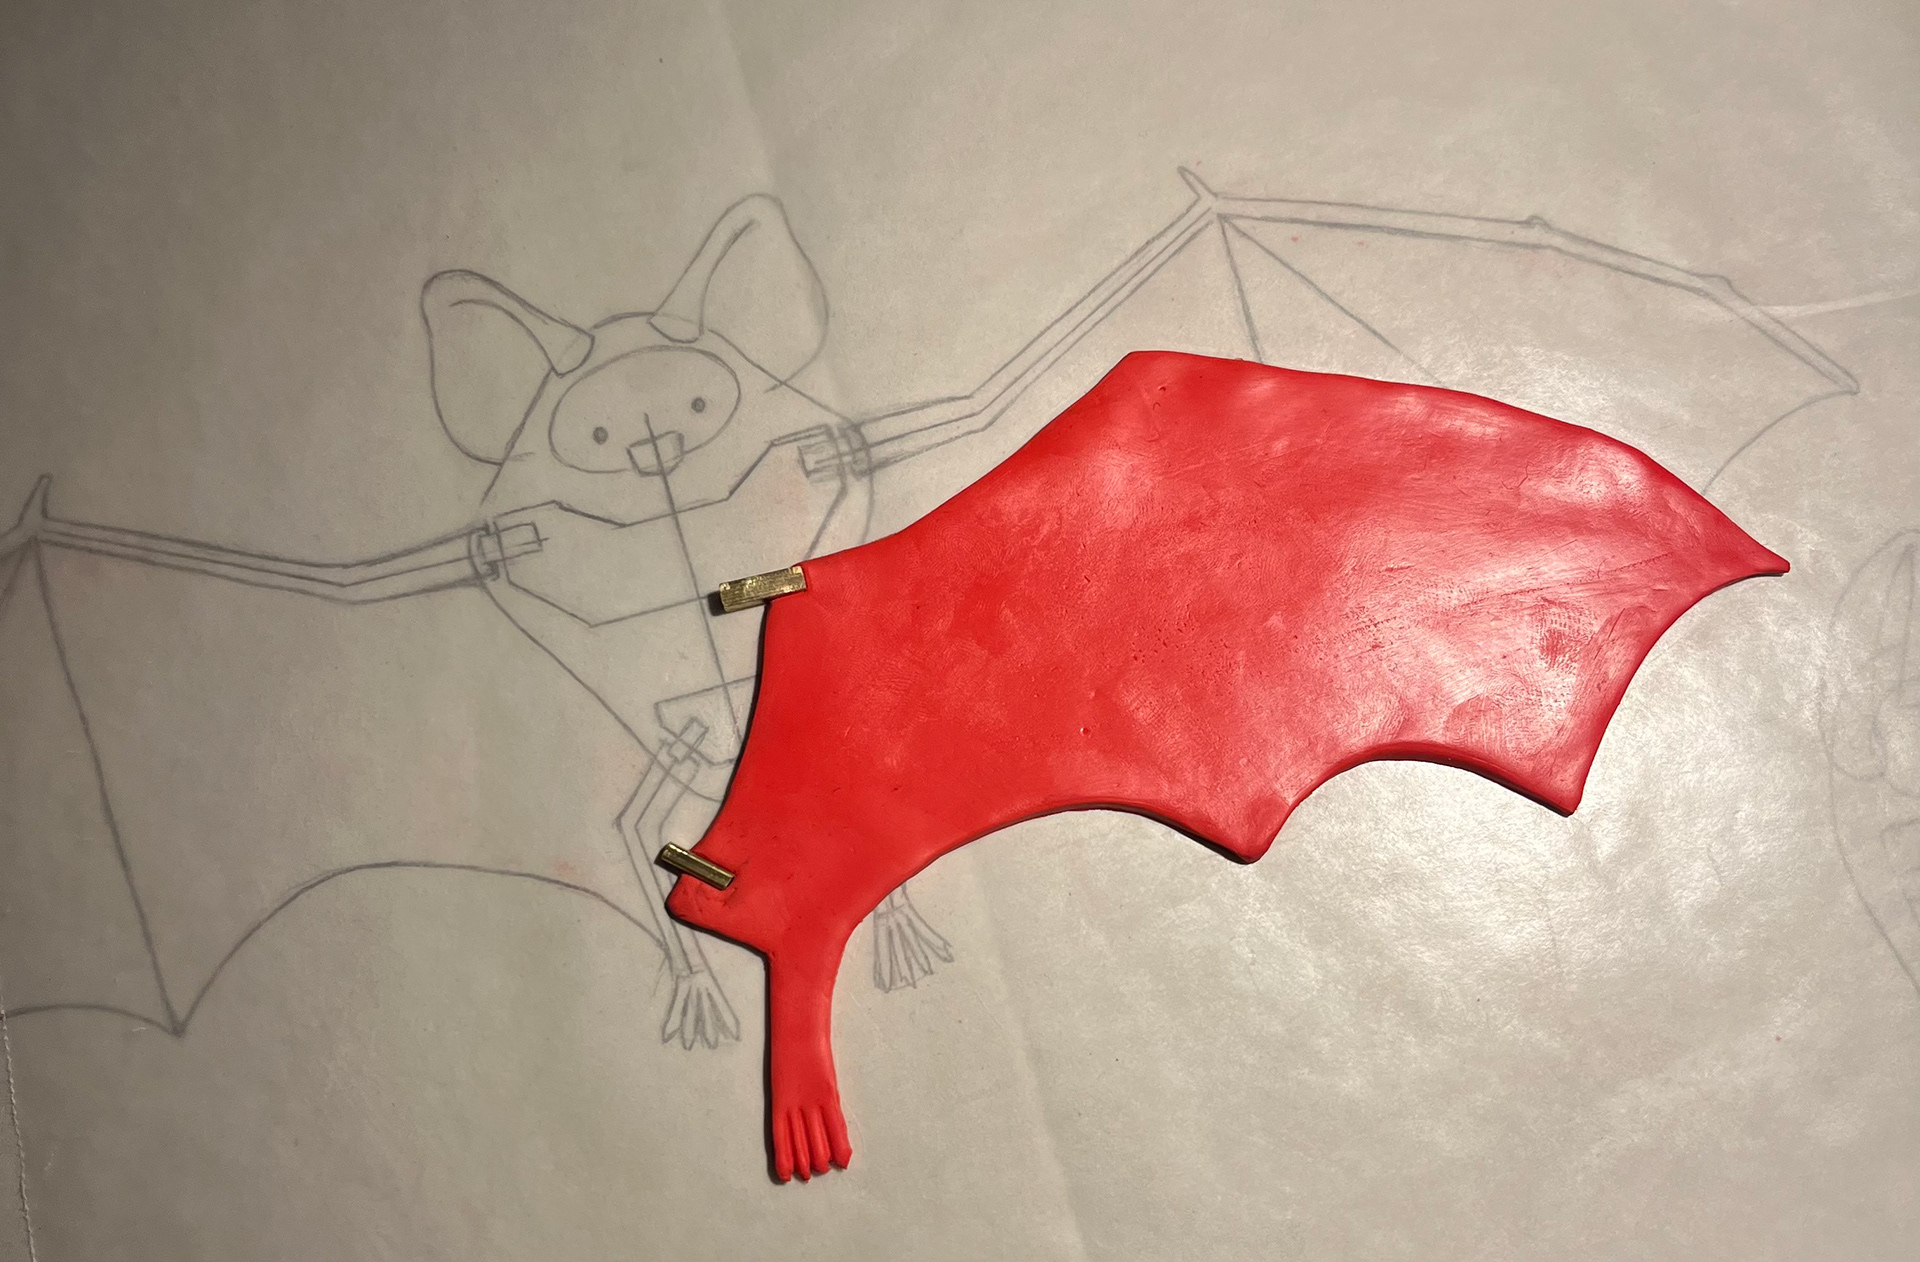
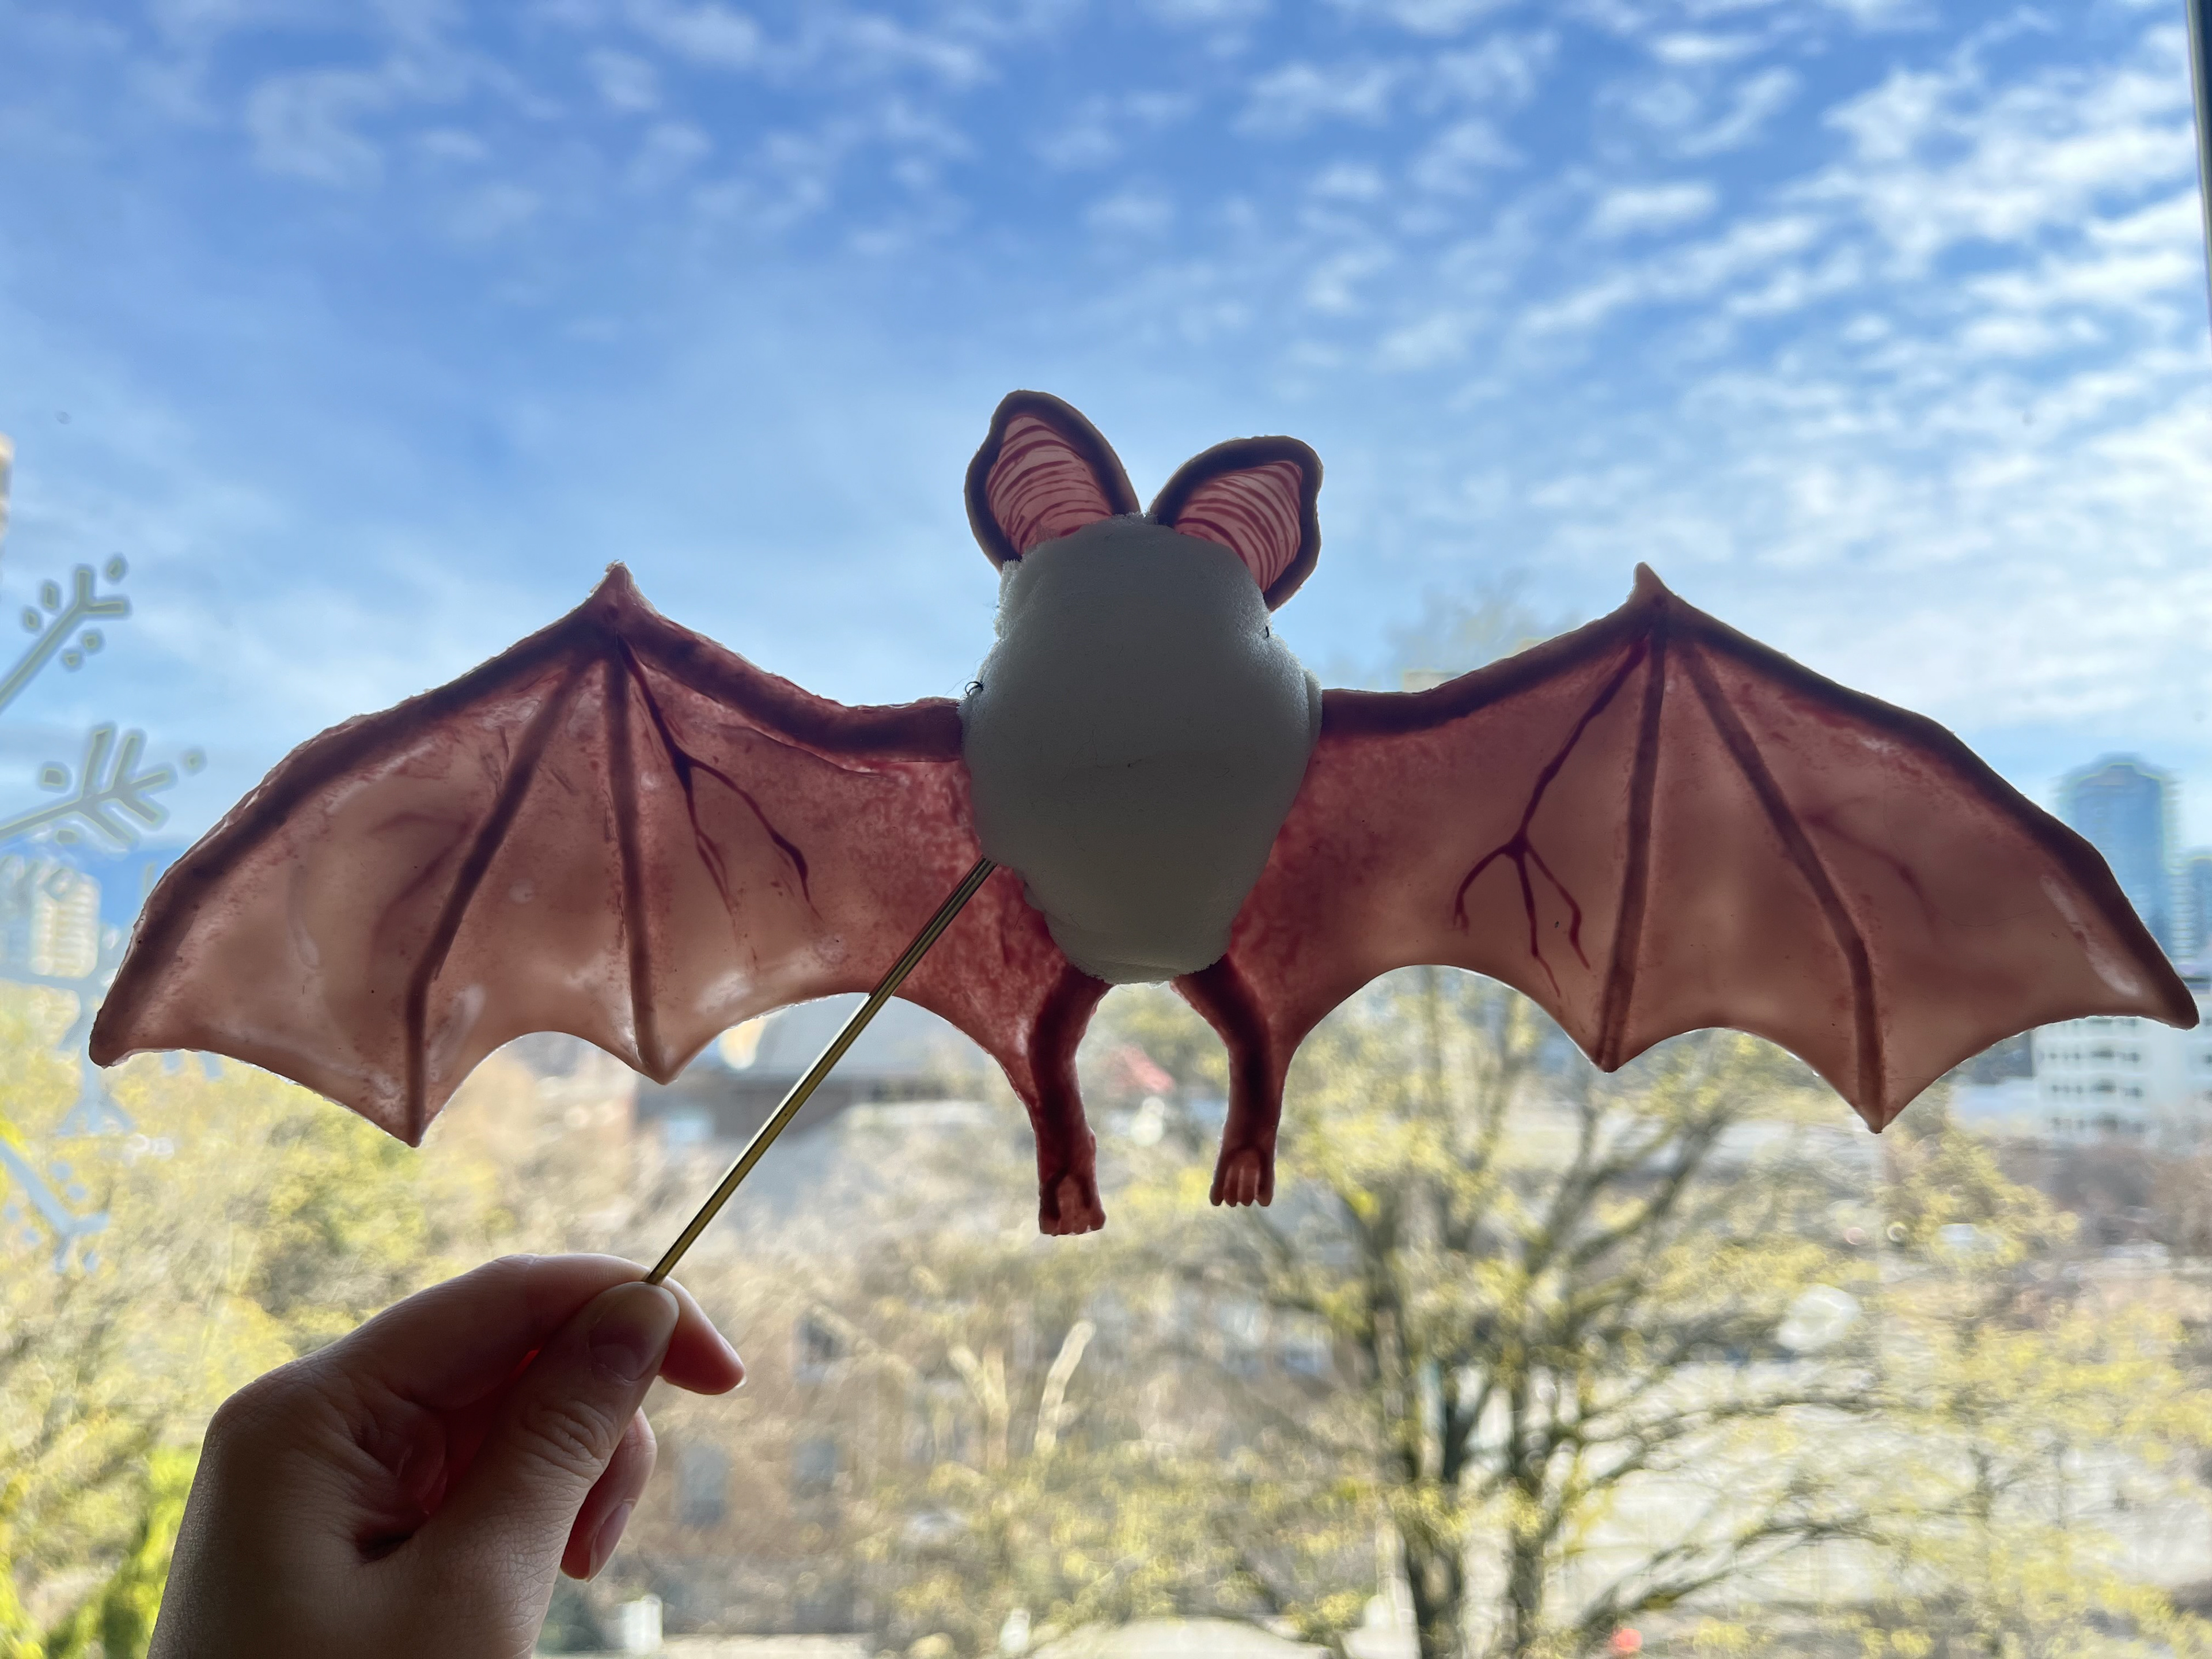
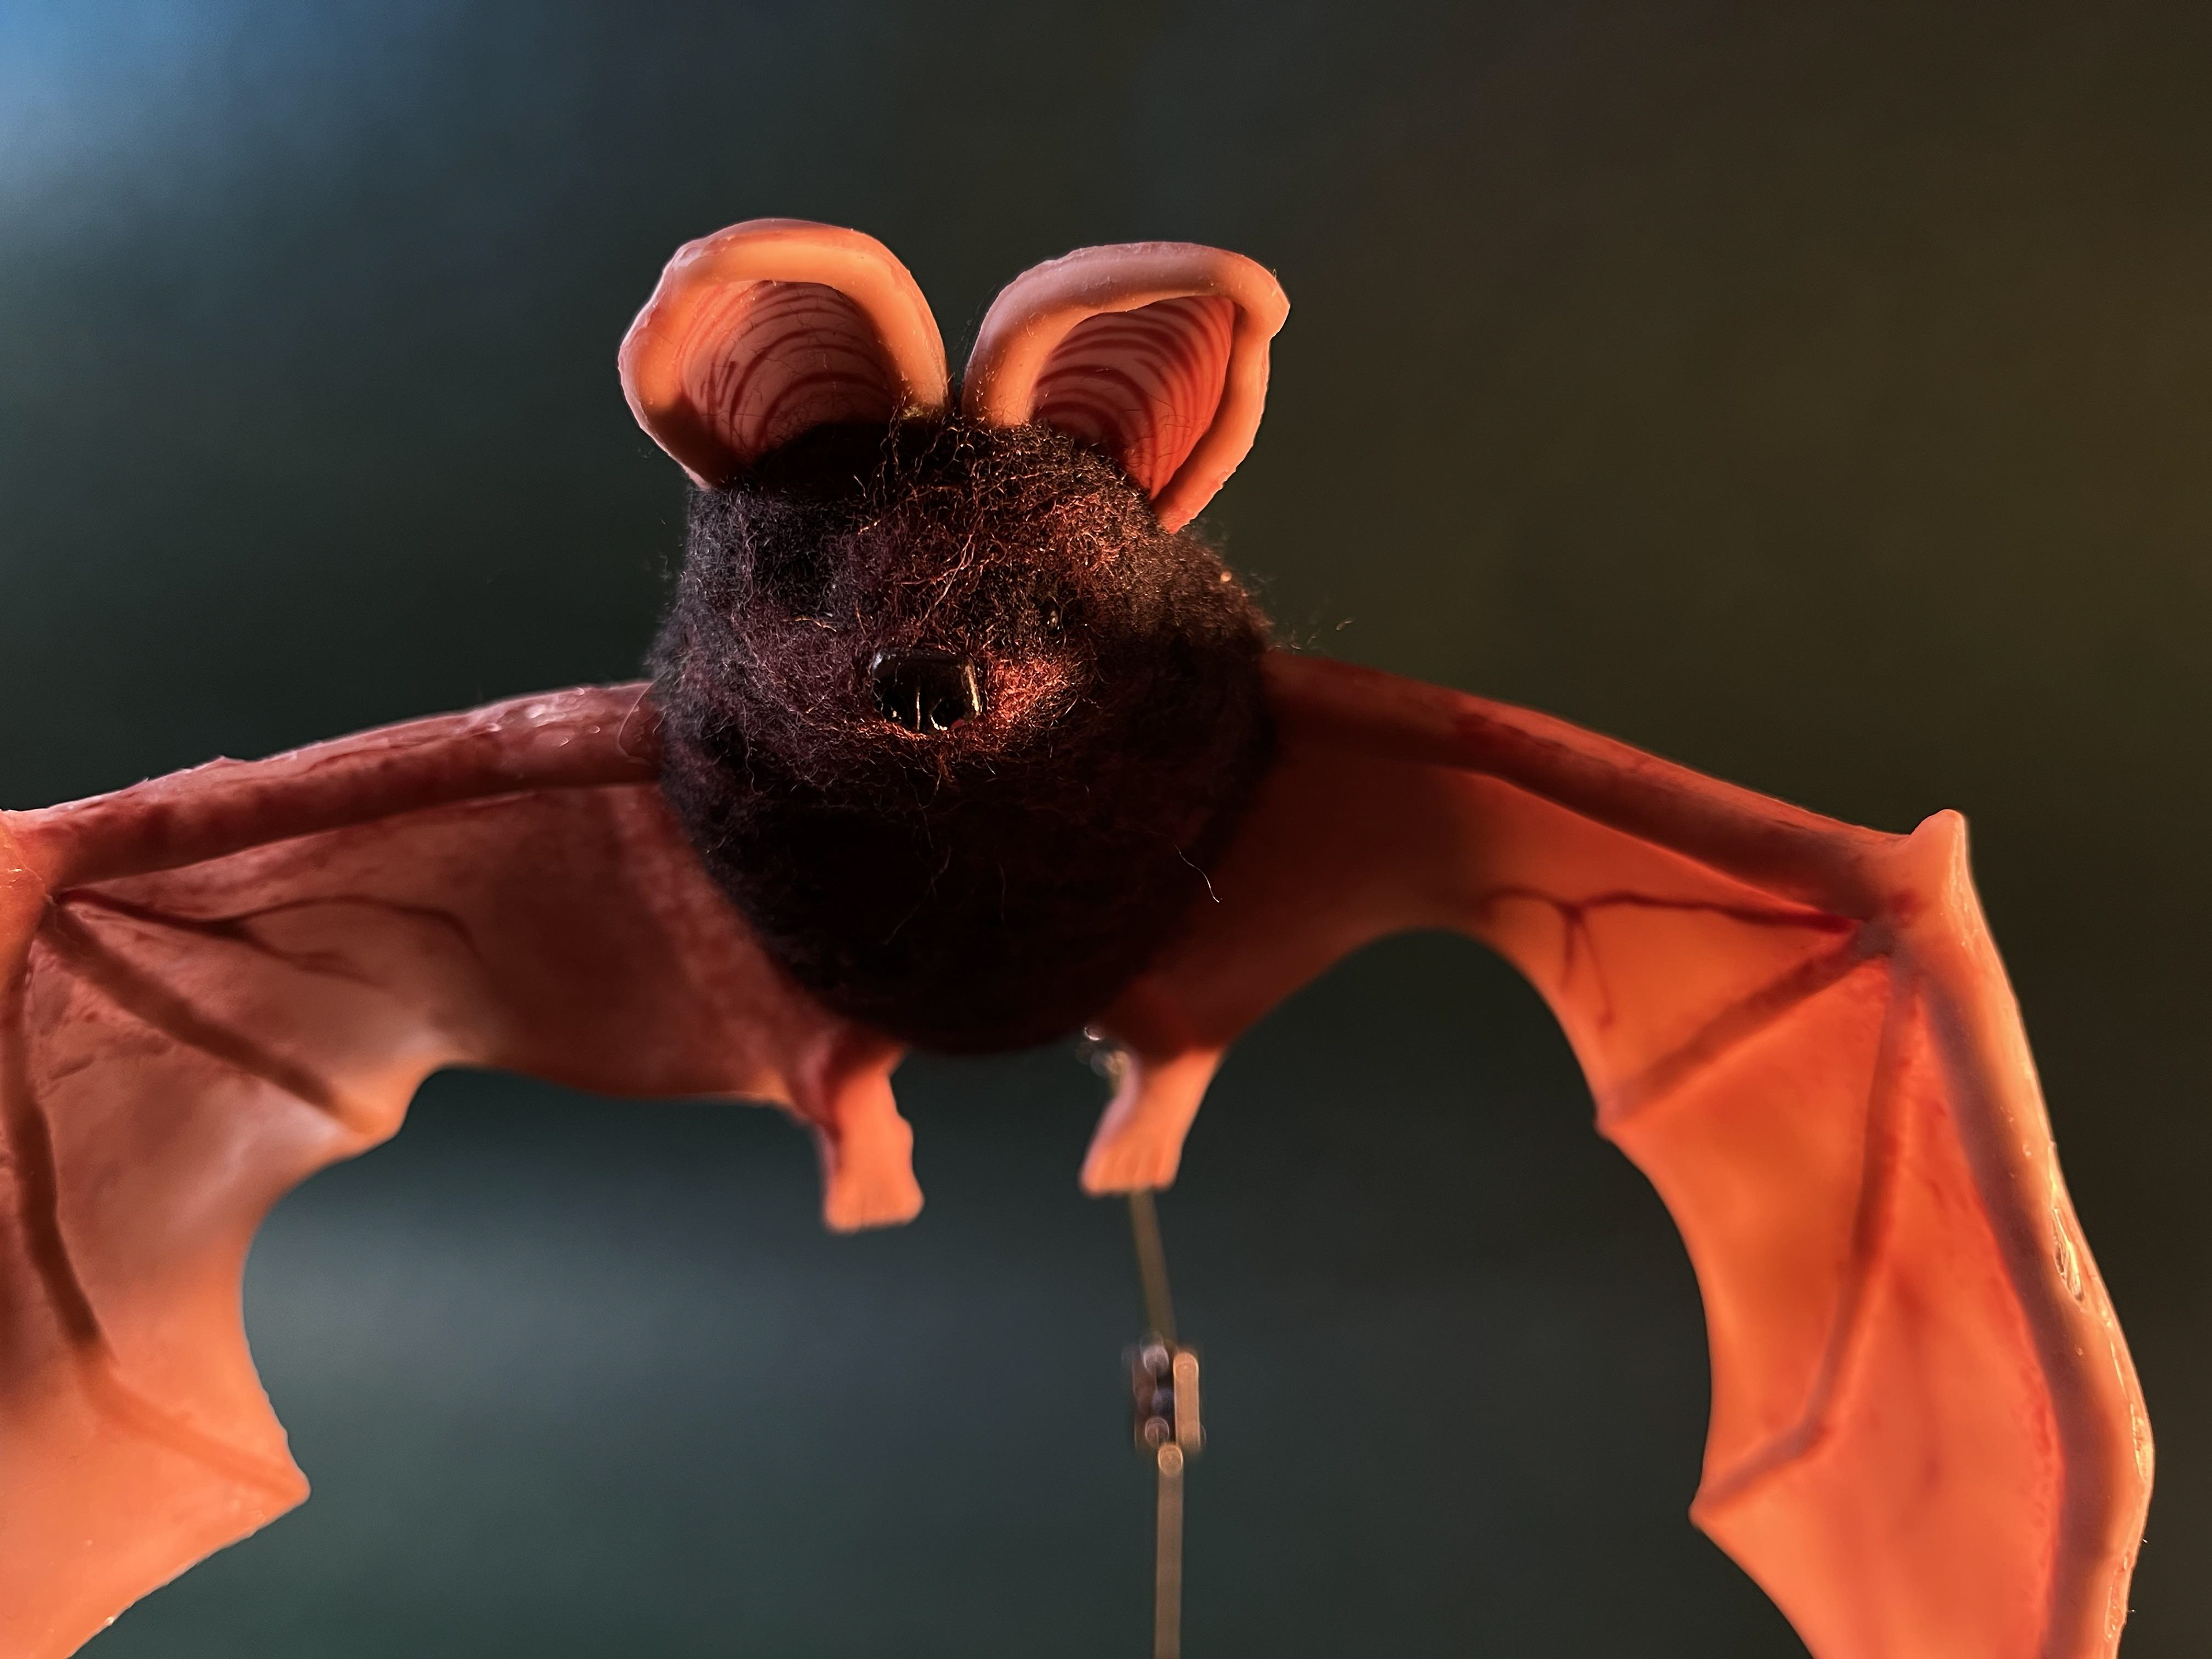
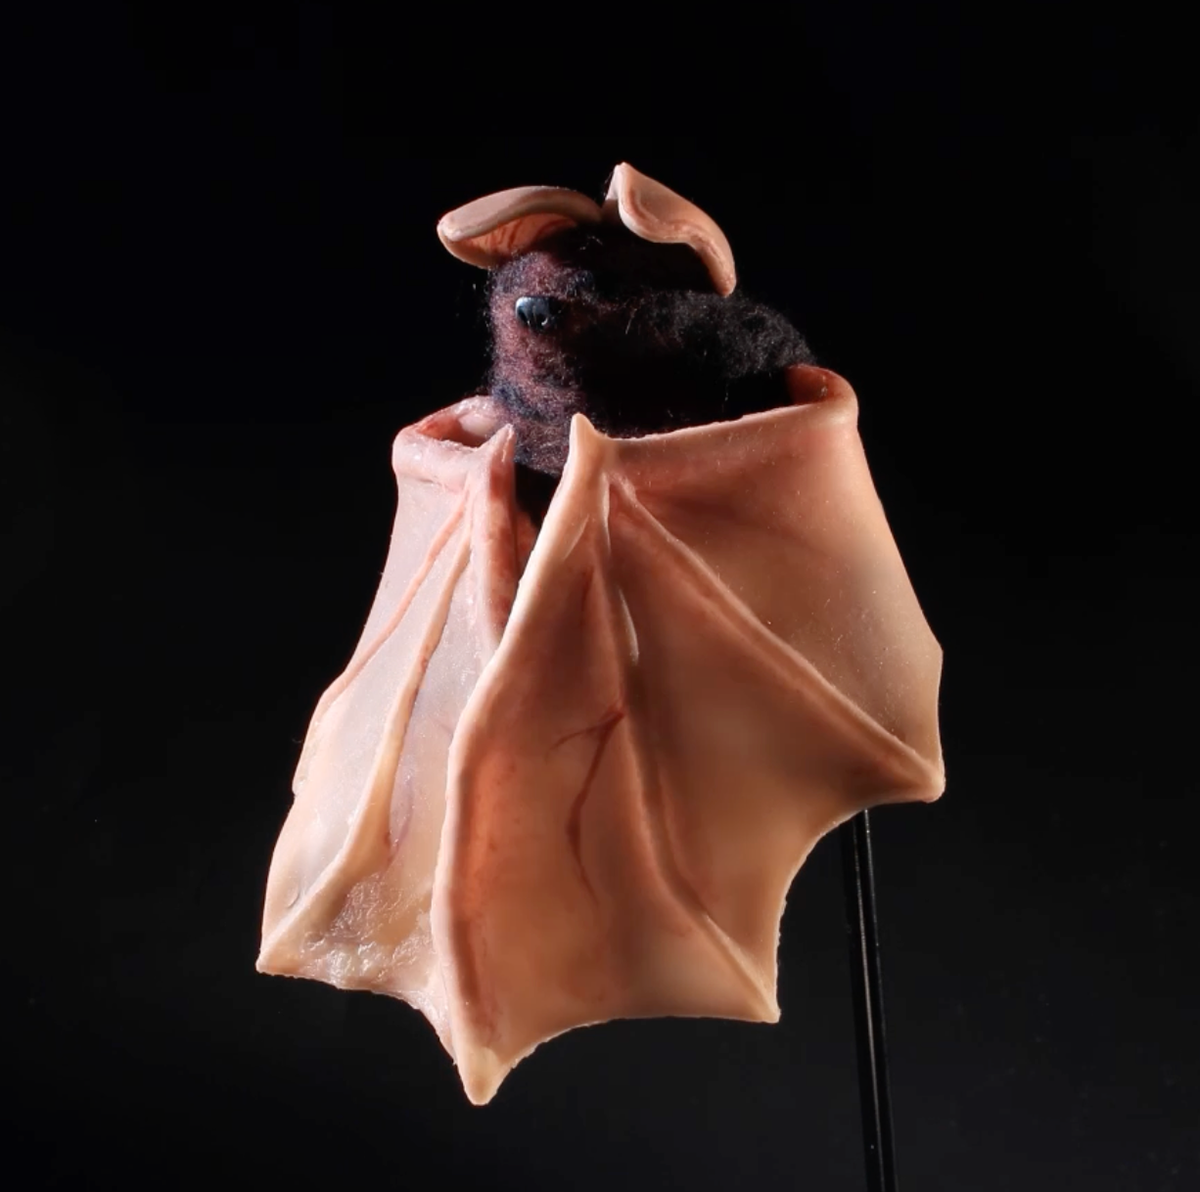
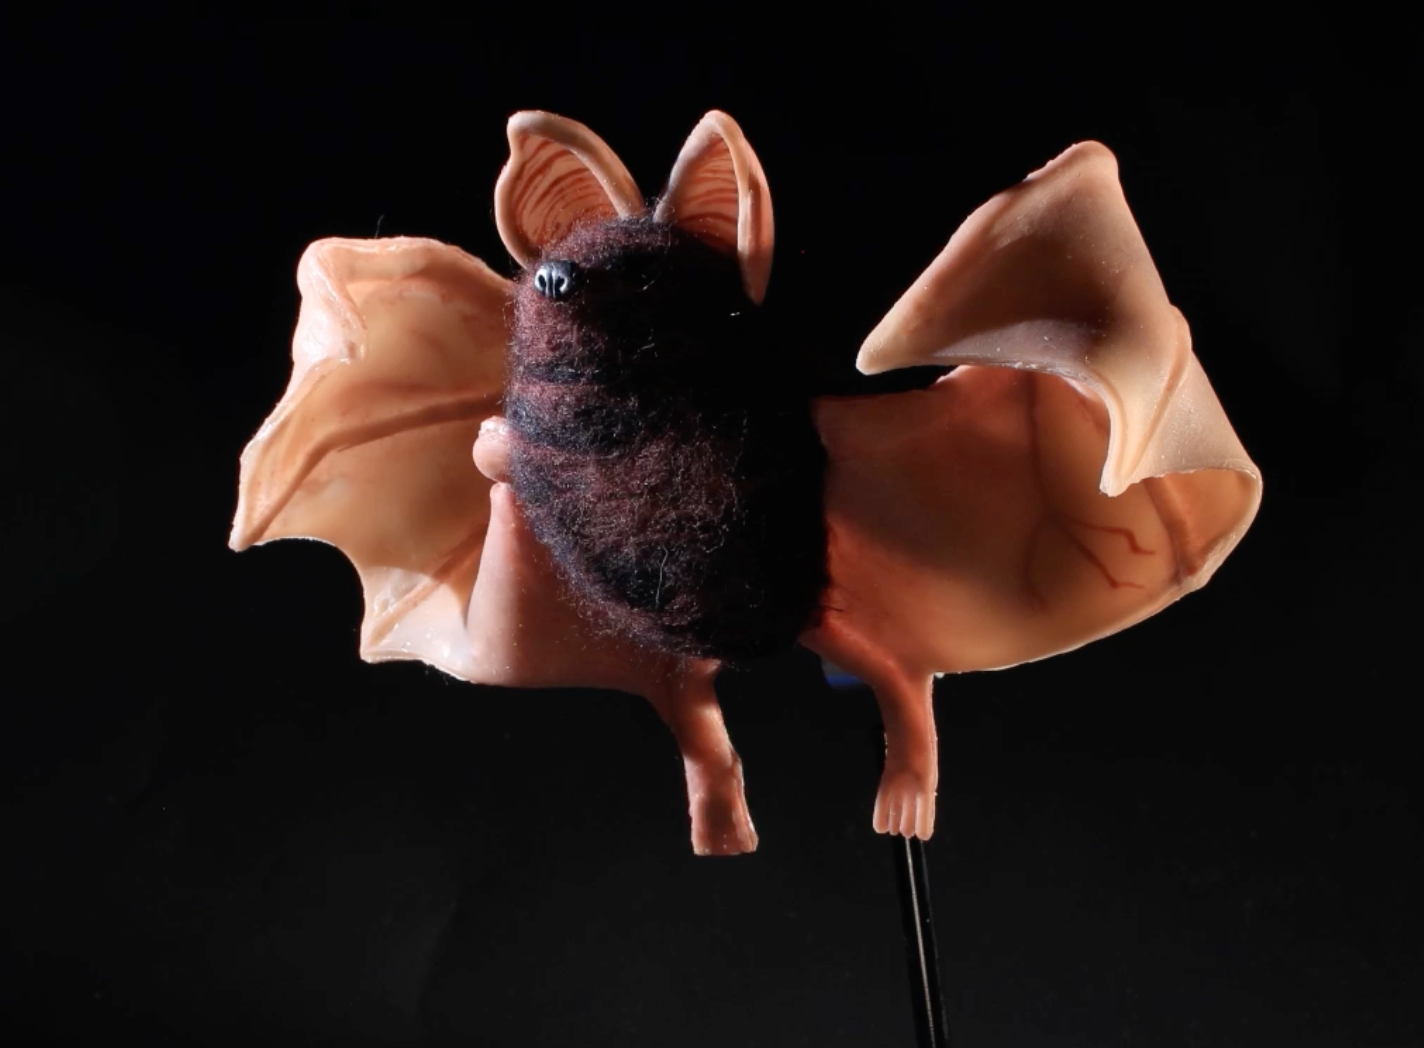
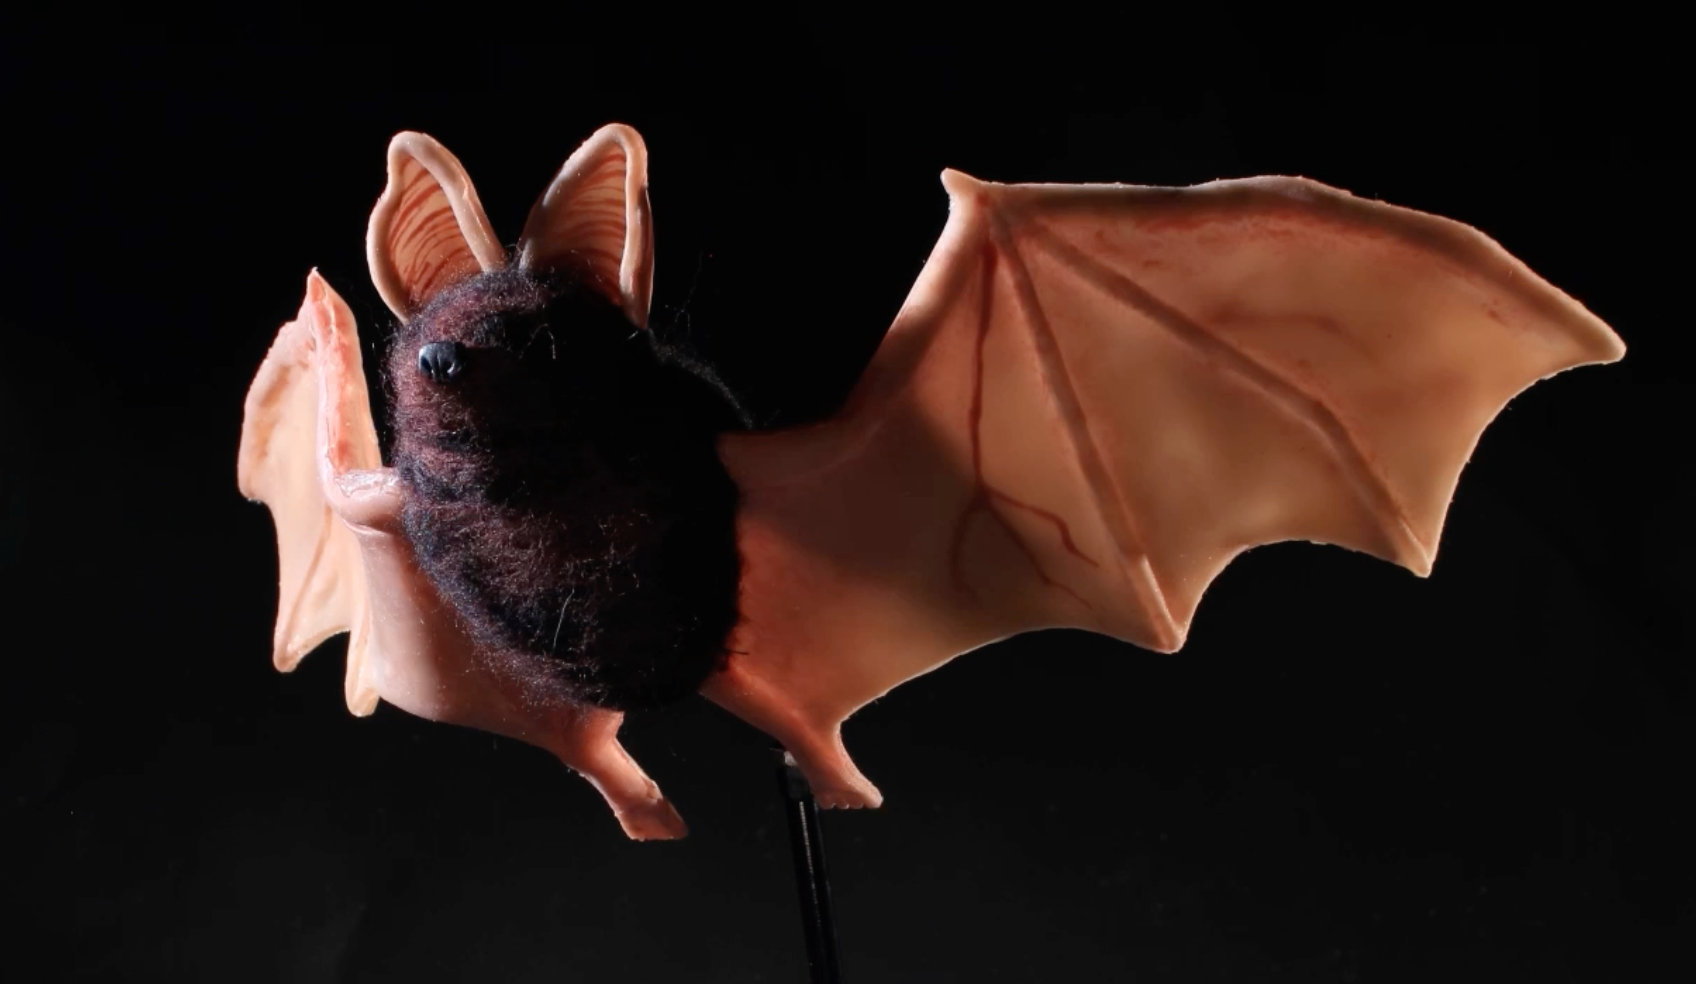
Bat Puppet
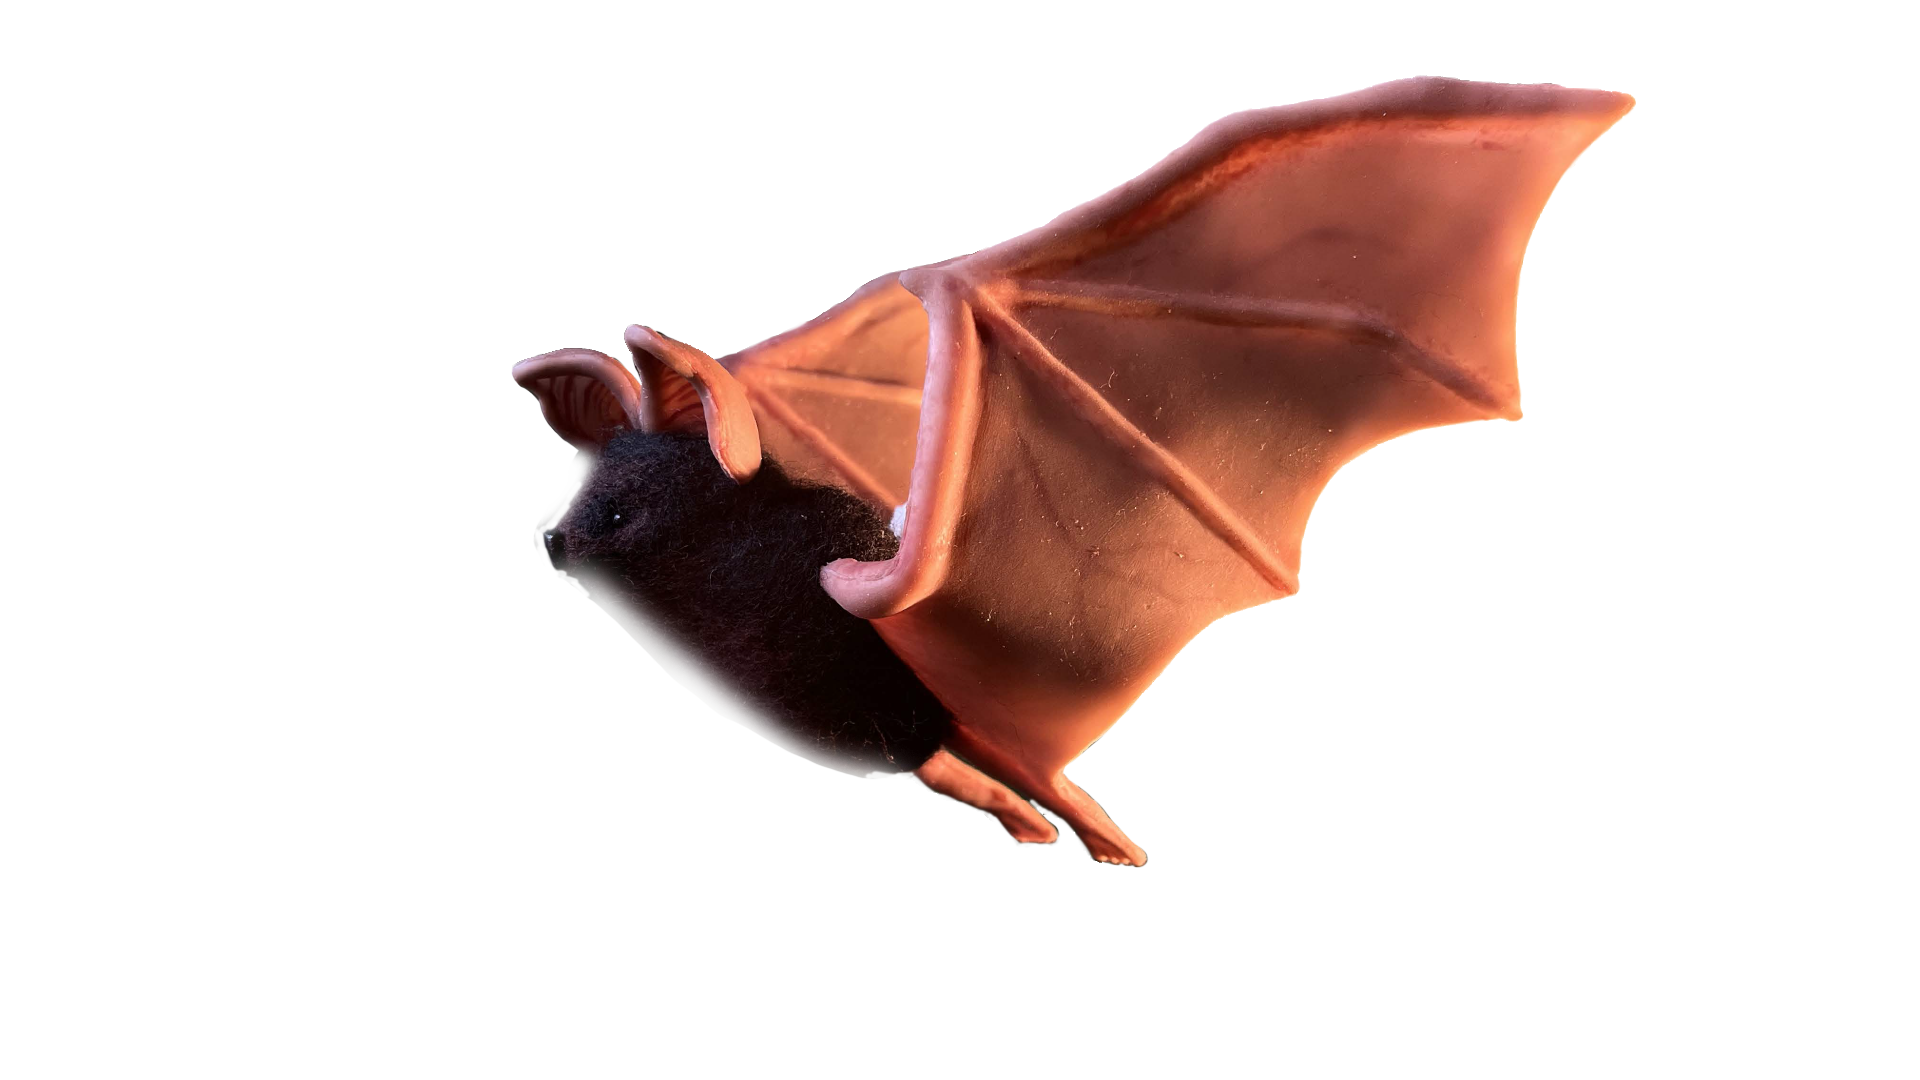
This stop motion puppet is made out of aluminum wire, wood, milliput epoxy putty, square brass tubing, foam, felted wool, and silicone.
I made this puppet with the intention of practicing a flap cycle. I was inspired by the translucency of bat wings, which would work well casted in silicone to stretch into a full range of motion.
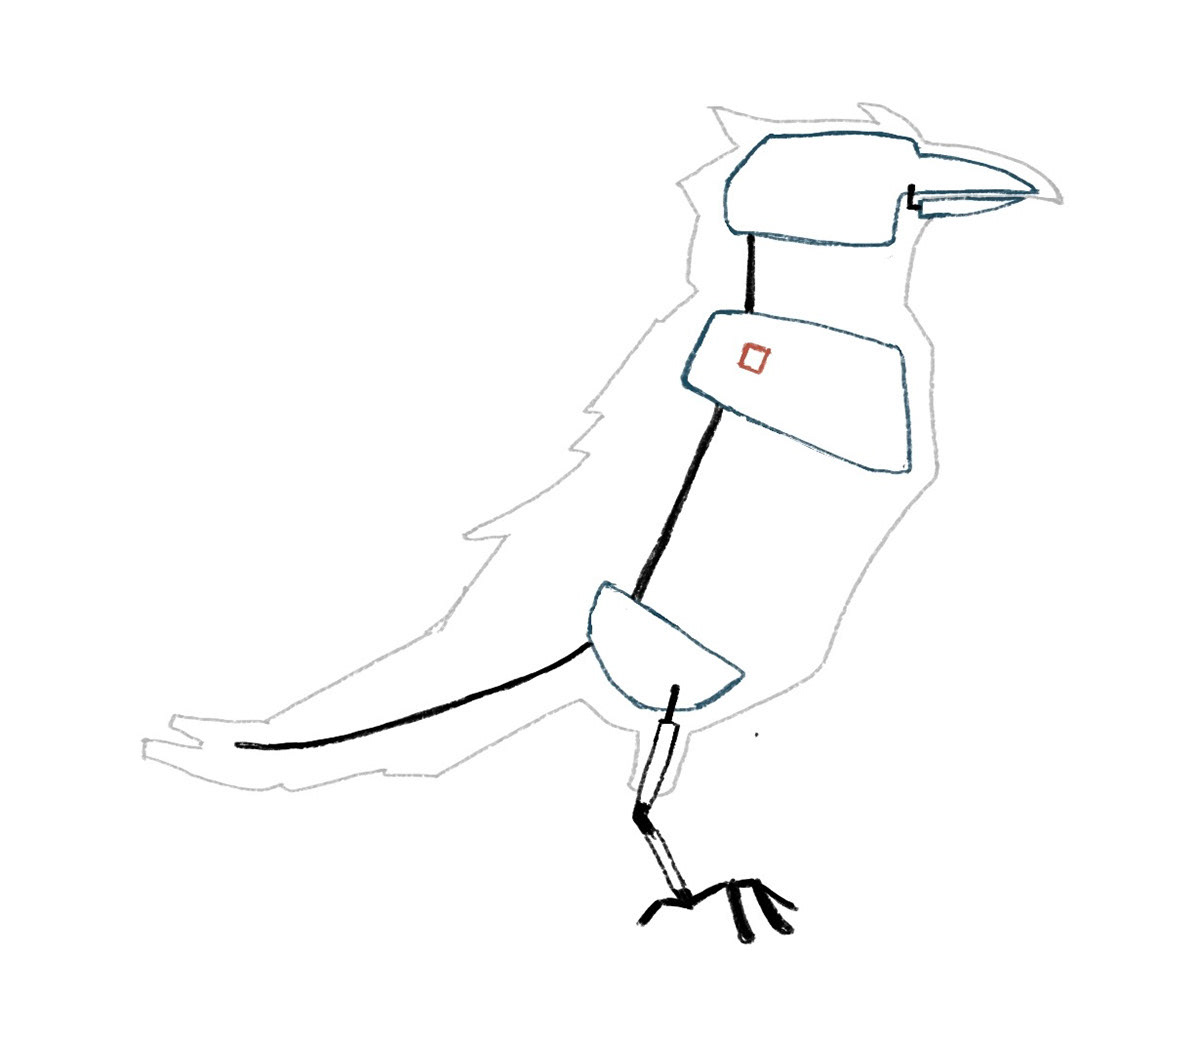
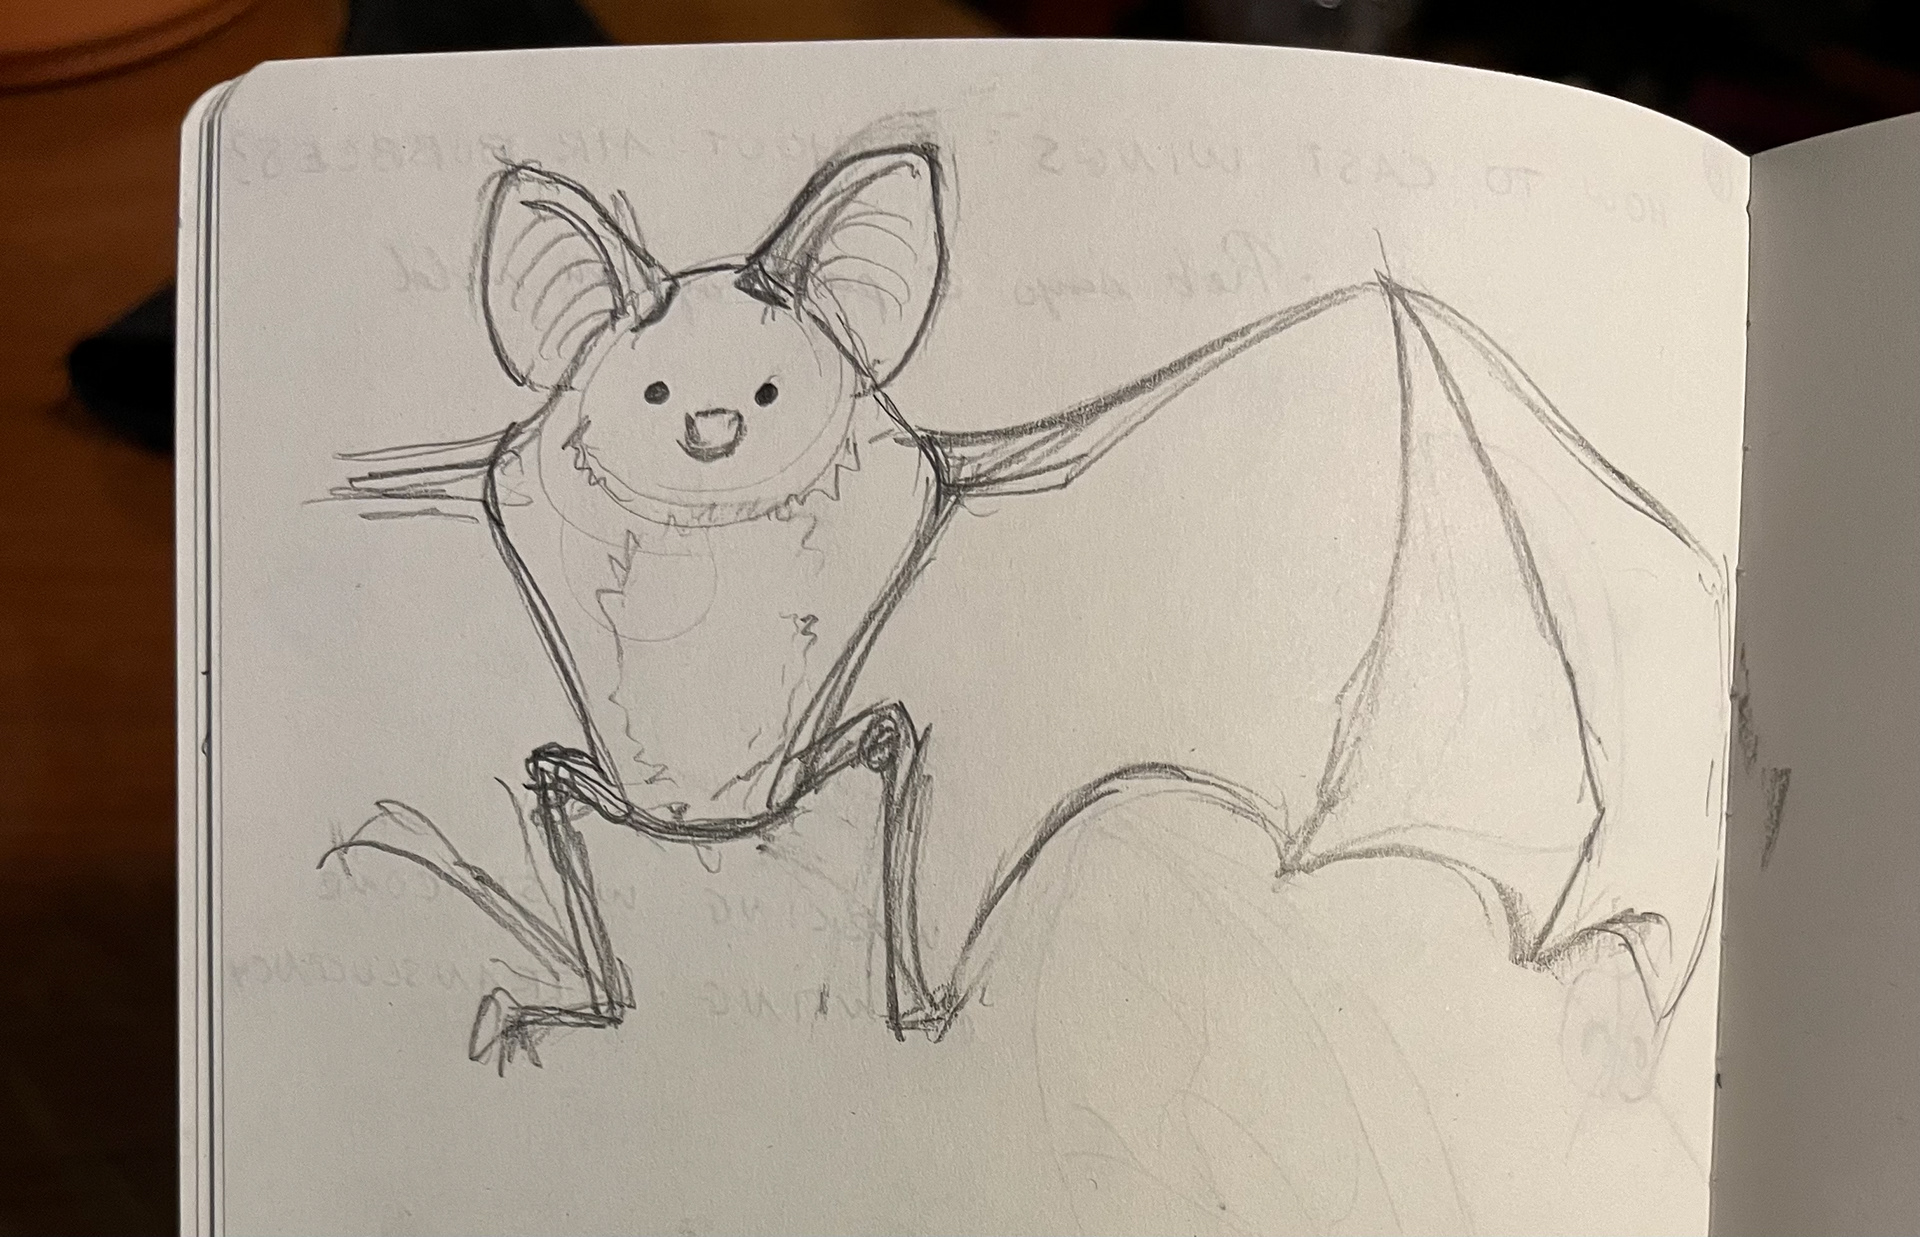
I first began with a rough character sketch and then created a scale drawing of the puppet to start building my armature and clay sculpts.

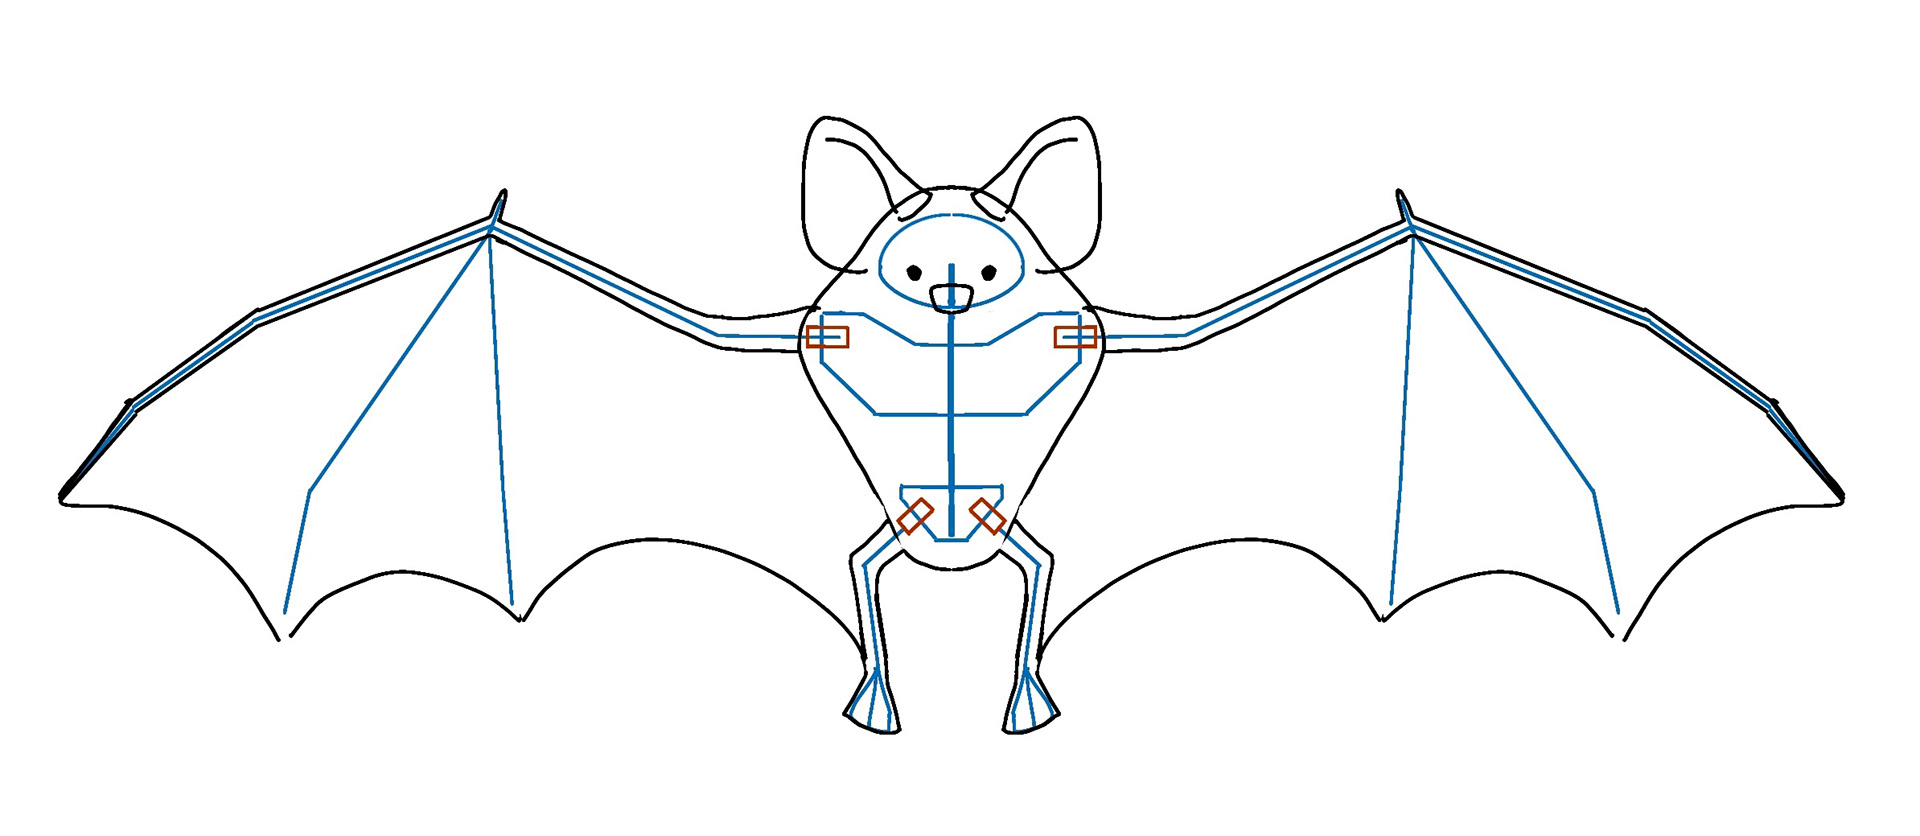
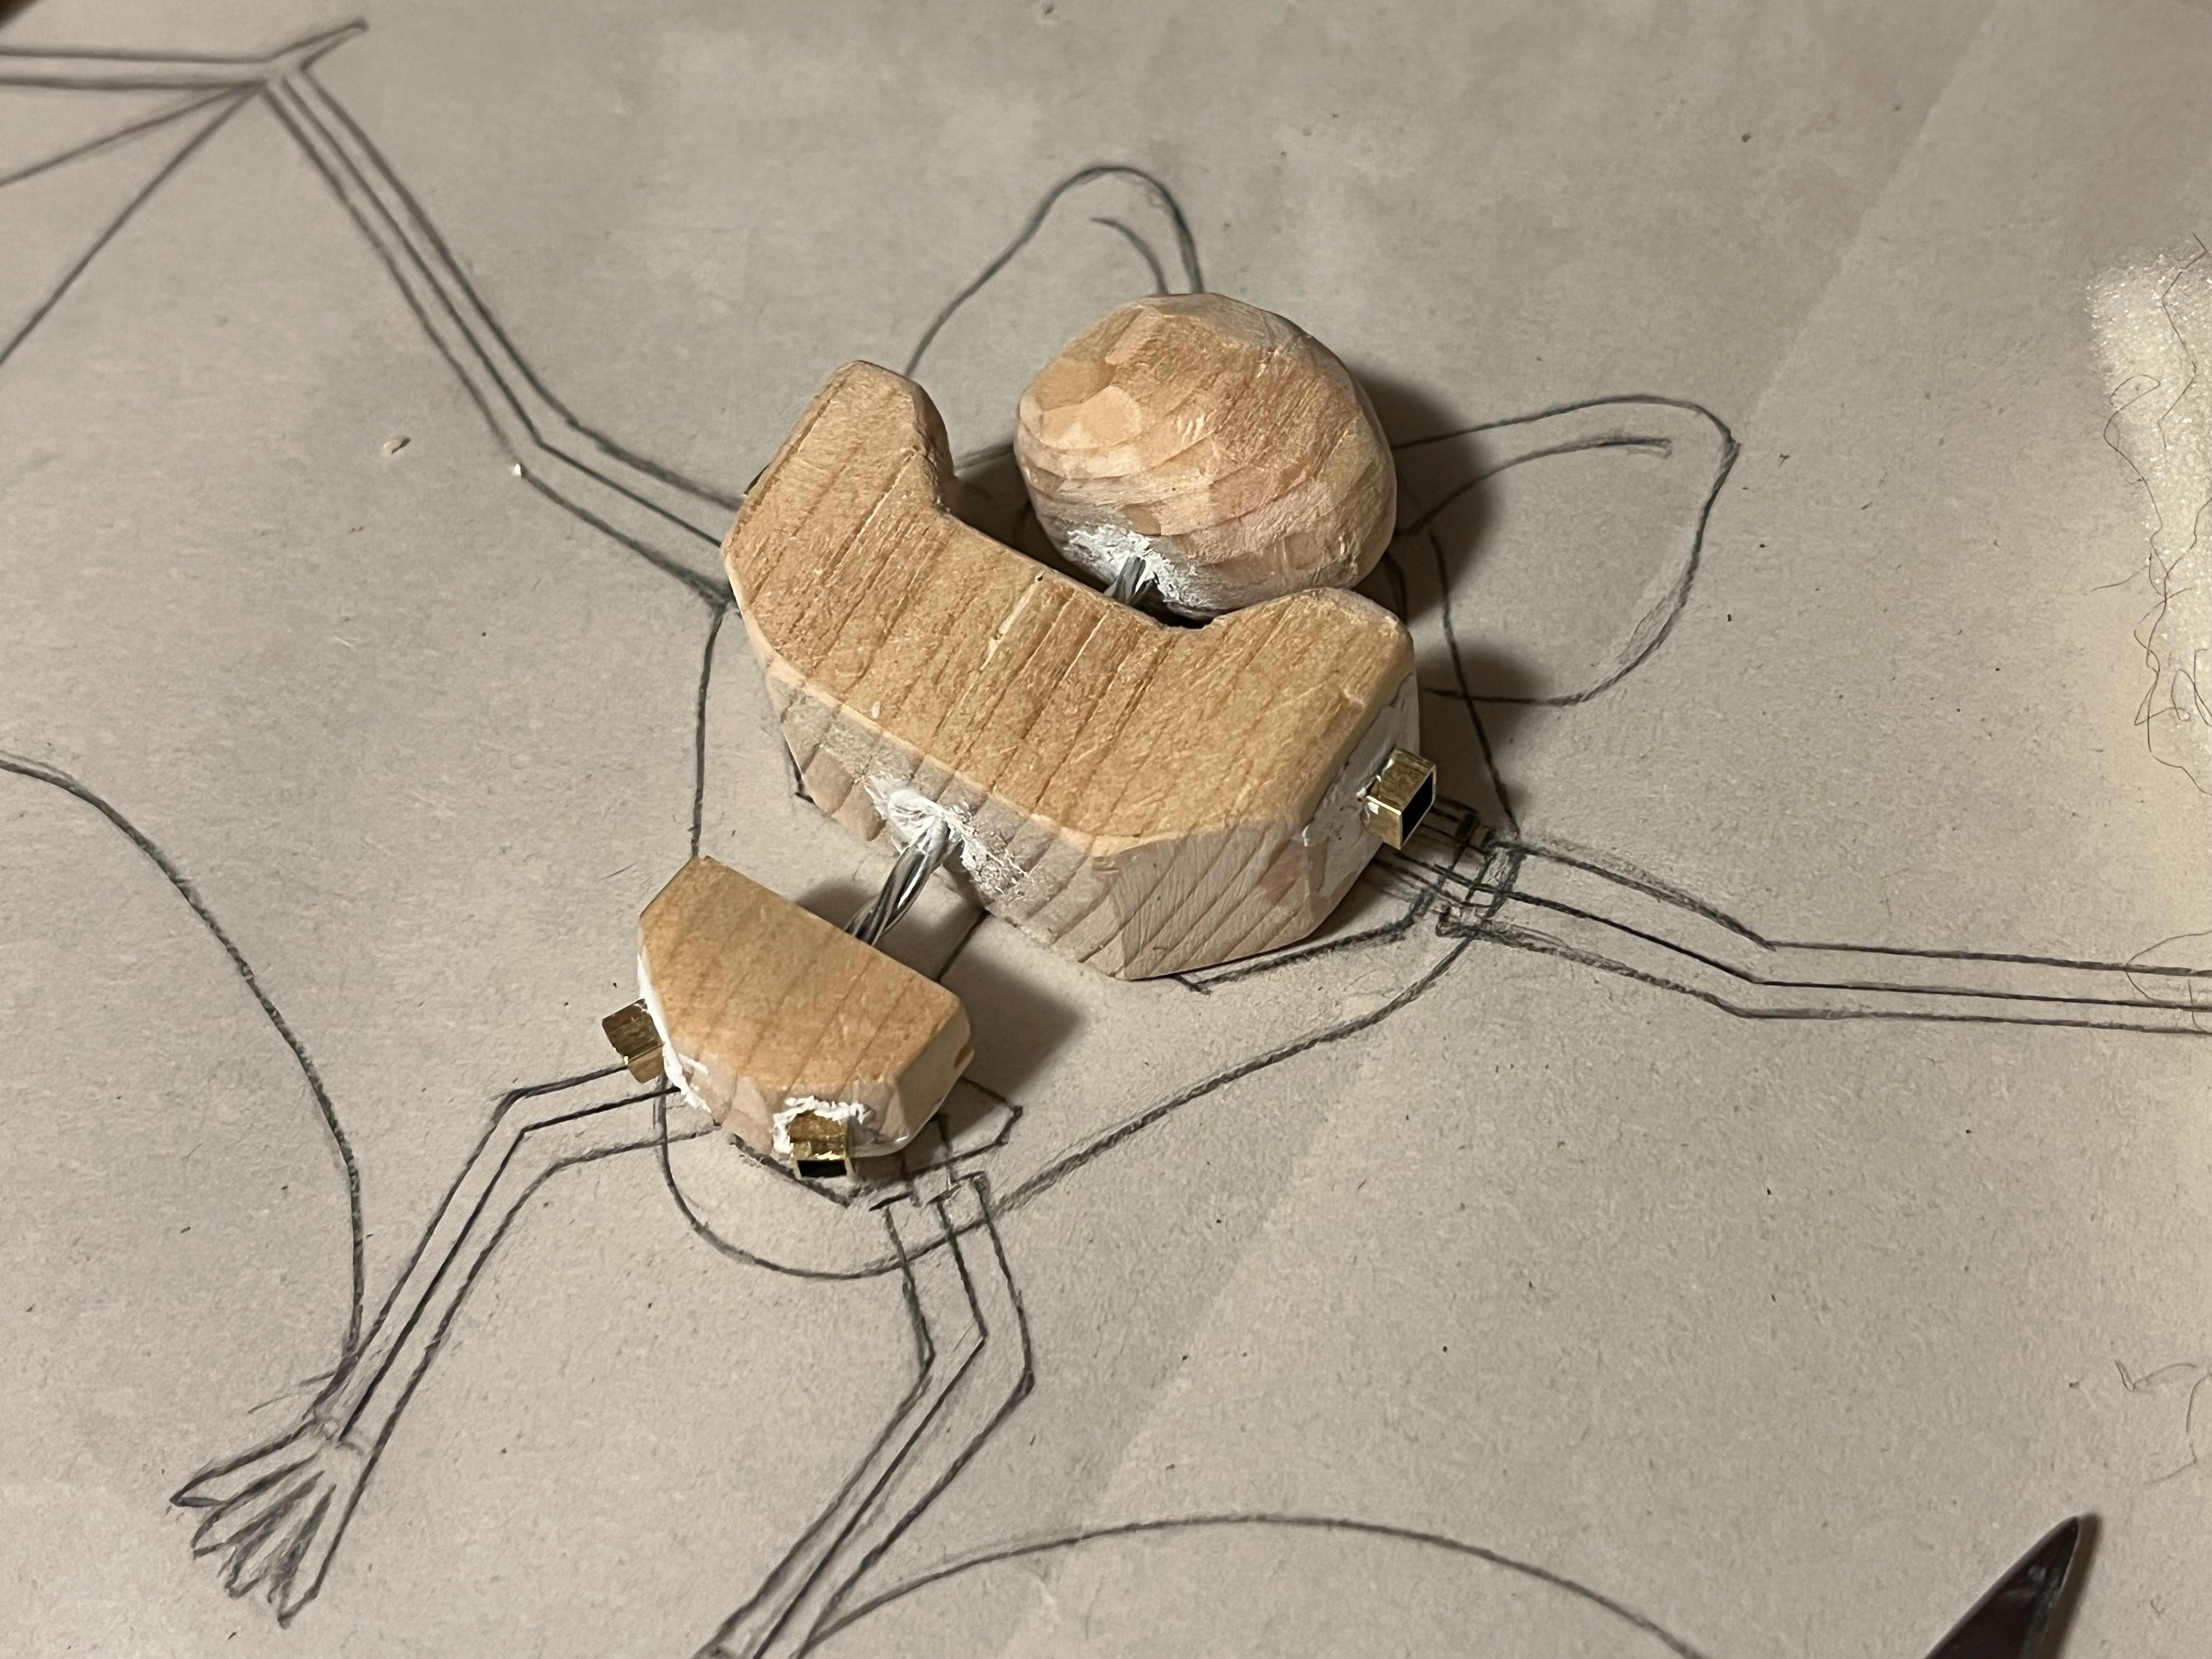
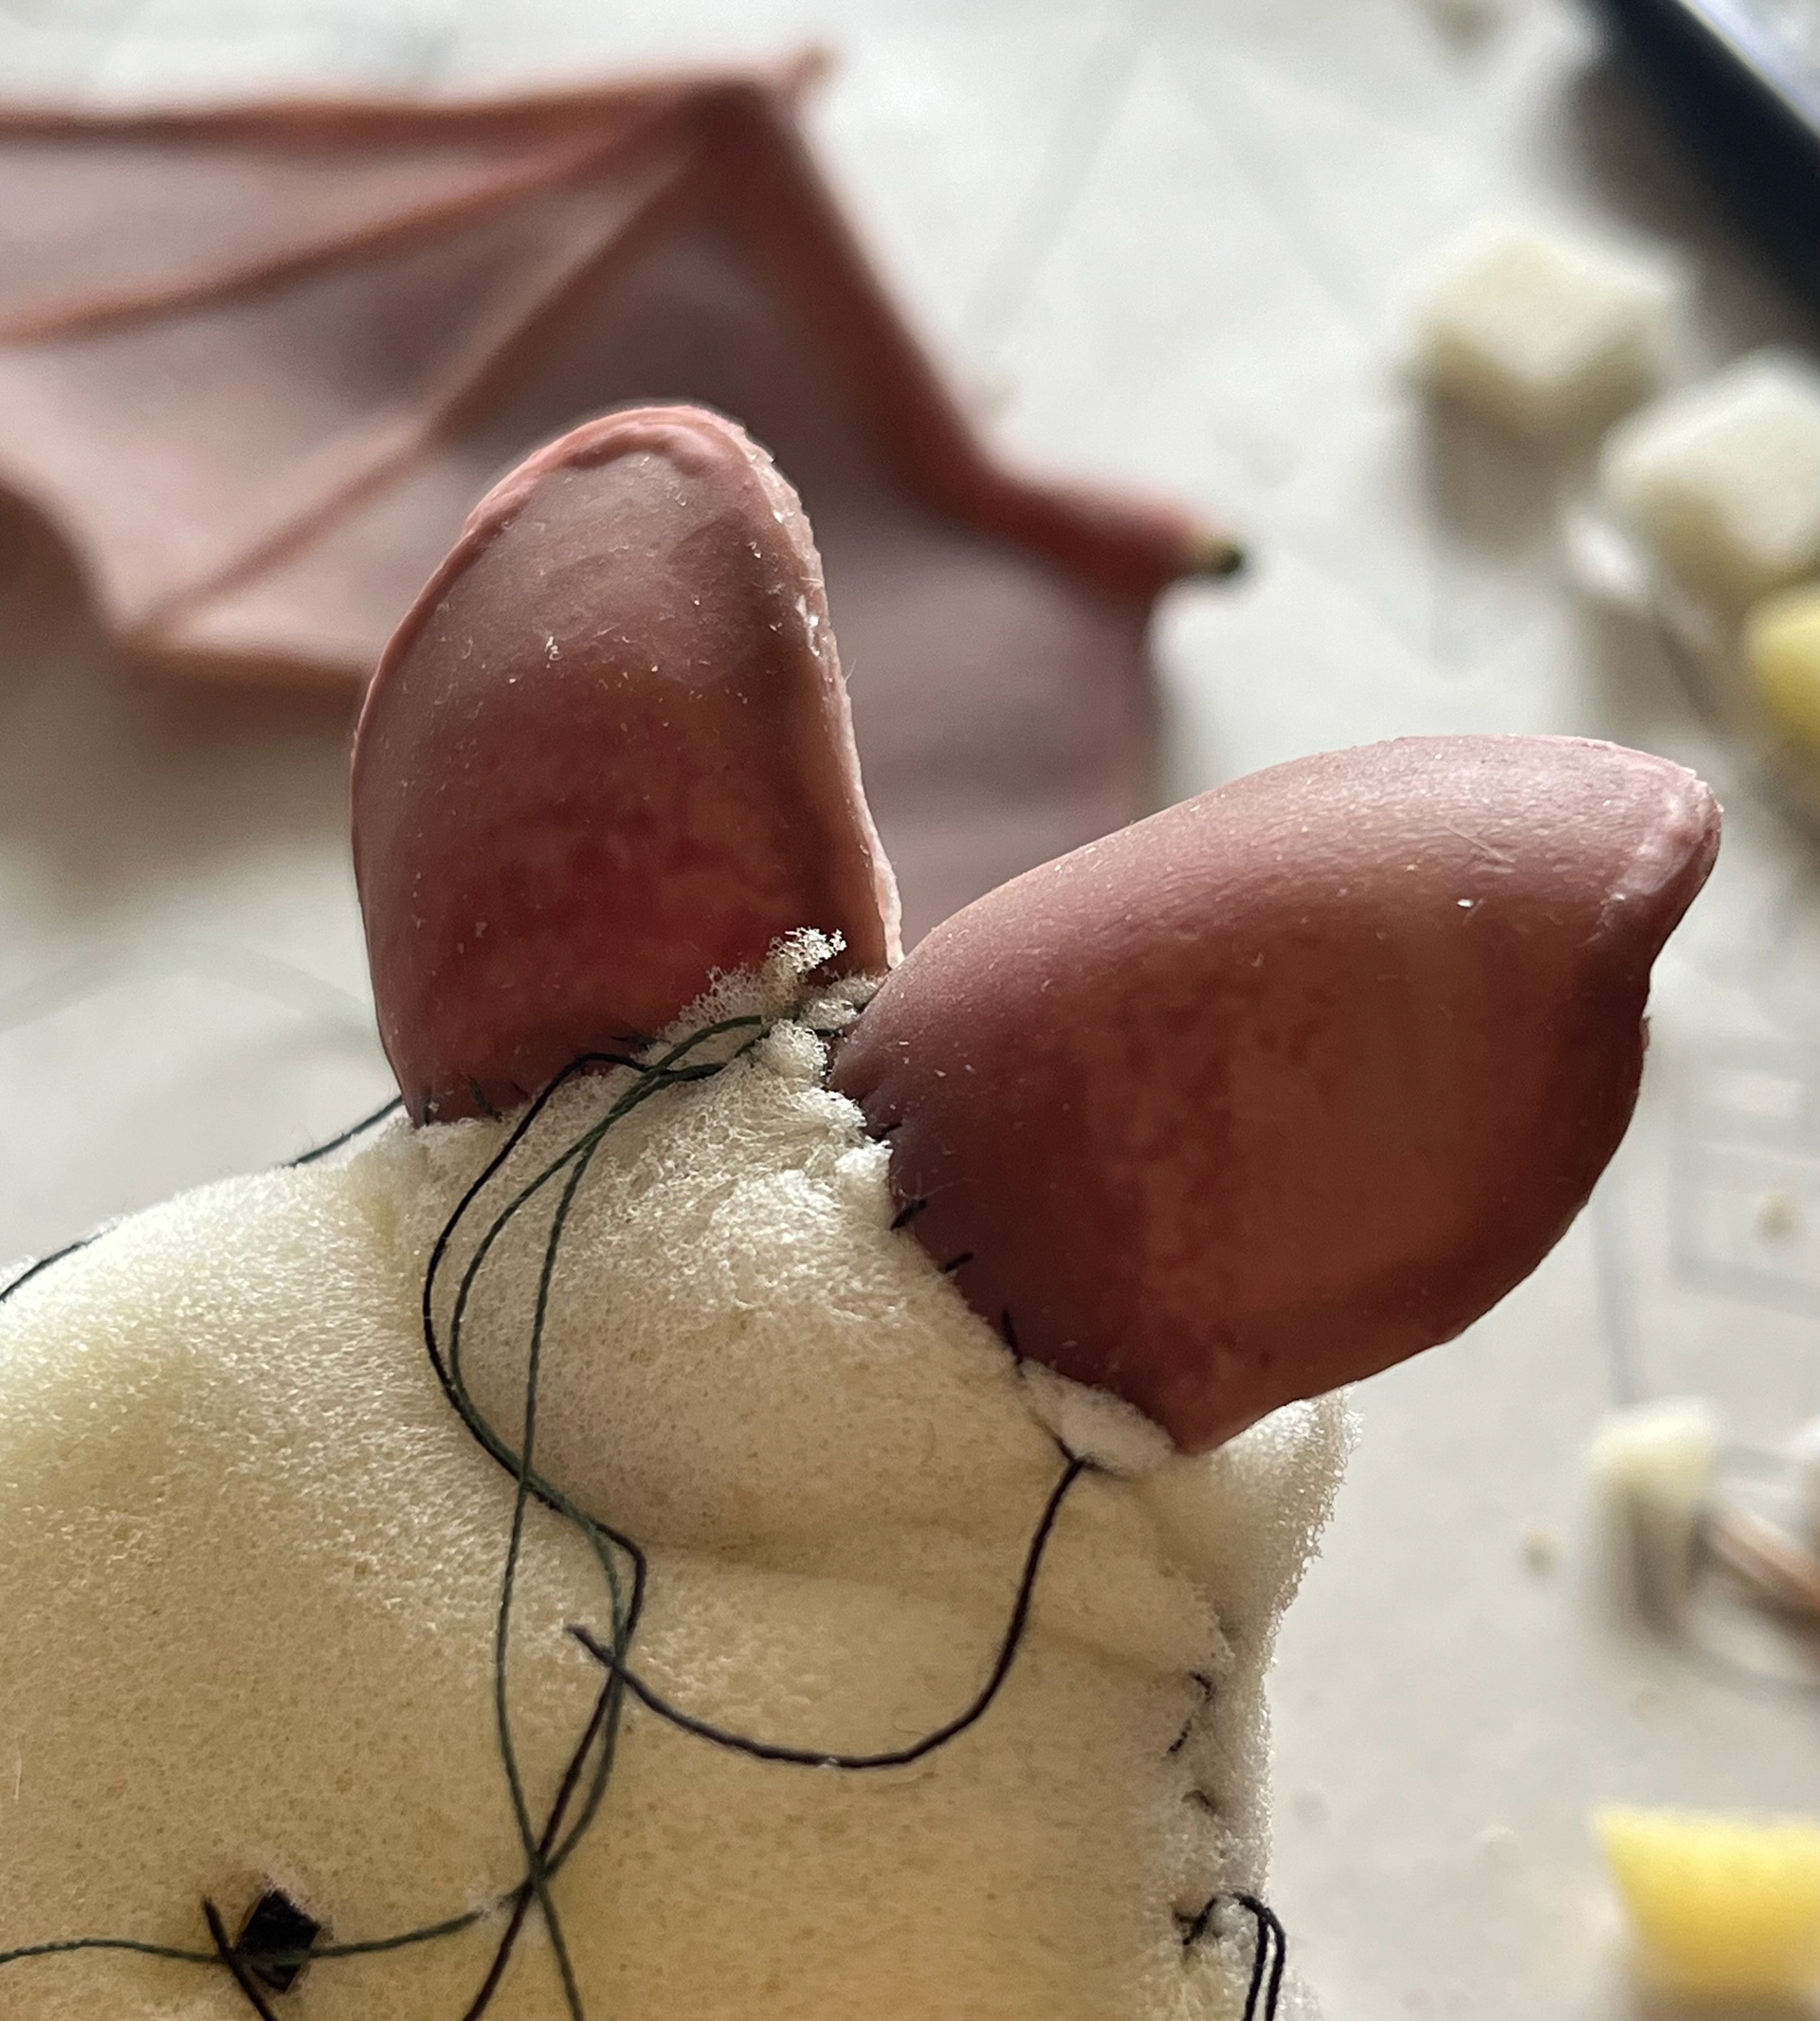
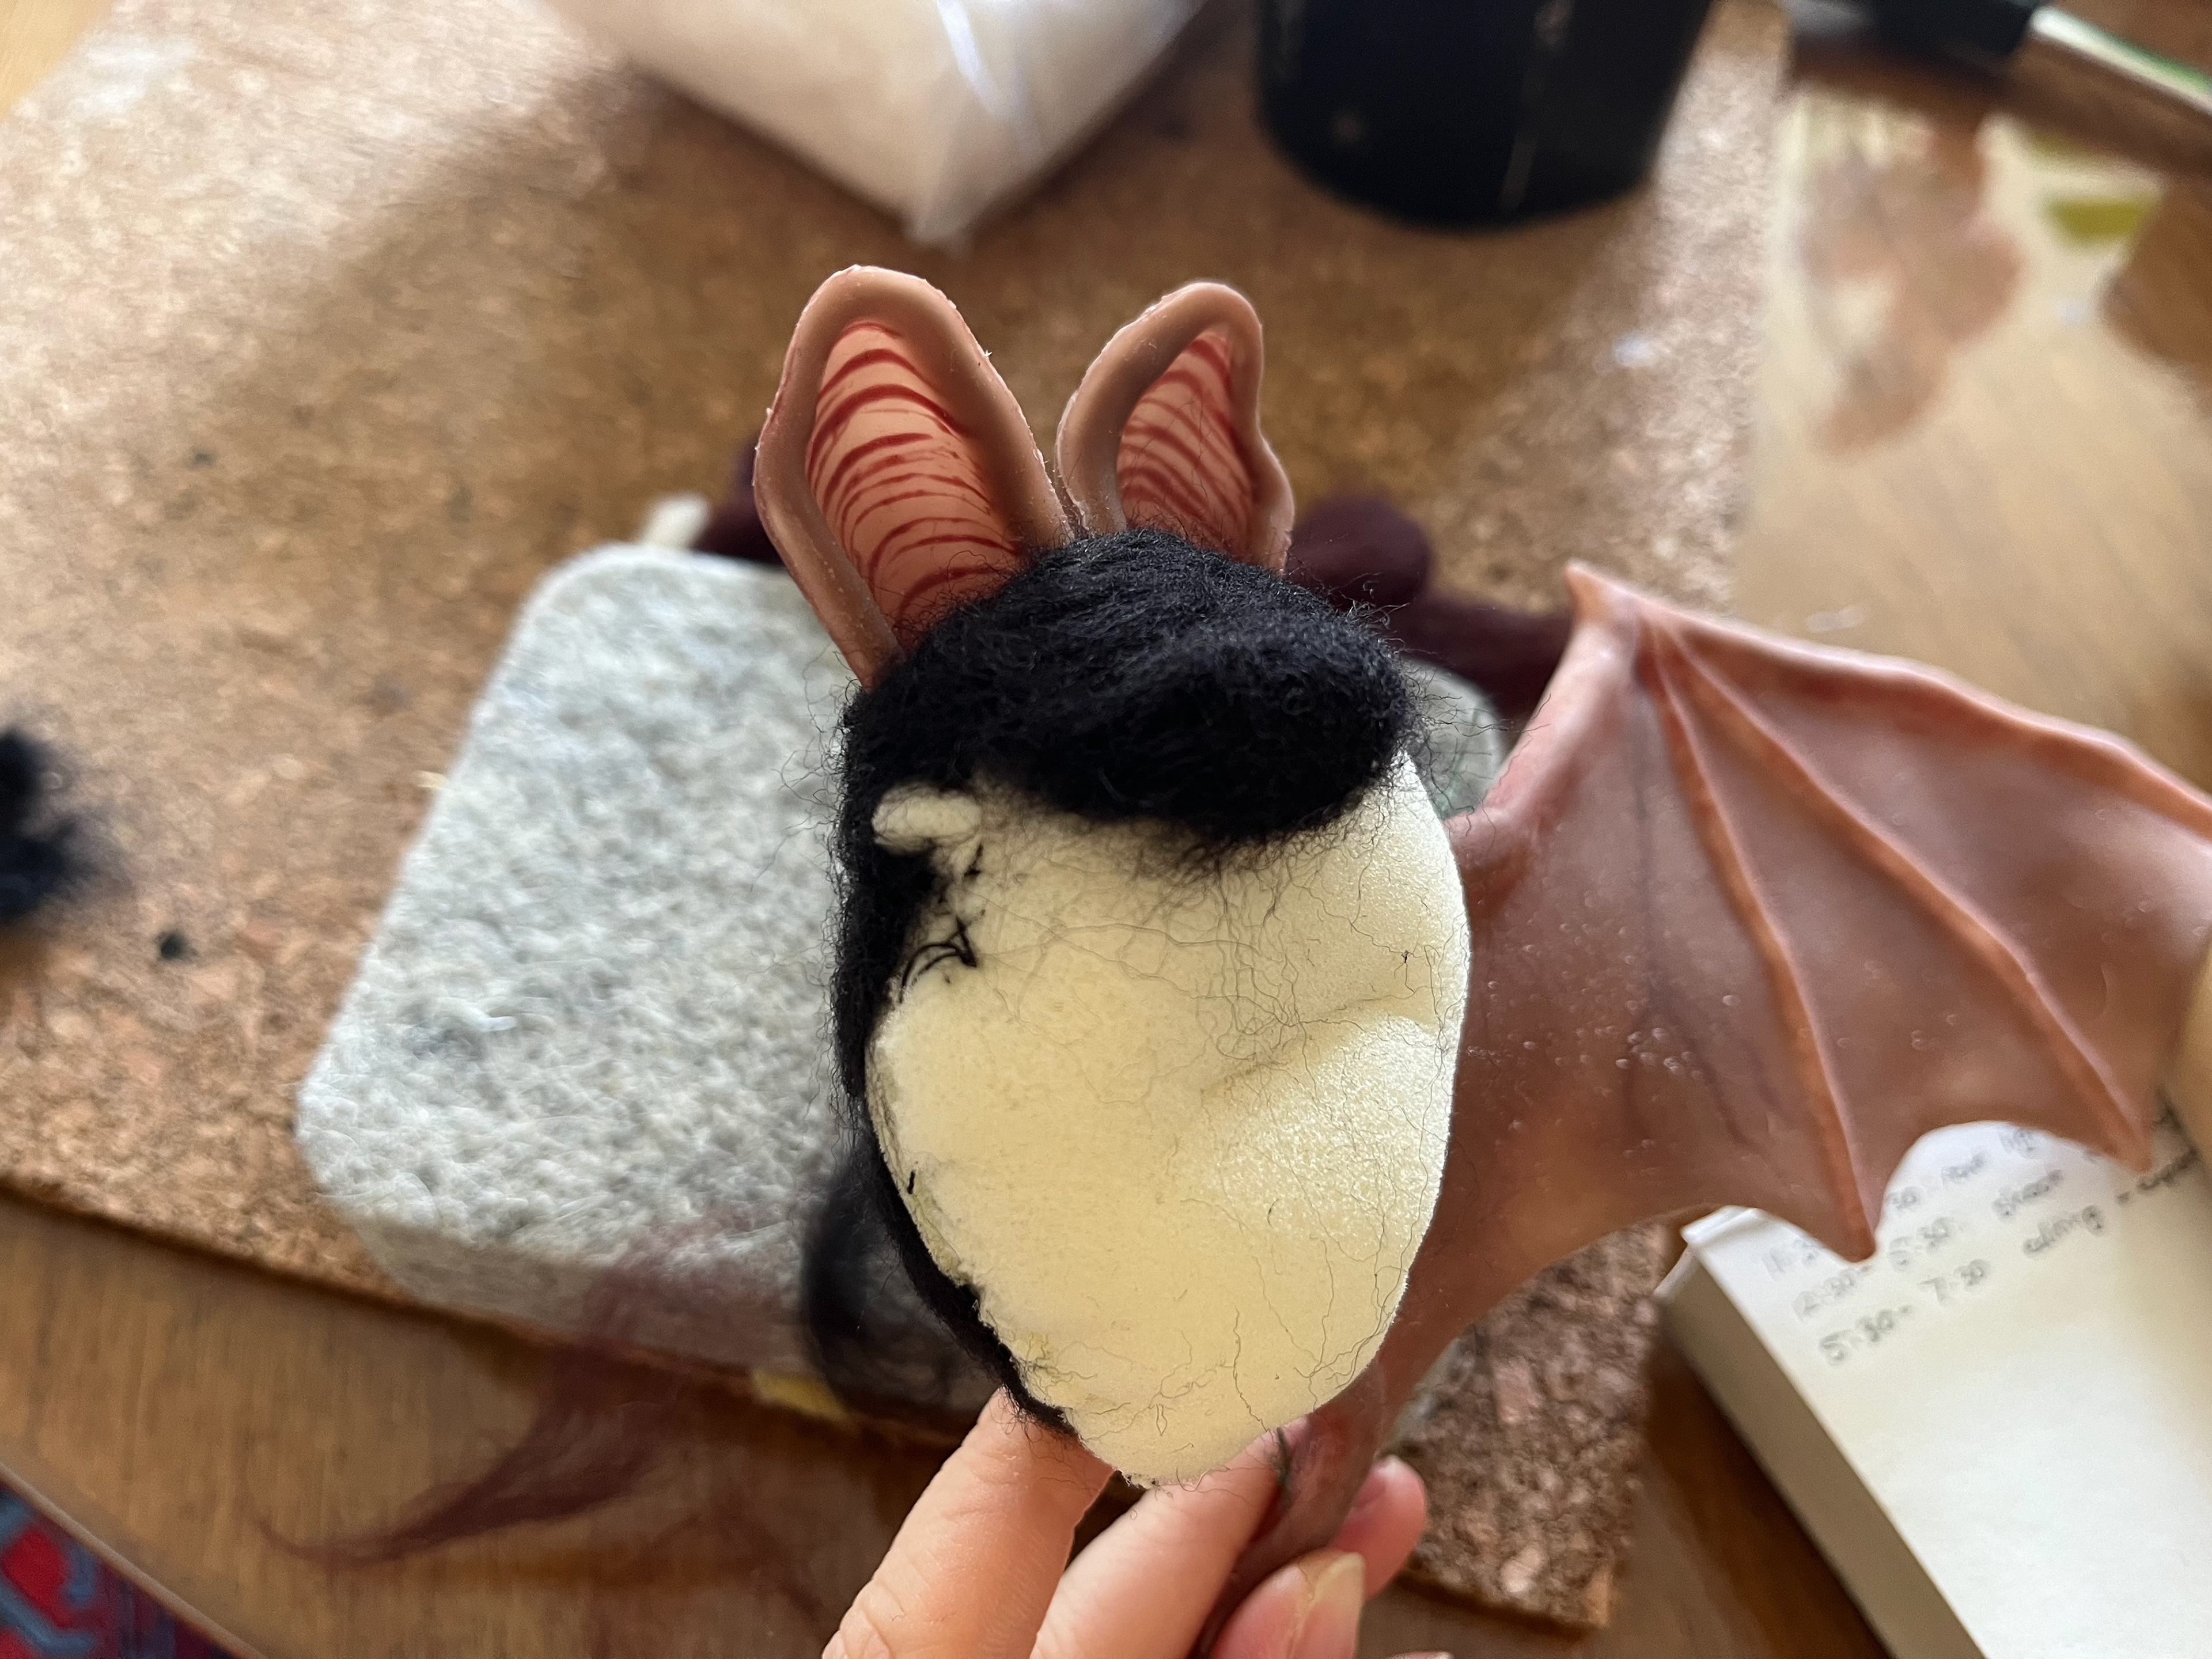
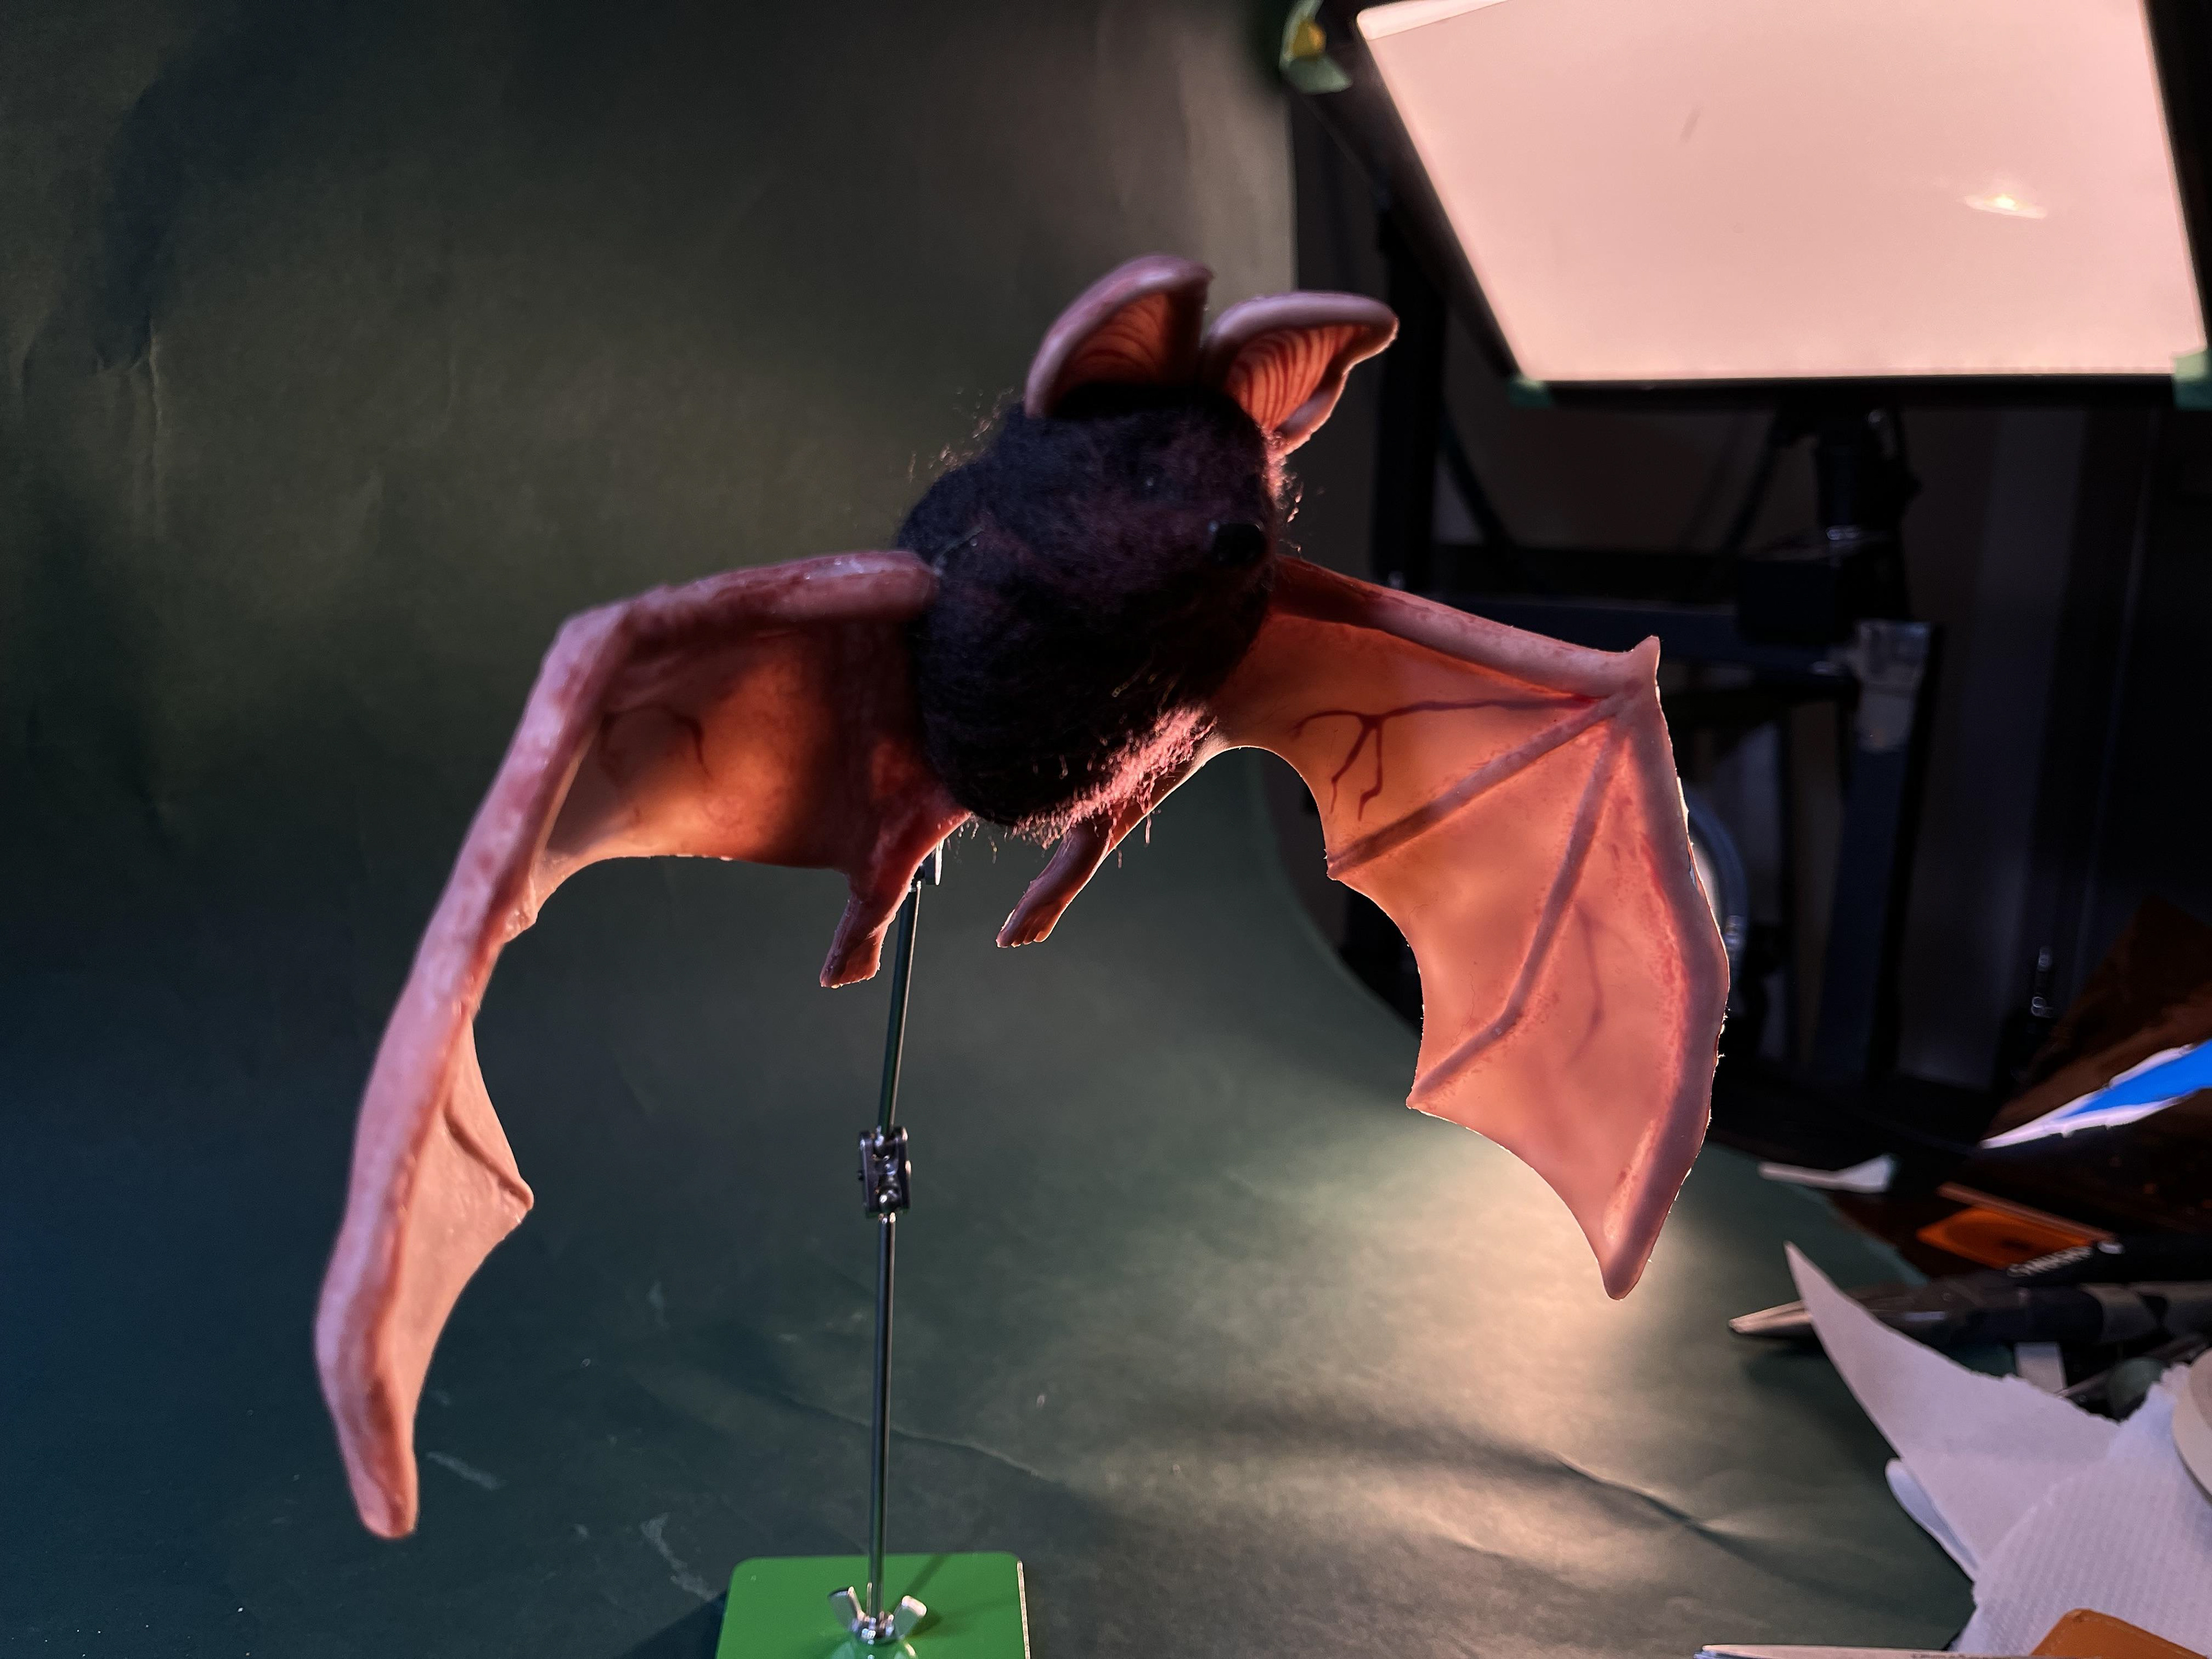
Since the wings and ears were symmetrical, I only needed to make one 2-part mold for each. This meant that I had to find a way to securely attach the wings to the body of the puppet, which I worked into the design by using square brass tubing as attachment points (red lines in diagram above). I wanted to make sure that the body was articulated and not just the wings, so that the flap cycle animation could be more believable.
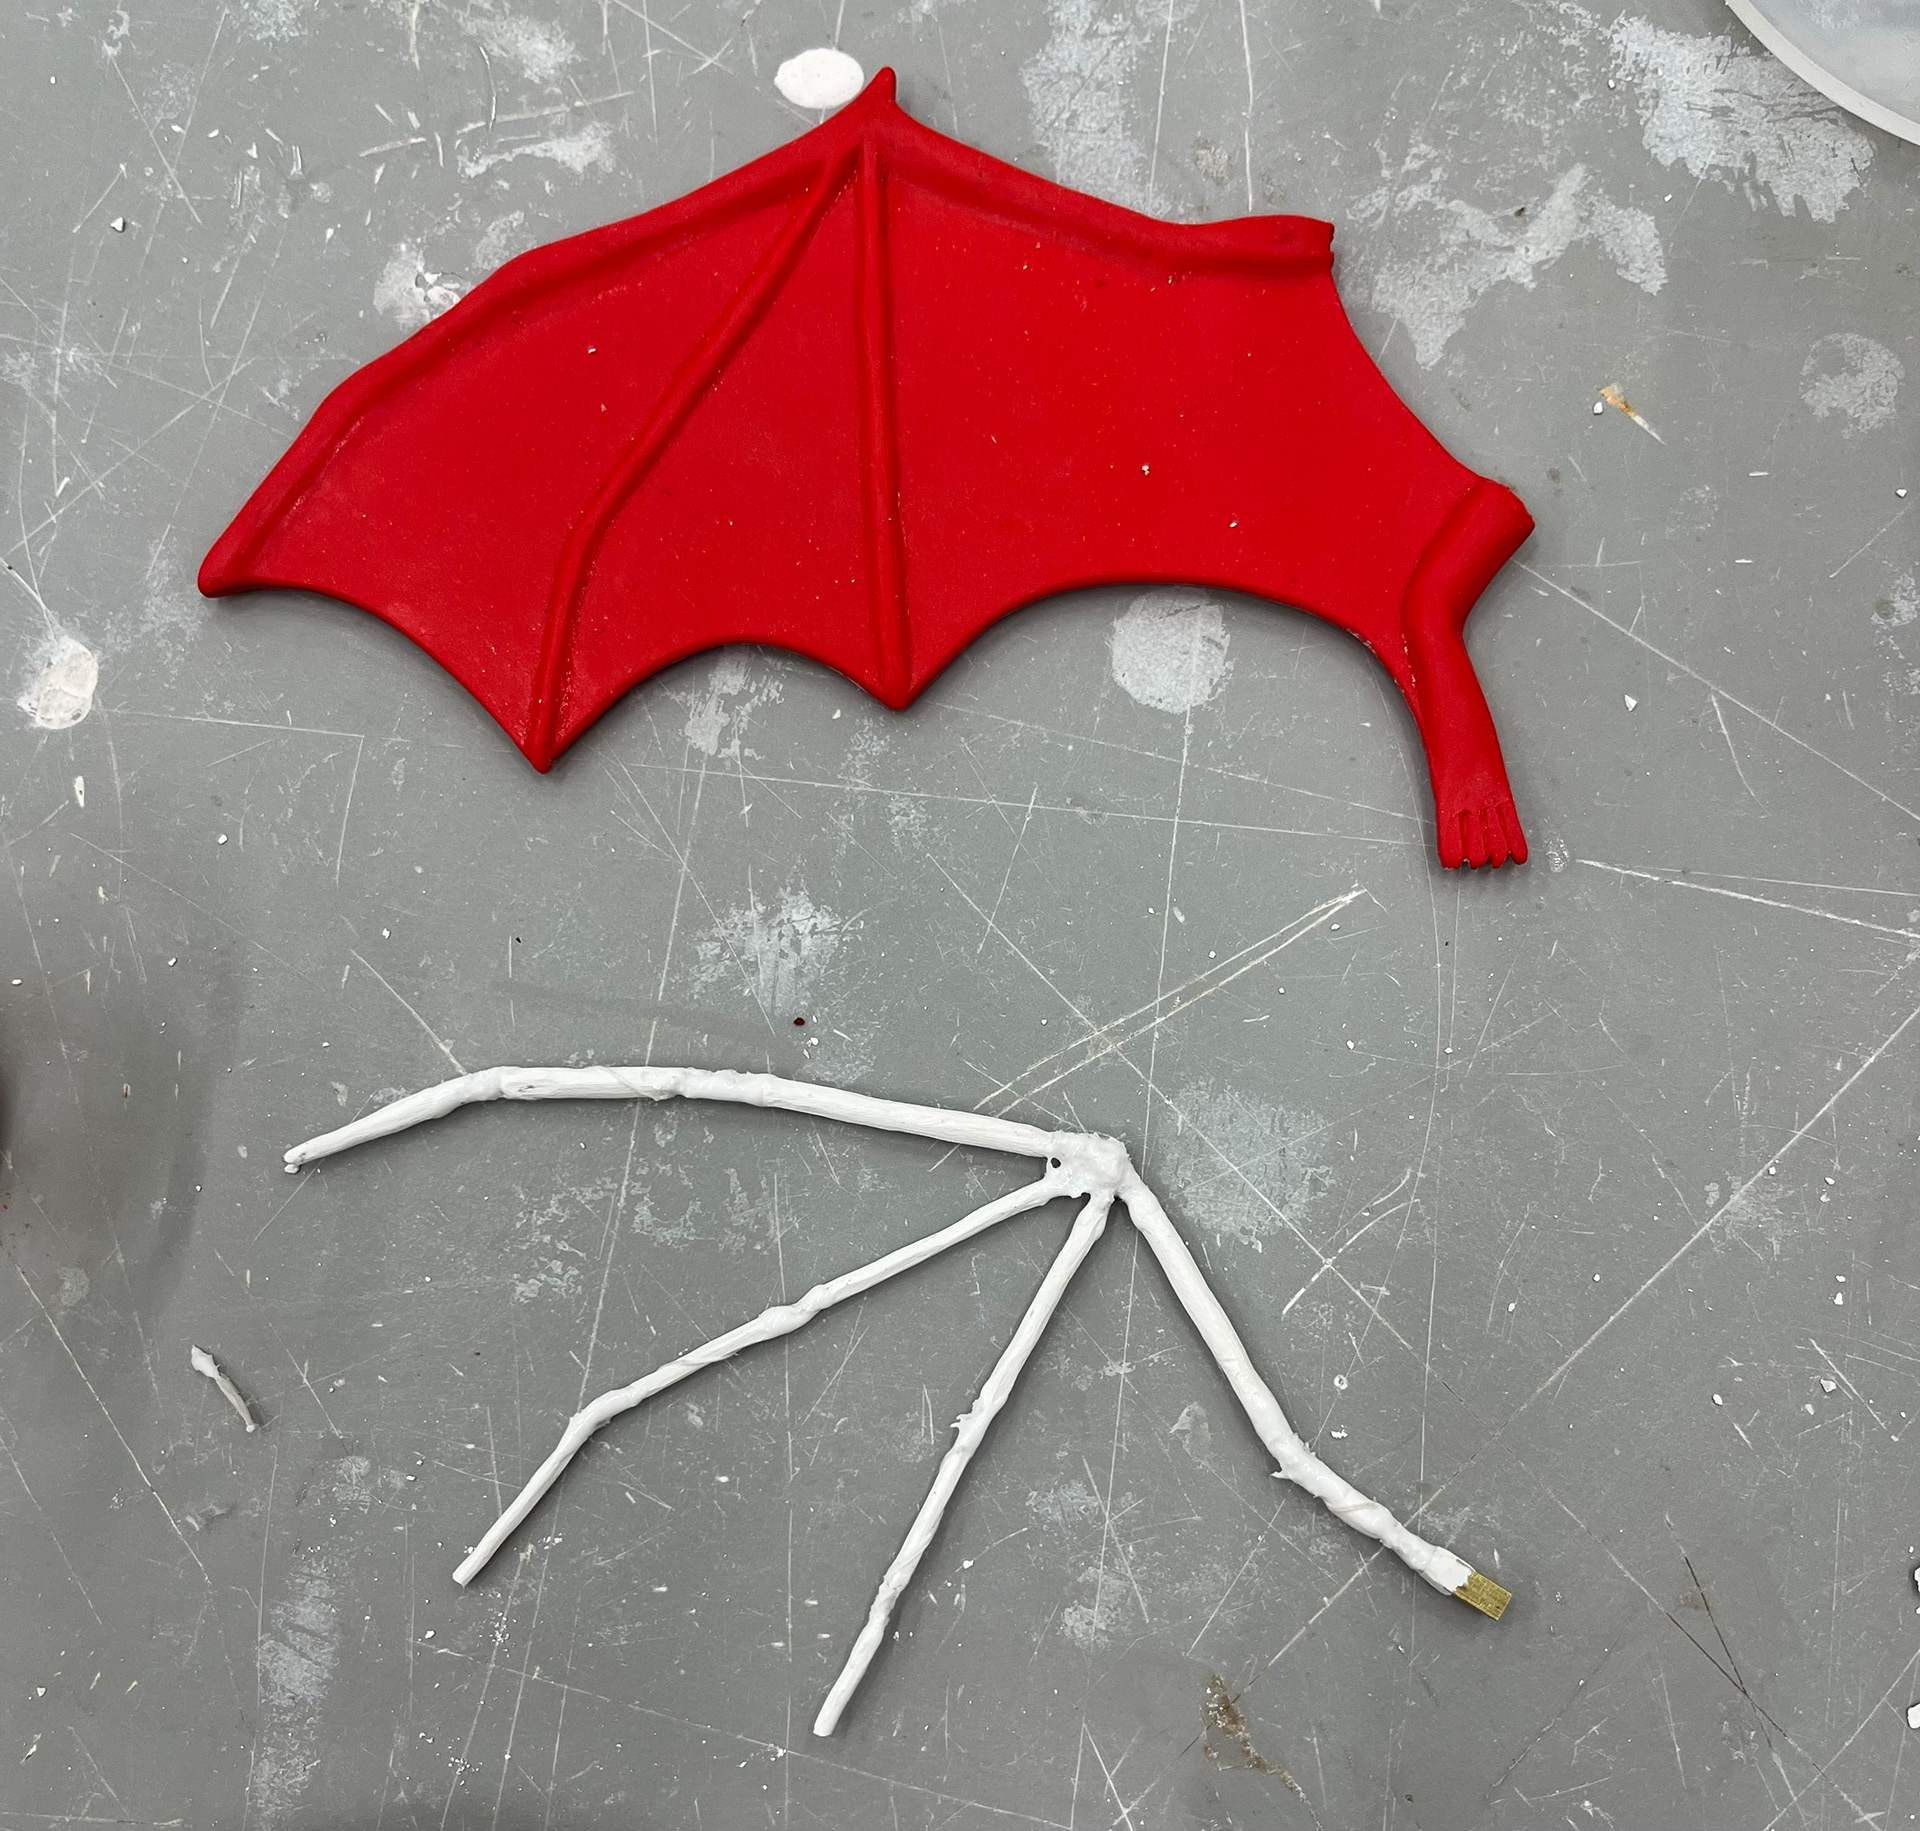
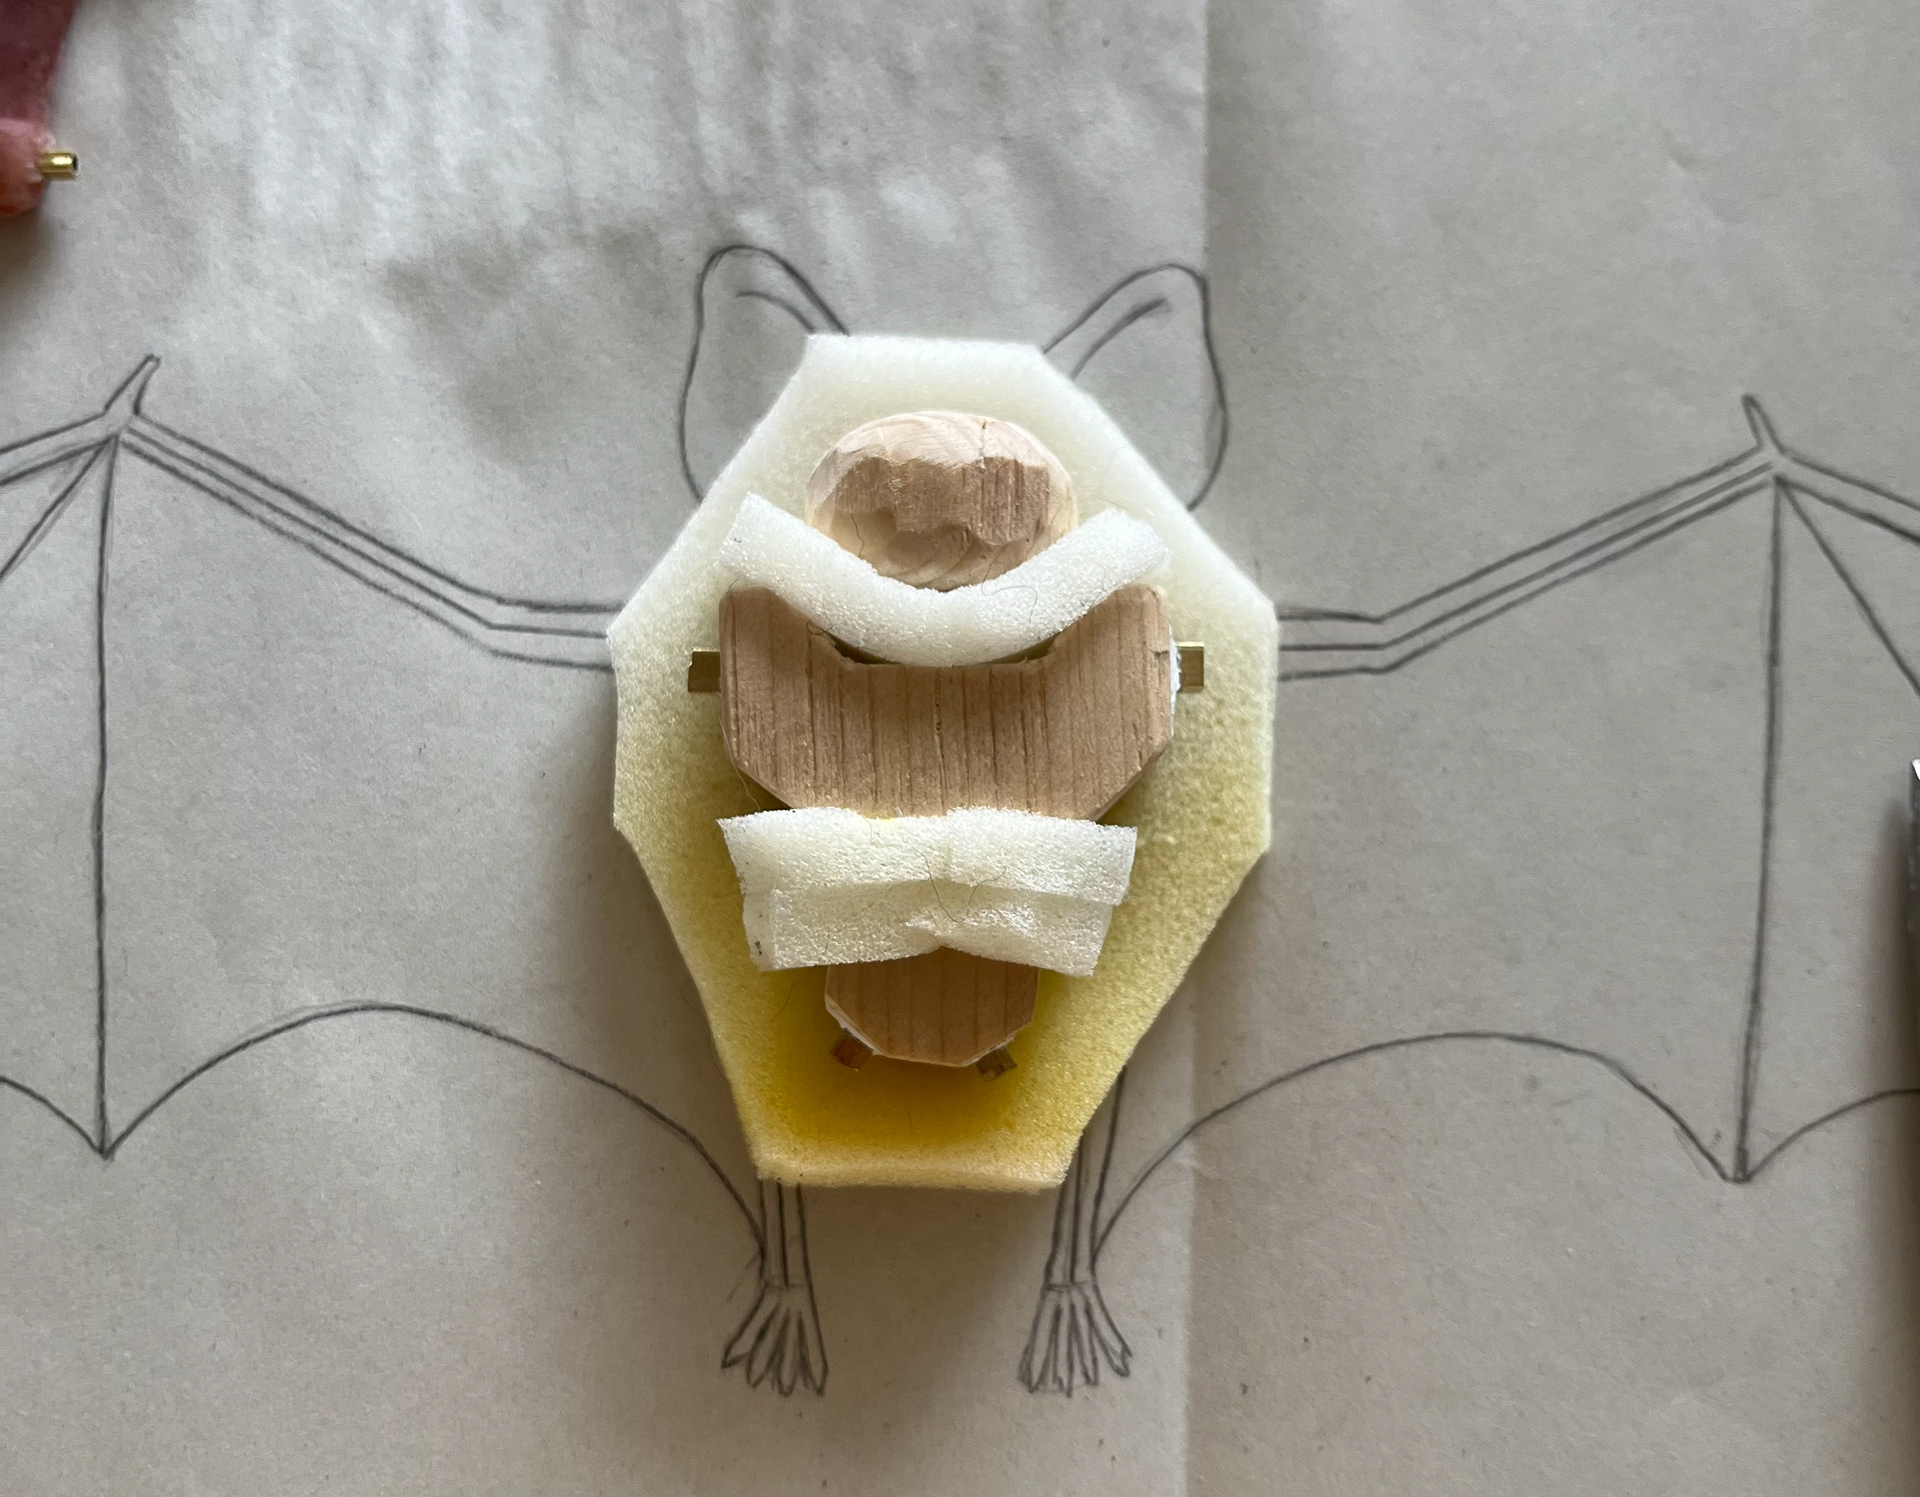
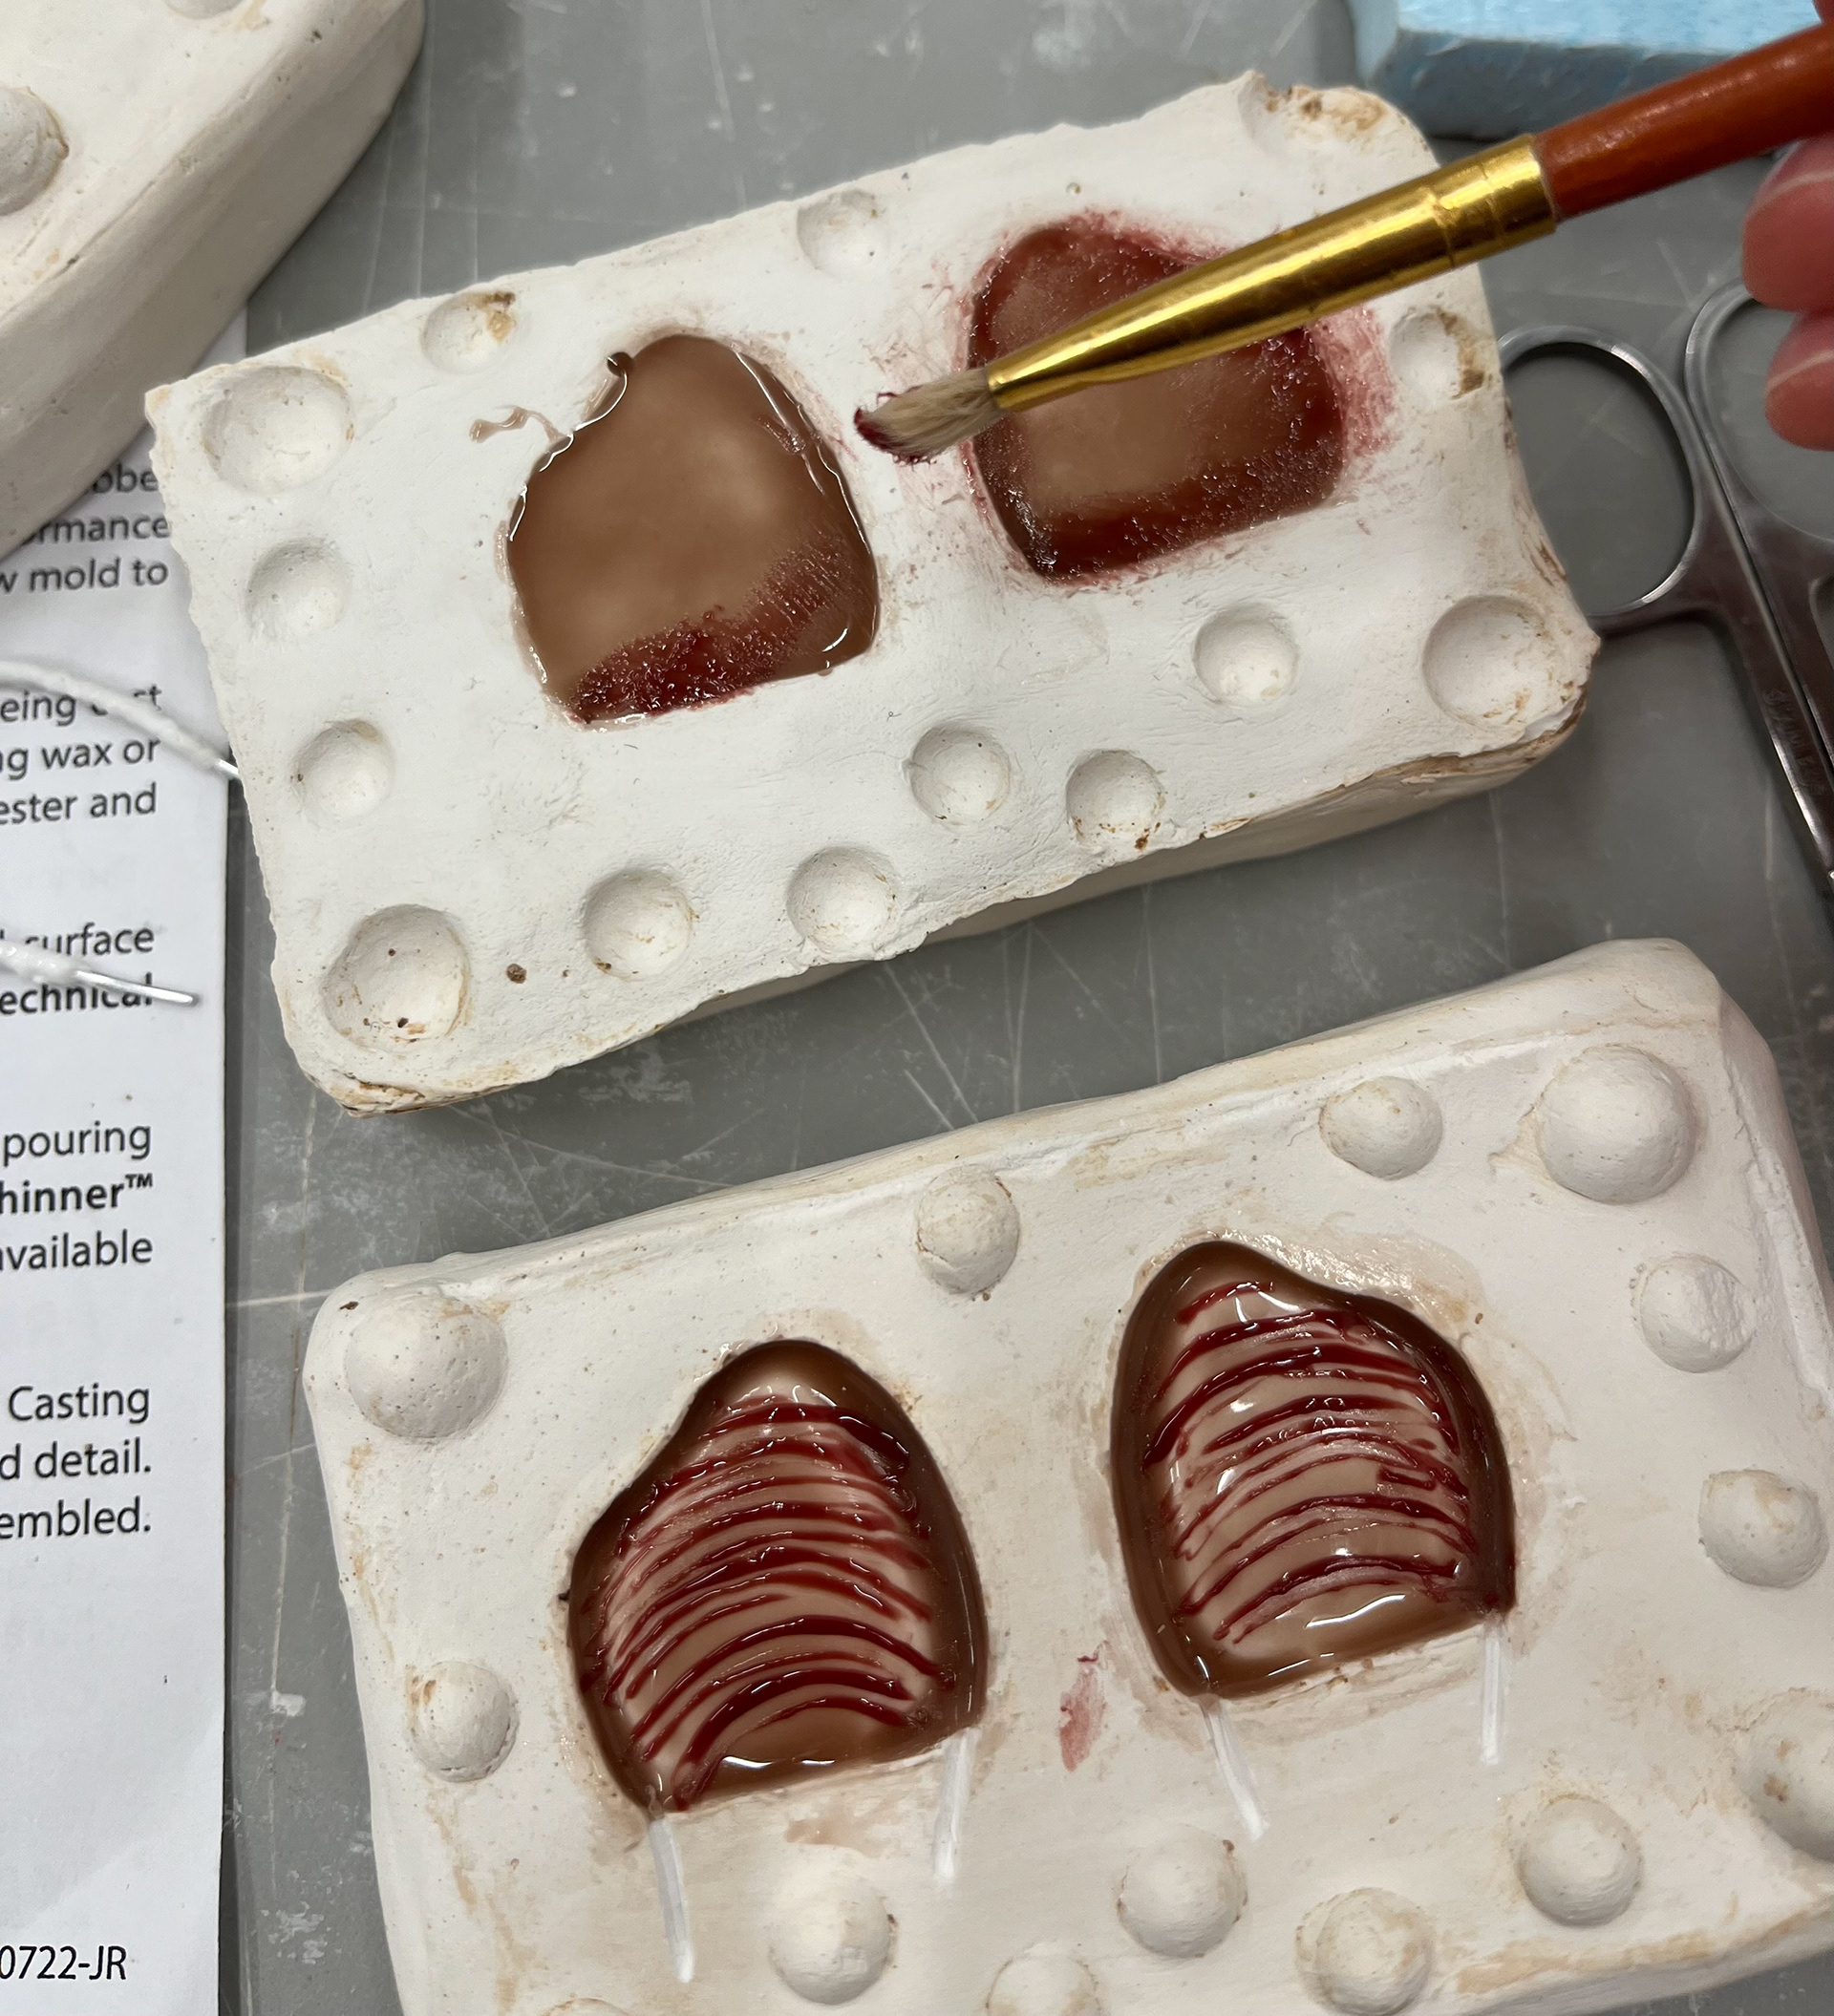

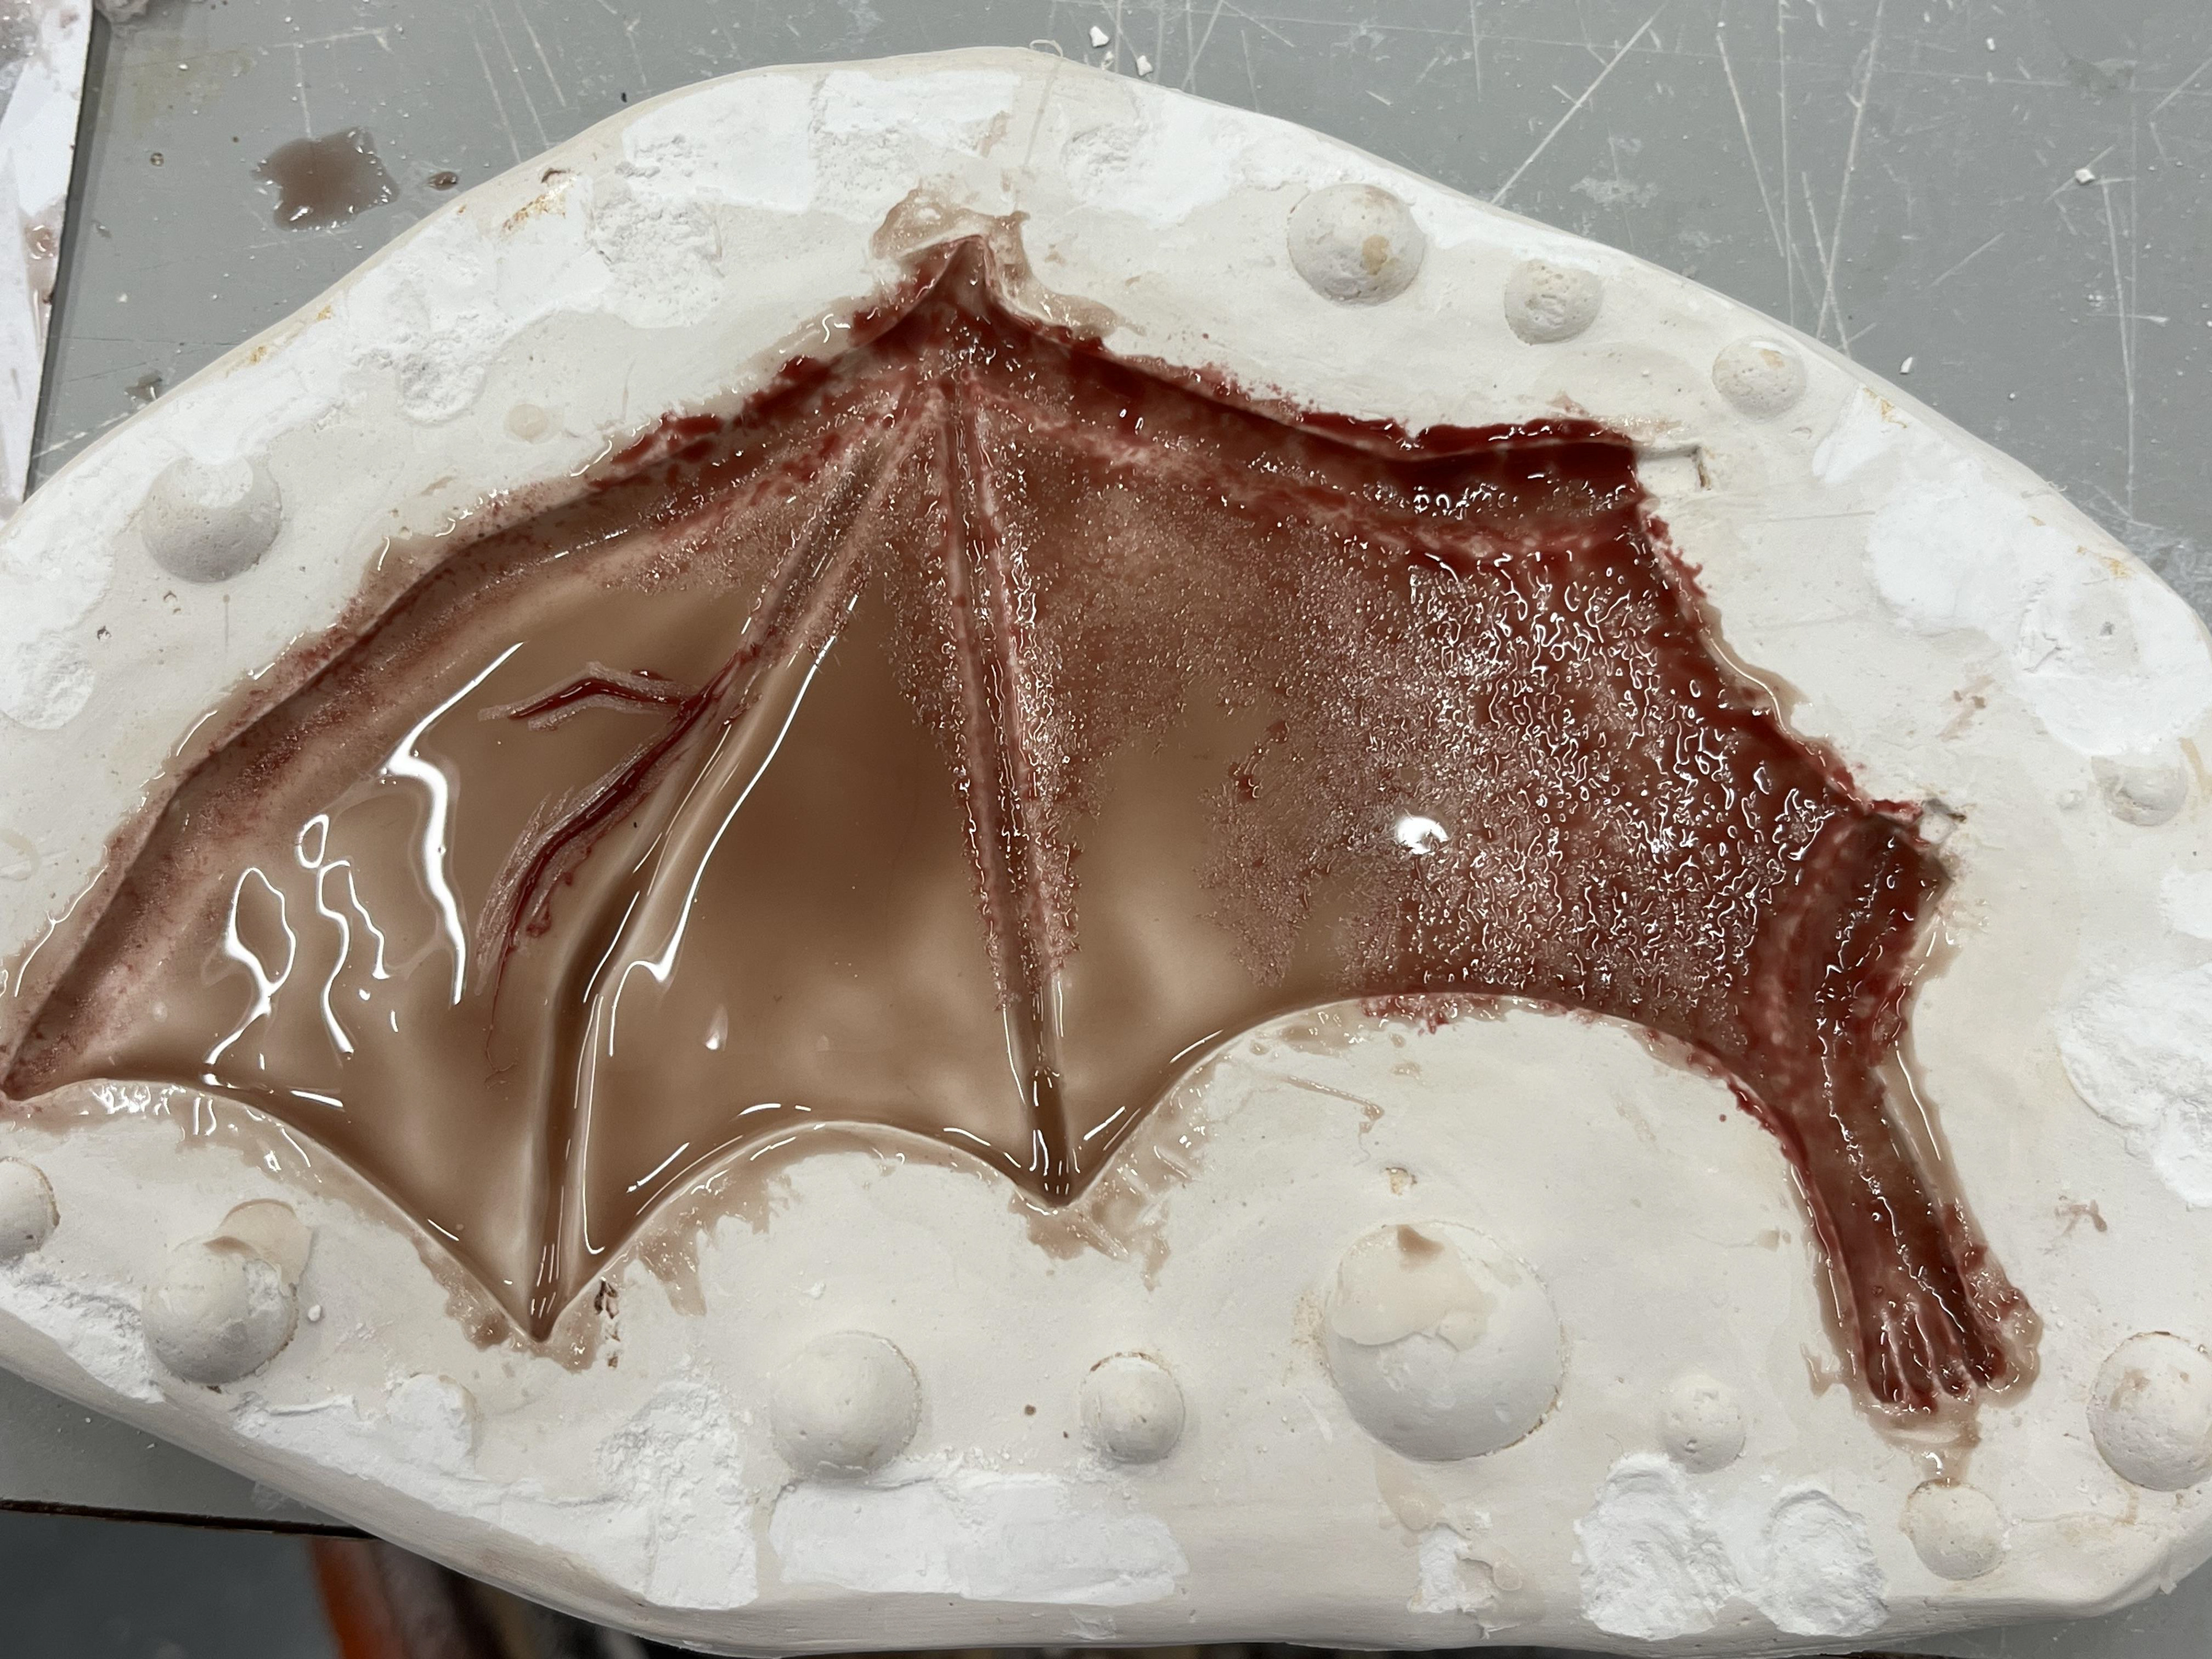
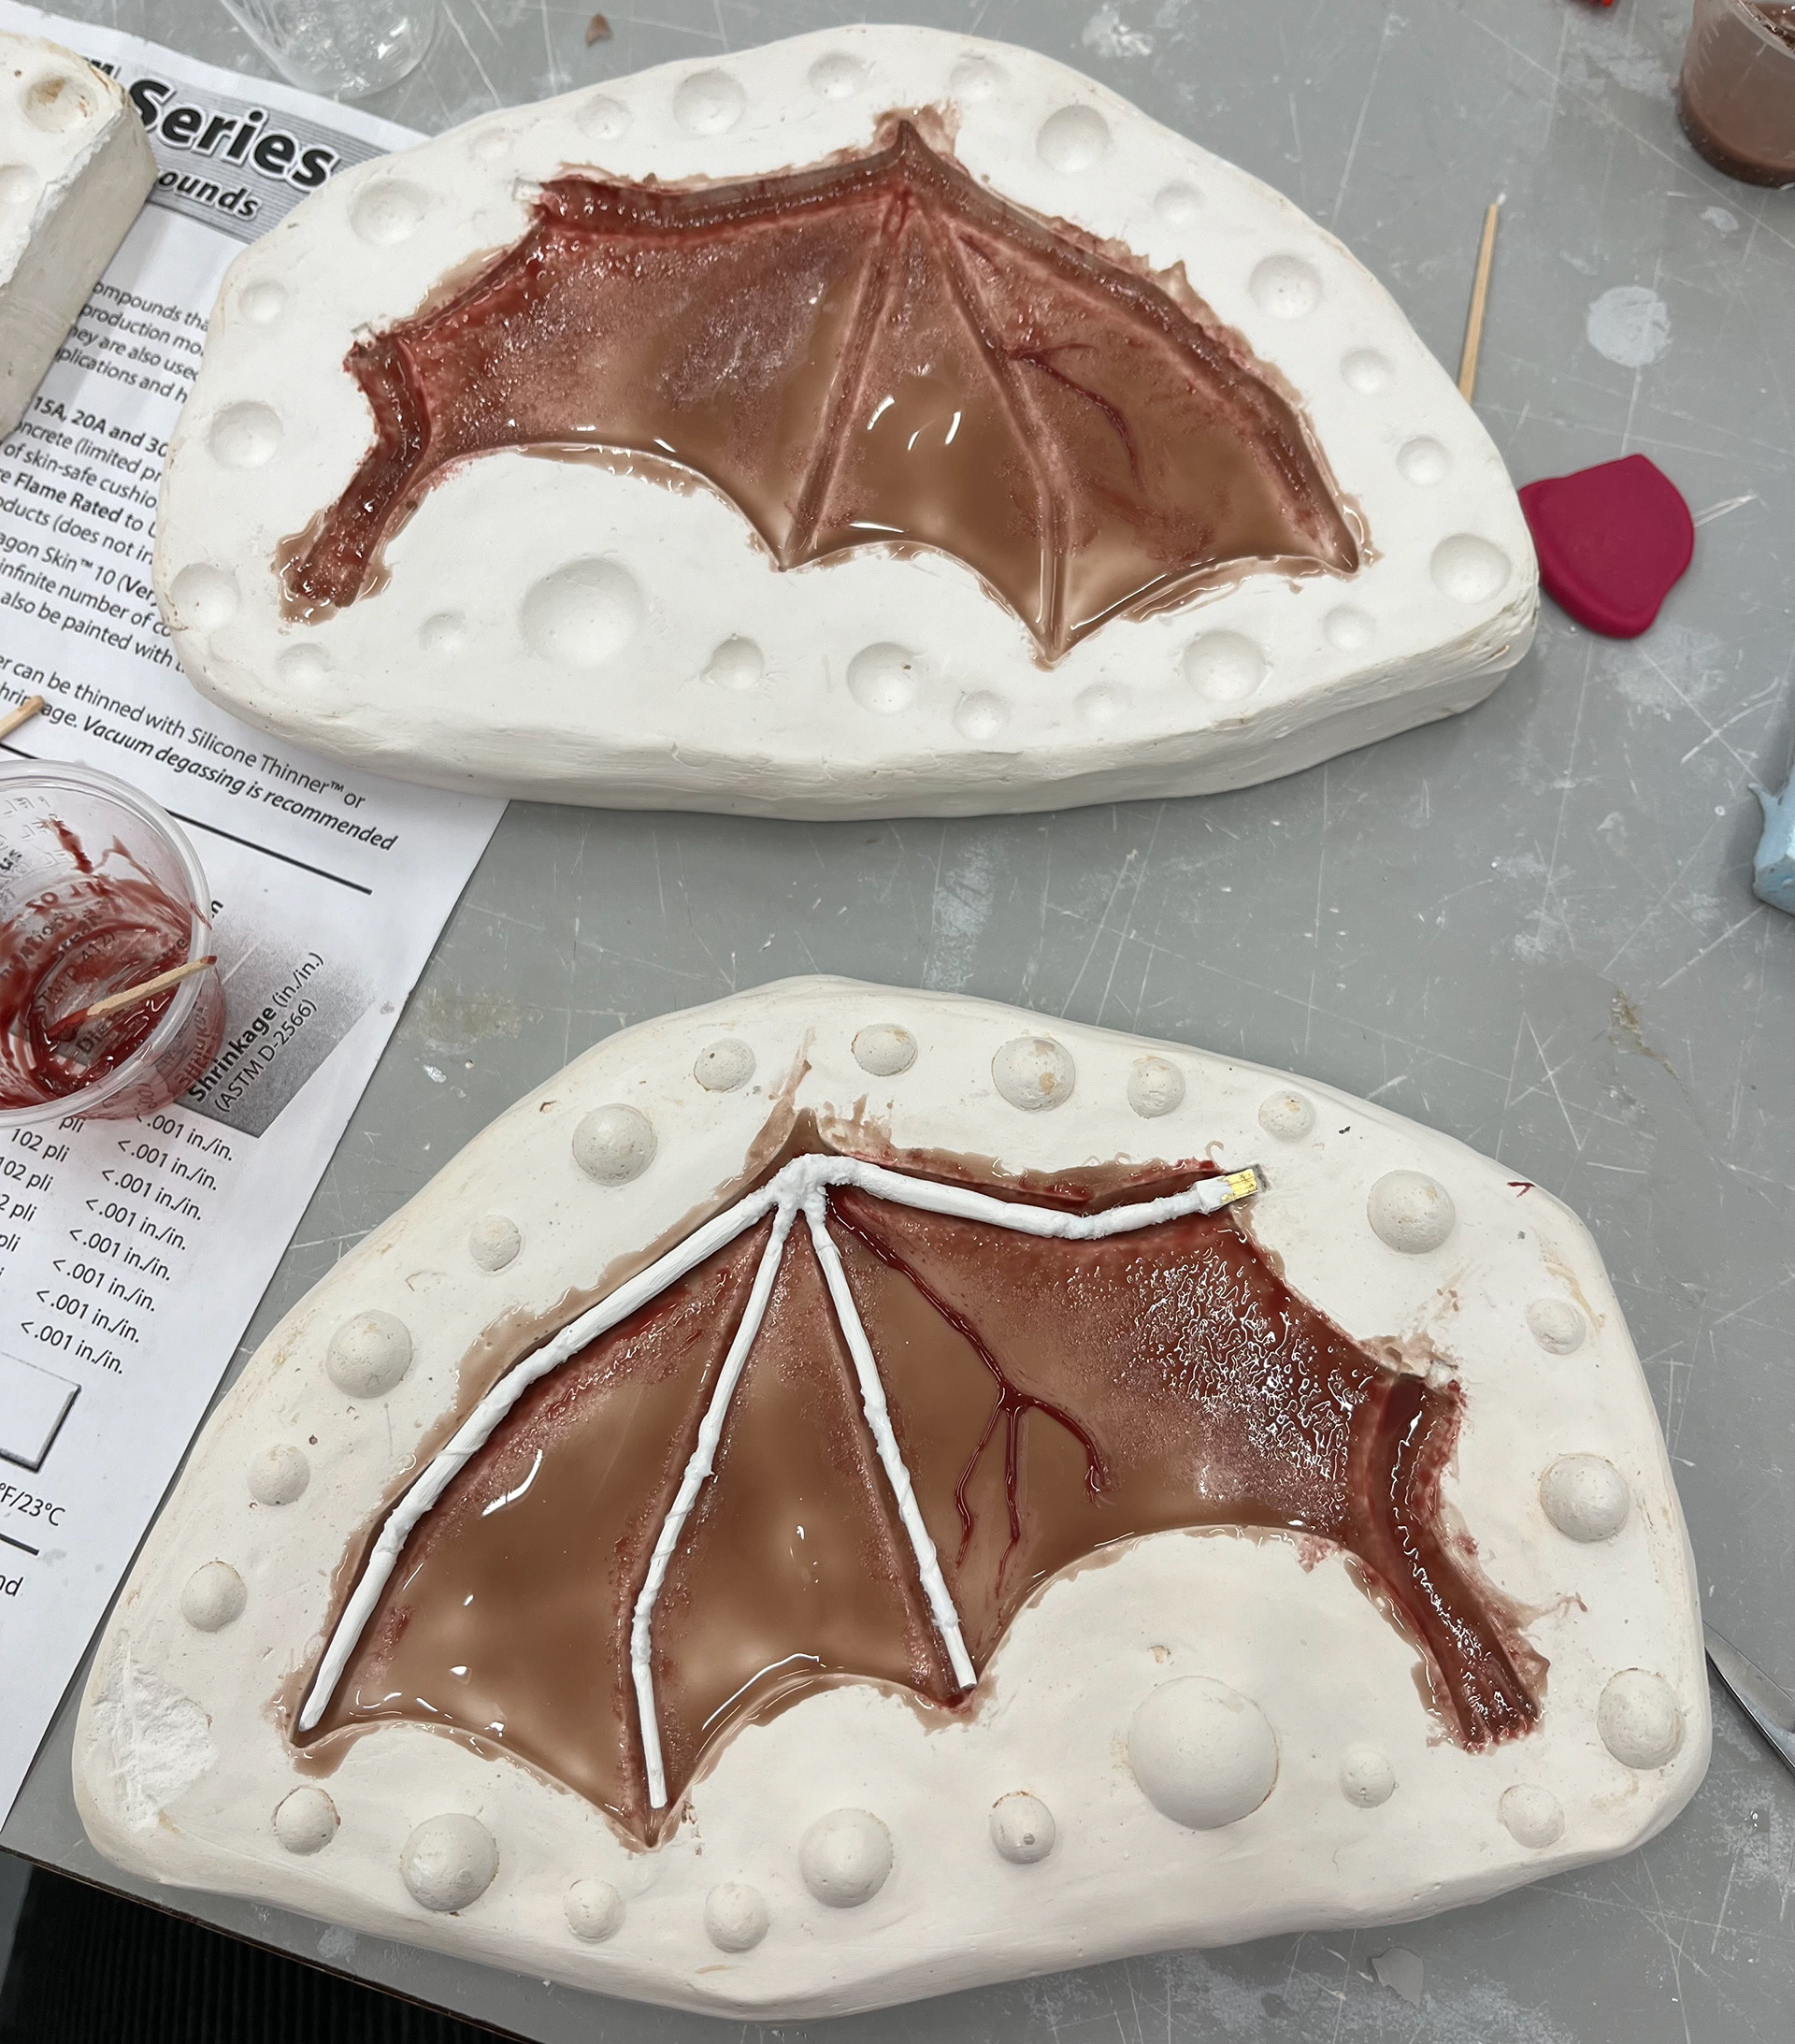
The photos above illustrate the steps in the fabrication process, from the armature and foaming of the puppet, to the sculpts for the silicone elements. This time around I tried painting with silicone for the first time in order to show detail and transparency in the brush-on layer.
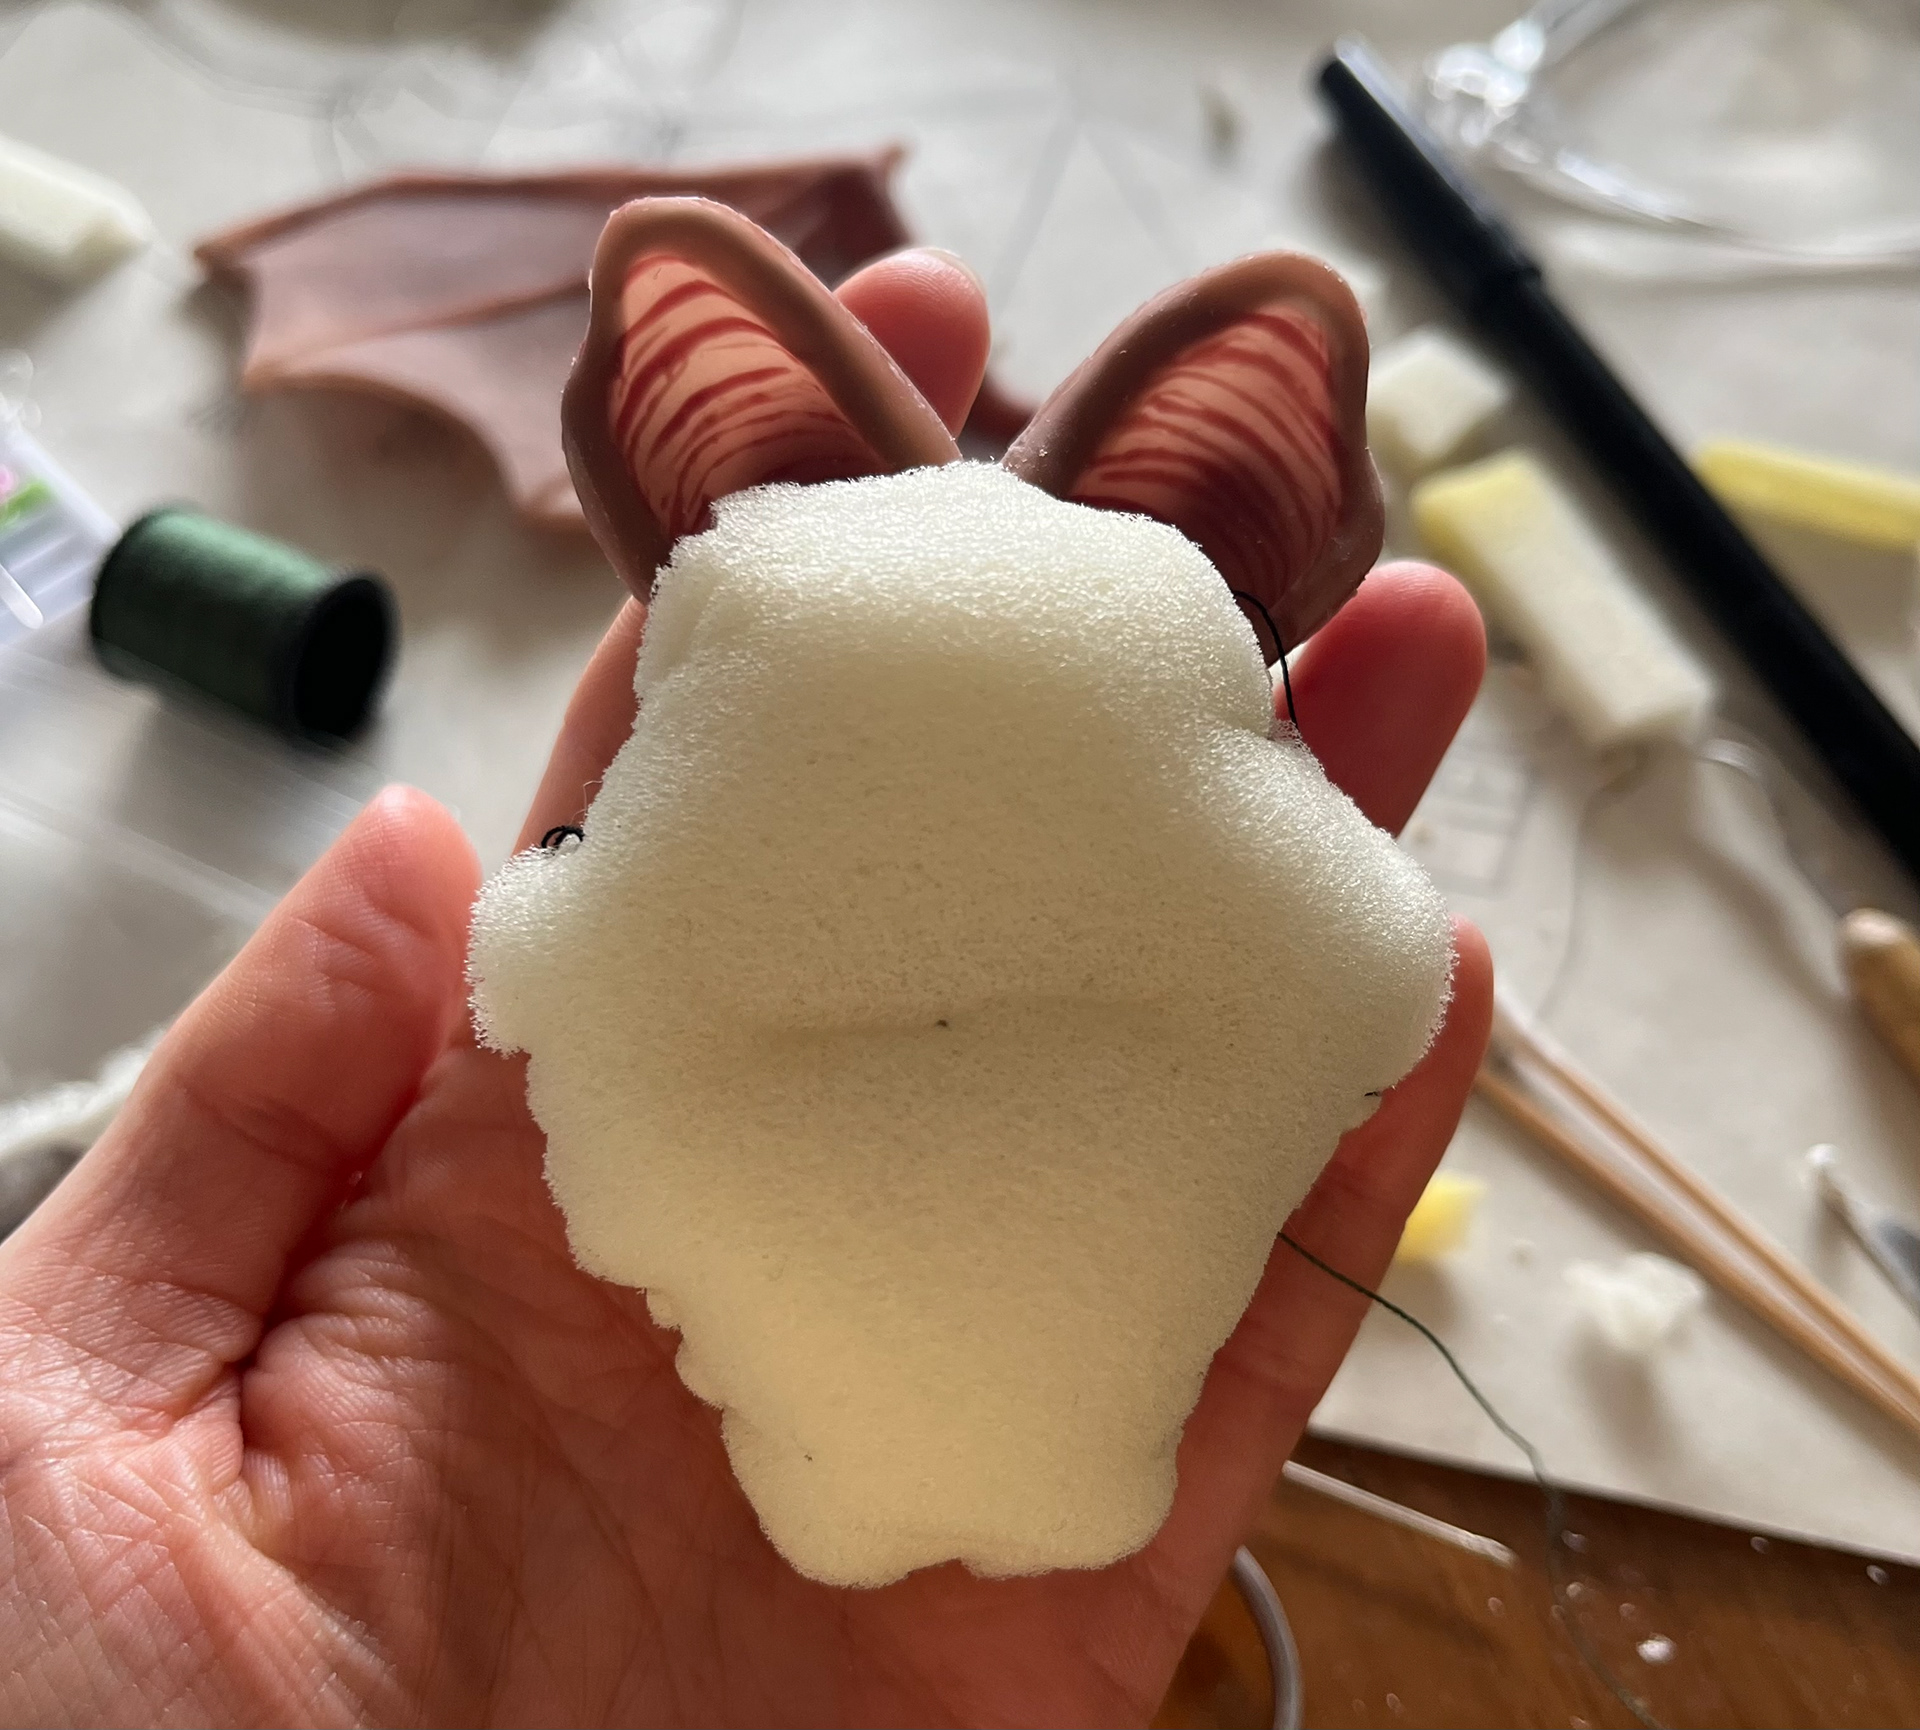
Then I began sewing the silicone ears directly to the puppet body, and added layers of needle felted wool to create the fuzzy body of the bat.
I made sure to keep the square brass tubing accessible to attach and remove the wings if necessary. There were also rigging points on the side and back of the puppet to allow for both a side and front profile animation of the bat.
Misc. Puppet Scale Sheets: